


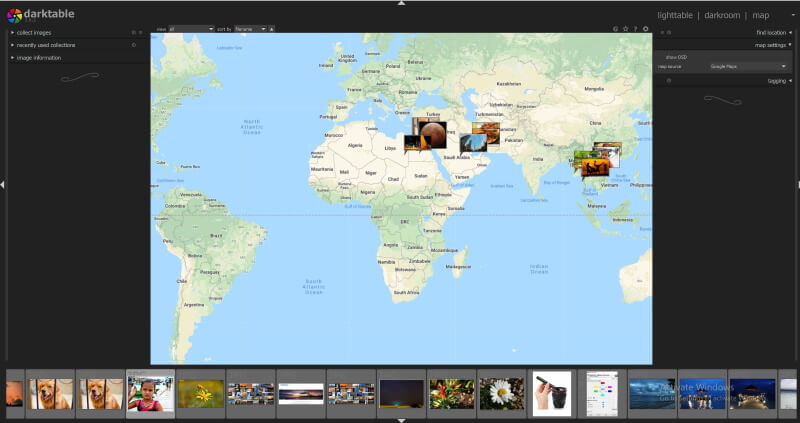
Darktable is a free and open-source editing software package, it looks very close to Adobe Lightroom. Darktable can open and edit RAW files from over 400 different cameras format, it can also organize your photos using tags, and geotags. A map module allows you to simplify the gathering of photos to geotags. If your image already has data on where it was taken, it will immediately be displayed on the map. However, if your camera does not apply GPS data to photos, or anything else prevents you from having geotags, you can manually enter your location data.
Its editing style is non-destructive, like Lightroom, allowing you to keep the original file and revert the edited photos back to their original state easily. It has an array of exporting possibilities, so you are never short of places to share your images. You can export images straight to Facebook and Flickr, or send them directly in an email.
You can download and install your free version of Darktable for Linux, Mac, and Windows from here. You can also download the Darktable user manual for more detailed information.
Darktable Main Features
- It is free, open-source software.
- Cross-platform: Darktable runs on Linux, Mac OS X / Macports, BSD, Windows, and Solaris 11 / GNOME.
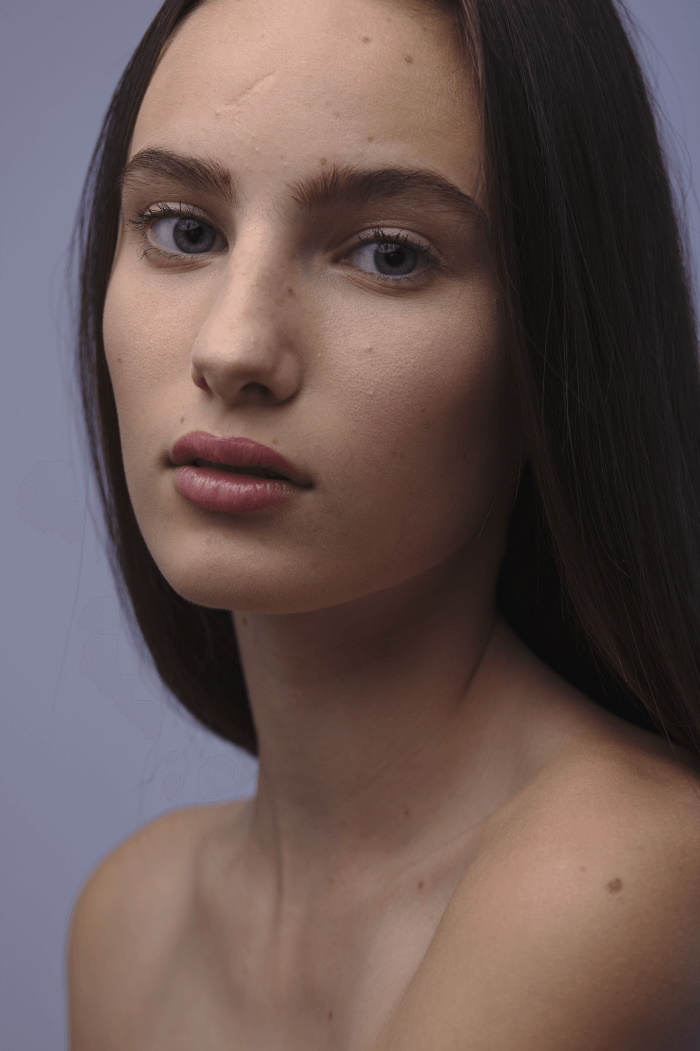
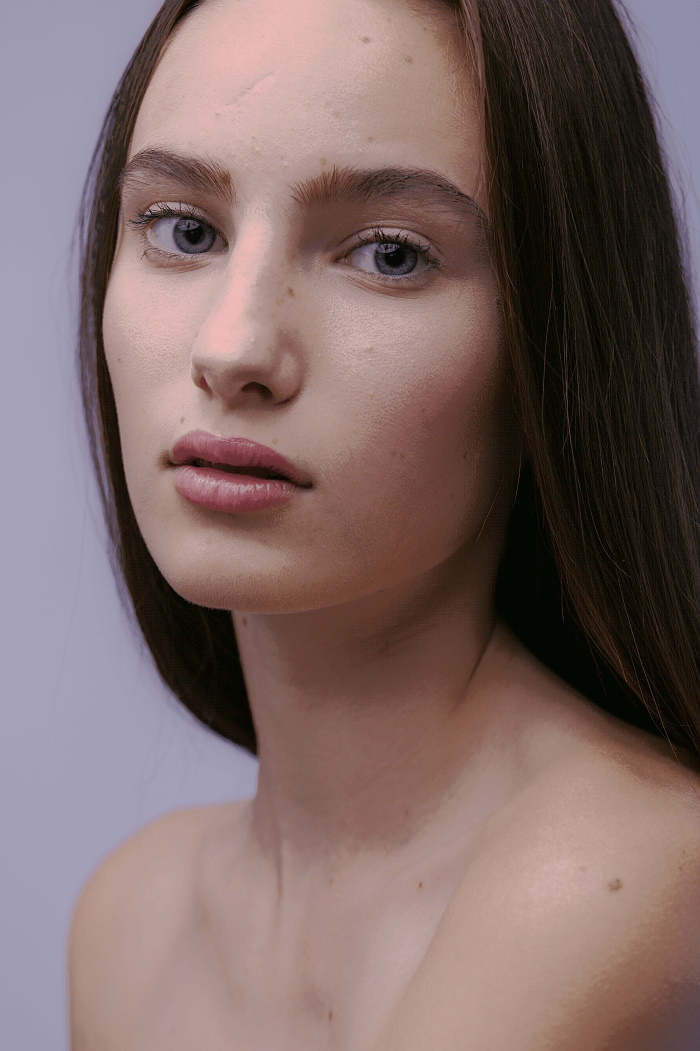
- Non-destructive editing throughout the complete workflow, your original images are never modified.
- Professional color management: Darktable is fully color managed, supporting automatic display profile detection on most systems.
- Image formats: Darktable can import a variety of standard, raw, and high dynamic range image formats (e.g. JPEG, CR2, NEF, HDR, PFM, RAF … ).
- Filtering and sorting: search your image collections by tags, image rating (stars), color labels, and many more, use flexible database queries on all metadata of your images.
- Speaks your language: Darktable currently comes with 21 translations: Albanian, Catalan, Czech, Danish, Dutch, French, German, Greek, Hebrew, Hungarian, Italian, Japanese, Polish, Portuguese (Brazilian and Portuguese), Russian, Slovak, Slovenian, Spanish, Swedish, Ukrainian.
- Powerful export system supports G+ and Facebook web albums, Flickr upload, disk storage, 1:1 copy, email attachments, and can generate a simple Html-based web gallery. Darktable allows you to export to low dynamic range (JPEG, PNG, TIFF), 16-bit (PPM, TIFF), or linear high dynamic range (PFM, EXR) images.
Darktable Modules
The interface of Darktable is quite simple; the software can be handled easily even by a beginner editor. Darktable is divided into 5 modules: Lighttable, Darkroom, Map, Slideshow, and Tethering.
The Darktable and Lightroom interfaces are almost identical, so you should not have problems switching between the two software.
The Lighttable module
After downloading and installing the software, run the program. The main screen looks like the below screenshot.
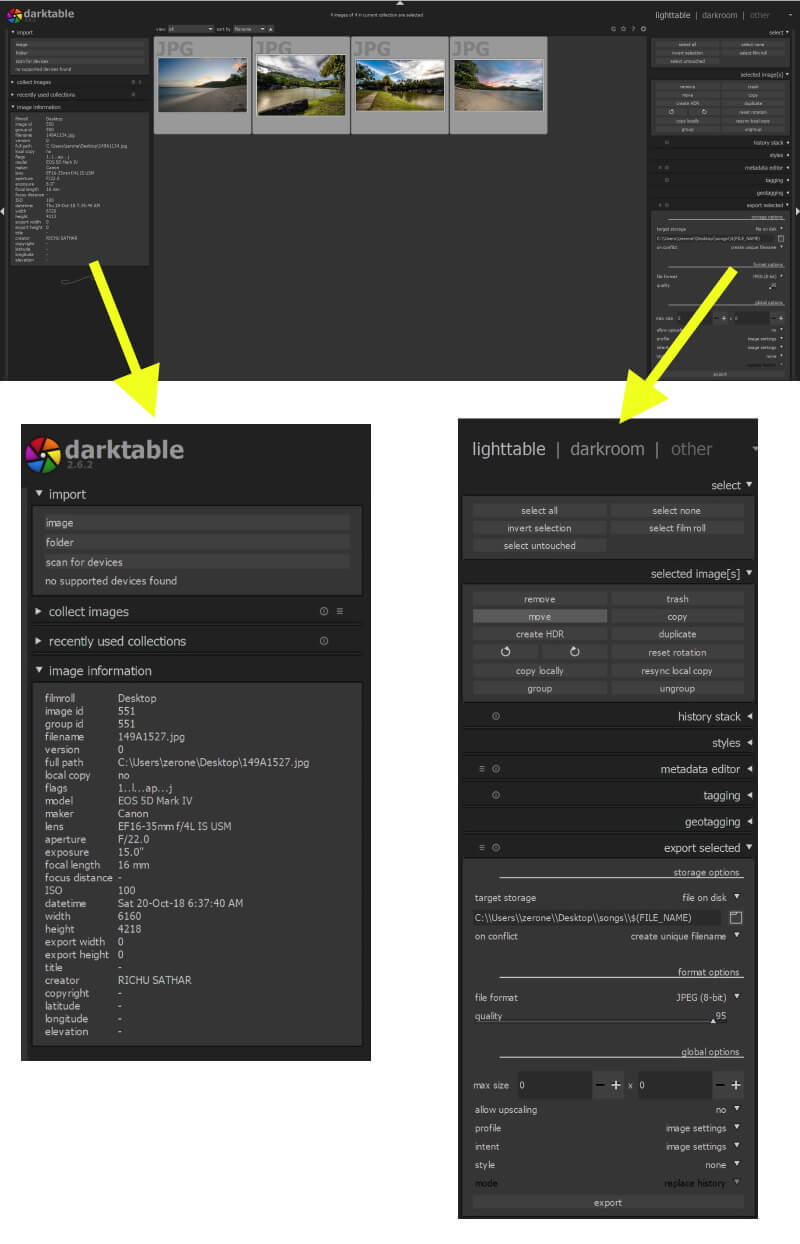
The left-hand side menu contains the import function, where you can import single or multiple photos to the software from a folder or any device connected to your computer.
Lighttable allows you to do a search for photos by various parameters, for example, by keywords, ISO, by the used camera or lens.
In the middle of the screen, you can view the selected photo. Also, you can sort and organize photos by rating, mark them with different colors, and can also be sorted by name, rating, groups, color, time, and so on.
The right-hand side menu contains some setting and export functions. You can select a photo or mutable photos, invert selections, copy or delete selected images with a single click.
You can also sort photos in groups and edit their metadata files, tagging them, and add geolocation data. Finally, at the bottom, there is the export function, where you save your edited photos in different file formats, quality, and sizes.
The Darkroom Module
Darkroom is the module for editing photos. When you select a photo in Lighttable and double click it, it will take you to the editing mode. Currently, Darktable contains 61 image operation modules. A screenshot of the darkroom is shown below.
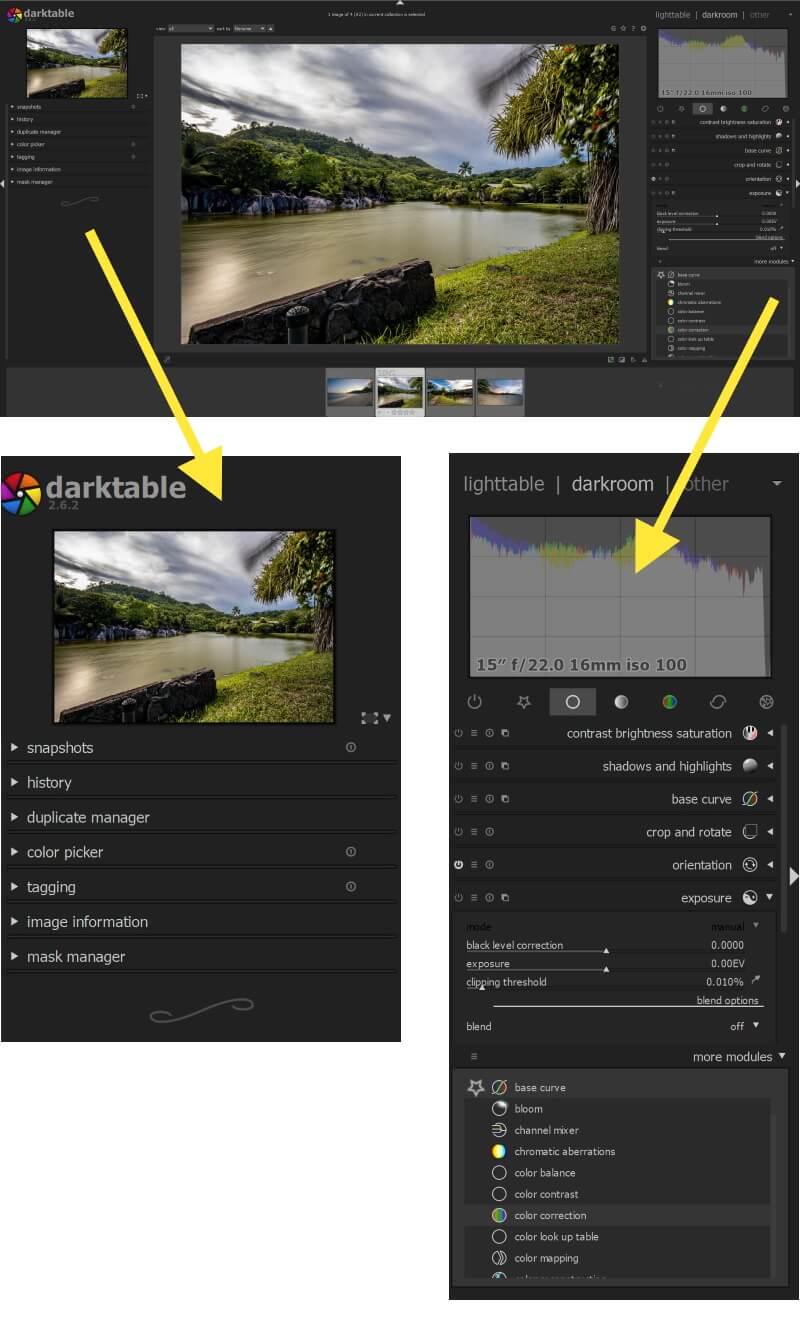
On the left side of the screen, you can see what you have done. There is a snapshot tab where you can take a screenshot of what edit you have done to your photo and you can use these snapshots for comparison reasons (before and after).
There is a History tab and if you open it up, you can see and go back to previous edits. There are tabs for Masks, Image info (EXIF), history, etc.
In the middle of the screen, you will find the photo you are editing and you can zoom in and out by the wheel of your mouse.
On the right-hand side of the screen, there is a histogram of the edited photo. Underneath it you will find the editing modules, they are grouped in basic editing group, favorite module, tone, color, correction, and effect group as shown below.
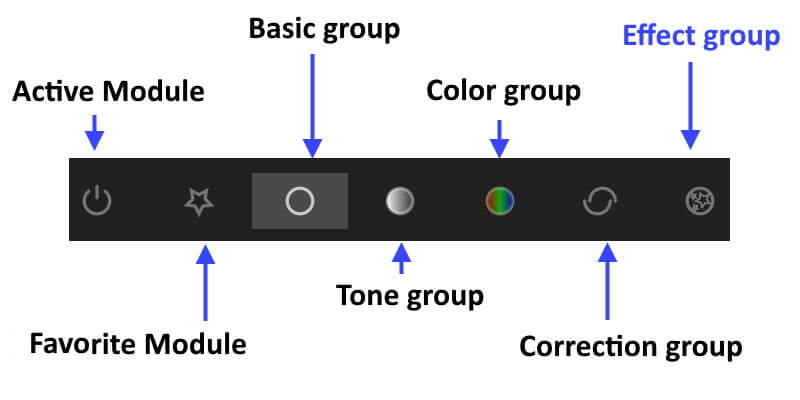
Basic image group
- You can tune your image using this simple module. It contains sliders for contrast, brightness, and saturation.
- Shadows and highlights: Improve images by lightening shadows and darkening highlights.
- Crop and rotate: This module is used to crop, rotate and correct the perspective of your image. It also includes many helpful guidelines that assist you using the tools (e.g. rule of thirds or golden ratio).
- Base curve: Darktable comes with generally enhanced base curve presets for several models that are automatically applied to raw images for better colors and contrast.
- Exposure controls: Tweak the image exposure either by using the sliders in the module or dragging the histogram around.
- White balance: A module offering three ways to set the white balance. You can set tint and temperature or you define the value of each channel. The module offers predefined white balance settings as well. Or just pick a neutral region in the image to balance for that.
Favorite group
You can add any module from the total of 61 modules to this group
Tone group
- Fill light: This module allows the local modification of the exposure based on pixel lightness.
- Levels: This module offers the well-known levels of adjustment tools to set black, grey, and white points.
- Tone curve: You can change the lightness by dragging the line up or down.
- Zone system: This module changes the lightness of your image. It allows you to modify the lightness of a zone taking into account the effect on the adjacent zones local contrast
- Two different tone-mapping modules: These modules allow you to recreate some contrast for HDR images.
Color group
- Channel mixer: This module is a powerful tool to manage channels. As entry, it manipulates red, green, and blue channels. As output, it uses red, green, blue or grey or hue, saturation, lightness.
- Color contrast
- Color correction: to modify the global saturation or to give a tint.
- Color zones: This module allows to selectively modifying the colors in your image.
- Color balance: Use lift/gamma/gain to change highlights, mid-tones, and shadows.
- The color looks up table: Apply styles or film emulations.
- Monochrome: This module is a quick way to convert an image to black and white. You can simulate a color filter in order to modify your conversion.
- Vibrance: For a detailed description read Henrik’s blog post.
- Velvia: It enhances the saturation in the image; it increases saturation on lower saturated pixels more than on high-saturated pixels.


Correction group
- Dithering: This helps with banding in smooth gradients in the final image.
- Sharpen: This is a standard UnSharp Mask tool for sharpening the details of an image.
- Equalizer: It is used to achieve a variety of effects, such as bloom, denoising, and local contrast enhancement.
- Chromatic aberrations: This module automatically detects and corrects chromatic aberrations.
- Denoise: Denoising with separated color/brightness smoothing.
- Defringe: Remove color fringes on high contrast edges.
- Haze removal: It allows you to remove the low contrast and color tint coming from the haze and air pollution.
- Hot pixels: This module allows you to visualize and correct stuck and hot pixels.Liquify: Push image parts around, grow them or shrink them.
- Lens correction: lens defect correction.
- Perspective correction: A great module to automatically un-distort shots with straight lines.
- Spot removal: Spot removal allows you to correct a zone in your image by using another zone as a model.
- profiled denoise: By measuring the typical noise of cameras at the different ISO levels Darktable is able to remove a lot of it.
Effect group
- Bloom: This module boost highlights and softly blooms them over the image.
- Color mapping: Transfer colors from one image to another.
- Framing: This module allows you to add an artistic frame around an image.
- Grain: This module is an artistic feature that simulates the grain of a film.
- Graduated density: This module aims at simulating a neutral density filter, in order to correct exposure and color in a progressive manner.
- Vignetting: It can create vignetting (modification of the brightness/saturation at the borders).
- Highpass: This module acts as a highpass filter.
- Lowpass: This module acts as a lowpass filter.
- Lowlight Vision: Low light module allows to simulate human lowlight vision, thus providing the ability to make lowlight pictures look closer to reality. It can also be used to perform a day to night conversion.
- Watermark: The watermark module provides a way to render a vector-based overlay onto your image.
Map Module
If your image has data on where the photo was taken, it will immediately be displayed on the map. However, if your camera does not apply GPS data to photos, or anything else prevents you from having geotags, you can manually enter your location data. In order to do this, simply choose a shot and transfer it to the location of the related photoshoot.
Conclusion
If you are absolutely set on paying nothing for a RAW file processor, or you are a newbie in the field of editing photos, Darktable might be the perfect choice for you. It is a powerful RAW image processor and you can learn a lot by using it. The good thing about Darktable is that there are many learning resources about its different modules especially some interesting videos on YouTube. I recommend that you try it.
Are you looking for Photo editing resources or editing Services?
Some photographers are struggling to learn and master editing software like Lightroom or Photoshop, they found the editing process is taking too much of their time. Therefore, assigning the editing tasks to an editing service may be the answer.
On the other hand, some others are looking for editing resources like actions, overlays, and textures to help them. For those I highly recommend paying a visit to my store, it has amazing professional photo editing tools.
Also, you can check my editing tutorials, there are many tips and tutorials there.
Thanks for reading, I hope you enjoyed the article if you have any questions just post them below & I will be happy to answer you.
If you enjoy the site, do not forget to subscribe, we will only inform you when a new article is posted.


I had no idea this software existed. I am a HUGE supporter of open-source software. I can’t believe all of the features of Darktable. It is easily comparable to lightroom which I think I don’t need to pay for it currently as I am still amature. I am totally downloading this and will be giving it a try. Thank you so much!
Hi Feochadan
Thanks for your comment, it is an amazing software, it is also free!. Enjoy a nice and easy editing
Thanks a lot for summarizing such an amazing review about Darktable.
I am very passionate about photography and during my free time I go to different events (wedding, baptism or birthdays) and I capture every special moment. I’m looking for a free software like Darktable. I think it would help me a lot. The wide variety of formats (JPEG, Cr2, HDR, PFM, …) is an advantage for me. Many clients ask me for pictures in different formats.
I can’t wait to use it. Is there a beginner’s guide to using Darktable?
Thanks for your comment. There are many resources online for Darktable, personally I recommend “A Comprehensive Intro to Darktaable: A free lightroom Alternative“, Also there many interesting videos on YouTube, TRy them and I hope you happy Editing!