Adobe introduced the new AI-powered masking to the Camera Raw Filter in Photoshop. This feature allows you to easily select and mask the subject, sky, and background. Then you can apply any of the editing features of the camera row filter to that masked item only and leave the rest of the photo elements untouched.
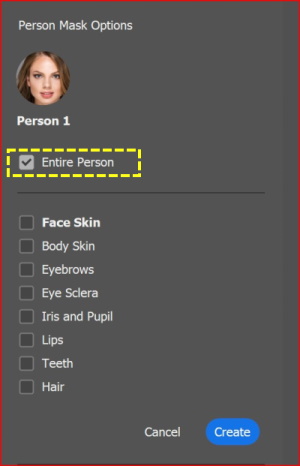
Furthermore, the new update makes it easy to select and mask people, and even individual body parts (such as the face skin, body skin, eyebrows, eye sclera, iris, pupil, lips, teeth, and hair) in a single click.
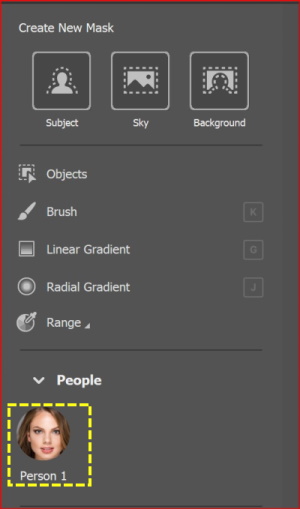
With photos having more than one person, Adobe’s AI automatically identifies and lists each person in a scene as “All People,” “Person 1,” “Person 2,” “Person 3,” etc. You can then choose, say, Person 2, and it will let you select and mask their individual body parts.
From there, you can use all the editing power of the camera raw filter.
What is the camera raw filter?
A camera raw file contains unprocessed, uncompressed grayscale picture data from a digital camera’s image sensor, along with information about how the image was captured (metadata).
Photoshop Camera Raw software interprets the camera raw file, using information about the camera and the image’s metadata to construct and process a color image.
The Photoshop Camera Raw filter allows you to use the functions of the ACR interface at any time within Photoshop. This allows you to make any adjustments within ACR at any time during your workflow instead of just limiting its usage to the raw processing stage.
How to use The AI Masking Tool
Example 1
We will use the below photo to edit the background and parts of the subject: Iris, eyebrows, lips, and hair.
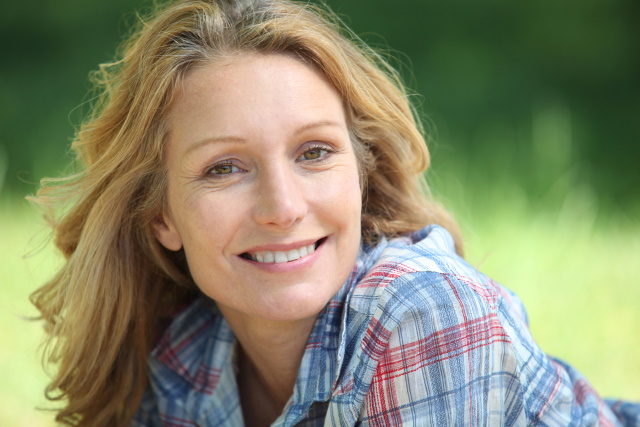
The photo is credited to Depositphotos
-
Edit the background
- Open the photo in Photoshop
- Duplicate the background layer (Ctrl + J)
- Change the layer to Smart filter (Filter > Smart filter), so you can go back to change your editing.
- Open the Camera Raw Filter (Filter > Camera Raw Filter) and the below dialog box will pop up.
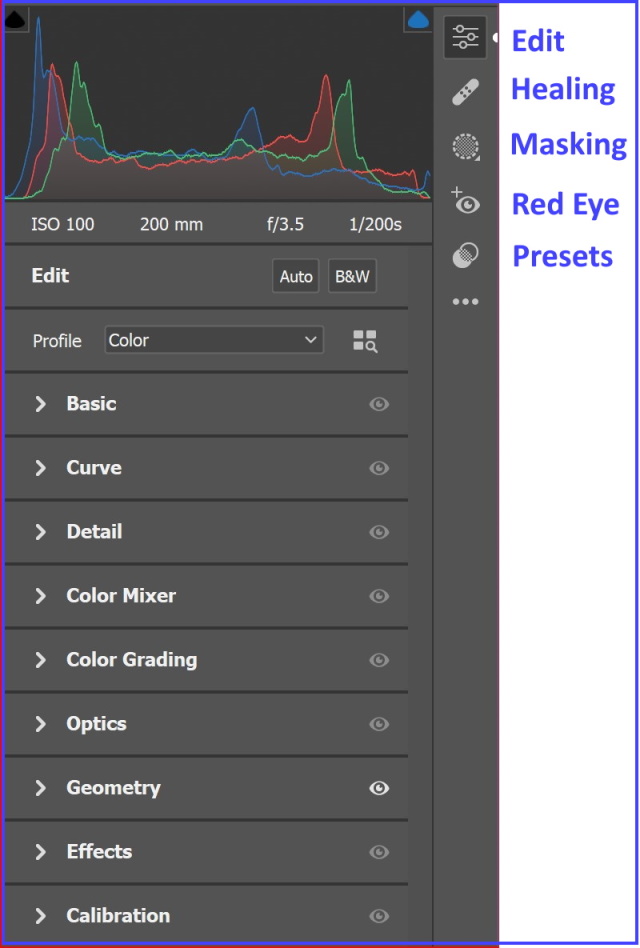
- Select the masking tool, and the below window will show up
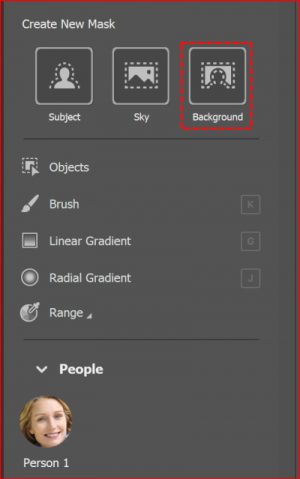
- Click the background icon, then a mask is created automatically for the background, and the editing tool is available to make any changes to the background only.
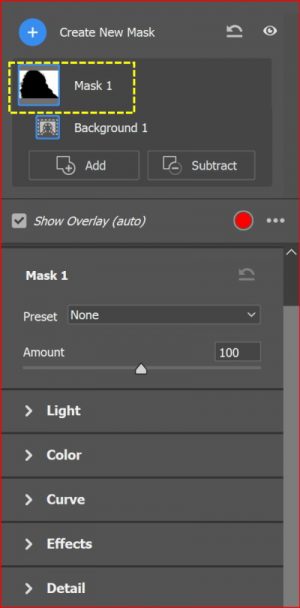
- We decrease the saturation (from the light group), and use the curve tool, the result is shown below
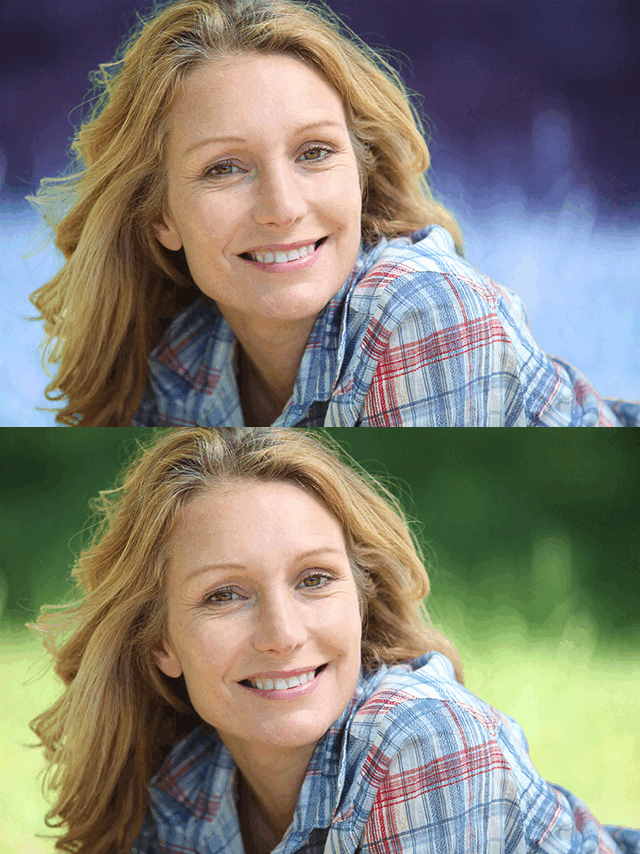
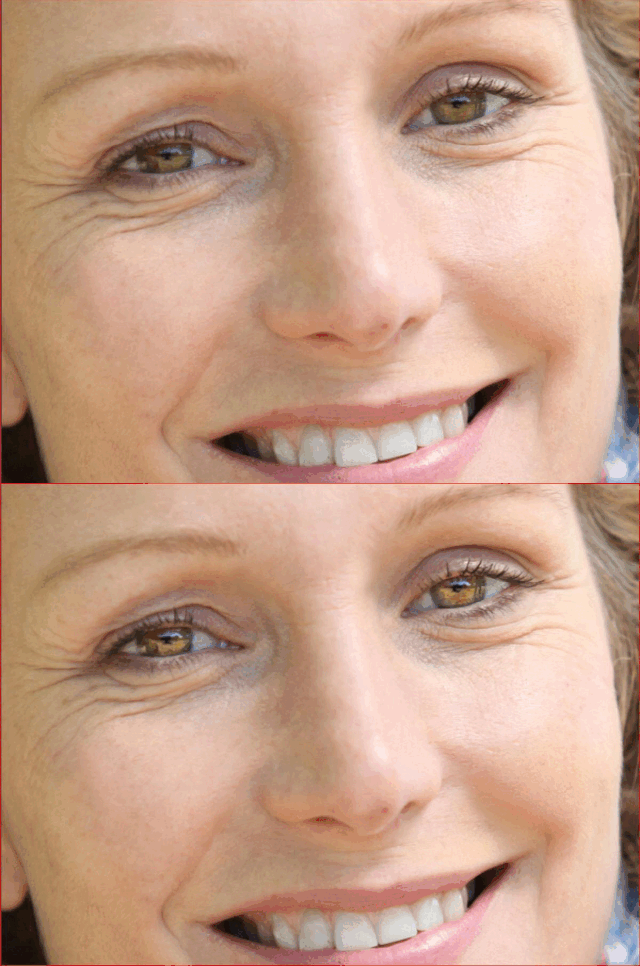
- Edit the Iris of the subject
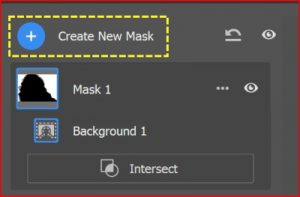
- Click on “create a new mask”
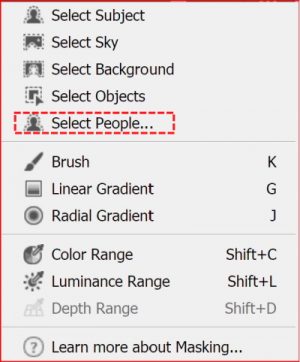
- Click on “Select people”
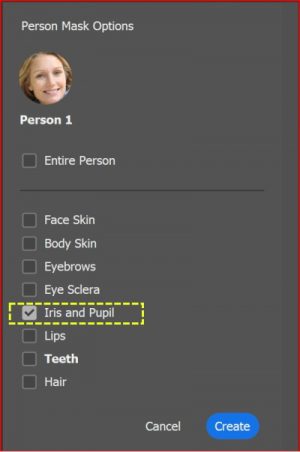
- Check the “Iris and Pupil” box, then click on the create button.
- Increase the contrast, shadow, and Clarity sliders. The result is shown below
-
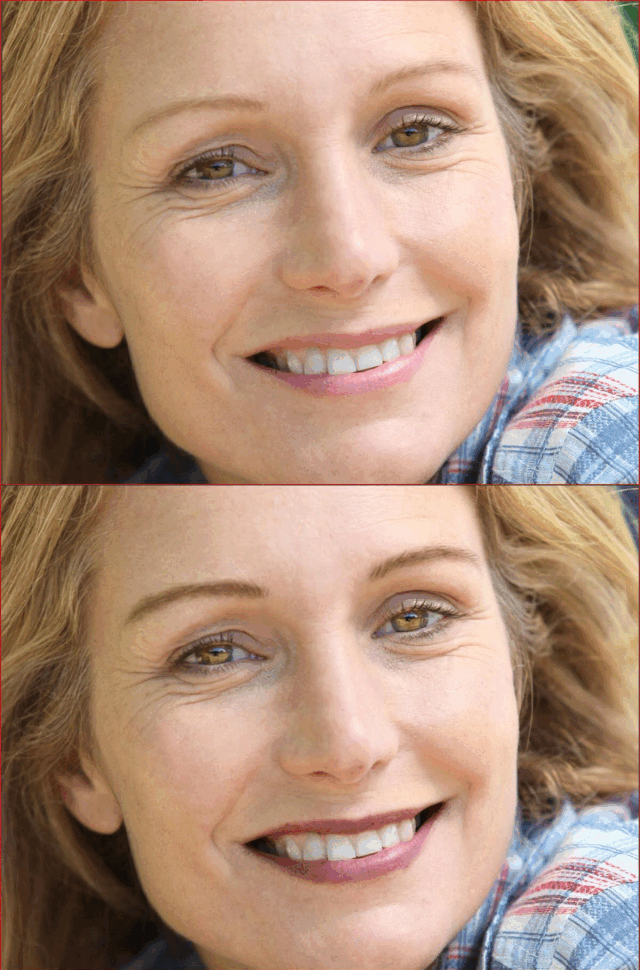
Edit the Eyebrows and the Lips of the subject
- Repeat steps 8 and 9
- Check the “Eyebrows” and “Lips“ boxes, then click on the create
- Decrease the highlights, and increase the sharpness slider. And use the curve tool. The result is shown below
-
Edit the hair of the subject
- Repeat steps 8 and 9
- Check the “Hair” box
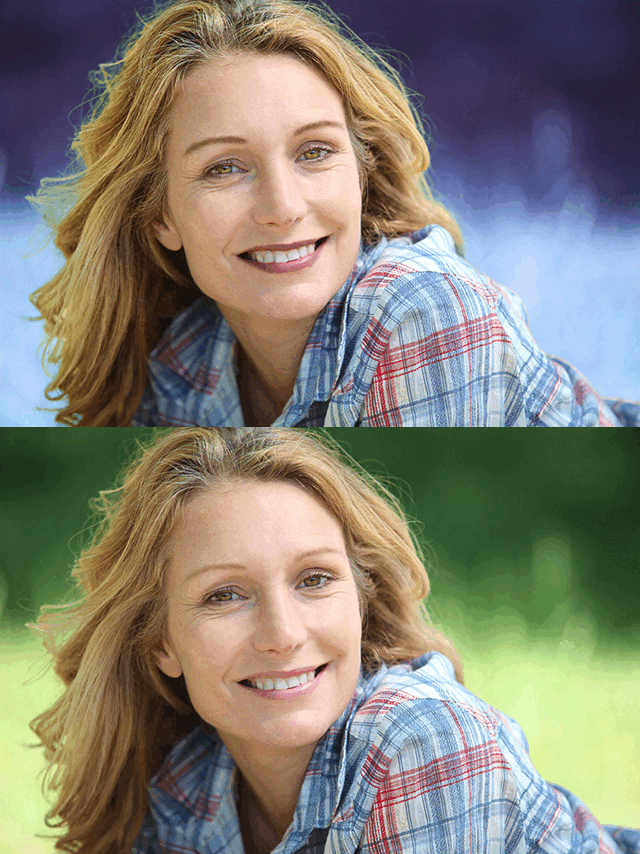
- Increase the saturation, texture, and clarity slider.
The final result is shown below
Example 2
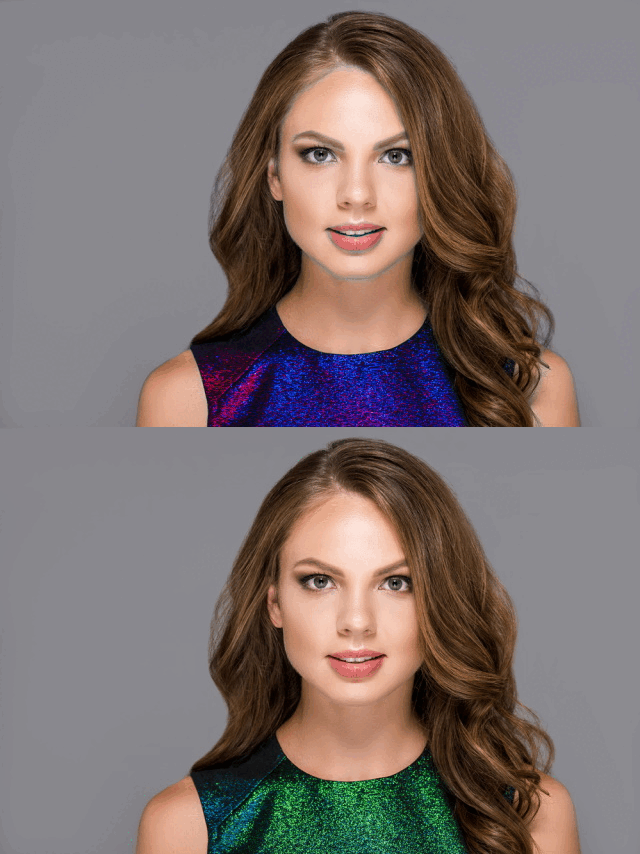
In this example, we will change the dress color of the subject.
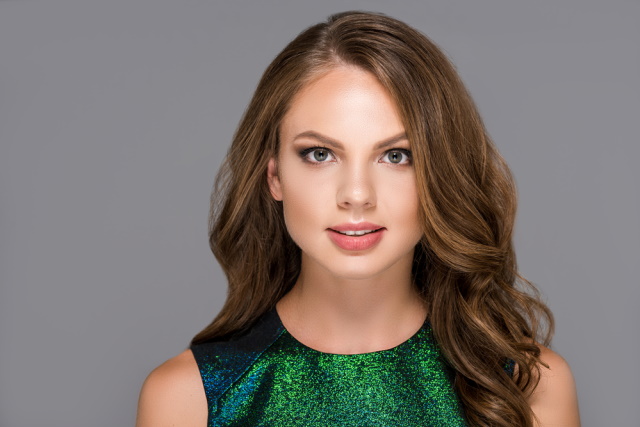
The photo is credited to Depositphotos
Although there is no direct masking of the clothing of the subject, we still can mask it using the following steps.
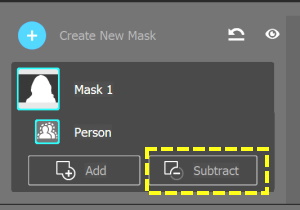
First, mask the whole subject, then subtract from the mask all the other parts of the subject as shown in the following steps.
- Open the photo in Photoshop
- Duplicate the background layer (Ctrl + J)
- Change the layer to Smart filter (Filter > Smart filter), so you can go back to change your editing.
- Open the Camera Raw Filter (Filter > Camera Raw Filter)
- Click on the masking tool, and click on “Person 1” from People
- Check the box “Entire person”, then click on “Create”
- Click on “Subtract”
- Choose “Select People”
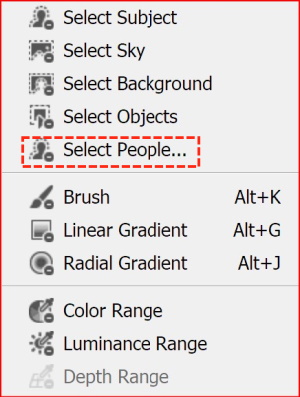
- Check all boxes
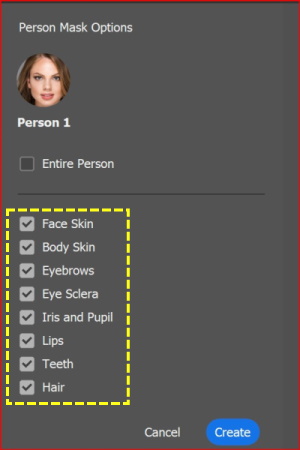
- Now, the dress is masked. Change the Hue and Saturation sliders.
- The result is shown below
Example 3
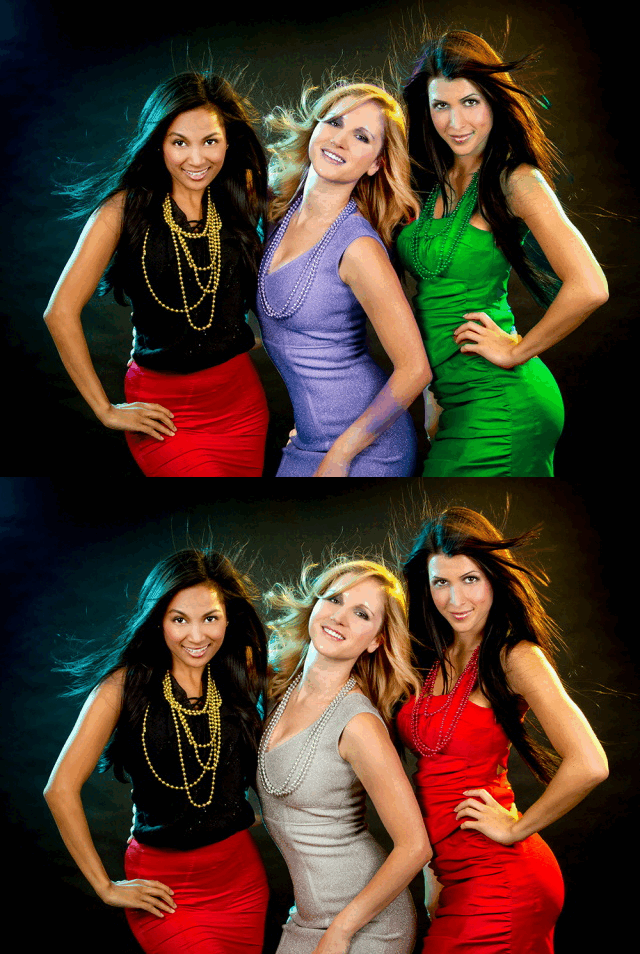
If you have a photo with more than one person, the new masking tool will allow you to handle each person separately. You can create different masks for each person in the same way as in example 2.

The photo is credited to Depositphotos
The masking menu will show up the three persons.

The result is shown below
Conclusion
Artificial intelligence technology is improving very fast and will prove a great asset for photo editors. And it will change the way that photographers edit their photos. It offers easier, faster, and better photo editing for photographers of all levels, from beginners all the way up to professionals.
Artificial intelligence is intended to turn manual, uninspiring, often time-consuming tasks into semi-automatic actions. For example, selective editing and background replacement took a lot of work. You would generally mask certain areas of the image, which involved carefully selecting subject edges and could get very tedious, especially with certain subjects.
My little advice to all photographers is to keep searching for new techniques in photo editing, it will elevate your work to a higher level.
Thanks for reading, I hope you enjoyed the article, in case you have any questions just drop them below & I will be happy to answer you.
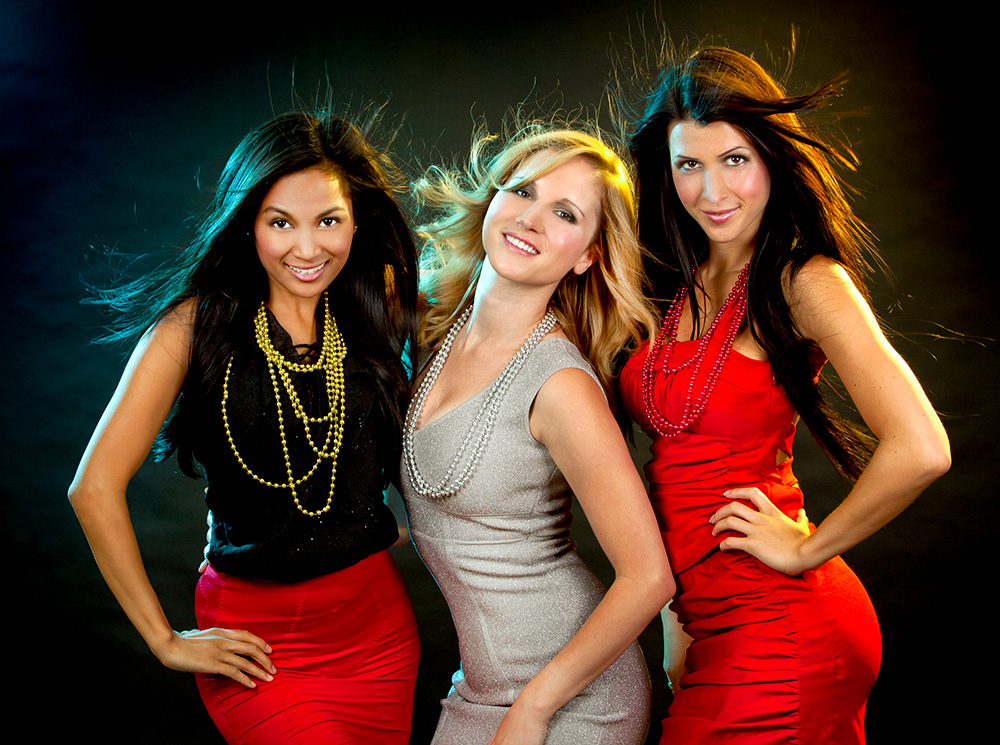
The featured Photo is credited to Depositphotos
If you enjoy the site, don’t forget to subscribe, we will only inform you when a new article is posted.



I have photos that I would like to edit, but I’m not sure how to use the new AI masking tool in Photoshop! With your guide, I can now use the new tool when editing my photos! Your guide will also be helpful for more experts in photography, that is why shared your guide on social media.
Thanks for your comment
Photoshop has such a vast array of editing options I personally have barely tapped into.
This new feature I had yet not heard of until now and I cannot wait to start to implement it after learning about it here on your new blog post.
Great instructional content broken down into a easy to read format.
I’m glad you find the article useful for you, many thanks.