In Digital Photography ISO measures the sensitivity of the image sensor. The lower the number is the less sensitive your camera is to light and the finer the grain. Higher ISO settings are generally used in darker situations to get faster shutter speeds.
Abbreviation of ISO stands for International Standards Organization, and it is also a standardized industry scale for measuring sensitivity to light. More commonly today, it pertains to the sensitivity of a digital image sensor.
ISO scale
The camera’s ISO setting is its sensitivity to light. The higher the ISO, the more sensitive it is. Each ISO setting is double the one before: if you increase the ISO from 100 to 200, you double the camera’s sensitivity; and if you increase it from 200 to 400, you double it again.

This makes ISO 400 four times more sensitive to light than ISO 100, and ISO 1600 sixteen times more sensitive to light than ISO 100, so on and so forth. What does it mean when a sensor is sixteen times more sensitive to light? It means that it needs sixteen times less time to capture an image!
Let us go through this ISO Speed example if you set your ISO to 100 and the proper exposure tells you that your shutter speed will be ½ second
ISO 100 – ½ second
ISO 200 – 1/4 of a second
ISO 400 – 1/8 of a second
ISO 800 – 1/15 of a second
ISO 1600 – 1/30 of a second
ISO 3200 – 1/60 of a second
In the above ISO Speed Example, if your camera sensor needed an exactly ½ second to capture a scene at ISO 100, simply by switching to ISO 3200, you can capture the same scene at 1/60th of a second! That can mean a lot in photography, since it allows you to shoot at higher shutter speed, so it can help to avoid camera shake or motion blur.
The below photo was captured at ISO 800, shutter speed of 1/5000 sec, focal length 46 mm, and f /4.
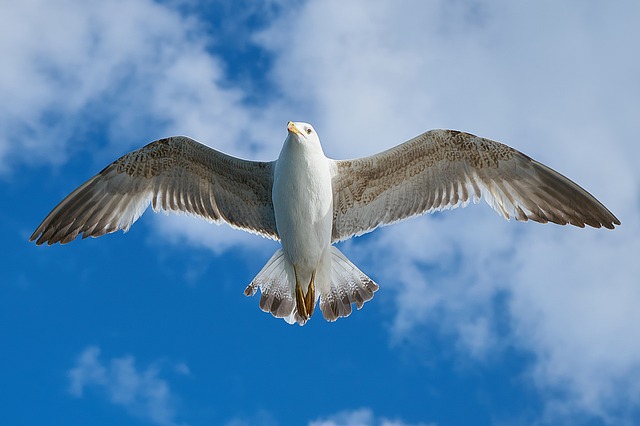
The camera sensor needed 1/5000th of a second to fully freeze the birds while they were in flight. Now, what would have happened if I used ISO 100 on my camera instead? My sensor would have needed 8 times more time to capture the same scene, which is 1/625th of a second. At that speed, I would have introduced motion blur into my picture, because the birds were moving faster than that speed.
In digital cameras, raising the ISO means a decrease in photo quality, with an increase in what’s called “noise.” It’s the digital equivalent of grain.
Noise sources
There are some factors that affect the noise level in photos:
-
The size of camera sensor
Cameras with smaller sensors, such as cell phones and compact cameras, have thumbnail-sized sensors, cameras noise can reach unacceptable levels even at low ISO. Cameras with larger sensors, such as DSLRs and Mirrorless Interchangeable-Lens Compact cameras, produce lower noise at higher ISOs. So, the larger the sensor size is, the better the noise at comparable speeds.
-
Pixel Density
The sensor collects light via very tiny buckets called “photosites”, which later become pixels in the final digital image. The size of the photosites plays a big role on the amount of noise that is present in the image. Generally, the smaller the photosite, the noisier the image gets. A high pixel density (smaller photosite) can create even worth noise if it combined with a small size sensor. Smaller sensors with a large number of pixels generally produce noisier images.
-
Shooting at high ISO
The higher your camera’s ISO is set, the more likely you are to encounter noise. There are two distinct primary types of digital noise:
- Luminance Noise: This is the gray or black-colored noise or grain you often see in a magnified view of an image, either on-screen or when you closely examine a large print. The subject details are components of the luminance noise, so you got to be very careful about removing this noise because you will end up losing subject’s details.
- Chrominance Noise: This type of digital noise is also part of high-ISO images, but it’s different. It’s the pastel-colored, speckled noise you sometimes see in mid-tone or shadow areas. This noise has less impact on the fine details of your subjects, so it often can be reduced or removed without appearing to blur or soften your images.
When to use low ISO
As a general rule always you should stick to the lowest ISO of your camera, which is typically ISO 100 or 200, whenever possible. When there is plenty of light, you should use the lowest ISO to retain the most amount of detail and to have the highest image quality.
If you’re shooting an image that doesn’t require a large depth-of-field, you can increase the aperture (thus allowing more light into the lens) and use a lower ISO.
If you’re shooting with artificial light, such as a flash, you can typically get away with a lower ISO setting.
When to use high ISO
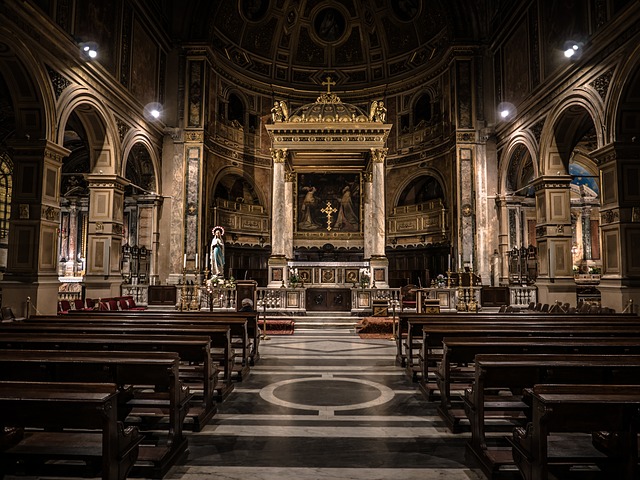
You should increase the ISO when there is not enough light for the camera to be able to quickly capture an image. Like in Art Galleries, Churches, and Concerts halls, the light situation is low and they have strict rules against using a flash.
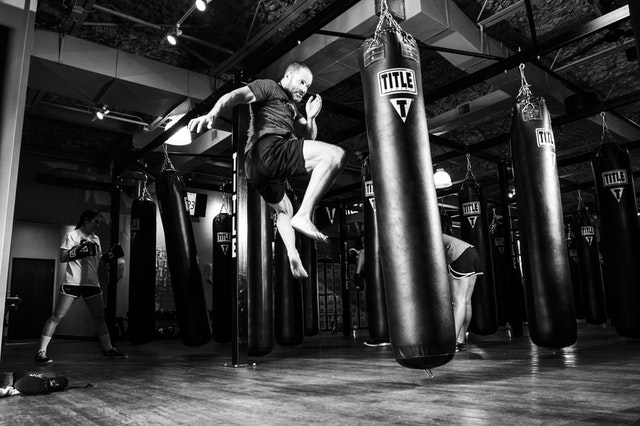
If your subject is moving you might consider increasing the ISO as it will enable you to shoot with a faster shutter speed and still expose the shot well. For example, when shooting Indoor Sports Events, where your subject is moving fast yet you may have limited light available.
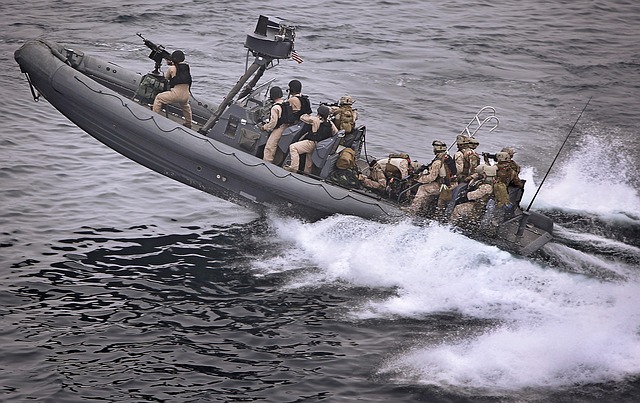
You might want to increase ISO is when you need to get ultra-fast shots, like shooting flying bird picture, fast moving cars, and fast moving boats.
What is Auto ISO?
Photographers are constantly doing a balancing act. They want to keep their ISO low for high-quality images (low noise), but also they need a fast enough shutter speed to get a sharp picture.
Auto ISO was introduced into digital cameras several years ago to help photographers manage that balance. Turning on that feature allows the camera to push the ISO up when it decides the shutter speed is getting too low for a good picture. The below photo shows the Auto ISO menu in a modern Canon camera.
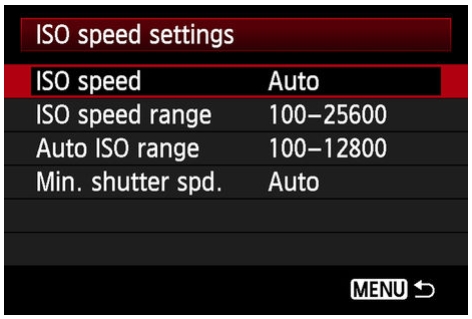
The following features are added to some modern cameras:
- User can manually pre-set a minimum and maximum ISO range
- For Auto ISO, the shooter can preset the minimum and maximum available ISO range (this is separate from the range for manually-adjusted ISO)
- For the first time with an EOS SLR, the shooter can set a minimum shutter speed used with Auto ISO. If the shutter speed drops below this user-set value, the Auto ISO will automatically be raised.
Auto ISO would let the photographer work at higher ISOs indoors and seamlessly switch to lower ISOs outside. It is also very helpful when lighting is changing radically during shooting.
How to deal with Noise
Most modern DSL offer some built-in Noise reduction feature. The photo below shows the menu of the NR feature.
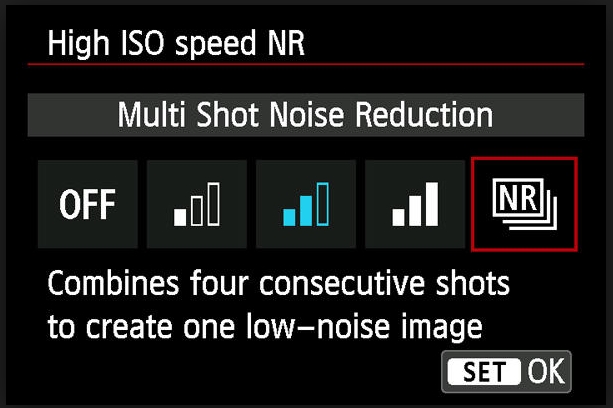
If like me and the majority of photographers do not use the camera manufacturer’s editing software, chances are the NR information is not being used and therefore it is useless to turn it on at the first place.
If your camera doesn’t have noise reduction built in, or you prefer shooting in RAW and adjusting the noise levels later, use your editing software. The advantage of using noise reduction software over in-camera noise reduction is that you have more powerful tools such as reducing grain selectively to parts of the picture where it’s needed while leaving other areas alone.
You may check my post >> How to Reduce the Photo Noise – The Free Noise Reduction Software >>
ISO is an important aspect of digital photography. If you want to gain more control of your digital camera, you should have an understanding of all parts of the exposure triangles, i.e. shutter speed, aperture, and ISO. You have to Experiment with different settings and how they impact your images.
This post is part of a three posts series that explain the exposure, the other two posts are:
What Is The Aperture In Photography
What is The Shutter Speed in Photography
Thanks for reading my article, hope you find what you are looking for. If you have any questions, please drop it down and I’ll be glad to answer it.
In case you like the site, don’t forget to subscribe, we will notify you if new stuff is posted.



hi Amin
thanks for this! I have a cannon DSLR and ive struggled with the settings especially with the ISO settings. In the end, i just take the photo on auto…talk about a waste of an SLR right?
your post was very informative…ive learned alot and hopefully i can take good pics just like you
Thanks for the comment, glad you find the article useful.
Amin, I have always wondered what that ISO thing was for on my camera. I never knew the right questions to ask! Thank you for thoroughly explaining how a camera’s sensitivity to light can be controlled and why you’d want to do it.
I am bookmarking this post so I can come back and refer to it when I need to remember how to use the thing.
Often, I attempt to take pictures in available natural light and sometimes the pictures get really dark.
Your ISO explanation will help me do better. Thank you….
Glad you like the post and thanks for the comment.