

This article “How to Reduce Photo Noise” is for beginner photographers, who want to reduce or get rid of noise in their digital images and don’t know how to do it. I will first explain what noise is, what the factors that cause it are, how you can reduce it using your DSLR camera, or using editing software in post-processing. I will also go through some free software that is used to reduce noise in your photos.
What is Noise in Digital Images?
The Wikipedia site defines Image noise as a random (not present in the object imaged) variation of brightness or color information in images and is usually an aspect of electronic noise. It can be produced by the digital sensor and circuitry of a digital camera.
In digital photographs, “noise” is the commonly used term to describe visual distortion. Noise is also defined as aberrant pixels. That means pixels that do not represent the color or the exposure of the scene correctly. It looks similar to grain found in film photography, but can also look like splotches of discoloration when it’s really bad and can ruin a photograph.
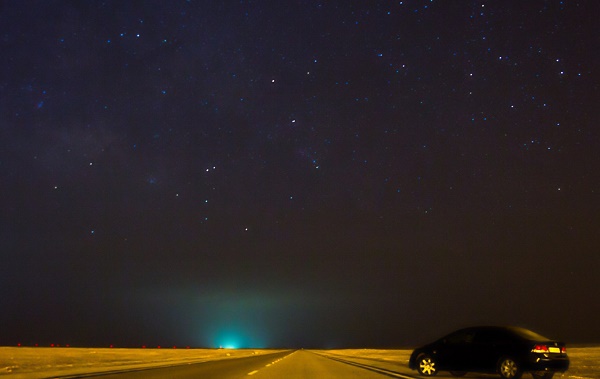
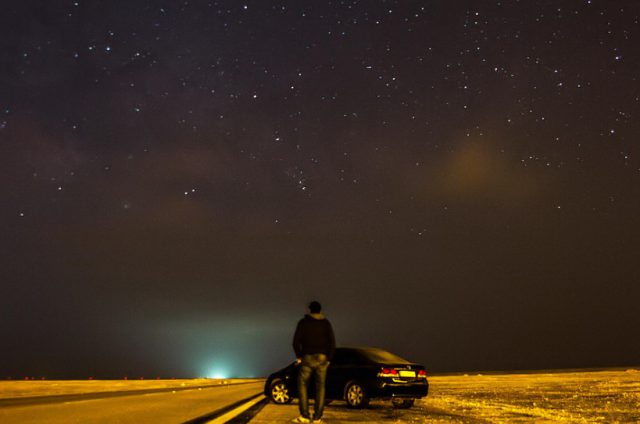
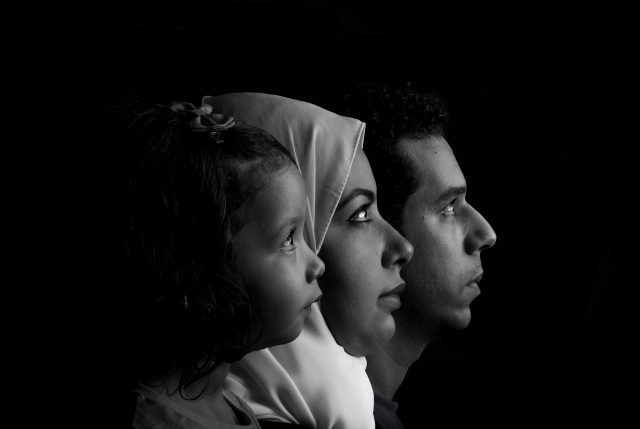
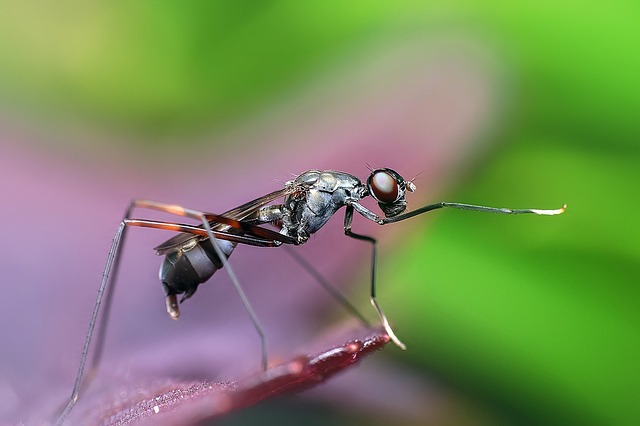
In the following photo, the small dots or grains might not be very noticeable when you look at the image on the back of the camera screen or at a reduced zooming view on your PC.
But when you zoom in and view the image at 100% or more on your PC, they all of a sudden become quite visible, especially in the area with dark tone (background).
Acceptable noise is a very subjective concept; the amount of noise that would be considered unacceptable to one photographer might be fine for someone else. The question of how much noise is too much depends also on the size of the prints you are going to do. Bigger print sizes will show noise artifacts more than small ones.
What causes digital noise?
-
The size of a camera sensor
Cameras with smaller sensors, such as cell phones and compact cameras, have thumbnail-sized sensors, camera noise can reach unacceptable levels even at low ISO. Cameras with larger sensors, such as DSLRs and Mirrorless Interchangeable-Lens Compact cameras, produce lower noise at higher ISOs. So, the larger the sensor size is, the better the noise at comparable speeds.
-
Pixel Density
The sensor collects light via very tiny buckets called “photosites”, which later become pixels in the final digital image. The size of the photosites plays a big role on the amount of noise that is present in the image. Generally, the smaller the photosite, the noisier the image gets. A high pixel density (smaller photosite) can create even worth noise if it combined with a small size sensor. Smaller sensors with a large number of pixels generally produce noisier images.
-
Shooting at high ISO
The higher your camera’s ISO is set, the more likely you are to encounter noise. There are two distinct primary types of digital noise:
1- Luminance Noise: This is the gray or black-colored noise or grain you often see in a magnified view of an image, either on-screen or when you closely examine a large print. The subject details are components of the luminance noise, so you got to be very careful about removing this noise because you will end up losing the subject’s details.
2- Chrominance Noise: This type of digital noise is also part of high-ISO images, but it’s different. It’s the pastel-colored, speckled noise you sometimes see in mid-tone or shadow areas. This noise has less impact on the fine details of your subjects, so it often can be reduced or removed without appearing to blur or soften your images.
-
Exposure Time
The photo noise is the result of thermal noise, which will become noticeable as your sensor heats up during a long exposure. In a long exposure the sensor temperature increases and if you leave the shutter open long enough thermal noise will be a factor. In general terms exposures under 1 minute are normally free of thermal noise but from 1 minute and up and depending on the ambient temperature things can get ugly. A five-minute exposure with a DSLR on a summer night will really look very bad due to noise.
-
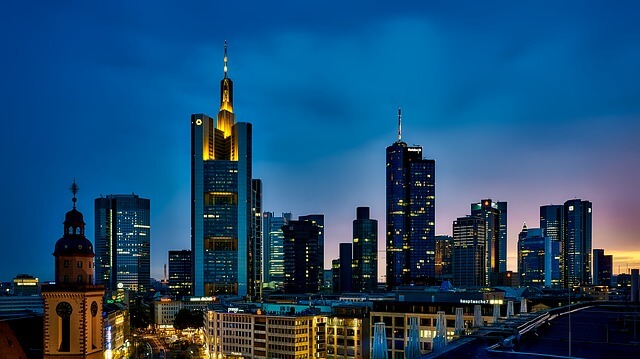
Dark area and Shadows
Grain shows up more against darker subjects or backgrounds.
Tips to avoid digital noise in photos
-
Use a camera with a larger sensor
If you care enough about the quality of your photo, having a full-frame digital camera can be a great step toward taking much more professional photos.
-
Shoot in RAW format
Shooting in JPEG image format includes a compression process to reduce file size. This process adds some noise that is known as JPEG artifacts. Of course, you don’t have to shoot RAW all the time, but when you are shooting in low light conditions, and you may increase ISO setting switch over to RAW, to give you a good chance to handle and reduce the expected noise later in post-processing.
-
Shoot at a low ISO
Higher ISO settings tell your camera’s sensor to group pixels together to capture more light. This grouping effect can make your image look gritty and noisy. Do some test shots to find out at what level the ISO settings on your camera start to degrade image quality.
You should know more about your camera noise associated with the different ISO settings. DxO Labs’ DxOMark service tests digital cameras for overall image quality, but they also do specific tests to determine the camera’s noise levels at all ISOs. It will tell you the highest ISO at which you will have acceptable noise levels (which they define as 30dB or higher), so try not to exceed it.
-
Use your camera’s onboard noise-reduction
Canon has two settings to handle noise and they are independent of each other.
1- High ISO Noise Reduction
This only applies to JPG files and is similar to what noise reduction programs do so you can leave this type of noise reduction off and do your own processing if needed.
2- Long Exposure Noise Reduction
You should leave that “On” or “Auto” if you are taking single shots without thinking about stacking. The camera will take a second exposure with the same exposure time as the photo but with the shutter closed, then the camera just subtracts what it finds in this “dark” exposure from your photo decreasing the noise.
-
Use noise-reduction software on your computer
If your camera doesn’t have noise reduction built-in, or you prefer shooting in RAW and adjusting the noise levels after the fact, use your editing software. The advantage of using noise reduction software over in-camera noise reduction is that you have more powerful tools such as reducing grain selectively to parts of the picture where it’s needed while leaving other areas alone. As an example, the following photo is edited by DxO Optics Pro to reduce the background noise. The interface of the software and the noise reduction menu look like this:
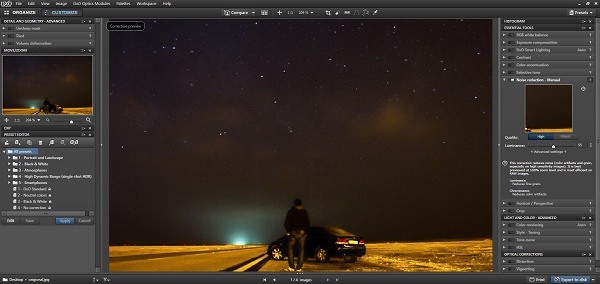
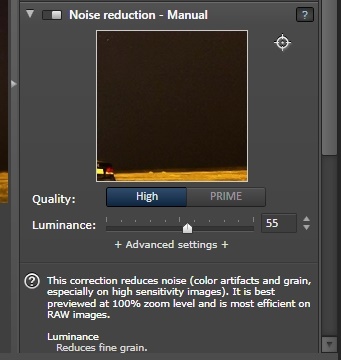

After applying noise reduction
The Free Noise Reduction Software
Most of the top editing photo software like Photoshop and Lightroom has an editing tool to reduce noise or has a plugin to do the same job. So if you already have editing software with a similar tool, just skip the rest of the post. If not there are some free tools (or at least have a free trial) that are designed to reduce your photo noise.
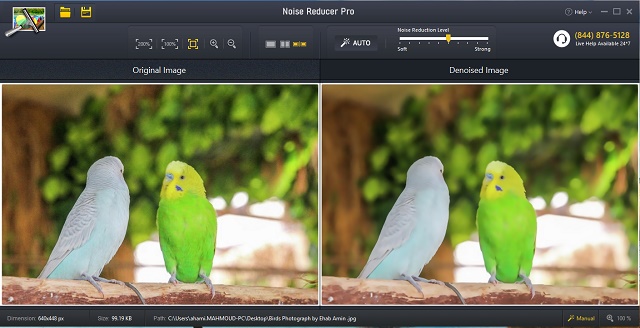
1- Noise Reducer Pro
 Main features
- Add and De-noise image in no time
- No harm to the original details
- Uses a smart noise-reduction technique
- Gives you a real-time comparison slider
- Manage Noise-Reduction levels manually
- What’s more, it’s FREE!! But for a limited time period.
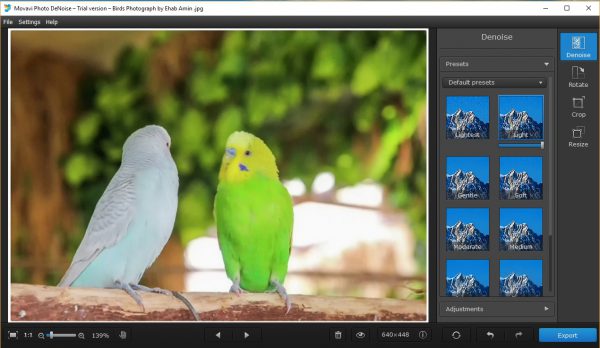
2- Movavi Photo DeNoise
 Main features
- Instant image denoising with ready-made filters
- Advanced denoiser settings for precise photo fixing
- Smart removal algorithm to easily clean up any type of digital noise
- Crisply detailed images even at stronger presets
3- Neat Image
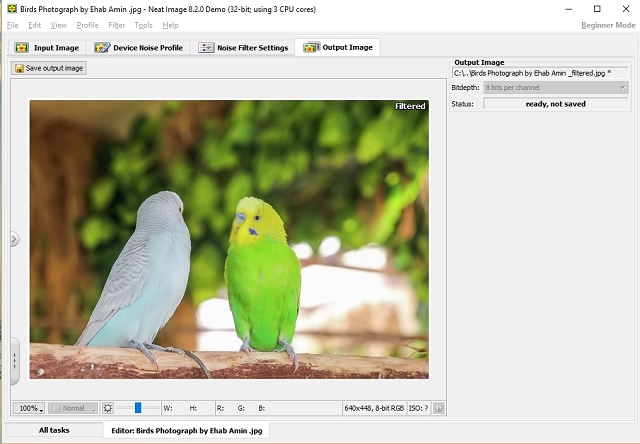
Neat Image works as a special-purpose digital filter. The filter is specifically designed to reduce visible noise in digital photographic images. It effectively reduces these kinds of noise:
- Luminance noise
- Color (chroma) noise
- Banding noise
- Salt-and-pepper (impulse) noise
- Electronic interference noise
- Film Grain
- JPEG artifacts
- In-camera noise reduction artifacts
4- Helicon Filter
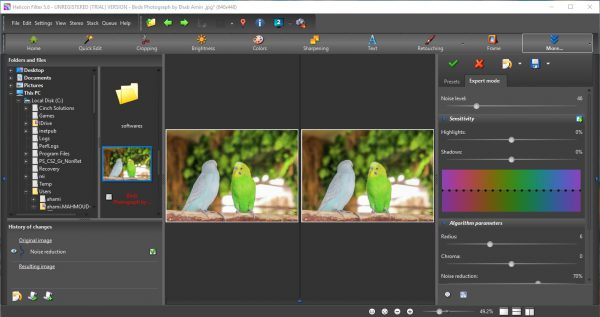 Main features (regarding noise reduction)
- Noise reduction
- Automatic noise reduction: The program automatically detects the level of noise and removes it.
- Noise reduction for selected colors: You can choose which color(s) you wish to reduce the noise for. For example, you might want to reduce the noise in the sky but leave it in for the trees, to leave in more detail.
- Advanced noise reduction: You can control several parameters of the noise reduction algorithm, such as the level of chromatic noise.
Finally, the good news is that the latest generation of digital cameras does a better job of producing images with lower noise levels.
Thanks for reading the article, hope you found it useful to you. If you have any comments or questions, just leave them in the below box. I will gladly answer it.
Don’t forget to subscribe, you will be notified when a new article is posted.


Yeah, noise is somthing that turns me off all the time I see it. The camera choice is indeed important in this, but if it’s still there, Blender has saved me countless of times.
Photoshop is probably better but just go with what you are most comfortable with.
Thanks for the great article!
Hi, Alex
Thanks for your comment. I agree with you Photoshop is the best, but if you can’t afford it, there are a lot of free and cheaper alternatives.