

While the new photo restoration filter in Photoshop 2023 is a beta version, however, it is an amazing start for the restoration process of damaged old photos. It simplifies the process and it is adequately fast because it carries the processing on your device rather than on the cloud.
Through The following tutorial, we will explain how to use the photo restoration filter with detailed steps and different examples. In addition, we will use the Colorize filter, and the Content aware fill command to finish the restoration task. so let us begin!
Introduction
Photographs are a great way of recording important moments of our lives, they can capture a place, events, or people’s lives. Photographs are something that people have used now for over 100 years to record interesting memories of our lives. Furthermore, they’re really useful when looking at how life has changed.
People are more likely to look at the picture than they are to read and they can be so much more descriptive of a place or an event compared to just words.
Before the age of digital photos, the only way to keep and store printed photos is to display them in frames or keep them in albums. Old photographs are quite susceptible to degradation and are prone to fade over time. Also, they are subjected to different threats such as moisture and stains.
What is photo restoration?
Photo restoration uses digital restoration tools to create digital versions of the images, improve its quality and repair the damage.
Photo restoration has recently become much easier with the development of photo editing tools like Adobe Photoshop. A major breakthrough is introduced to Photoshop by using AI (artificial intelligence). In the last update of Photoshop 2023, Adobe develops a new filter called “Photo Restoration”.
The Photo Restoration filter is a new Neural Filter that uses an AI-trained model to help restore old or damaged photographs. You can restore the original quality of your images by using the basic editing options of the filter or choose to further refine using the advanced options (adjustments). Once complete, there is always an option to export the image to the main Photoshop workspace for further refinement.
It is worth mentioning that the filter is a “beta” filter, It is intended for testing, and the learning models or workflows are still being improved. Still, editors can use these filters but with the knowledge that the output may not always be consistent.
How to use the photo restoration filter
Example 1:
In the following example, we will use the below photo
- Open the photo file in Photoshop 2023
- Duplicate the background layer (Ctrl + J)
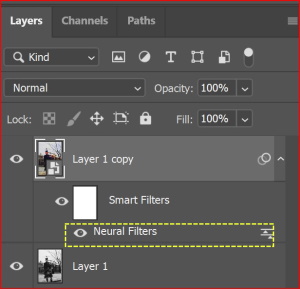
- Convert the layer to Smart Filter
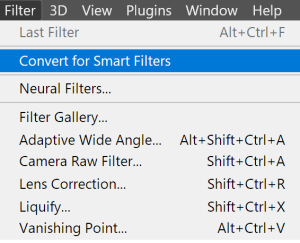
- Open the Neural Filter
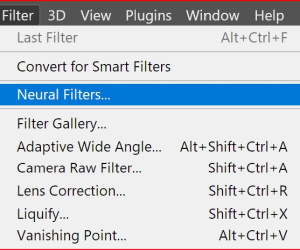
- The neural filter menu pops up, then select the Photo Restoration filter. If you are using the filter for the first time, you need to download it.
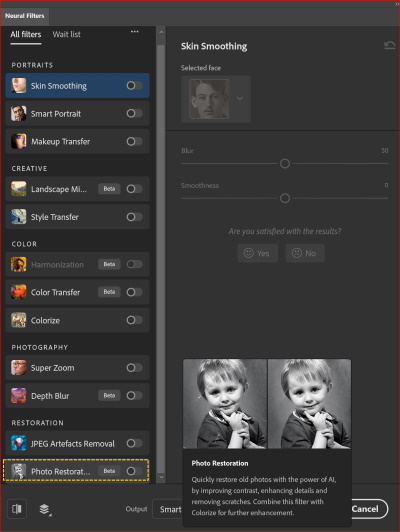
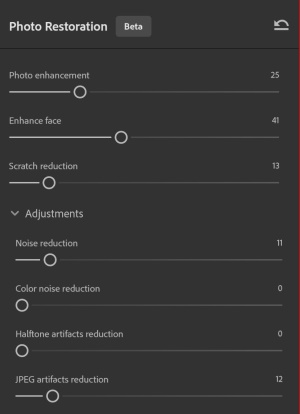
- Use the “Photo enhancement”, “Face Enhancement”, and “Scratch Reduction” sliders to enhance the photo.
- Wait a few moments until the filter finishes processing the photo. You can see the progress of the applied filter under the photo preview.

- Readjust the sliders again until you get the required look, then press O.K
- You can use the mask provided by the filter to hide the filter effect on some areas of the photo.
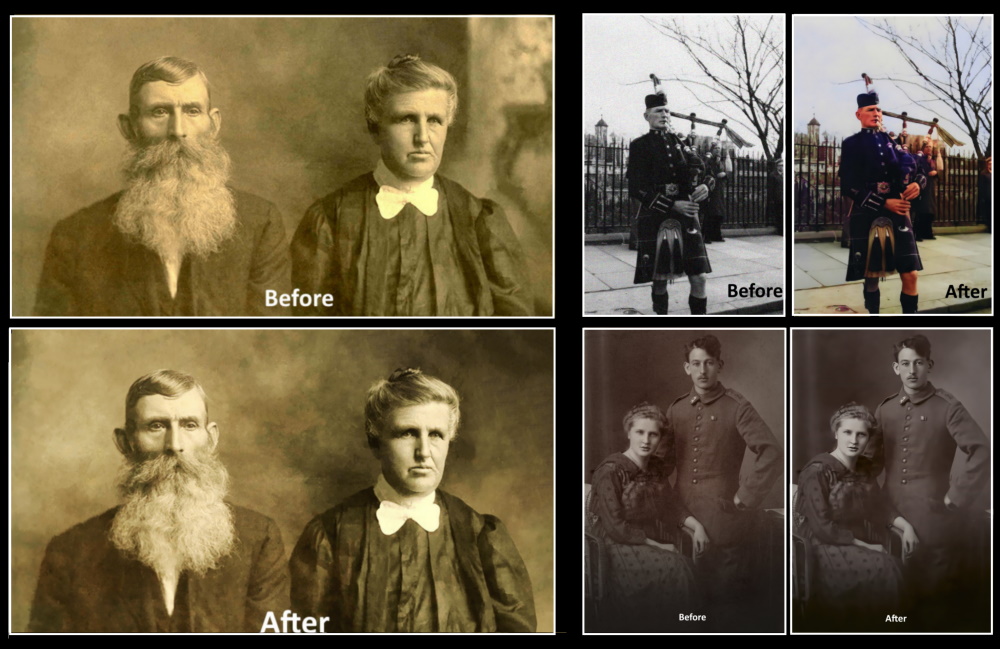
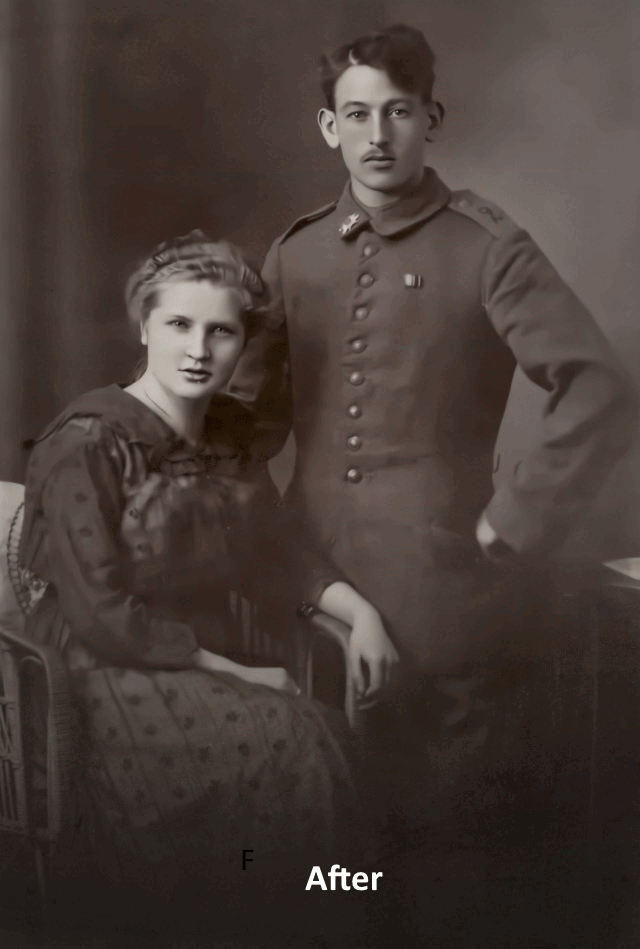
The before and after photos are shown below
Example 2
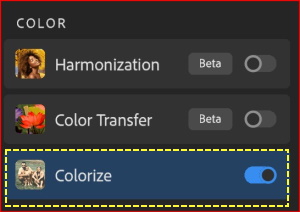
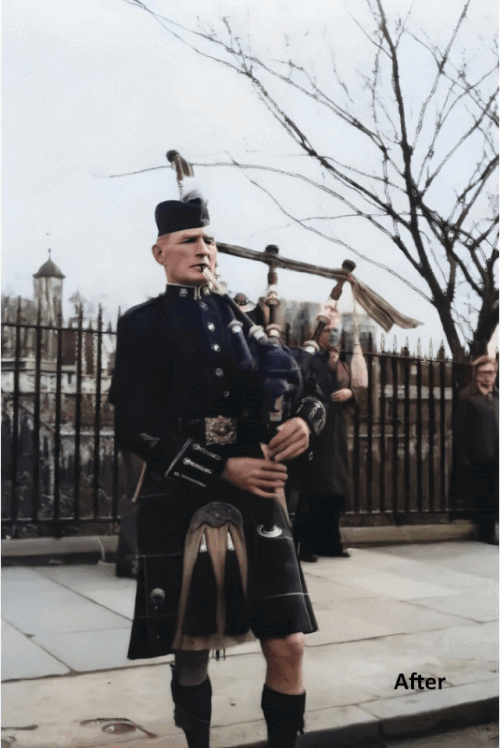
In this example, we will use the “Colorize” filter after applying the photo Restoration filter.
- Repeat the same steps as the first example, then apply the “Colorize” filter as follow:
- Double-click on the neural filter to open it again
- Activate the “Colorize” filter
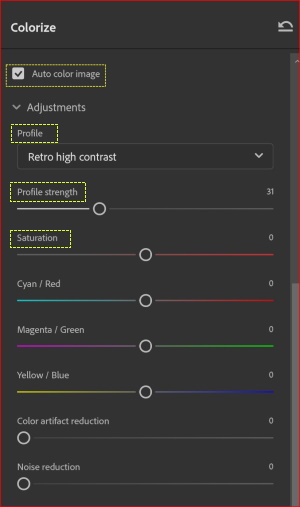
- Check the “Auto color photo” to apply color automatically.
- Try different “profile”
- Adjust the “profile strength”
- Adjust the “saturation”
The before and after photos are shown below
Example 3
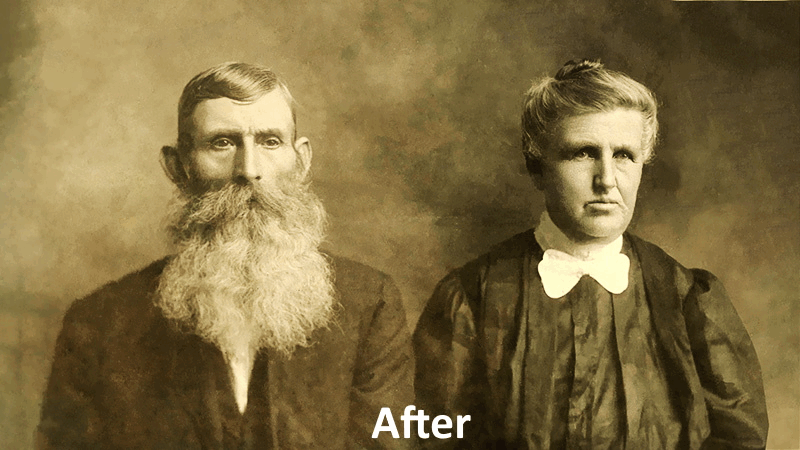
In this example we will use the “Photo Restoration” filter, then we will use the “Content Aware Fill” to edit the background. Finally, we add color using the “Colorize” filter.
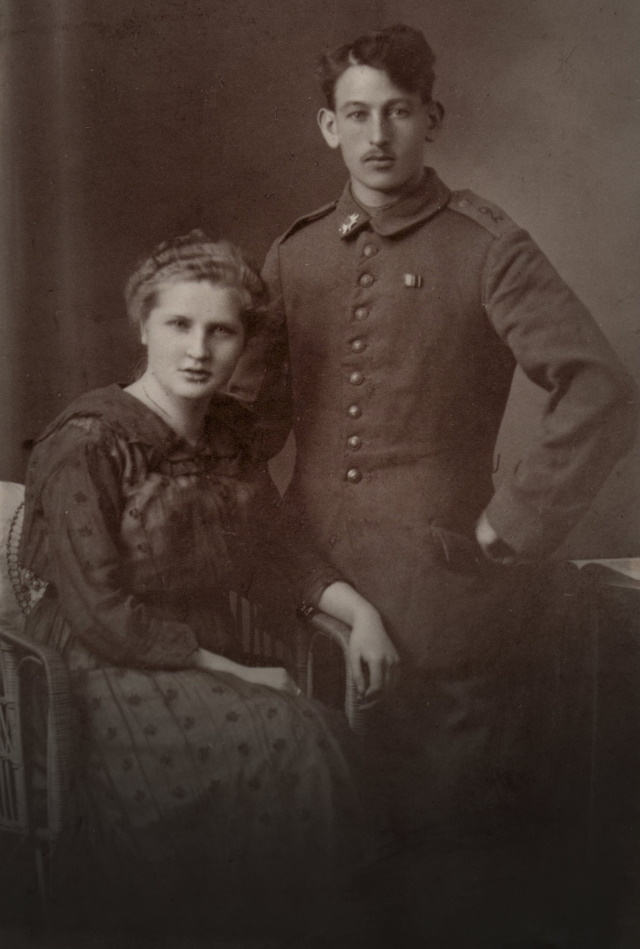
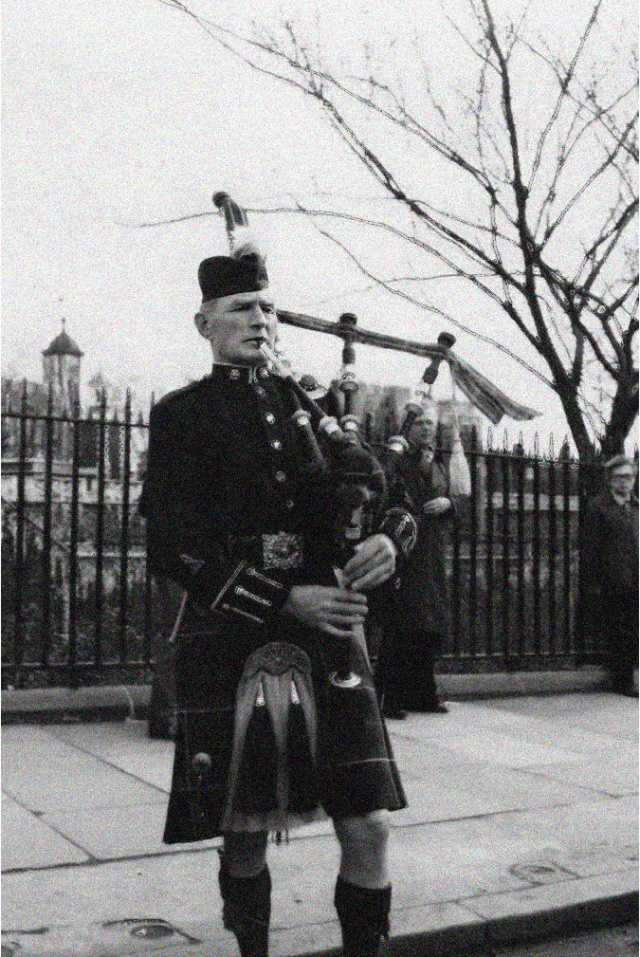
The original photo is shown below
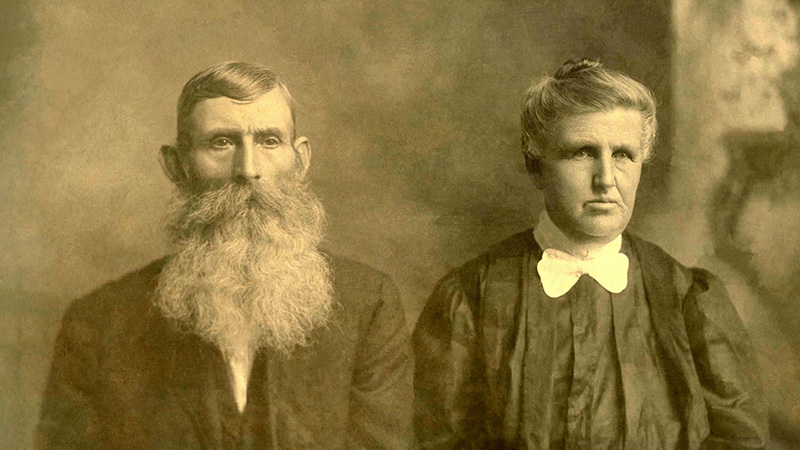
Image by William Cain from Pixabay
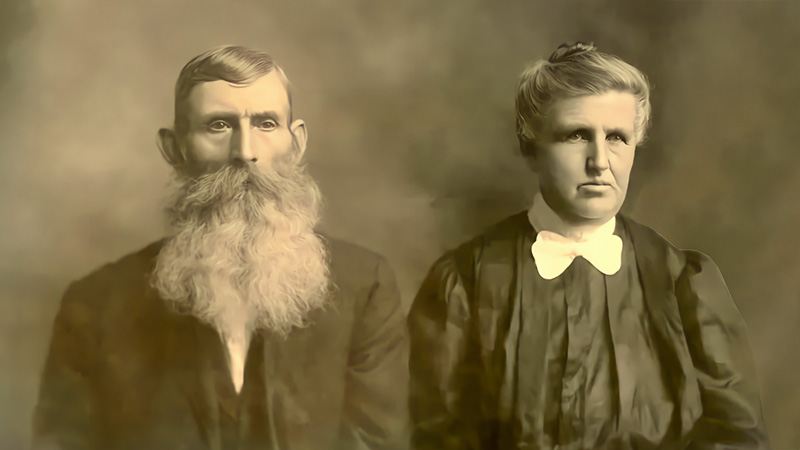
- Repeat the same steps as example 1 to apply the “Photo Restoration” filter, the result is shown below.
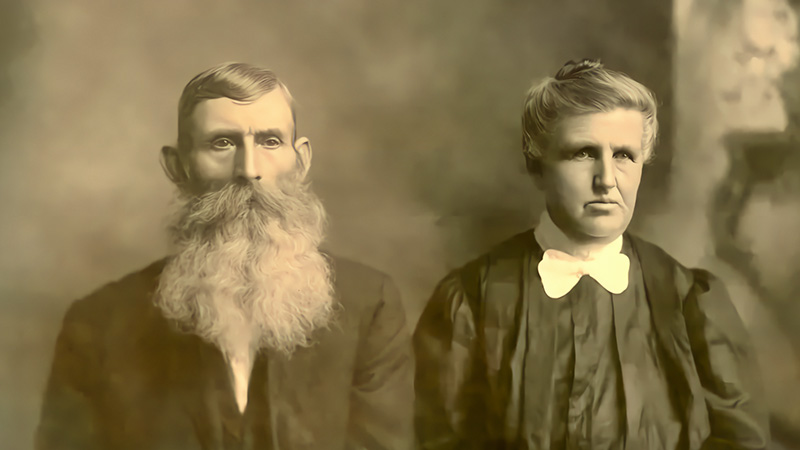
The filter does a good job regarding the restoration of the two subjects, but the background is heavily damaged and needs extra editing as follows:
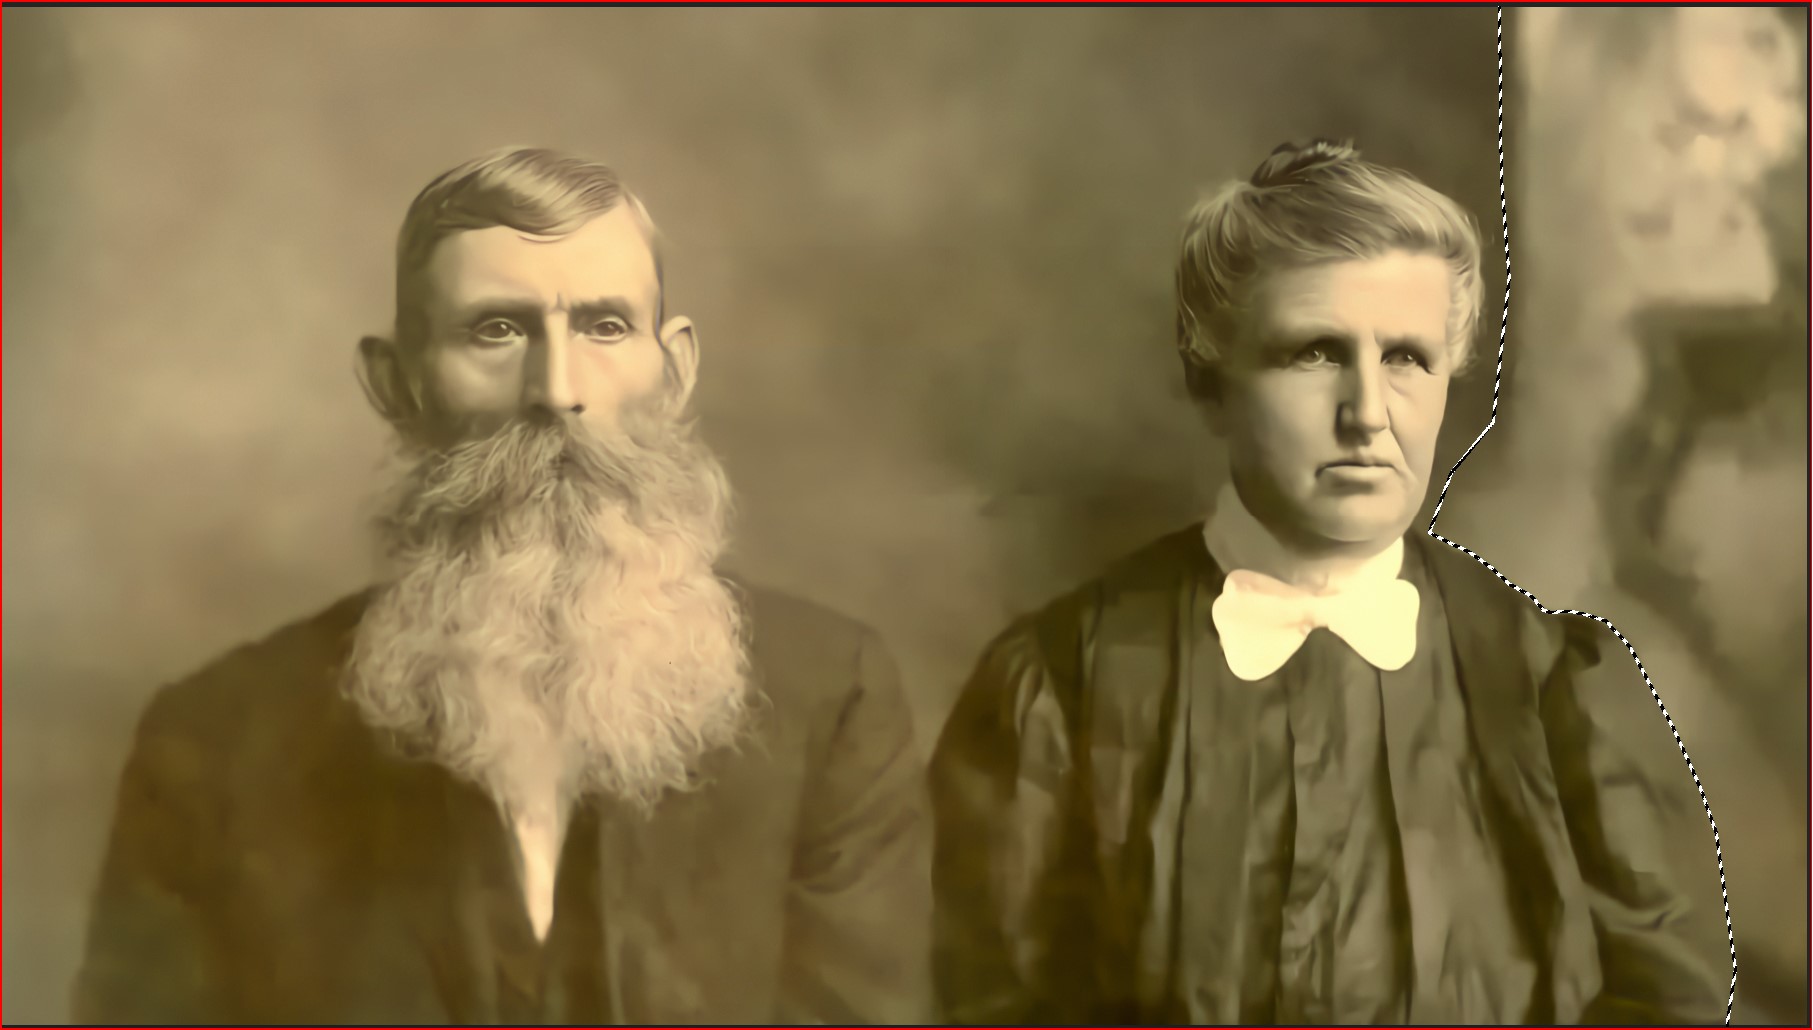
- Duplicate the edited layer
- Right-click the layer, and choose “Convert to layer” to change the layer from a smart layer to an ordinary layer.
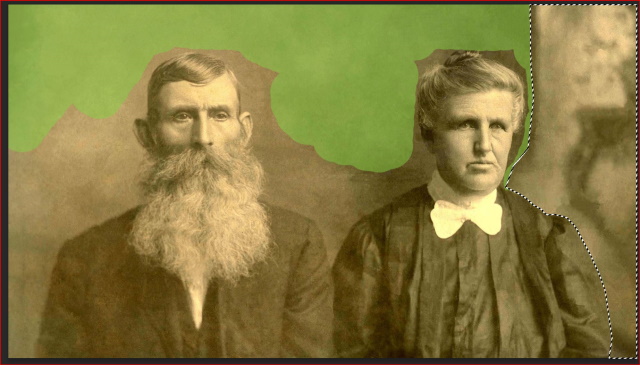
- Use the polygon Lasso tool to select the damaged area as shown below
- Use the Content-Aware Fill, (Edit> Content-Aware Fill), and the following window pops up
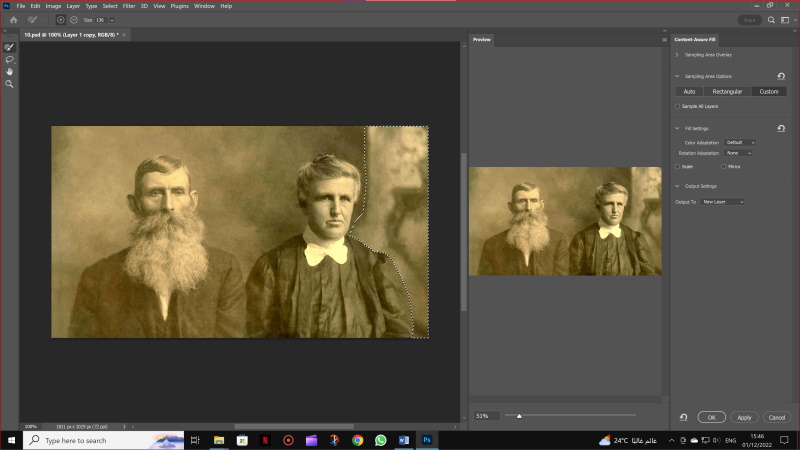
- To choose the sampling area, click on custom, as shown below
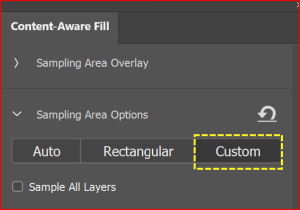
- Then using the brush select the sampling area, the result is shown in the preview window.
- Choose the output to the current layer, then Press O.K to apply the fill
- Open the neural filter, and activate the “colorize filter“
- Follow the steps in Example 2 to add color to the photo.
The before and after photos are shown below
Are you looking for Photo editing resources?
If are looking for editing resources like actions, overlays, and textures, I highly recommend paying a visit to my store, it has amazing professional photo editing tools.
In addition, you can check my editing tutorials, and my YouTube channel there are many tips and tutorials there.
Related posts
A Comprehensive Guide to Editing Old Photographs
Thanks for reading, I hope you enjoyed the article, in case you have any questions just drop them below & I will be happy to answer you.
If you enjoy the site, don’t forget to subscribe, we will only inform you when a new article is posted.


Hey everyone,
I recently came across the article on Old Photo Restoration with the New AI filter in Photoshop by Ehabphotography and I have to say, I am impressed with the level of detail and technical knowledge shared in the piece. The author does an excellent job of explaining how the new AI filter in Photoshop can be used to restore old and damaged photographs to their original beauty. The before and after examples provided in the article truly showcase the power of this new technology.
I think it is great to see advancements like this being made in the field of photo restoration, as it allows us to preserve precious memories more effectively. The use of AI filters allows for a more accurate and efficient restoration process and the results are simply astounding. I highly recommend checking out this article and the services provided by Ehabphotography if you have old and damaged photos that you would like to restore.
Marios
I really appreciate your comment, and I am very pleased that you find the article interesting and helpful
Thanks for your comment
Thank you very much for this valuable detailed post about Old Photo Restoration. I actually know a little bit about photoshop. I use it to make some photos. But I have not restored the old photo. I have some old photoes of my father and I will use this post to make it. Keep posting like this
Thanks