

Photo culling is one of the less attractive parts of the life of a photographer. While it may seem like an easy task of picking the good photos and rejecting the bad photos, doing it constantly for 500+ RAW files is…not at all healthy. Not for your body and not for your business.
This is a major problem for over-shooters, wedding photographers, sports photographers, and other high-volume photography businesses whose daily tasks require this dull and repetitive task.
Thankfully, with the right software, it is now easier than ever to cull or at least do the first pass for n number of photos, using AI within a few minutes.
There’s a lot of automation that can happen that isn’t a replacement for humans, but for mind-numbing behavior. ~ Stewart Butterfield
What is FilterPixel?
FilterPixel is an AI Photo Culling software available for Windows and Mac users that helps photographers save time by culling their photos automatically within a few minutes.
Designed for all kinds of photographers, FilterPixel is a tool that not only does the first pass for the photos and weeds out the bad shots by tagging them, but it also selects the best photos out of the gallery using a feature called “Autoselect”.
There is a 14-day free trial that offers up to 10,000 photos to cull using AI.
How FilterPixel culls photos using AI?
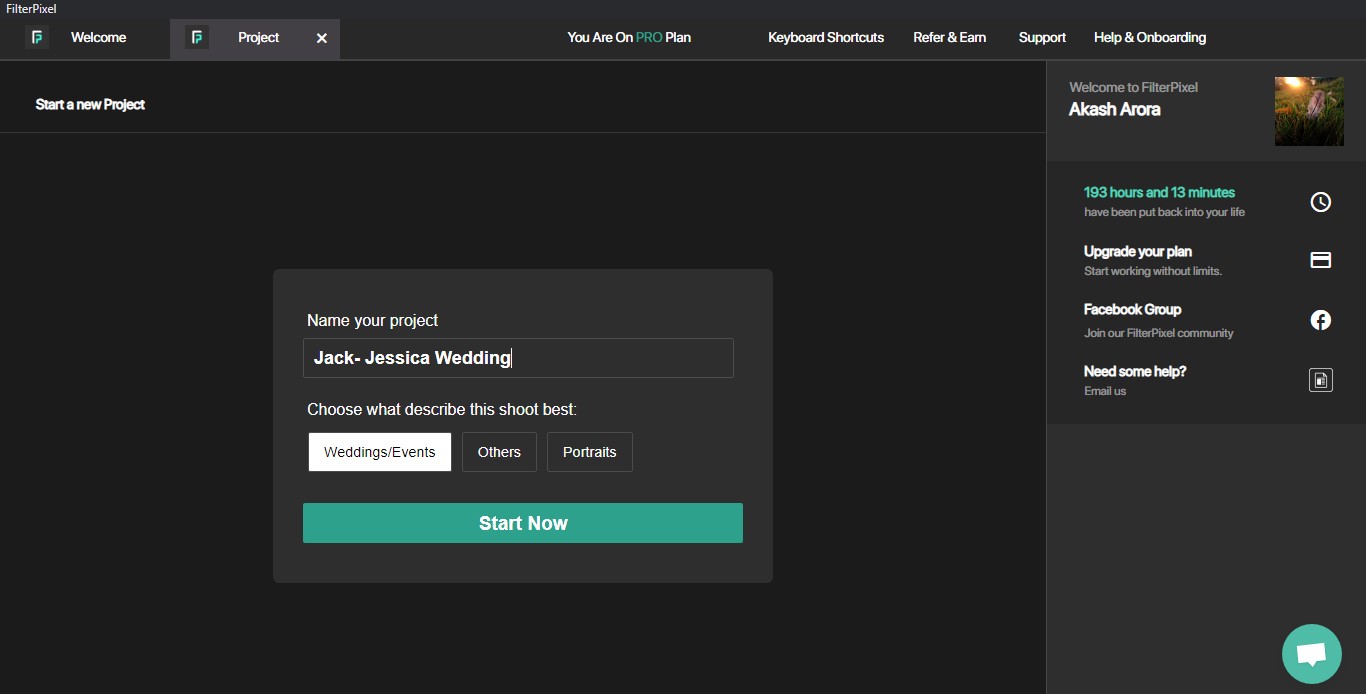
While creating a project after selecting the folder, there will be 3 categories to choose from.
These categories are “Weddings/Events”, ”Portraits”, and “Others”. This helps AI to understand what kind of shoot it was and which photos to tag rejected and selected. (Photographers that shoot a different genre can use Filterpixel assist which is discussed later in this post.)
After clicking ‘Start now’, FilterPixel will show all the previews inside the folder and start with the first pass, tagging the photos with issues inside the unlabeled pile as rejects.
It takes around 25 mins on 5000 photos for the first pass to complete. During this process, the AI is scanning all the photos and tags the ones with issues as rejects. This process takes HOURS for humans to do it manually.
During this process, photographers are free to leave their laptops/PC, or they can cull the pictures themselves manually by marking them as Accepted (P), rejected (X), or Unlabelled (U). They are free to override the AI decisions to select/reject/unlabeled photos.
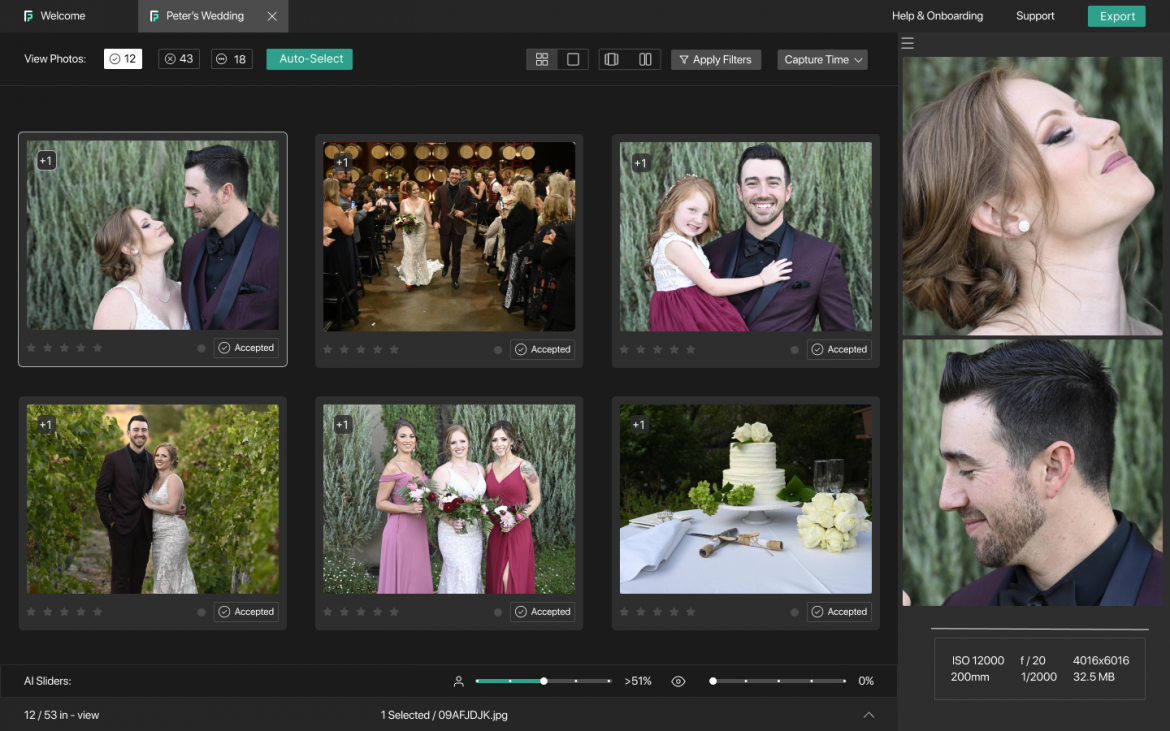
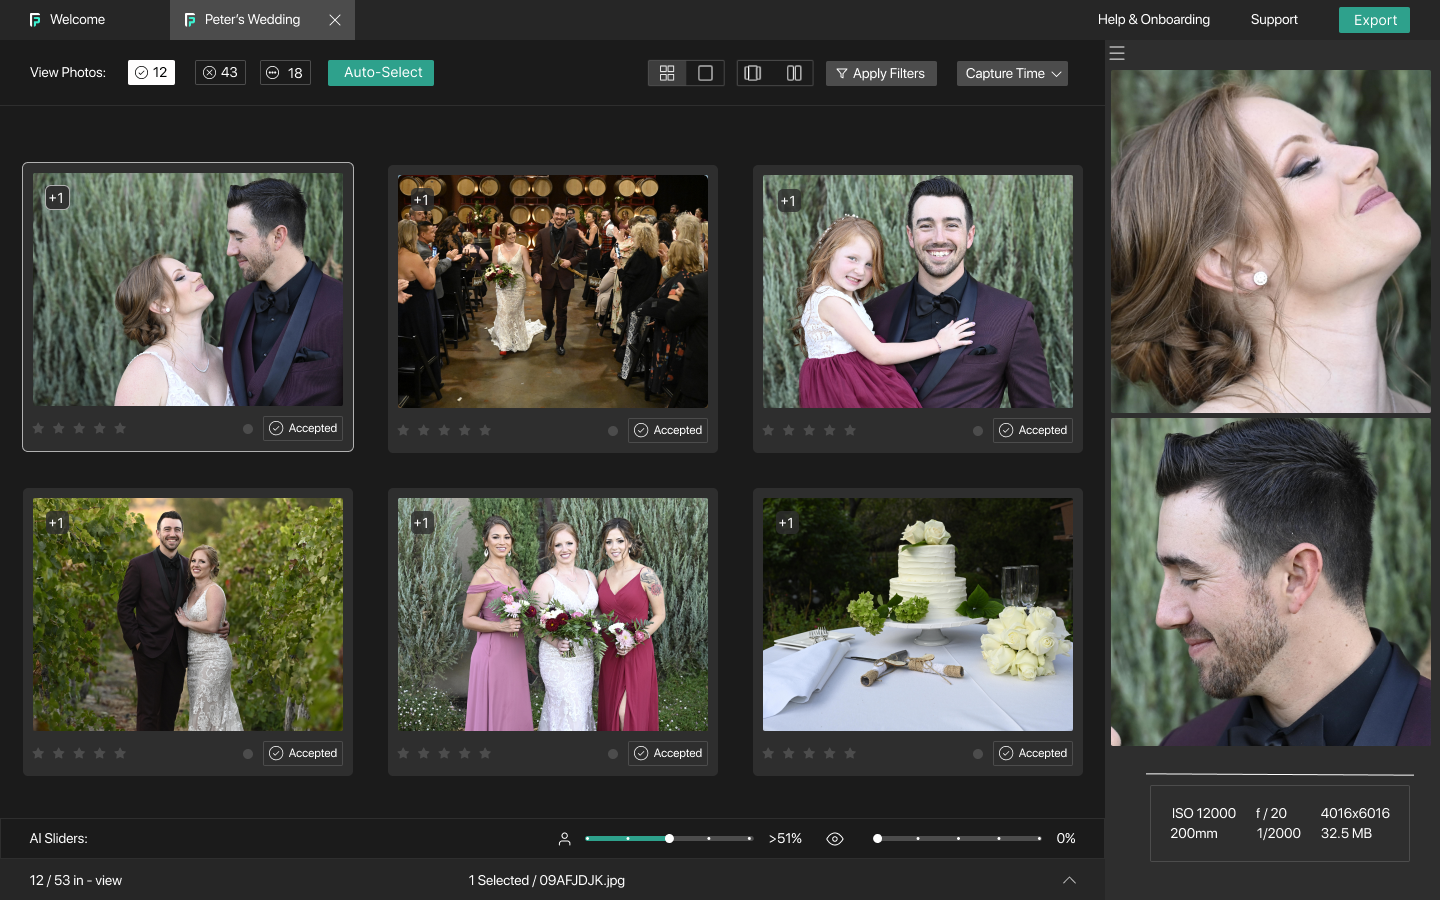
After the first pass is done, photographers have a lot of features to play with, that makes it easier for them to filter, sort, compare, and organize photos according to their preferences and make culling decisions.
Face views will be enabled for all the photos by the time the first pass is done. This feature automatically detects the faces in the photos and previews them in a zoomed-in version on the side of the screen so photographers don’t have to do it for every image.
AI Features to Cull Your Photos
The first feature you will notice getting enabled after the first pass is the green button called -‘Autoselect’. This is one of the most useful features of the Software.
Autoselect feature
Clicking on Autoselect button will instantly tag all the best photos out of the duplicates, as accepted.
Photographers will also notice some of the unique shots without any duplicates. These are also tagged as accepted so the user doesn’t miss out on any good standalone shots.
The photographer can go through all these shots in the accepted pile and review them.
Survey mode
If they don’t agree with the AI’s selections they can easily compare them with other shots using survey mode. Users can access Survey mode by clicking on ‘+1’ or ‘+2’ on the top left of the photo- which indicates there is a duplicate photo present that is not selected/ rejected.
Users can also simply press “S” on a photo to open the survey mode.
The survey mode shows all the duplicate versions of a photo and photographers can compare them and select/reject the photos inside survey mode.
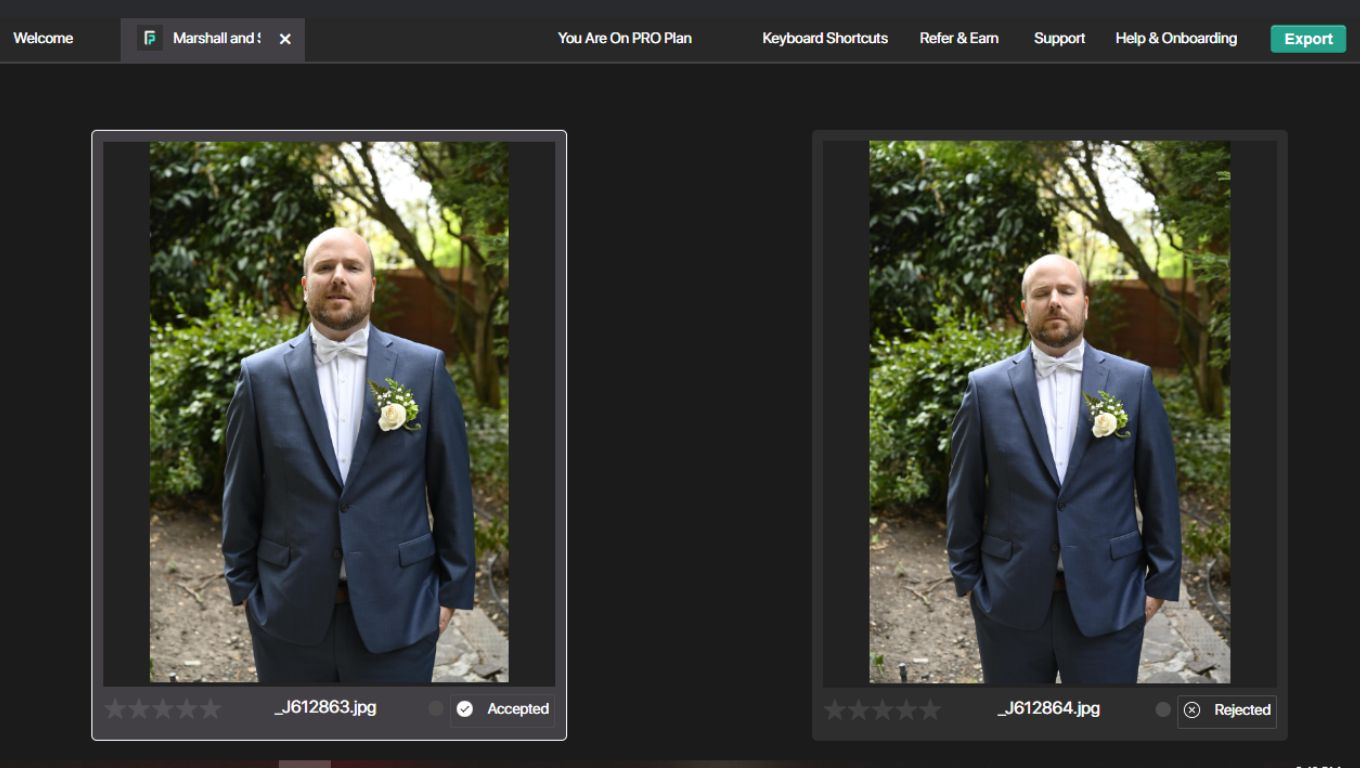
Comparison Mode
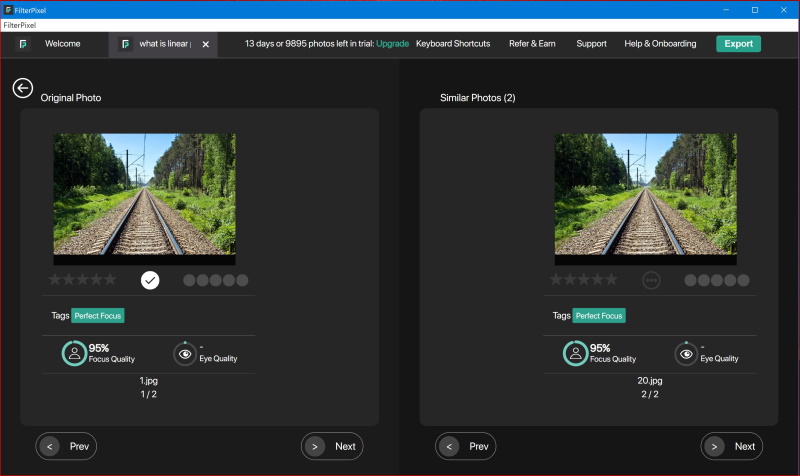
Comparison mode is another feature that helps in comparing two similar photos at once along with the face views and eye/focus quality scores of the two photos. Photographers can click on left/right to move from one duplicate to another.
Sort by focus/eye quality
Users can also sort the photos based on the focus/eye quality, capture time, or file name. This helps photographers see the sharpest photos present in their album on top based on their focus/ eye quality.
Narrow down your photos using AI
AI Sliders
Photographers that only want to choose a certain portion of their photos, (for example- 400 out of 1000 photos) can easily narrow down their selections or overall images using the AI Sliders present at the bottom of the FilterPixel app.
Note: This feature is only visible in the grid view.
The AI Sliders are of two types:
1) Focus Sliders
Dragging the focus slider all the way to the right (or 100%), filters out all photos with a focus quality of less than 100%, and only shows the previews of pictures that are 100%. Users can press “Ctrl + A” and then “P” to select all the photos present in a certain focus range.
2) Eye Sliders:
Just like Focus sliders, dragging the eye sliders to the right filters out all the photos with lower eye quality.
AI Filters
AI Filter is another awesome feature that is exclusive to FilterPixel.
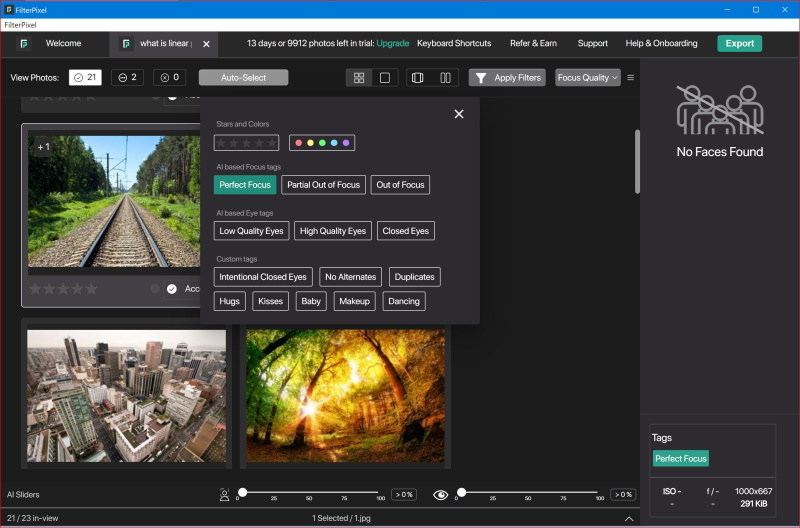
It provides a wide range of filters such as stars, colors, and camera models but the most interesting ones are
- AI-based Filters
- Custom tags (Subject-based)
AI-based filters consist of high/low-quality eyes as well as high/low-quality focus filters.
Clicking on them will only show photos with such attributes.
Custom tags include subject-based filters such as baby, dancing, kiss, and hugs. Choosing such filters should help filter out photos with those events/subjects present in the photo.
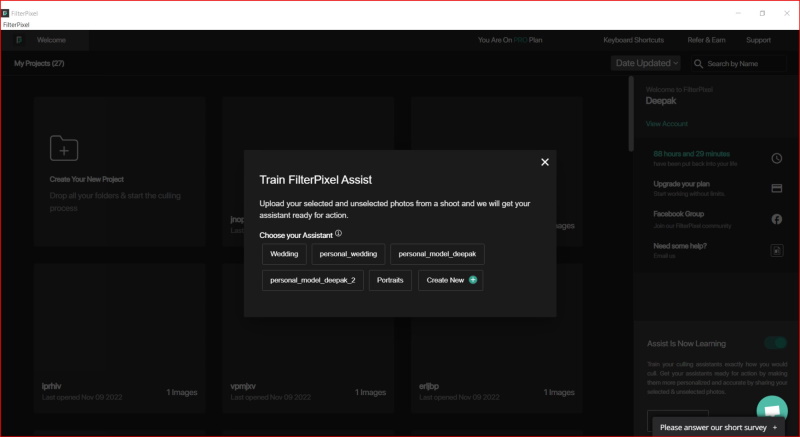
FilterPixel Assist
For a more personalized experience, users have the option to create their own AI Culling assistants that can cull according to their preferences rather than using the general culling models.
This is done using a feature called FilterPixel Assist.
Photographers can upload their pre-culled albums (Selected and unselected photos) and have their own assistant ready within 24 hours that cull photos according to their preferences.

Photographers that are not interested in Portrait/ wedding photography but are into wildlife, landscape, or any other form of photography- can now create their own personalized assistants using their previously culled galleries and have AI to select/ Reject their photos.
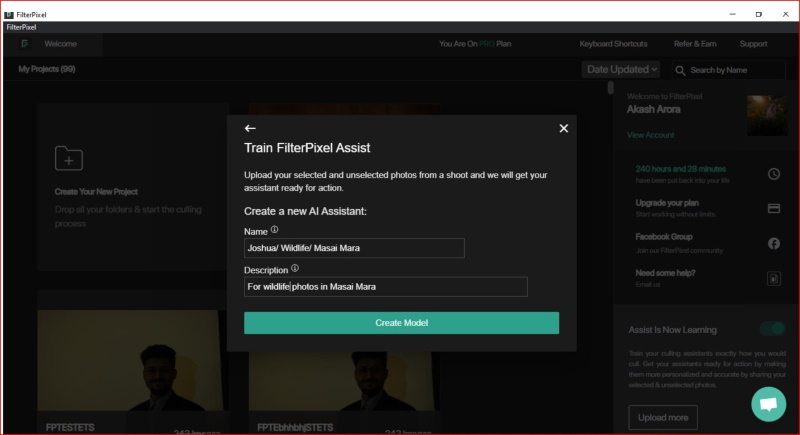
This feature is currently in beta and photographers can apply for assist on their website to get access.
Export to Editing Software
An important aspect of photo culling software is that it should easily fit into a photographer’s workflow.
Hence, after finalizing the best photos- FilterPixel provides the option to simply drag and drop your favorite photos into another editing/organizing software such as Lightroom, Capture One, Photoshop, etc, or into a local folder of the PC/Laptop.
Conclusion
Ultimately, photographers are making great use of AI to select/reject photos using FilterPixel.
A lot of them have reported cutting down their culling time by up to 80% using AI features.
For photographers in doubt about AI saving their time, they can always try FilterPixel for free for up to 14 days with all the AI features.
Related Posts
Best Photo organizing software
Thanks for reading, I hope you enjoyed the article, in case you have any questions just drop them below & I will be happy to answer you.
If you enjoy the site, don’t forget to subscribe, we will only inform you when a new article is posted.


This is incredible! As a mom who takes pics all the time, I would not have discovered this feature. In fact, i have gone through photos manually to pick the best one. This would have saved me so much time. It is something I can incorporate to my business when taking pics for our online clothing store! We use everyday people modeling our clothes and take many candid shots and manully select the better of them. This will help us tremendously.
Your breakdown through the article shows how simple the app is to use and makes me want to try it more! I don’t have the time to practice from scratch with all these apps to find the easiest one. This breakdown does my work for me.
Thanks so much for sharing
Glad you like the article, thanks for your comment
Thank you very much for publishing such a valuable detailed post about Use AI To Culle Photos. Actually, I am not very knowledgeable about these things. But I learned a lot of great information from your post. Especially about these AI Sliders. I gained a lot of knowledge. Keep posting like this. I will definitely share this.
You are welcome, thanks