

A Neutral Density (ND) filter is a semi-transparent piece of glass that could be mounted in front of your lens. The filter prevents a certain amount of the incoming light from passing to the optical sensor. When doing that prevention, it doesn’t change the contrast or sharpness of the image. It is called a neutral density filter because the light obstruction through the filter is equal for the whole visible spectrum, so it shouldn’t add any color cast (although this isn’t always the case).
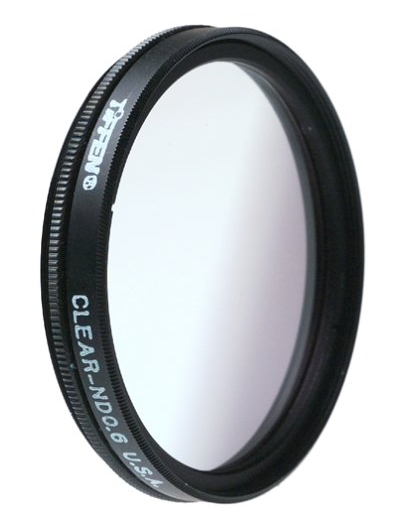
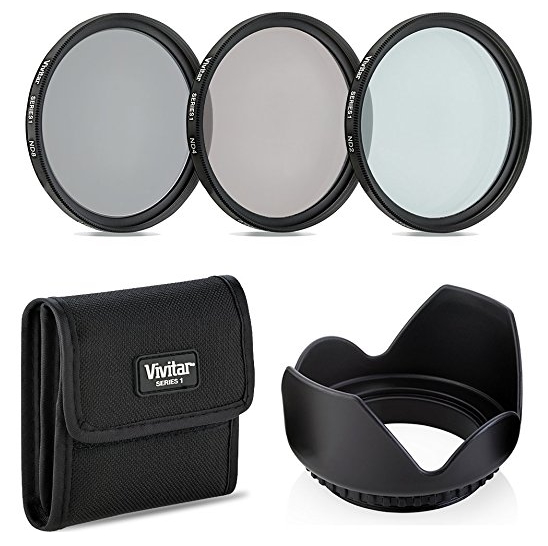
When using an ND filter, you can use a longer shutter speed than otherwise possible to soften the appearance of turbulent water and blurring the moving water in a waterfall. An ND filter also enables using larger apertures, which can produce a shallower depth of field. They are very easy to use, and their effect cannot be replicated digitally. The picture below shows a circular ND filter.

When to use ND filter
The most common applications of an ND filter are:
-
Longer exposure:
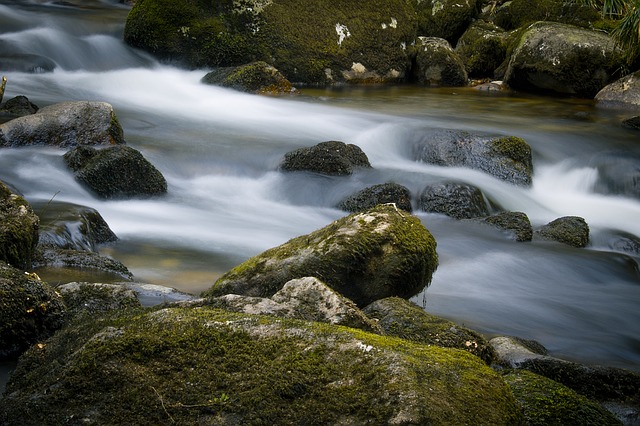
To explain the problem, if you are taking a photo of a waterfall on a sunny day, and you want to have that “creamy” and “silky” effect of the flowing water. You obviously need to set your camera to a slow shutter speed to get that motion blur. Of course, you can reduce aperture. But, there will be a situation in broad daylight when you have the aperture set to the camera-supported minimum, and still, you are not able to lower the shutter speed enough to get that motion-blur without overexposing the photo.
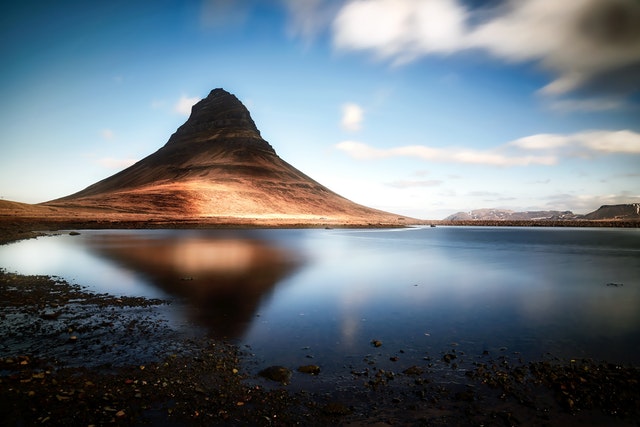
The solution is using an ND filter, the filter will act like sunglasses on your eyes, it will reduce the amount of light that reaches the camera sensor, so you can take photos in broad daylight and still set the shutter speed as slow as one second or more at a reasonable aperture. The following are photos that are taken using long exposure technique in a bright day light by using an ND filter.

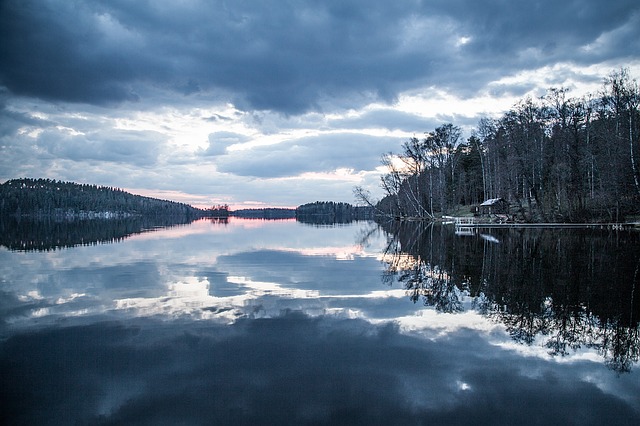
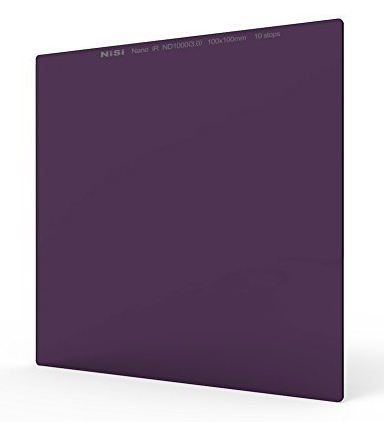
Another long exposure application is when you want to render clouds in the sky to look like blurred streaks. During daylight, achieving this effect usually requires having a 10-stop or greater ND filter strength, which blocks all but a staggering 1/1000th of incoming light, as shown in the following photos:

-
Shallower depth of field
A less common application is to enable a shallower depth of field in very bright light. For example, most SLR cameras have a maximum shutter speed of 1/4000 second, so a subject in direct sunlight might, therefore, require an f-stop greater than about f/4.0 (at ISO100). With a 2-stop ND filter, one could reduce this to f/2.0, yielding a dramatic improvement in background blur and subject isolation.


-
The big difference in brightness
On a bright day, to obtain the subtle detail in both the foreground and the sky requires a greater number of stops than the camera’s sensor can capture. Without a filter to bring down the brightness of the sky, you have to choose whether you are going to meter for the sky or to the foreground. If you choose to meter for the sky, you will find that everything in the foreground becomes a silhouette. If you choose to meter for the foreground, the sky will become bland and washed out. The ideal solution is to use an ND Graduated filter. It is a filter that attaches to the front of your camera’s lens. It is graduated 50/50 in color starting from dark gray at one end to clear at the other. It is given a number which tells you exactly how much it is going to reduce the brightness by.
By positioning the dark part of the ND Grad against the sky, you can reduce the amount of light that reaches the sensor and therefore the number of stops in the image. In the mid area, this filter gradually changes from dark to clear making the effect look natural. Because the dark part of the filter covers the bright sky, it helps to reduce its brightness, bringing the number of stops in the image closer to the range that it is possible to capture with your digital camera.

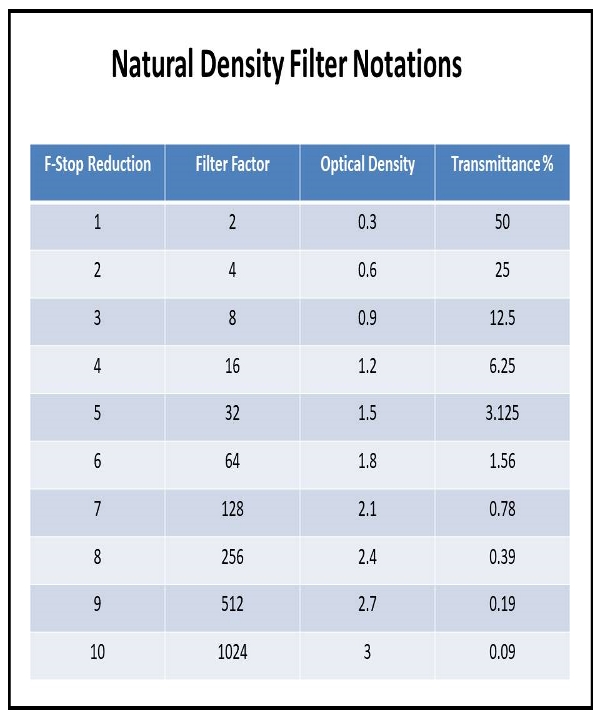
ND filter notations
ND filters are classified based on the amount of light they block; here are the various types of scales that are used to specify the type of filters.
Some manufacturers label their filters using what is called the Optical Density of the filter, whereas some of them use what’s known as the Filter Factor.
-
Filter Factor (ND2, ND4 etc.)
This is a representation of the factor by which the neutral density filter reduces the light coming into the lens. For example, an ND filter that reduces light by one stop has a filter factor of 2. A one stop reduction of light is always half the light, so the factor by which a one stop neutral density reduces the light is 2.
Filter Factor = 2 to the power x. Where x = the reduction in f-stops.
-
Optical Density (0.3, 0.6, 0.9 etc.)
These days this seems to be the most common way for manufacturers to represent the amount of light by which their neutral density filter cuts light. An ND0.3 is a 1-stop ND filter, and an ND0.9 is a 3-stop ND filter for example
-
Transmittance (%)
The transmittance number is actually very rarely mentioned on a filter itself, but you might see it mentioned on some packaging. The reason I included it in the reference table is that I find it’s just a good visual representation of the light that gets cut by neutral density filters.
The relation between the different types of notations is summarized in the following tables:
Natural Density filter types
1- Solid ND filters
There are two types of solid ND filters:
Ring-mount filters are easy to pack and less likely to break in the field. They also do a good job of preventing light leaks, as they screw onto your lens. With a screw-in filter, you can usually use your lens hood. The only problem associated with these types of filters is that you need a filter that matches your lens diameter (screw). For example, the following photos represent an ND filter with a 77 mm diameter.
So, it is necessary that you know exactly your lens diameter. It is usually engraved on the lens, the below photo indicates a lens with a 67 mm diameter.
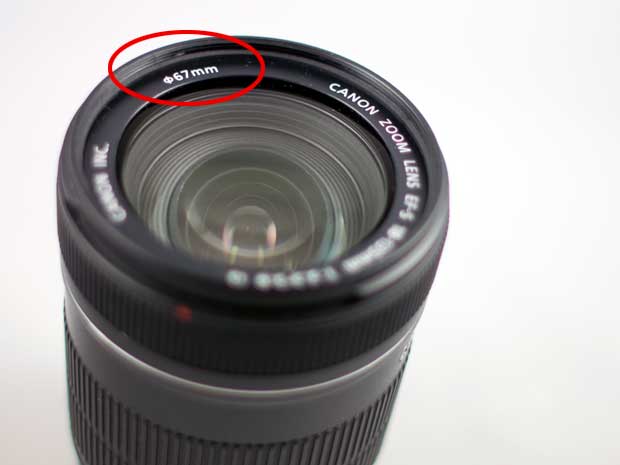
In case you can’t find your lens diameter, this site will help you, CANON LENS-TO-FILTER CHART
Cons of the ring-mount ND filters:
- Using Round/Screw-In Graduated ND filters, it gives the photographer absolutely no control of the grad line placement in a scene.
- Round filters can vignette, especially in wide-angle lenses.
- Some lower-quality filters are not optically good, meaning they can produce color casts on photos.
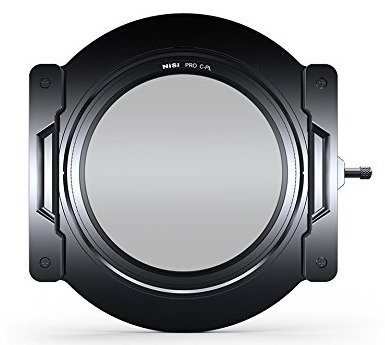
Square/rectangular filters[popup_anything id=”9316″]require a holder[popup_anything id=”9316″]to use. It sometimes called the “Cokin” type system, or “slide holder” system, which uses square or rectangle filters, which are mounted to the lens via a holder, and an adapter ring that threads onto the lens. A big advantage of these filters is that you can easily stack multiple filters, including more solid NDs or graduated NDs, without vignetting. It’s also fairly easy to remove these filters in the field.
Solid-ND filters are ideal when you really want to go slow, and you need maximum filtration. A ten-stop ND filter will turn your 1/100s exposure into a 10-second one. Stack a 5-stop filter on top of that, and you now get a 327s exposure, that’s over five minutes!
Cons of the slide holder system:
- Depending on size and brand, the initial cost can be very high.
- Depending on the number of adapter rings, filters, holders, and cases, the system can get rather large.
2- Variable ND filter
Variable ND filters[popup_anything id=”9316″] are essentially two polarizing filters stacked together. The front part of the filter rotates, and you can use it to dial in a range of filtration between 2-8 stops.
Variable ND filters are ring-mounted and fairly thick, meaning you’ll need to be careful using them at wide focal lengths or risk vignetting.
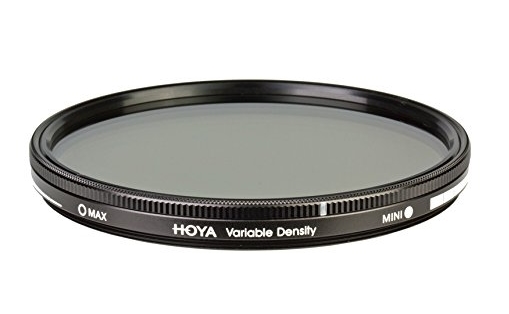
Variable ND filters are perfect for situations where you just need to slow the exposure down enough to get the desired motion effect. They offer enough filtration to do the job, and if conditions change, you can adjust the filter without having to switch it for a different strength.
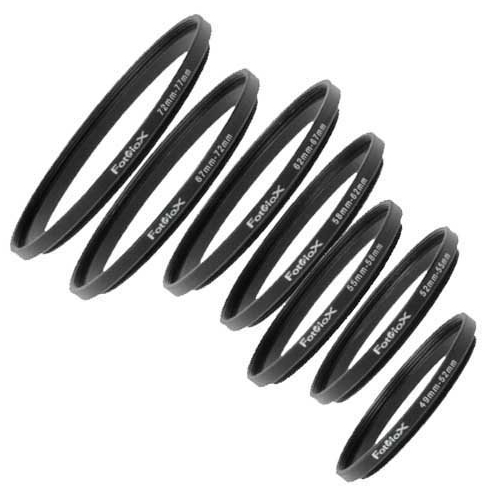
These prevent you from having to purchase a different screw-on filter size for each lens diameter (usually listed as 77 mm, 72 mm, etc.). One could then just purchase an ND filter that fits their largest lens, and use what’s called a “step-up adaptor” to have this same ND filter fit on any smaller lenses.
Related posts:
Camera Lens Filters Explained – Your Full Guide
Best neutral density filters – Use long exposure in the morning
What Is Polarizing Filter? – Everything You Need To Know
Thanks for reading the post, hope you found it useful. If you have any comments or question please drop it in the box below and I’ll be glad to respond as soon as possible.
If you enjoy the site, don’t forget to subscribe, We will inform you if there is a new article posted.


Hi Ehab!
I think that your post on neutral density filters was great. How long have you been in the photography field? I have dabbled myself but never really taken to it. Thanks for the information on how to sharpen photos and reduce the exposure. I have always wondered how to do that.
I have been in photography since 7 years, thanks for dropping by!