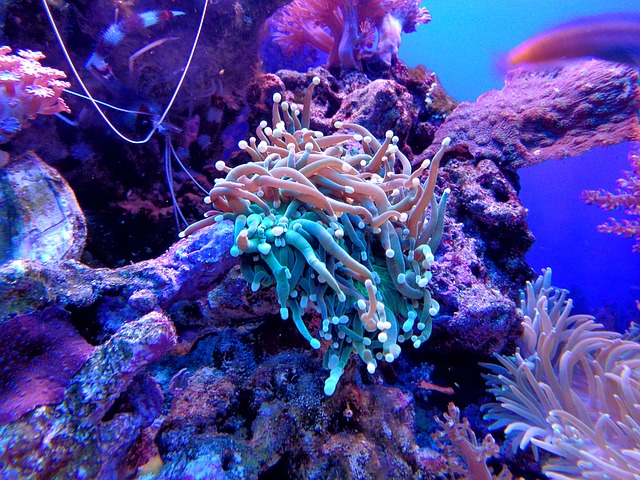


Underwater photography is a very interesting and exciting type of photography. If you are well prepared with suitable equipment and gear and have the necessary knowledge, you can take marvelous photos of the fantastic world of underwater creatures and plants.
Wikipedia defines it as Underwater photography is the process of taking photographs while underwater. It is usually done while scuba diving but can be done while diving on surface supply, snorkeling, swimming, from a submersible or remotely operated underwater vehicle, or from automated cameras lowered from the surface.


UW photography basics
If you are a newbie underwater photographer and want to know and start taking some UW shots, the following are some general basics:
- You should have good diving skills and buoyancy before starting to practice UW photography. The most important skill to master is buoyancy control – not only for getting good steady shots but also for protecting the reef. Using a camera can be distracting, and it can be too easy for a new diver to crash into the reef, or worse, float to the surface without knowing it.
- You have to decide on what camera you are going to use a waterproof compact or SDLR camera, also you have to choose the type of the required accessories such as Underwater camera housing, dome port, wide and/or macro lenses, wet lens, and the external lighting source (strops). The underlined terms mentioned above are discussed in the few coming paragraphs.
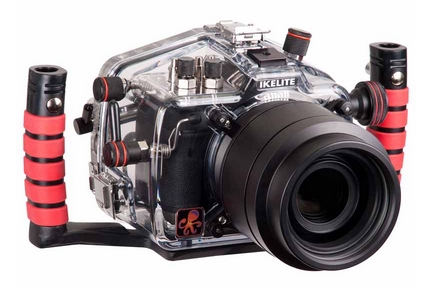
What is underwater camera housing?
An underwater housing is essentially a camera case for your camera that allows full control of the camera when diving, and it is also a waterproof and pressure-proof case, and in many cases as ergonomic as using your camera without it.
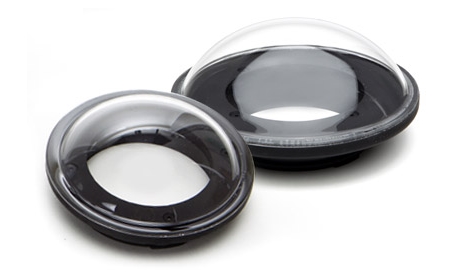
 What is a dome port?
For underwater photography with wide lenses, the dome port is the best choice. The dome port is a concentric lens that acts as an additional optical element to the camera lens. The dome port significantly reduces the problems of refraction, radial distortion, and axial and chromatic aberrations.
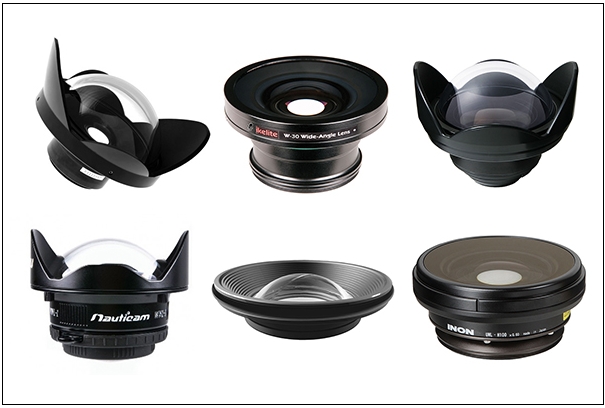
 What is a wide-angle lens?
It is a lens attached to either the camera or underwater housing, which allows a very close approach to large subjects. Without a wide-angle lens, underwater photographs of large subjects will have poor color and contrast.
What is a macro lens?
It is a lens attached to either the camera or underwater housing, which allows an underwater photographer to get very close to small subjects.
What is a wet lens?
Compact camera users can purchase “wet lenses”, also called add-on lenses that add macro and wide-angle ability. A wet lens is any lens that can be attached or removed from the camera while underwater. The glass elements of the lenses are sealed but the junction point between the camera housing and the lens is filled with water. The lenses can be macro- for shooting small objects or wide angle for shooting large objects. You will also see the term “stacked” when describing macro lenses. This means you can add or “stack” 2 or more of them together to get greater magnification.
- You need to practice using the whole system before going to actual action, the time is critical and limited when you are shooting underwater photos. Also, you should practice shooting using macro mode in low light conditions and use the flash to get accustomed to the proper setting of your camera.
- Shooting photos underwater is quite different than normal photography because water media is denser than air. Water reduces contrast, color, and sharpness. Water absorbs colors such as red, orange, and yellow; the deeper you go the more color is absorbed, red is the first color that water absorbs. There is a simple solution for this issue, you can use underwater color correction filters on your camera, which are essentially red filters. These filters correct the color balance by reducing the cyans or Blues in your pictures. Choose a filter density according to the depth at which you will be photographing and the color of the water, they range from dark blue to green.
- As you go deeper less light is available, so if you shoot a picture from a large distance your subject will be dark and blurry. You need to get very close to your subject (probably less than 1 meter away from your camera) and use a flash or external strobe. On the other hand, using flash on your camera has its limitations too; the distance plays a big role. If you aren’t close to your object and use the build-in-flash the light will be sent back from particles in the water causing noise on the picture, this is known as backscatter. Using a Strobe that is mounted on the camera housing makes the light come from a different angle and thereby reduces the backscatter on the picture. Backscatter can be minimized by using a strobe arm and aiming the stroke top down so that the particles don’t get an illuminated front of the lens.


The Beginner’s Guide
There is a large technical background that you need to know in order to take expert underwater photos. However, remembering the following steps and a few basic principles will help beginners to get into action smoothly:
- You need to master Buoyancy control before starting underwater photography. The key to all sharp photographs is steady hands and no camera shake. The only way to achieve this in underwater is to be absolutely stationary and hover using breathing techniques. For those that have not learned to control their buoyancy, your only chance is to take photographs while resting on the sea floor.
- Breathing underwater is noisy and scares wildlife, but of course, you can’t hold your breath for a long time, so keep it at least steady. Only hold your breath while releasing your shutter.
- Some fish are friendlier and braver than others. Some of them are dangerous too. so Please take care of yourself, safety comes first.
- When you begin to take your first trials of underwater photos you should stay at a shallow depth, because the light from the sun penetrates water and easily reaches your subjects. The shallower you are the less light gets absorbed by the water, giving you more light to work with and resulting in more colors in your pictures.
- In order to get the maximum natural light into your pictures, shoot while the sun is directly overhead. The reason for this is that the light refracts off the surface of the water when the sun’s light is angled, and only a part of the light enters the water. When overhead, the sunlight entering the water is the greatest.
- Don’t use the zoom, it doesn’t lessen the amount of water between the camera and the subject and will just show up underwater particles.
- Always shoot on the same level as the subject, or preferably from below, so the image will have greater depth and you’ll make use of most of the light. Try to tilt the camera a bit upward – and move downward. This way you get the object from a different angle, and your picture gets more light in from the sun above.
- If possible, try to make eye contact between the object and the camera. This will make the object seem more alive and the photo more vivid. Eye contact is important to everybody, it immediately draws the attention of the viewer to the subject that’s looking towards the camera. It can be hard when taking pictures of fish, but it is worth a try.
- Choose backgrounds that are going to show your subject most clearly. A lot of coral is too detailed and colorful to really work as a background so look for simple clear crisp backdrops.
- Setting the shutter speed in underwater photography is very important. Setting the shutter speed too low, you will get more light in but blurry subjects, setting the shutter speed too high, you will freeze motion and get beautifully detailed pictures, but the photo will be underexposed and you will get a black background. The common practice in underwater photography is to use a higher ISO setting, a powerful strobe, and a medium shutter speed that will capture enough light without blurring the subject. If your underwater photos don’t look sharp, check to see which shutter speed was used, it should need to be 1/30th for still objects, 1/60th for slow-moving objects, and 1/125th of faster for faster-moving fish.
- Use the camera’s underwater mode. This model is designed to filter out blue so your images are more representative of the actual color of the objects you’re photographing.
- Use a wide-angle lens if possible rather than zoom into an underwater scene. This is, of course, if you’re shooting a subject that is safe to get close to. It will reduce the distance that light has to travel from your subject to the camera, your images will be clearer, with more visible fine details.
- If you’re shooting with a camera in the housing, you may use a macro lens to get even closer. You’ll be able to photograph corals or fish at close distances that make your images look amazing.
- You need to be aware of the composition of your images. Use the lessons you’ve learned regarding creating pleasing compositions, such as the rule of thirds; placing the horizon at the top/bottom third instead of right in the middle of the image, filling the frame with your subject, looking for patterns to photograph, etc. Avoid taking photos when part of a fish or diver is cut off by the edge of the frame. Another shot you want to avoid is getting a photo of a fish when it is swimming away from you, try to get a photo of a fish that is facing you. Use your imagination to get better compositions.
- To make your photograph more interesting to view, consider adding a subject that will show the scale of the scene you’ve captured. For example, if you’re photographing a shipwreck, by adding a SCUBA diver into the scene, you’ve now provided the viewer with a sense of the size of the wreck.
- By using good image editing software, you can add filters, correct color, and reduce that annoying cyan tinge bringing out the true colors of things. Imaging suites also help get rid of backscatter using the spot correction tool. Post-processing software can enhance any of your underwater photographs but is still no substitute for a sharp well-taken picture, to begin with.
Related Post
Camera and Accessories for the Underwater Photography
Finally, underwater photography is rather a difficult job and a challenging type of photography. It needs a lot of preparation, learning, and practicing. Don’t expect to get amazing shots in your first trial, it will take time.
Thank you for passing by and for reading the article, hope you enjoy it and found it useful to you. If you have any questions or comments please leave it in the box below and I’ll answer them as soon as possible.
If you do like the site, don’t forget to subscribe, we will notify you only if a new article is posted.
Also, if you like reading about other types of photography, you can check my post “The Different Types of Photography “, you will find 25 more types of photography.


Great article, it was very informative! How long have you been working with underwater photography, and where do you go to take your photographs?
Also I like how you include a picture for almost every subheading and instead of just talking you’re able to show everything. It makes it a lot easier for everybody else plus they are some beautiful pictures!
Hi, Vlad
Thank you for your lovely comment, I’m very glad that you liked it. As for the post’s photos, I deliberately put too many photos to try to impress the viewer and make them anxious to practice such a wonderful type of photography. It seems working well!. Thank you again for passing by and hope to see you again.