


Time-lapse photography is a photography technique that compresses time. A natural event may take minutes, hours, or even days to actually happens, by the time-lapse technique you will compress the time of this event and visualize it in a short video or footage that takes only seconds. A plant growing process or the opening of a flower, for example, can take hours or days to complete, by using the timelapse technique you can really summarize this event visually in a video that only takes a few seconds to watch. Wikipedia defines it by:
“Time-lapse photography is a technique whereby the frequency at which film frames are captured (the frame rate) is much lower than that used to view the sequence. When played at normal speed, time appears to be moving faster and thus lapsing.”
The time-lapse photography technique is done by taking consecutive photos of a moving subject at equal repetitive intervals, then stitching all the captured photos into a video using special software.
Maybe the best way to define it beyond that wiki definition is to just show you examples of time-lapse videos:
Also, there is an amazing video of flowers opening, you can watch and enjoy yourself with the fantasy and beauty of the time-lapse techniques.
The essential gear
-
Camera
Any modern DSLR camera will do the job in only one condition. Your camera must either have a built-in intervalometer function or be able to accept a remote connection/remote control.
CHDK is a firmware add-on for many Canon PowerShot cameras that among other features can provide an intervalometer. The Magic Lantern add-on firmware adds many functions including an intervalometer to Canon 5D Mark II, 550D, 60D, 600D, 50D, and 500D cameras.
-
intervalometer
It is an attachment or facility on a camera that operates the shutter regularly at set intervals over a period. My recommended type is:
Canon Timer Remote Controller TC-80N3[popup_anything id=”9316″]
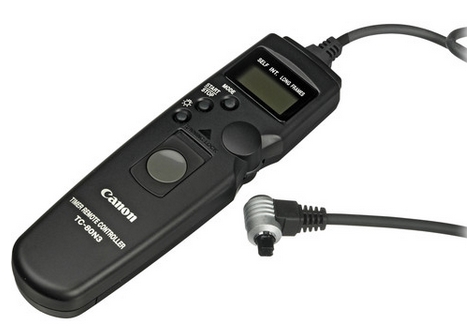
Product Highlights
- Remote Shutter Release
- Functions as an Intervalometer
- Self-Timer
- Interval Timer
- Long-Exposure Timer
- Exposure Count Setting
- LCD Display with Backlighting
- Enter Settings with a Single Thumb
You can buy Canon Timer Remote Controller TC-80N3 from my recommended retailers Here[popup_anything id=”9316″]
A heavy sturdy quality tripod is an absolute must. You need a tripod to lock down your camera to get the same angle and composition you visualize, without any movement whatsoever throughout the whole shooting period.
ND filters reduce the amount of light entering the camera without altering its color. But why do we need to reduce the amount of light? In time-lapse we want the following options:
Using a wider aperture (with fixed shutter speed) to get a shallower depth of field in bright conditions.
Using a slower shutter speed (with a fixed aperture) to get motion blur of moving subjects in bright conditions. This technique is called shutter dragging.
Camera setting
When you are trying to set your camera for a time-lapse project, you will face one of two possible different conditions. The first one, is when the lighting condition is nearly constant during all periods of shooting. And the second one is when the lighting condition will vary considerably during the shooting period. This is the case when shooting during night and day scenes, for example when shooting the sunset or the sunrise.
1- Constant lighting condition
- The camera setting is quite simpler, and you may try the following general guidelines:
- Make sure your camera is in manual mode in order to lock all of your camera’s settings. If you’re not sure which manual settings to use, you can put your camera into the auto mode to find the proper settings, and then use those settings in the manual.
- Aperture setting: it controls your images’ depth of field. A smaller aperture (higher f-number) will produce sharper images and reduce background image blur, which is ideal for landscapes. A larger aperture (lower f-number) is better for low-light scenes and when the subject is in the foreground.
- Shutter speed setting: Longer exposures are good for low light situations, like night shots, and for blurring moving objects. Shorter exposures are good for capturing clear, non-blurry shots, especially for moving subjects.
- ISO setting: The lower the ISO the better, this will reduce noise and keep your images crisp and clear. However, in low light situations, you will have to increase your ISO in order to better capture your subject.
- Manual Focus: Make sure you enable manual focus before starting your timelapse. If your camera is trying to focus on every shot, it will create a “zoom-in-zoom-out” effect, and it may even fail to focus when it is too dark.
- Finally, shooting in RAW format, it will give you more flexibility in post-processing to edit the images, but be aware this also results in large file sizes.
2- Varying lighting condition
In situations with gradually changing light levels, like when you are shooting a sunset or sunrise, and to allow you to capture proper exposure, you have to use the Exposure Ramping technique (Holy Grail time-lapse). In order to shoot in this condition, you will need to adjust your camera’s ISO and/or Aperture along with the shutter speed.
The problem is: that most intervalometers require you to change your settings manually on your camera, so you will potentially have a camera shake. The answer is to have an intervalometer that can remotely and directly change your camera’s shutter and ISO settings. An interesting system that offers this facility is provided by Alpine Lab and is called Pulse. It allows you to control your camera remotely and wirelessly from your smartphone. I’m not going to discuss it here because it needs a separate post. Maybe I’ll make a special post about it.
The Flickers issue
Flickering is a common problem in time-lapse photography captured using a digital still camera. Frame-by-frame variations in lighting or in exposure leads to perceptible brightness fluctuations or flicker. In other words, instead of the camera’s settings between shots remaining perfectly constant or purposefully changing in a slight and gradual way, large unintended exposure jumps occur in a few of the frames which create images that look out of place when compiled with other images.
Time-lapse flickers can be eliminated or at least minimized in two ways:
- Optimizing the camera setting
The best way to minimize flicker is to eliminate as many opportunities for your camera to jump exposure settings as possible. And the best way to do it is:
Using a manual setting of your camera
Using wide apertures are always better, (wider than f/8)
Using slower shutter speeds, (less than 1/100th of sec.), is why you may need an ND filter to achieve these speeds.
- Using De-flickering software
There are also many available software packages to reduce or illuminate the flickers during post-production and most of them work quite well. One option is GBDeflicker which comes in two forms either a plugin for Adobe application or a stand-alone Windows application. Another powerful option is LRTimelapse 4, which is the complete solution for time-lapse editing, keyframing, grading, and rendering.
How to determine the frame interval?
The shorter the Interval, the better chance you have of video being of better quality. This is a very subjective subject for many reasons. The other limit is that the frame interval should have a longer interval than the exposure time required for shooting one frame. Because you should allow your camera enough time to save and then clear the image buffer before the next frame is taken.
The flowing table is a short and simple guide for choosing the frame interval according to the speed of the subject; you may start your time-lapse project by using these values:
Fast clouds, moving traffic 1 sec
Sunrise and sunset 3 sec
Stars 20-30 sec
Growing plants 120 sec
Remember, If you are shooting a moving or changing subject for the first time and aren’t really sure what interval to use, it is usually best to use one that is faster than you need rather than slower.
How many photos do I need?
Calculation example:
You’re trying to create a 25-second time-lapse movie of a certain sequence of moving subjects that actually will take 2 hr., and I’m going to play it back at 30 frames per sec
The question is: How frequently should I take photos? And how many photos are required?
Required final duration (sec) X playback frame per second = No of the frame (photo) required
A 25-second sequence that plays back at 30 frames per second would require 750 frames (30 × 25 = 750).
Convert the total time into sec = 2 X 60 X 60 = 7200 sec
The total time (sec) / No of frame = frame duration. i.e. 7200 / 750 = 9.6 sec.
You should take 750 photos at 9.6 sec intervals.
You can use an interesting time-lapse calculator that is available online, it calculates the shooting interval, number of photos, and even the required memory size.
Compile your video
Once you have the images on your memory card, you’ll need to use an application to turn those images into frames of a time-lapse video.
Software to stitch the final video
There are many applications that can work to stitch together your time-lapse compilation. LRTimelapse 4 is considered one of the most interesting software packages available in the market. LRTimelapse 4 enables photographers to use their favorite photographic tools (Lightroom or the Adobe Creative Suite) to produce time lapses with all the advantages and power that those tools offer for image editing. It allows them to easily deal with time-lapse specifics, like getting rid of the tedious flicker effect, and even helps them to achieve the so-called “holy grail of time-lapse photography”: smooth day-to-night transitions.
There are also some free applications: VirtualDub, VideoMach
Learning resources
Here are some links to some other time-lapsing resources and tutorials that I have found to be especially useful:
Photojojo’s Ultimate Time-lapse Tutorial
Thanks for reading the article, hope you enjoy it and found it useful to you. If you have any questions, or comments leave them in the box below and I’ll answer it as soon as possible.
If you do like the site, don’t forget to subscribe, we will notify you only if a new article is posted.
Also, if you are interested in further reading about other kinds of photography techniques you may check my post “The Photography Techniques”, you will find 15 more photography techniques.


Love this! I’m actually fresh into photography (about 2 weeks) and recently got a Nikon D3400. Been practicing with exposure and what not, but this is great! I’ve always had a thing for time lapses, especially of landscapes with the sky on top. I’ve used the feature on my iPhone and will now definitely use it on my new DSLR. As a fellow photographer, how long did it take you to get good at photography?
Thank you for dropping by, and for your comment. I really don’t know how long it takes to become a good photography, but I advise everyone to practice a lot and always keep reading and learning. Happy photographing!
Hello, Edwin, I recommend to you this free Course, will help u a lot in learning photography in a short period. Click Here to view it.
Great post. I have never heard of time lapse photography but you have explained what it is very well. I like the use of videos on your site. This has made everything easier to understand as a person who does not know much about photography. My brother is a photographer and he will find your website very useful.
Thanks for your nice comment, I agree with you, using videos makes things much easier for both writer and the readers .hope to see you again or maybe your brother!
I’m new to photography and have Canon 600D. I’ve never heard of Time Lapse photography before. After going through your article, I think I’ll give it a try. However, in some tutorials they claim that Canon DSLR doesn’t have time lapse functionality. So do I need to buy Canon Timer Remote Controller?
And one more thing, when I tried to download Magic Lantern, I’m getting a message:
“Warning!
Magic Lantern is not approved nor endorsed by Canon in any way, and using it will probably void your warranty.
We are not responsible for any damages to your camera.”
What is Nightly Builds?
Thanks for your comment, Although Magic Lantern claimed that they are approved for certain models (Canon 5D Mark II, 550D, 60D, 600D, 50D and 500D cameras ). I prefer using external intervalometer and leaving the original camera firmware as it is. MY recommended one is mentioned in the post, it is the Canon Timer Remote Controller TC-80N3. It is also made by Canon so it is 100% compatible with all Canon cameras models.
For the second question It is an open source term, Nightly Builds is where there is a machine running a script that will automatically pull all changes from the version control system, compile (build) all the code, and then post it somewhere to download or (if it is a website or service) publish it to a test system and start it running.