

Timelapse is considered to be one of the interesting types of photography I personally like to shoot time-lapse from time to time it’s so cool to transform a 2/3 hour of real-life time into just a 1 or 2-second time-lapse video, so what Time-lapse photography definition as per Wikipedia it’s a technique whereby the frequency at which film frames are captured (the frame rate) is much lower than that used to view the sequence. When played at normal speed, time appears to be moving faster and thus lapsing. For example, an image of a scene may be captured once every second, then played back at 30 frames per second; the result is an apparent 30 times speed increase. In a similar manner, a film can also be played at a much lower rate than it was captured, slowing down fast action, like slow motion or high-speed photography. so How to Shoot Timelapse Photography? keep reading I will go with you step by step and explain briefly the time-lapse photography tips and will go through the post-processing by Lightroom.
What photography gear do you need to shoot a time-lapse?
- A DSLR Camera
- A wide-angle lens (any lens can work but a wide one is preferable)
- Tripod
- Intervalometer (you can ignore this if your camera body has the ability to set interval time between shots)
Camera settings to capture a time-lapse
I don’t prefer using manual mode while shooting time-lapse as you are supposed to leave the camera on a tripod for a quite long time so you might face changes in the surrounding lighting which will result in either under/overexposed photos and ruin your time-lapse video, the solution is to let the camera balance the exposure for you either by aperture mode or shutter mode, I always use aperture mode as mostly I shoot land/cityscapes so I need everything in focus and I don’t want the camera to play with my aperture and brings softness to some of my images the series.
Aperture & ISO
I recommend setting your aperture at F/8 not so wide to avoid softness or too narrow to avoid diffraction and setting your ISO at 100 in the daylight or 400-800 at nighttime, as stated above use the aperture priority mode then the camera will set the shutter speed for you and you don’t have to worry about your exposure all your images in the series will be well exposed.
How many photos are needed for a time-lapse?
Before shooting the time-lapse decide how long you want your video and what frame the resulting video will be, The 2 most popular frames are 24 FPS & 30 FPS so now easily you can do the math.
24 FPS example
This means that the video will play 24 frames per second so if you want the video length to be 30 seconds that means you need to take 720 photos (24 FPS * 30 sec.)
30 FPS example
Now it has become easy if you want to make a 60-second timelapse video then you have to take (60×30) 1800 shots, anyway the more shots you take the longer the video will be.
Trial & Error
Just take 20 test shots with the required interval between shots and move the right button in the camera quickly and see if you are satisfied with the movement if no adjust your settings format your memory card and shot again till you are completely satisfied with the results.
Manual focus Vs autofocus
Setting your camera to autofocus will consume your battery as every shot the camera will try to autofocus so set your manual focus and then you are done.
Don’t shoot Raw
I always recommend shooting in Raw format which gives you more editing capabilities in the post-processing but here the case is different you need a lot of shots so you need space on your memory card, it depends on the size of your card if you have a big one like 32GB you can shoot high-quality JPEG if 16GB or lower you can reduce the JPEG quality anyway we will export the time-lapse video in a high-quality resolution (1080p).
Setting the interval is really important
The interval between the shots in the timelapse will control how fast the moving objects appear in the final video, so from my experience below is the best intervals depending on what are you shooting.
-A 1-second interval is great for shooting the moving traffic and cars
-2-3 seconds suitable for moving clouds, sunsets & sunrises
-15-30 seconds suitable for sun moving across the sky & stars
-More than 30 seconds can be great for growing plants (100-120 seconds) or construction projects ( 5-15 minutes) in that case you sure need a battery grip as the camera will stay shooting for a longer time.
Have a look at this video which has been taken at 7-second intervals and you can clearly see that clouds move too fast.
And 2 seconds intervals for moving cars, this is around 730 images.
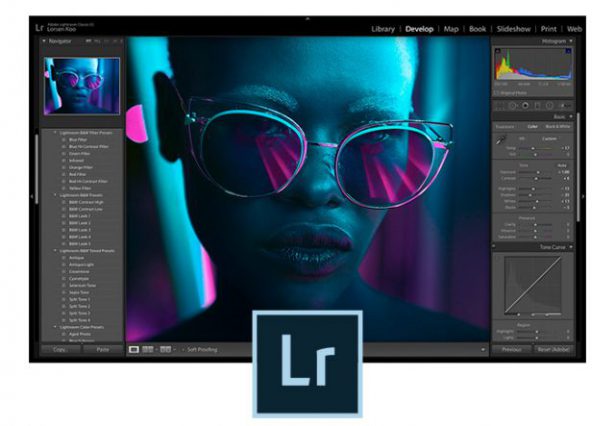
How to make a time-lapse video by Lightroom CC
- First, you need to import all the images in your time-lapse folder
- Then you need to make your own adjustments to a single image from the development module
- Go to the library and Ctrl+A to mark all of your images.
- Press on the Sync settings button & check all boxes to paste your edit into all the images.
- Go to the Slideshow module and adjust your video settings from the right panel you can add a music track if you want.
- Choose your FPS from the left panel under user templates, if you didn’t find it you can download a free template below.
Finally, press export video and make sure you choose 1080p for the best quality.
Walk through this 5-minute video tutorial.
Gear used to shoot the above time-lapse videos:
You can now get the PS/LR for $9.99 monthly
Thanks for reading the article, hope you found it useful and helpful for you. If you have any comments, please drop them in the box below, I will be glad to respond.
If you like the site, remember to subscribe, we will inform you in the case of a new post.


I must confess that I’m really blessed reading this post, I didn’t have an idea on timelapse Photography because I usually think those fast framed shoots are shot with video cameras and some video editors worked on it but now I’m convinced and educated about it. This is really helpful, you have successfully unleashed my genius, I’ll make sure I try it out as soon as possible. Even though I’m not accustomed to LR. I’ll strictly follow your explanations
Thank you Amin Hasheem. With this kinda review, even the most dullard mind will handles the camera and still do a good job after reading this articles. So lovely.
Even I’m not a camera fan but the part of try and error gave me moral that I can do it and still love it. I just have a wonderful idea about Photography
I’m gonna get the DSLR camera to start with and start from there. I think I just got free education with this article. Thank you
What an interesting article, my son has taken up very recently a passion for photography and is doing a lot of work and touch up as well with Lightroom and Photoshop. I do not understand much about all this technical stuff but I am sure he will truly appreciate your blog and explanation and he will find it very useful. Thank you