

Using Curves to enhance color and contrast in Photoshop is a powerful tool that can help you create stunning images. With the right knowledge, it’s easy to learn how to use this feature for your own projects. After mastering Levels, it’s time to take a step up to using Curves in Photoshop.
Important remarks:
- The first thing one should do when learning how to use curves is to make sure that he duplicates the background layer before making any changes so as not to be destructive with his edits. This can easily be done by going through the Layer>New Layer from Copy menu or simply using the shortcut (Ctrl + J).
- As with any new skill set, shortcuts are important and helpful tools that will speed up workflow immensely over time so taking note of them will prove beneficial.

The Curves description
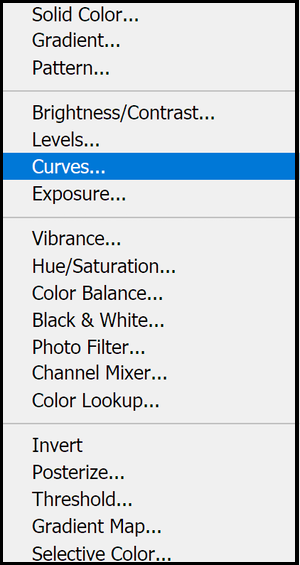
The Curves dialog is a powerful tool in Photoshop that allows you to adjust the tones and contrast of an image. It can be accessed by using Image>adjustment>Curves the shortcut (Ctrl + M), or you can also use the curve tool by adding an adjustment layer, the benefit of using the curve adjustment layer is that you can work undestructively.
In both methods, the following dialog box will show up.
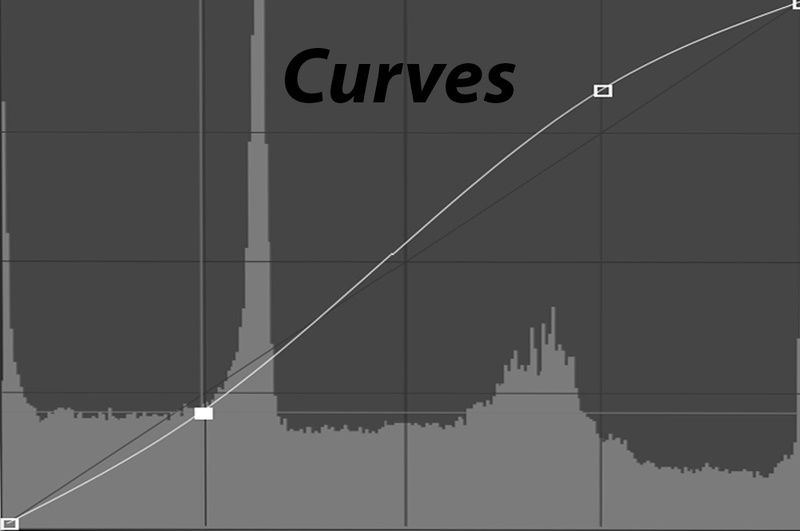
The graph’s initial representation of the image’s tonality is a straight diagonal line (baseline). The graph’s upper-right corner depicts the highlights in an RGB image, while the lower-left corner shows the shadows.
The graph’s vertical axis represents the output levels (new adjusted values), while the graph’s horizontal axis reflects the input levels (original image values).
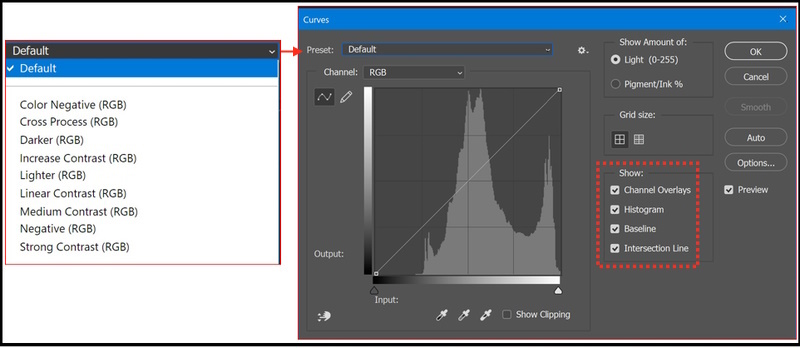
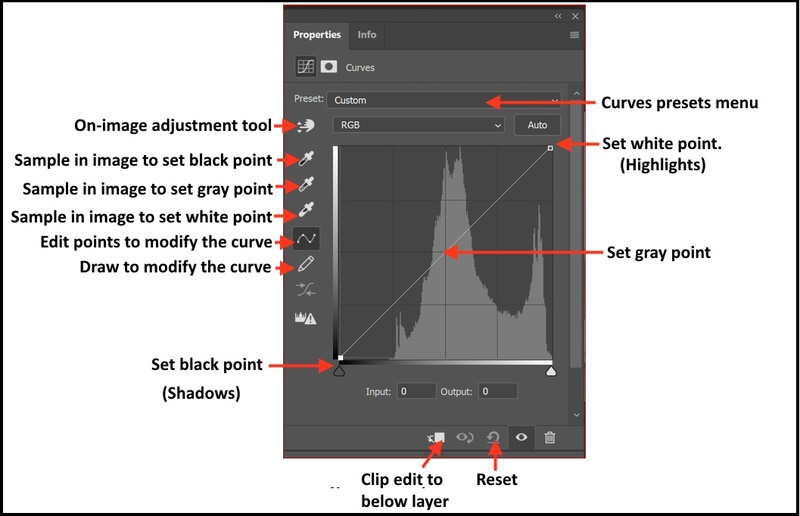
There are nine pre-sets, In addition, there’s also a faded histogram in the background that corresponds to all of the tones within your image. Two more tools, Channel Overlays, and Intersection Lines are available for users to assist you in working with curves more efficiently.
How to use curves
Clicking on the baseline, a point will be added as a control point. By dragging the point up, you can lighten both the tone in the image and the surrounding tones. On the other hand, as you move it downward, the area around your point will become darker in the image.
Dragging a control point left or right increases or decreases the contrast.
As control points are added to the line and moved, the curve’s shape changes to reflect the adjustments you make to the image.
You don’t even have to drag out the point, instead, you can use the Up/Down/Left/Right arrow keys to move a point after creating it with a click.
While holding down the Shift key, clicking the arrow once moves it 10 points (in the range of 0-255). You can also directly enter the number into the Input (where you click) and Output (where it moves to) for absolute accuracy.
There are a few choices available if you only want to delete one point. Drag the point outside the grid, another option is to click a point and then press the Delete key. The final choice is to (Ctrl + click) to eliminate a point.
You may examine where each point on your curve is with respect to the grid placement points for each red, green, and blue channel by dragging any point, which causes junction lines to appear.
The Channel Overlays display changes made when applying curves to each individual red, green, and blue channel. The Channels Overlays, the Histogram, the Baseline, and the Intersection lines can all be turned off in the “Show” section of the dialog box. They’re all on by default.
The curve Disply options
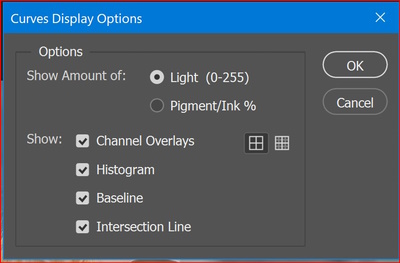
In the Curves Display Options dialog box, select any of the following:
- Light (0-255): Displays the intensity values for RGB images in a range from 0 to 255, with black (0) at the lower-left corner, and white (255) at the upper-right corner.
- Pigment/Ink %: Displays the percentages for CMYK images are displayed in a range from 0 to 100, with highlights (0%) at the lower-left corner.
- Simple Grid: Displays gridlines in 25% increments.
- Detailed Grid: Displays gridlines in 10% increments.
- Show Channel Overlays: Displays color channel curves superimposed on the composite curve.
- Histogram: Displays a histogram of the original image tonal values behind the graph.
- Baseline: Displays the original image color and tonality as a 45-degree angle line for reference,
- Intersection Line: Displays horizontal and vertical lines to help you align control points as you drag them relative to the histogram or grid.
Examples of using curves
Example 1: Modification of the input and endpoints
Curves are primarily a contrast tool, the connection between the tones in your image is defined by contrast. Strong shadows and highlights, as well as a lot of saturation, are typical characteristics of high-contrast images. Photos with low contrast will appear flat and almost grey. An increase, in contrast, can be advantageous for many photographs.
When most of the tonal information is located in the center of the histogram, the modification of the input at the endpoints can make a significant difference. You simply move the highlight’s endpoint to the left and move the shadow endpoint to the right. You increase the contrast with this adjustment.
Original Image by mostafa meraji from Pixabay
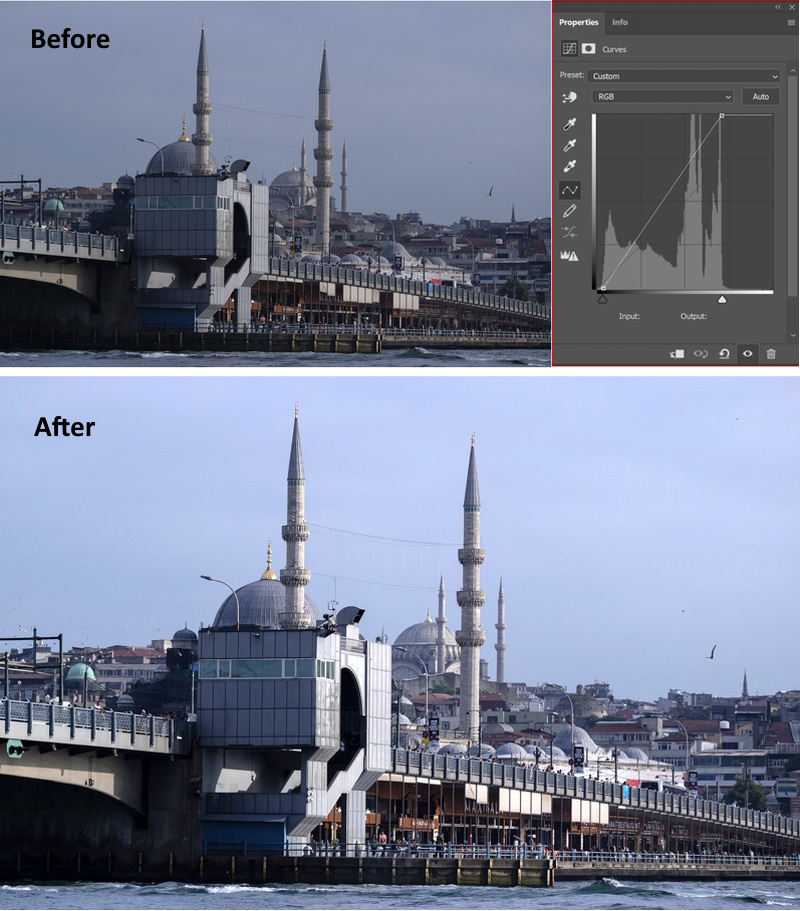
Example 2: Increasing the Contrast using the “S” shape curve
A quarter of the way in from the left on the line, click first. Drag the newly generated point downward next. This will make your whole image darker. It doesn’t take much dragging down to notice a difference. After that, you should make a second point and move it up a little, this time around halfway along. Once more, only a minimal quantity is required for this to function.
You’ll see that your curve has an S-shape to it if you look at it. One of the most popular methods to use curves to generate contrast is certainly this S-Curve.
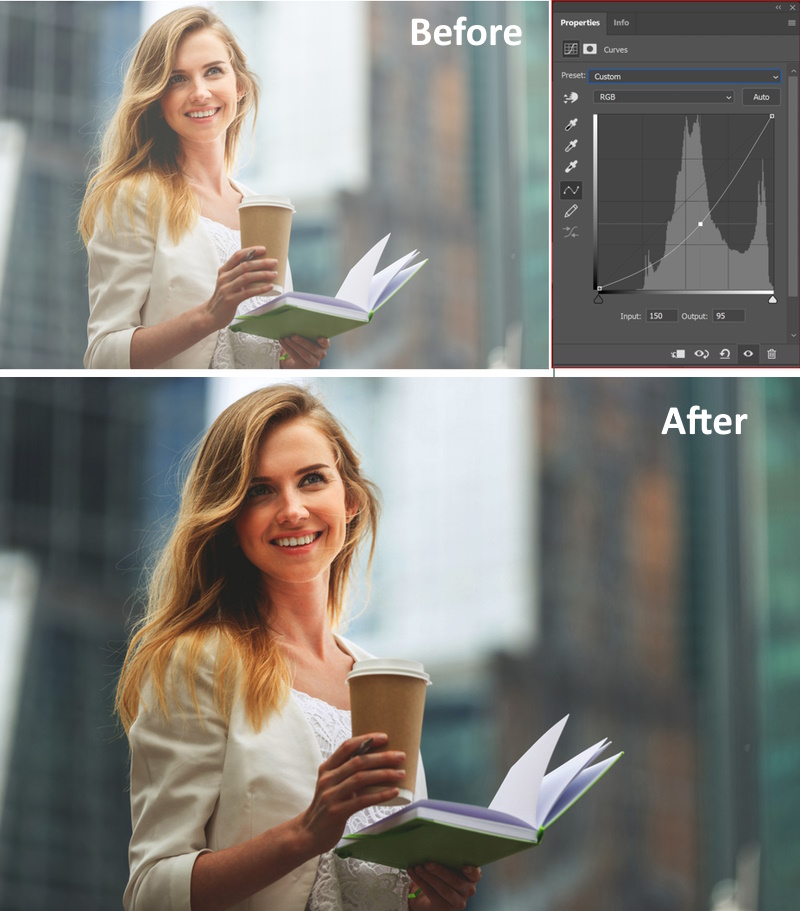
Example 3: Lighting or darkening
To increase the brightness of an image, create a point in the middle of the baseline, then drag it upward. Similar in function to the Brightness slider, but with more flexibility. This will lighten the mid tones. If you drag it down, it will darken the image as shown in the below example.
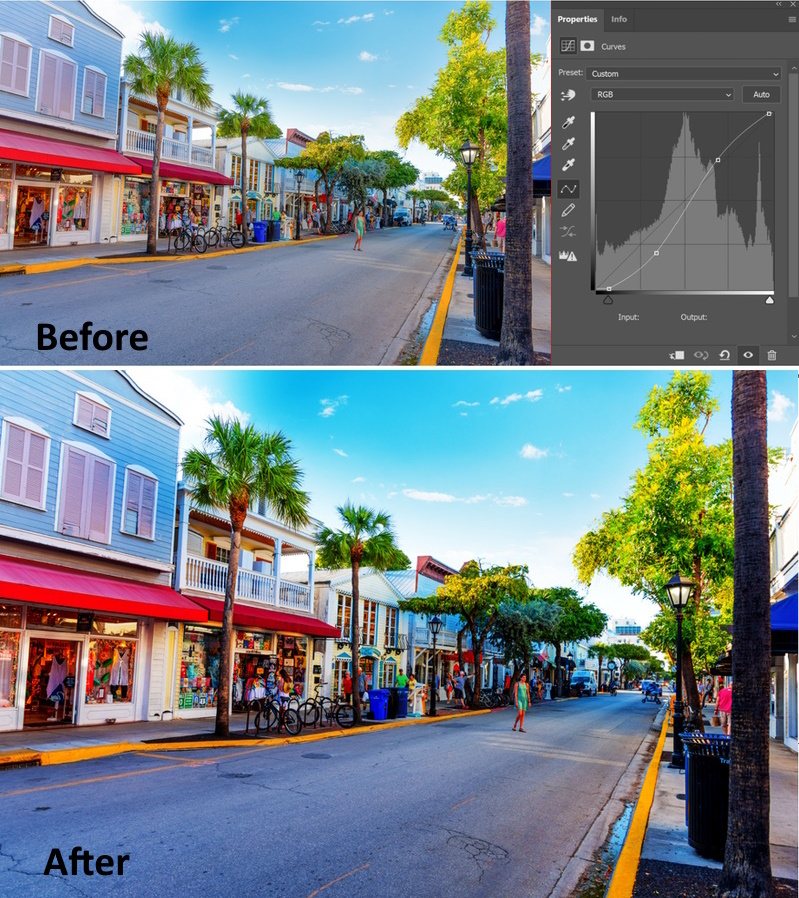
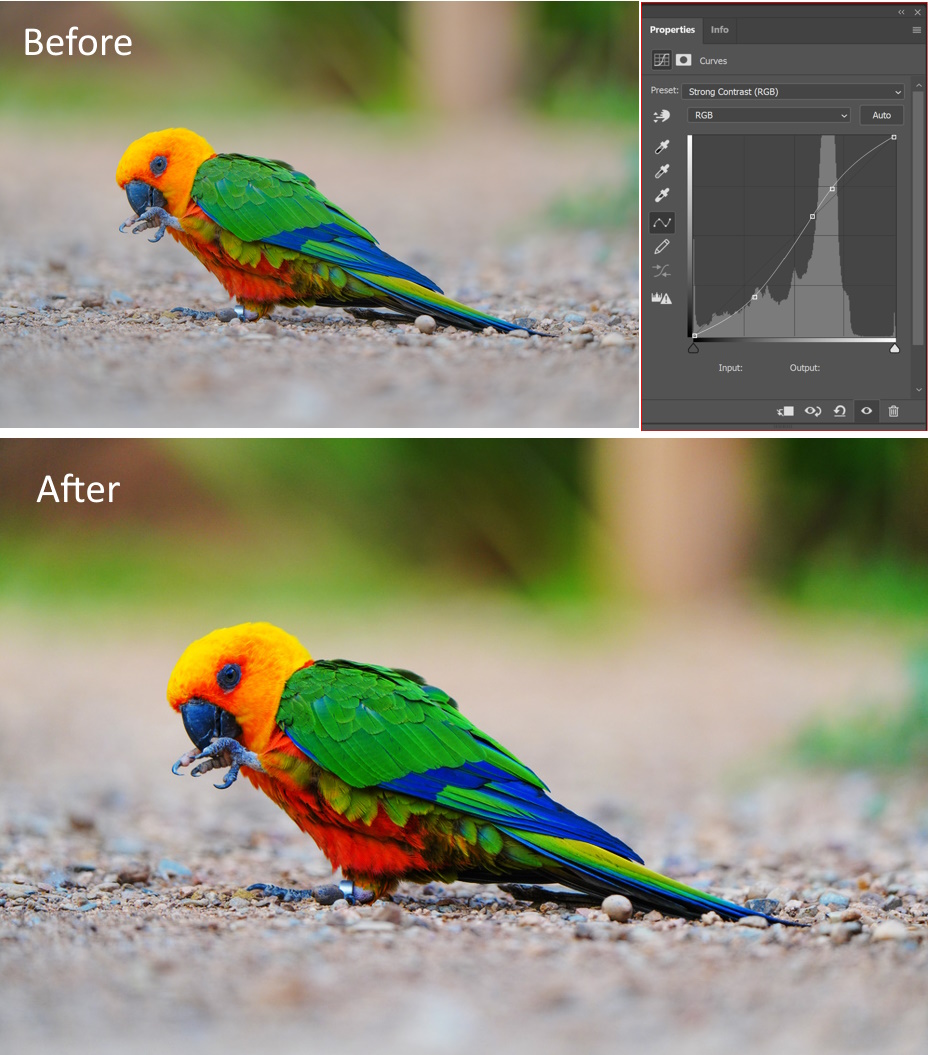
Example 4: Changing the contrast using the presets
You may experiment with the Curves presets in the menu to get a sense of what different points can do to a curve. You may also save any curve you manually generate by selecting “Save Preset” from the tiny cog next to the menu,. The menu will then include your Curves preset.
In the following example, we are going to use the “Strong Contrast RGB” Preset.
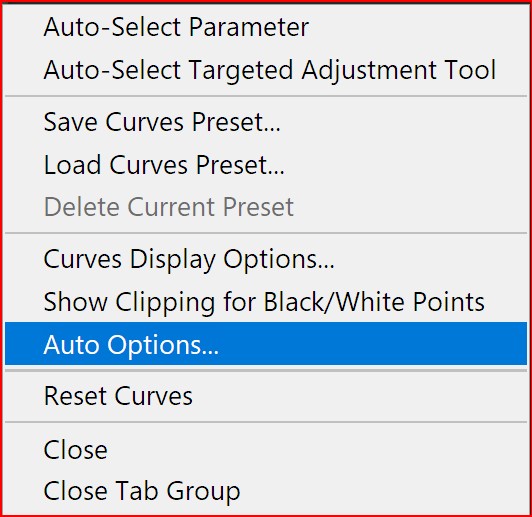
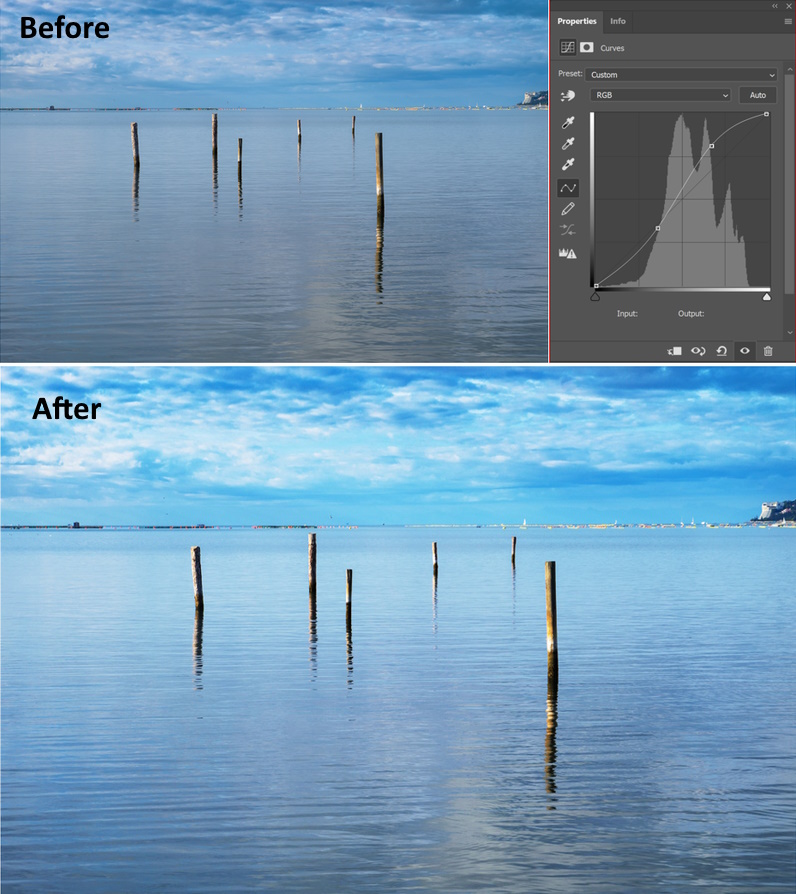
Example 5: Changing contrast using the Auto function
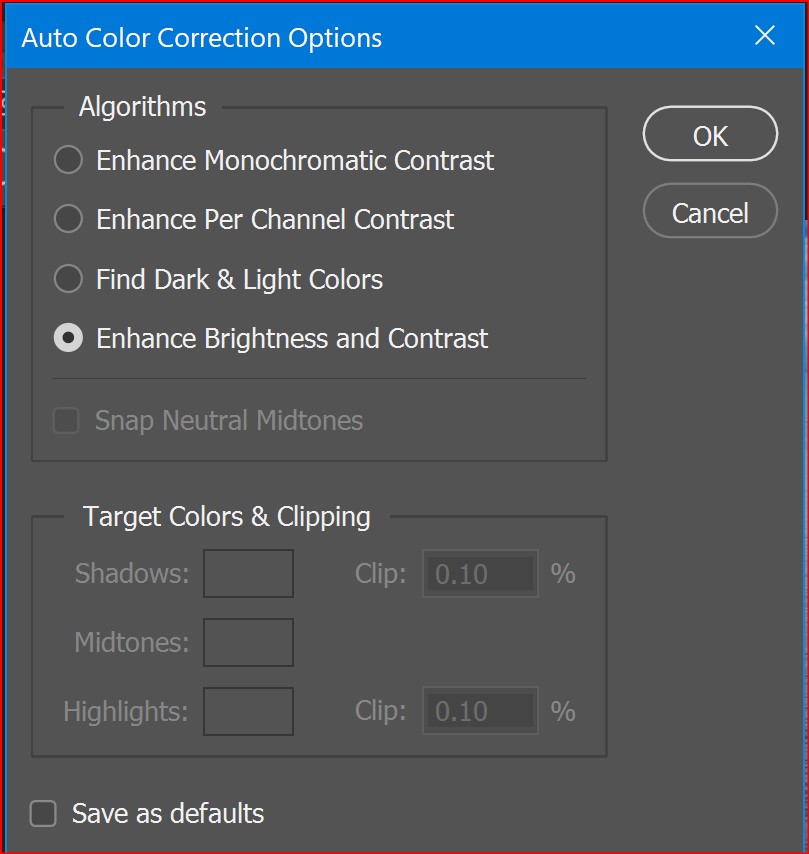
The auto function applies an automatic color correction using the current default setting. To change the default setting, choose Auto Options from the Properties panel menu
And set the options in the Auto Color Correction Options dialog box.
In the following example, we use the auto function
Adjusting the colors balance
In the RGB color system, the Red color is opposite to Cyan, and the green color is opposite to
Magenta and Blue color are opposite to yellow.
For example, if you decrease the blue color you will get more yellow, and vice versa.
To adjust the color balance, in the Properties panel, choose the channel you want to adjust from the menu to the left of the Auto button. In the Properties panel, do any of the following:
- Click directly on the curve line and then drag the control point to adjust a tonal area.
- Select the On-image adjustment tool and then drag in the area of the image you want to adjust.
- Select the On-image adjustment tool and click the tonal areas in the image that you want to adjust. This places control points along the curve line.
Useful Shortcuts
You can use these keyboard shortcuts for Curves:
- To select multiple points, Shift-click points on the curve. Selected points are filled with black.
- To deselect all points on the curve, click in the grid, or press Ctrl‑D (Windows) or Command-D (Mac OS).
- To select the next higher point on the curve, press the plus key; to select the next lowest, press the minus key.
- To move selected points on the curve, press the arrow keys.
Are you looking for Photo editing resources?
If are looking for editing resources like actions, overlays, and textures, I highly recommend paying a visit to my store, it has amazing professional photo editing tools.
In addition, you can check my editing tutorials, and my YouTube channel there are many tips and tutorials there.
Thanks for reading, I hope you enjoyed the article, in case you have any questions just drop them below & I will be happy to answer you.
The used photos in this article are credited to depositphotos
If you enjoy the site, don’t forget to subscribe, we will only inform you when a new article is posted.


Very informative article on the use of curves in Photoshop. You explained in a very understandable and detailed way that was easy to understand. You are correct about Photoshop’s Curves being one of the most powerful tools. You explained how to use the curves tool to color-correct images in a very easy-to-understand way.
Glad you liked the article, thank you for the comment.
I’m not very tech-savvy, so this article lost me pretty quickly. The Curves tool in Photoshop seems handy but the instructions were too complicated for me to follow. Can you explain how to use this tool in easier terms with examples? I know you used photos but videos would be really helpful. Well, I can try YT to get your idea clearly as long as there are sStep-by-step instructions
I appreciate your request, I am already planning to do a youtube video explaining the steps for using the Curves tool. Thanks