


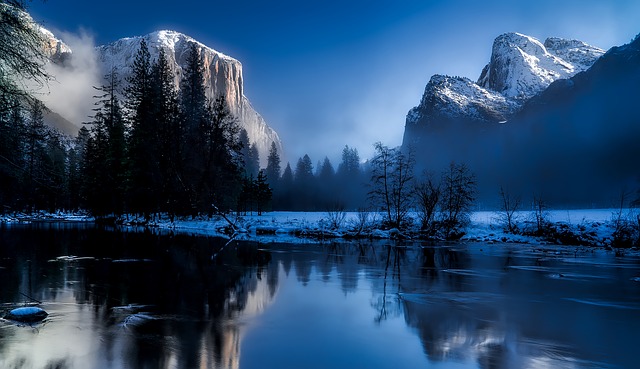
When shooting a typical landscape image, you are generally capturing more of a scene not only a specific subject. So the question is Where to focus to ensure that everything in the scene is as sharp as possible. It is much simpler in portrait photography, just focus on the eyes. When the eyes aren’t on the same plane of focus, focus on the near eye. Also in wildlife photography, you focus on the animal. In fact, in any type of photography where there is a clear subject, you always focus on that subject. In landscape photography it is totally different, you are having many subjects, may be in the foreground and surely many other subjects in the background.
Therefore, in this post, I’ll go through some tips for helping you know where to set the focus for landscape photos.
Tips 1 – Think before setting the focus to infinity
Many new photographers think that because they’re shooting a landscape photo, and the horizon is far away, it’s best to focus on infinity, I’m afraid that is wrong.
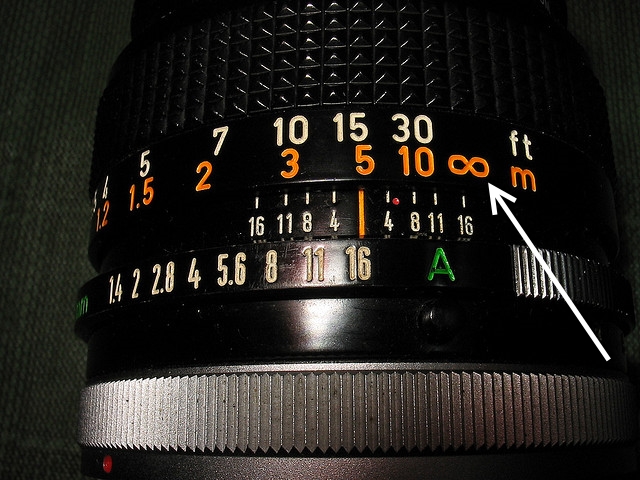
If you focus at infinity, you lose lots of your depth of field, because there will be barely any focus in front of infinity, and nothing behind the focus. So don’t focus to infinity, unless you’re trying to focus on a single subject, located at infinity.
If everything in the frame is truly at infinity, and there is nothing close to you and in the foreground then setting the focus at its maximum distance is not a bad idea.
Tip 2 – Focus at the hyperfocal distance
The hyperfocal distance is the distance at which everything beyond it and up to infinity is acceptably sharp, and Half of the distance between the hyperfocal length and the lens will also remain acceptably sharp too. The figure below illustrates the definition.

For more information on hyperfocal distance, check my post How to Control DOF of Your Photos – Shallow Depth of Field vs Deep Depth of Field. You will also find tables and calculators online, and even app on smartphones, that allow you to calculate the hyperfocal distance.
The hyperfocal distance depends on the following factors:
If you figure out the hyperfocal distance will often allow you to set the focus point quite close, in order to maintain sharp foregrounds in your picture. It also means you often don’t need to use the smallest aperture your lens offers, so you can avoid the effects of diffraction.
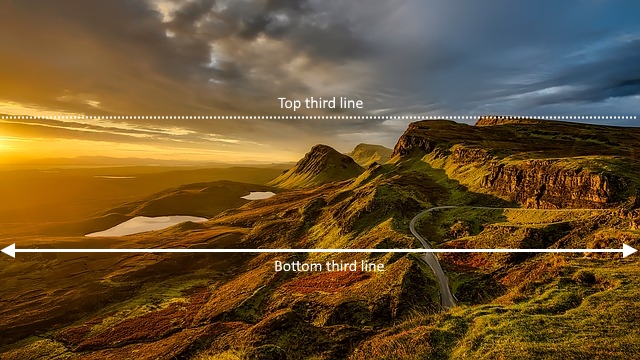
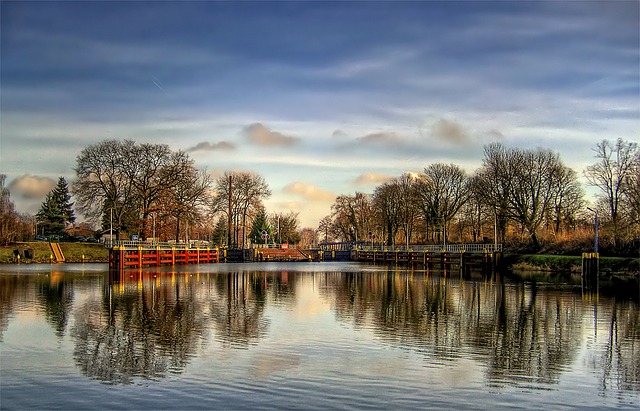
Tip 3 – Focus at around the bottom third of the scene.
There is a piece of practical advice said by landscape professional photographers, that you should focus along the bottom third line in the scene as illustrated in the below photo. if your landscape scene doesn’t have any specific point of interest it is probably advice worth using. It is also an easy way compared to the hyperfocal distance.
Tip 4 – Do some final adjustment
After setting your focus point, switch the lens to manual focus and switch the camera to live view. Then simply check the sharpness of your foreground and background by zooming to the two zones one after another. If the sharpness isn’t good enough readjust the focus until finding the perfect one.
If you can’t reach the proper sharpness of both the foreground and the background Try doing one of the following:
- Take a few steps back, to make both foreground and background look closer to each other.
- Step down your lens f-stop number furthermore.
- Use a wider lens.
Tip 5 – Use of a focus stacking software
If you are shooting a still scene and there is nothing moving in the frame, you may consider using the focus stacking technique but take care you shouldn’t change or move your camera position at all, and of course, you should use a sturdy tripod. There is a post about Photo focus stacking that explains the process in detail.
Focus stacking (also known as focal plane merging and z-stacking or focus blending) is a digital image processing technique that combines multiple images taken at different focus distances to give a resulting image with a greater depth of field (DOF) than any of the individual source images.
Start by setting the lens aperture to its sweet spot ( It is usually between f/5.6 and f/8). Take the first shot with the focus set at the foreground, the take the second shot with the focus set at the middle ground, and finally, take the third shot focusing on the background. Then you blend the three photos in a focus stacking software ( for example Adobe Photoshop) to get the final photo ( there will be sharpness throughout your entire picture).
As with many aspects of photography, when it comes to choosing the focus point, there isn’t any fixed rule is going to cover every situation., You’ll just have to use your own judgment in the field.
Related Posts
How To Capture Landscape – Your Simple Guide
Landscape Photography Tips and Tricks – Shoot Like A Pro
Thanks for reading the article, hope you found it useful and helpful in finding the appropriate focusing points and keeping your photos tack sharp, if you have any comments or need any further information, just write it down in the box below.
If you enjoy the site, don’t forget to subscribe, we will only inform you when a new article is posted.
The form you have selected does not exist.


Wow, I got distracted by the beautiful landscapes that you have captured, thanks for this tips!
Thanks for your nice comment, wish you all the best
This is a great post. I love photos of beautiful scenery and views. The more people that read this information will only lead to more beautiful photographs!
I know now that my next trip I will be pointing and aiming the camera differently!
Thanks! glad that you liked the post.
I found your post to be incredibly interesting. I’m not a photographer but I was fascinated with reading about all that goes into capturing the perfect landscape picture. It’s clear that you know what you are talking about.
I love the pictures in the post too….they are gorgeous. Did you take them yourself?
Hi Matt
Thanks for the comment, glad you found the post interesting. No, I did not take them, I have used them for illustration purposes.