

Sometimes you take a shot and you think it is amazing. When getting back home you think I will do some editing and make this photo even better. Suddenly you discover that your photo has a dull and tasteless sky. It has no clouds, just a uniform blue area. In this post, I intend to show you how to change the sky with the help of famous Photoshop.
There are many techniques to replace the sky with another astonishing one. The most straightforward way is done by pasting the new sky as a layer over the original photo, the add a layer mask to allow you to cancel the old sky, and then finally doing some fine retouching to match the sky color with the original photo.
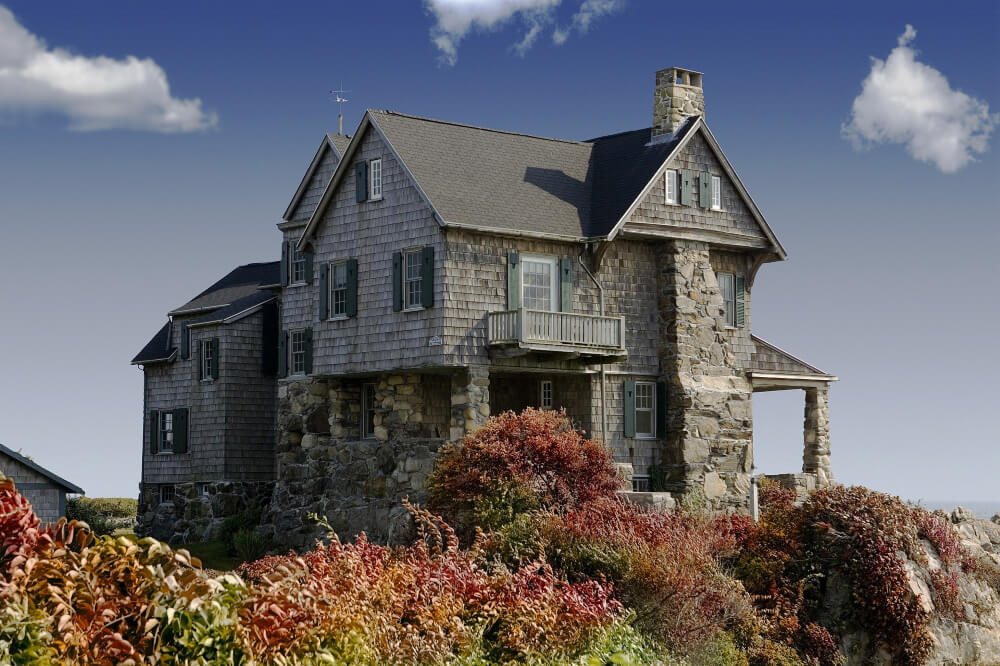
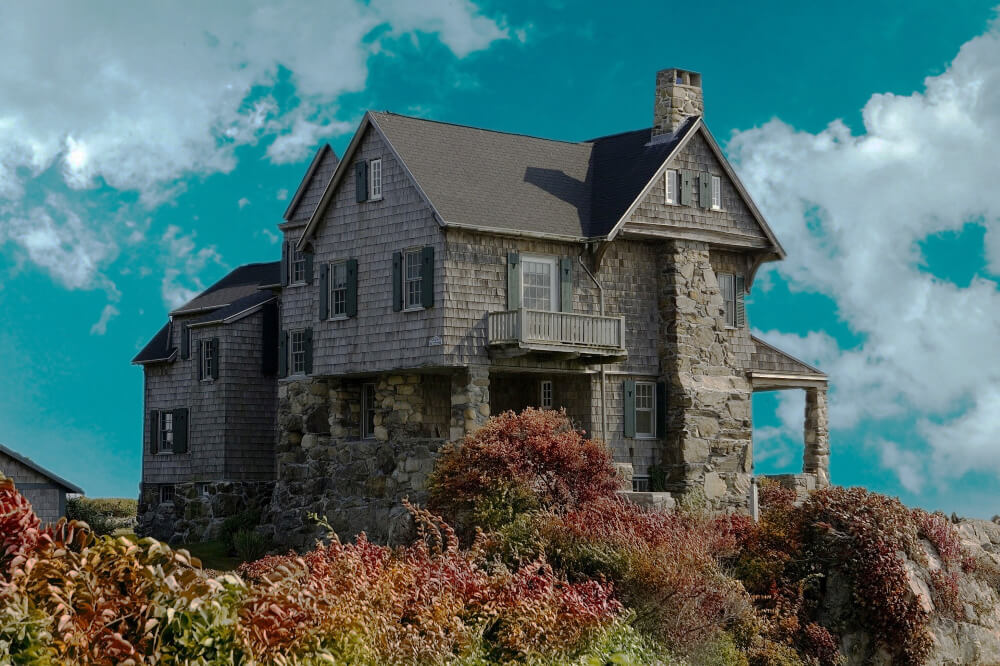
Before we start, here are some examples (before and after photos) to illustrate the idea.

For the full list of Photoshop keyboard shortcuts, you can click here
Step by step to Change a Sky
I will use the below photos in changing the sky of the original photo.


Open both the original and sky photos

Combine the two photos
- Method 1
- Click and hold on your mouse button the sky photo
- Move your cursor right up into the tab of the original photo
- Move your mouse over the top of the original image. (Still holding down the Left Mouse Button)
- Release the left button of your mouse.
You can use the edit menu to do the second method

- Method 2
- Use mark tools to select the sky image, then copy it
- Go to the original photo and past the sky photo
By using one of the above-mentioned methods, you will end up with the original photo and the sky photo in separate layers.

Resize, Crop, and position the sky photo
- Click on the sky layer to make it the active layer.
- Activate the free transform from the edit menu or use the following shortcuts (Ctrl+T for Win, or Cmd+T for Mac)
- Drag the corner handle to resize and reposition the sky. (Hold down the Ctrl Key to unconstraint proportions).

Select the area without the sky from the original photo
Use one of the following tools to select the area in the original photos that contain no sky
From the toolbar select Polygonal Lasso tool (or use Win & Mac shortcut: L), or Quick selection tool (or use Win & Mac shortcut: W)

The selection will look like the following photo:

Add a layer mask to the original photo
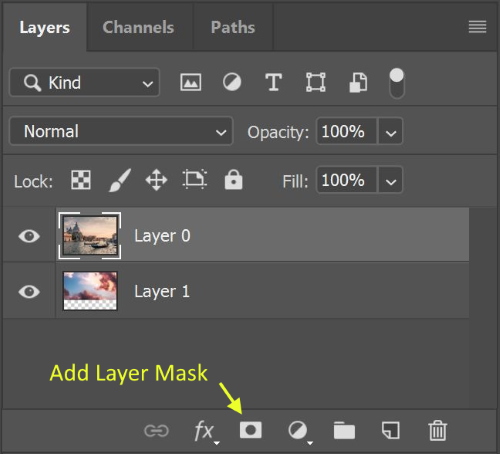
- Make the original layer is the active one.
- From the layer menu at the bottom right, click add a mask
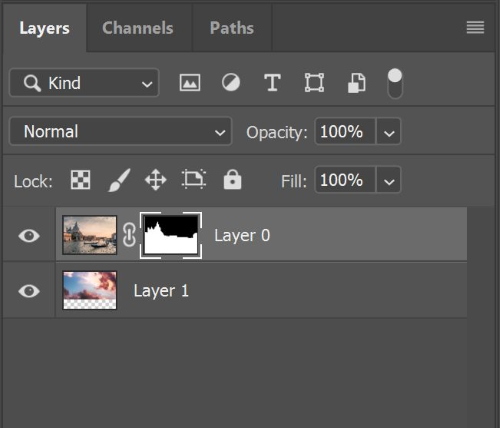
- The layer mask symbol will appear beside the original photo symbol. The white area allows the underneath layer to appear, the black area hide the underneath layer)
Refine the mask selection
- Click on the mask symbol
- Use the feather slider to refine edging of the selection
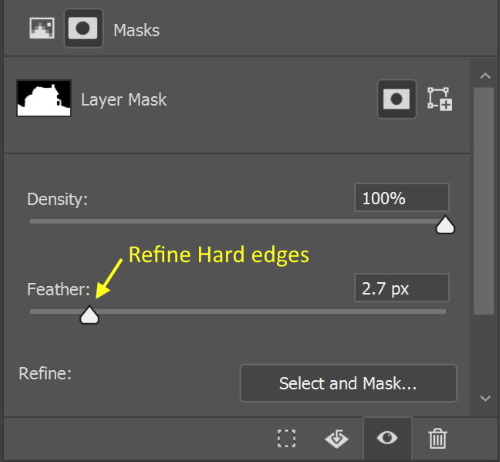
The final image will look like

Look for the missing areas
When making the selection, I might miss some tiny areas of the photo, for example, the windows in the tower. To find these tiny areas, you can zoom in on the photo using shortcuts (Win: Ctrl+ +, Mac: Cmd + +). To zoom out use the shortcut (Win: Ctrl + -, Mac: Cmd + -)

Now I am going to fix these areas. I will paint the missing area by using the eyedropper tool and the brush tool. You can pick them from the toolbar
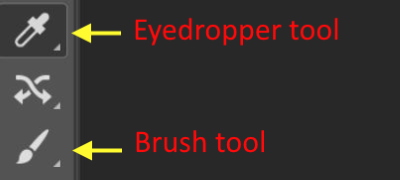
Or use the eyedropper shortcut (Win & Mac: I), the brush shortcut ) Win & Mac: B)
Adjust the sky photo colors to match the original one
To match the color of one photo with the color of another photo we use the Match Color command, which has been available in Photoshop since Photoshop CS. To get this function. We will try to match the colors of the sky photo to the colors of the original photo, following these steps:
- Make the sky the active layer
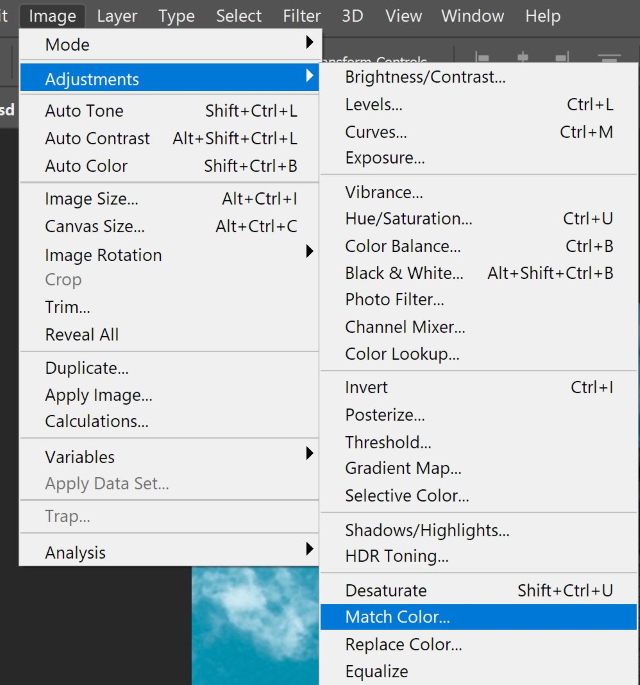
- From the Image menu, select Adjustment, and then click Match color. The following dialog box appears:
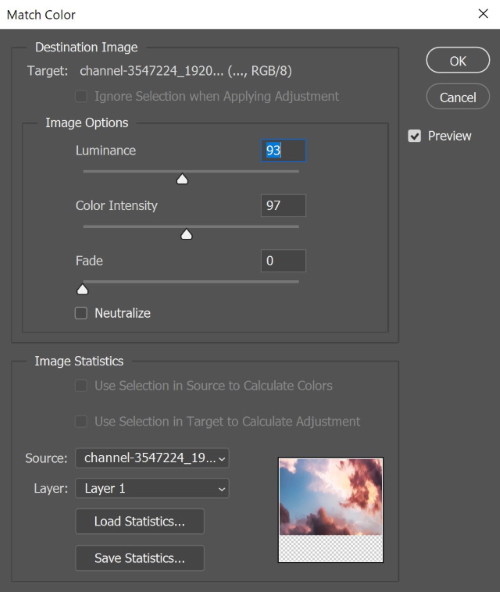
- Choose the original photo as the source.
- Choose the sky as the layer
- Adjust the Luminance, color intensity, and fade sliders
- You may check the neutral checkbox
Now the final image is done.

Related learning resources:
Adobe Photoshop CC Classroom in a Book (2019 Release) 2nd Edition
Adobe Lightroom CC and Photoshop CC for Photographers Classroom in a Book 1st Edition
Are you looking for Photo editing resources or editing Services?
Some photographers are struggling to learn and master editing software like Lightroom or Photoshop, they found the editing process is taking too much of their time. Therefore, assigning editing tasks to an editing service may be the answer.
On the other hand, some others are looking for editing resources like actions, overlays, and textures to help them. For those I highly recommend paying a visit to my store, it has amazing professional photo editing tools.
Also, you can check my editing tutorials, there are many tips and tutorials there.
Thanks for reading, I hope you enjoyed the article if you have any questions just post them below & I will be happy to answer you.
The Featured Image by David Mark from Pixabay
If you enjoy the site, don’t forget to subscribe, we will only inform you when a new article is posted.


It’s very good to learn how to add some changes to the sky and make it come alive. I have been going into some outside pictures of late and I understand that the beauty of this type of pictures is the aesthetics of the sky. I am happy that Photoshop can help to beautify it. Nice to see this. Thanks for sharing .
Wow. Thanks a lot for giving us this amazing tips about changing a sky in Photoshop.
I am a beginner in this photography industry. I started going every weekend to special events such as: weddings, baptisms and birthdays. I really like taking pictures in nature and I always wondered how I could change the color of the sky or bring a sunbeam on a gloomy day. You have put here an extraordinary tutorial that can help anyone.
Thanks again and I hope to see more posts like this. Wish you all the best!
Hi Nimrodngy
Thank you very much for your nice comment. It pleases me a lot when I realized that someone has learned somethings from my tutorial. I wish you all the success.