

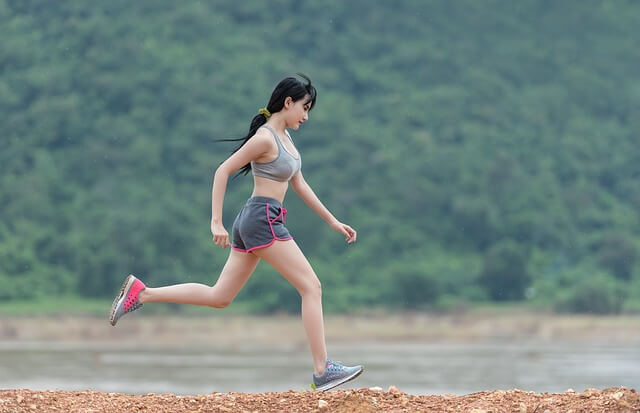
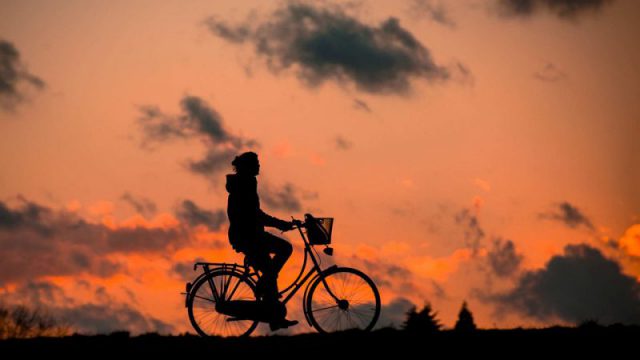
Everyone has heard of the coveted golden hour, but only photographers are privy to the magical time of the blue hour. The world transforms into a hue of blues and cool-toned colors during this serene time. Skilled photographers prefer blue as it adds character to photos. A few tips on mastering photography at this hour are;
Choose the setting
Photographers and tourists usually take pictures in the golden hour, so it is always busy. But as it passes, a sense of calmness descends, captured in the blue hour. Moreover, you can decide which aperture you set on your camera depending on what time in the blue hour you are shooting. The change in aperture can help determine how you edit the picture. You can also use image and CV editing services to help bring your photos to life.
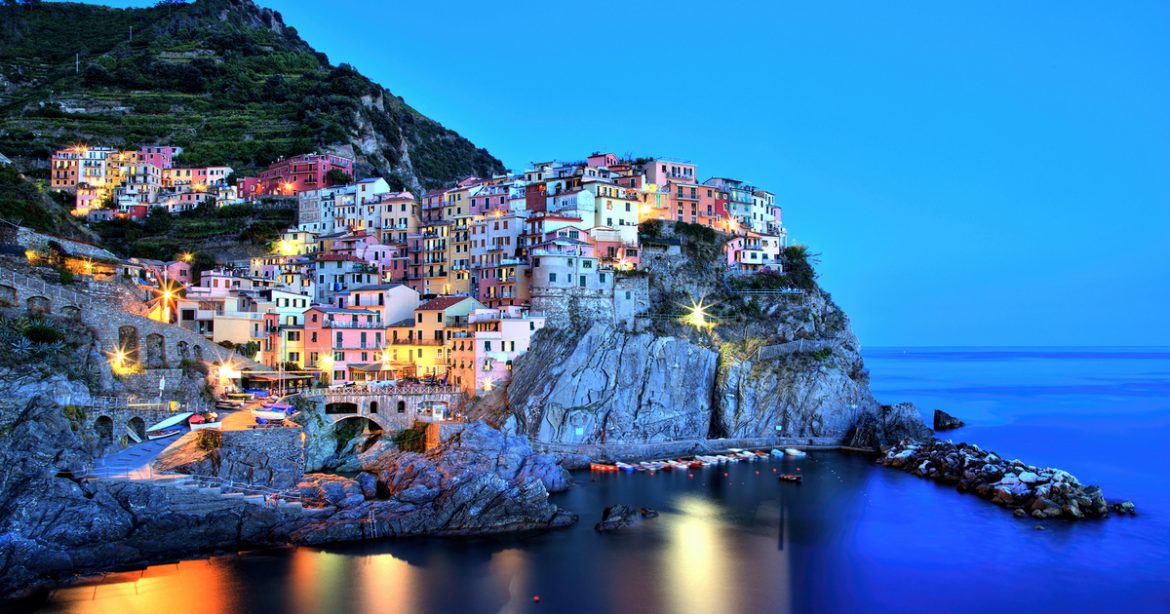
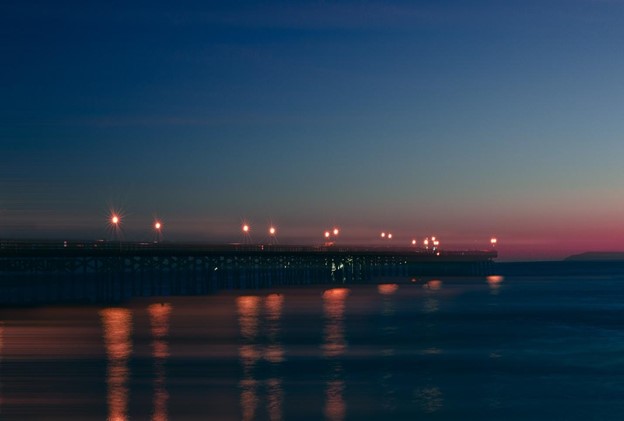
Blue hour photography works wonderfully with landscapes as well as in cities. In cities, the sky is blue and contrasts with the yellow hue of street lights, illustrating the sharp details of the buildings, roads, and signs. With landscape photography, this hour brings about a subtle softness and moodiness in the images.
Plan the blue hour photography shoot
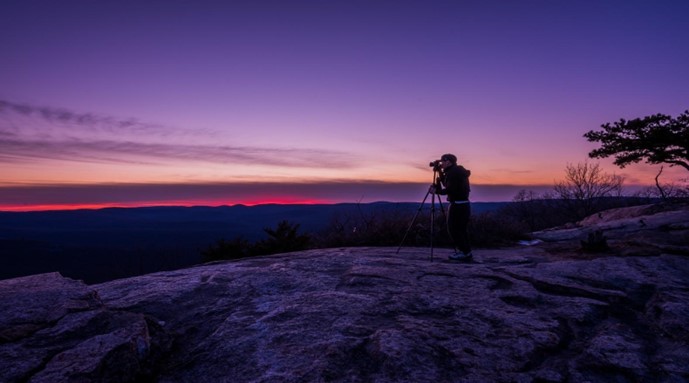
The blue hour lasts for a short time range of 15 – 20 minutes. Luckily it comes twice a day, once before sunrise and once after the sun has set. Due to its limited timeframe, taking captivating pictures on the first try is challenging. So, it is beneficial to utilize your day to plan the shoot. If you want to take pictures of the scenery, it is better to visit the area beforehand and understand the environment. You can use a tripod and set it to easily change the setting if you need to, without destabilizing the camera.
You should always get to the location early and double-check all your equipment because you do not want to miss the blue hour searching for where to set up and what lens to use. If you plan it correctly, you may experience the golden hour and get two birds with one stone. You can even opt to use a writing service to help create a schedule. You can pay for resume, portfolio compilation, and even schedule creation to help manage it all.
All it takes is practice and a little help
The blue hour will last only for 20 minutes, which does not give you enough time to experiment with different angles and settings. Do not fret and be discouraged, as many photographers take a few days to take the perfect shot. You need little time management and a few tries because practice makes perfect.
It will help if you use electric lights during the shoot. If you are an amateur, the lights will help increase exposure after the sunsets and give you a little more time. They can also add light bursts
and flashes to your pictures and give them more depth. You can even scope out a few locations close to each other and move your tripod from one place to the other for maximum exposure to the blue hour. A tripod will have several benefits, such as;
- Sharper images as the camera are more stable,
- The tripod will help you stay focused and slow down, thus increasing your chance of getting the perfect shot,
- You can use a smaller aperture and lower ISO setting instead of when you hold the camera yourself.
The monochromatic look
Most people have the misconception that monochromatic means black and white. In reality, it means various shades of the same color. During the blue hour, your monochrome pictures will be hues of blue, purple, and even a little green.
In city photography, you can aim for a monochromatic background with cool tones contrasting with the warm tone hues from the house and street lights. The monochrome-colored pictures will also add elegance to your portfolio. If you are unsure how to incorporate these images in your portfolio, you can pay someone to write your resume and create your portfolio for photography.
Take your pictures in raw form
If you take your pictures in raw form, it is easier to edit them to enhance their quality and color. If you do not know how to, then you can find picture editing and resume writing services under $100 to help you with it.
When you edit your pictures, be gentle and not make the colors too saturated. The increased saturation makes the colors unnaturally intense and ruins the softness of the images. So, you should tread lightly and edit with a light hand avoiding any changes in the exposure and temperature of the pictures.
With these tips, you can start practicing taking pictures and seeing the world in a different light. It will take some effort, but that is the first step to becoming a good photographer. So, what are you waiting for? Go out and find locations you would shoot during blue hour!

Thanks for reading, I hope you enjoyed the article, in case you have any questions just drop them below & I will be happy to answer you.
If you enjoy the site, don’t forget to subscribe, we will only inform you when a new article is posted.


I am an early riser so I have see the sky and this hue many times on clear mornings, but I never thought about trying to capture it on film. Only in the last few months have I begun to try to be serious about photography. I have a perfect place to try this on a beautiful granite outcropping next to a lake. Your suggestions are really helpful. The picture attached to your article is amazing. It is easy to find the exact time for sunrise so I will be getting setup to try to capture the Blue Hour. Thanks.
Thanks for dropping by Anastazja!
Thanks for the lesson on how to utilize the blue hours each day to get beautiful photographs. I had heard of a “golden hour” as the hour or so just after sunrise and just before sunset, but hadn’t considered the different quality of light that the blue hour can bring to a composition. The results and your photographs are stunning!
I don’t think my digital cameras have a RAW setting option (Sony cameras). What would be a 2nd choice of format when RAW isn’t available?
JPEG. you can have a look here at the difference between JPEG & RAW.