

Have you ever needed to enlarge a photo before? I am sure you did. Most phone cameras are 12 megapixels, and many digital cameras are still in the 16-to-24-megapixel range. These megapixels seem adequate for many scenarios, like posting online or sending to a friend. However, if you want to make a large print to display on your wall, extra resolution helps to keep edges clean and details intact.
Even if you have a shiny new camera, what about those older pictures already in your catalog taken with a lower-resolution model? Some of my favorite pictures were taken fifteen years ago using a camera with only 8 megapixels.
In this tutorial I will explain how to enlarge photos in Photoshop without Losing Quality by using common ways, then I will introduce to you the amazing new feature that has been added recently (2021), it is called Super Resolution.
Let us start by discussing some terms and definitions; the term resolution refers to the number of megapixels produced by an image sensor. It represents the amount of detail a camera can capture. For example, a 20 megapixels camera (often written as 20 MP) captures less detail than a camera with 30 megapixels. However, what is a megapixel mean? Moreover, how does it affect your ability to print and display photos?
I recommend checking out this website “clipping world” which is doing a great color correction service.
Pixel, Megapixels, Image size, and File size
A pixel is the smallest picture element that your photo can be divided up into. A pixel can only be one color, and a photograph is made up of a grid of thousands of pixels, each of the different colors that together make up your image. You can see these pixels if you open a photo and zoom in until you see single blocks of color (as shown below). Each of these blocks is a pixel.
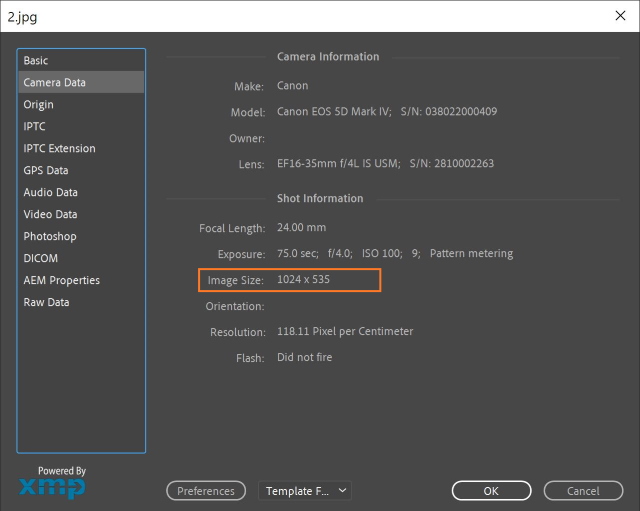
A megapixel is equal to 1,048,576 pixels; for simplicity, camera manufacturers round this number to 1,000,000. Let us take an example; my camera is Canon EOS 5D Mark IV, which can capture 30.4-megapixel images. Nevertheless, this number tells us nothing about the actual pixel dimensions of the image, it just tells us the total number of pixels that make up the image.
Most DSLR cameras capture images with an aspect ratio of 1.5. Therefore, the ratio comparing the number of pixels along the long edge of the image to the short edge of the image is 3:2.
A full-sized RAW image of my camera has a dimension 0f 6752 x 4501 pixels. By multiplying the number of pixels along the image width by those along with the image height, we get the actual number of pixels in the image (6752 x 4501= 30390752). We call this a 30.4 MP camera.
Image size
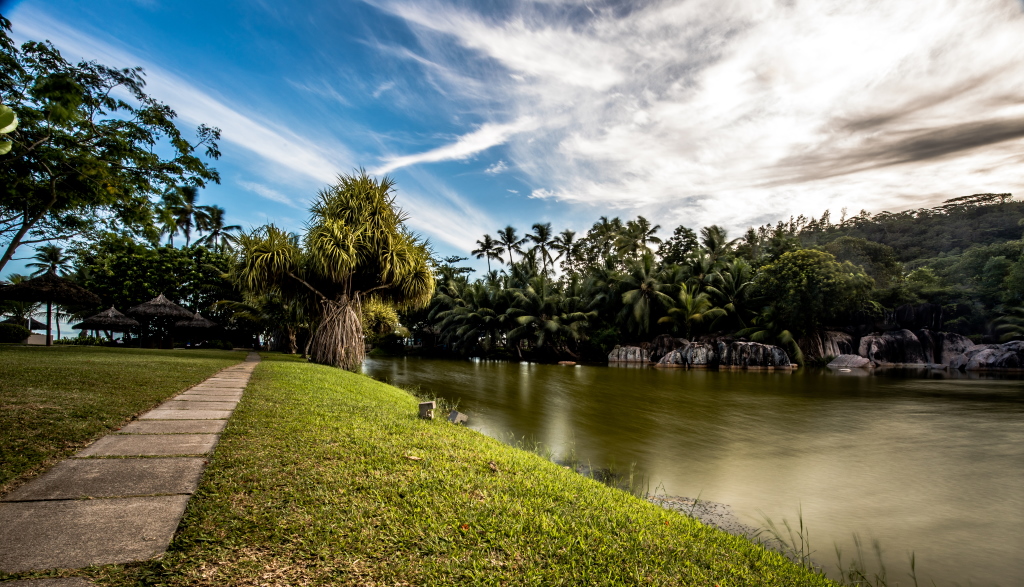
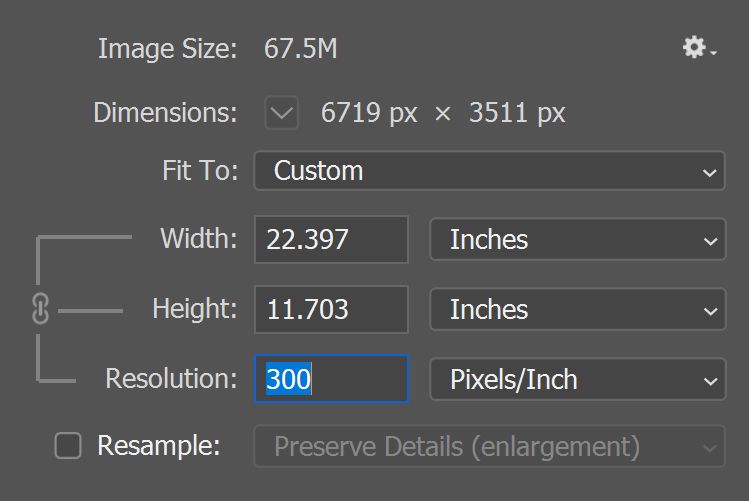
Image size is the term given to describe the height and width of an image in pixels. Now to check image size, I will use the following image as an example
Image by Ehab Amin
You can check the width and height of an image using Photoshop, just open the image, then choose File > File Info > Camera Data. The image below shows the resulting information dialog box.
File size
The file size of an image is the digital size of the image file, measured in kilobytes (K), megabytes (MB), or gigabytes (GB). File size depends on the following:
- It is proportional to the pixel dimensions of the image.
- The used file format (GIF, JPEG, PNG, TIFF, etc.)
- Color bit-depth
- The number of layers and channels in an image
Images with more pixels may produce more detail at a given printed size, but they require more disk space to store and maybe slower to edit and print.
Image resolution thus becomes a compromise between image quality (capturing all the data you need) and file size.
Image resolution
Image resolution refers to how much detail is captured in an image. In other words, the resolution is the fineness of detail in an image and it is measured in pixels per inch (ppi). The more pixels per inch, the greater the resolution.
Photographers will need to think about image resolution in the following situations:
- Choosing a camera, a 36-megapixel camera can provide substantially more detail than a 12-megapixel camera.
- Exporting images for the web. Website images require a much lower resolution than magazine advertisements, brochures, or anything else that is to be printed. In general, images on the web should be 72 ppi. Of course, you can put images on the web that are of higher resolution however, the higher the resolution of an image means that it will have a larger file size. Large files take longer to load on the web.
- Exporting images for print. In general, printers require images that are at least 300 dpi. If you supply a printer with a file that is less than 300 ppi, the images in your file will look blurry and out of focus. Some printers even require a higher resolution than 300 dpi so it is always a good idea to consult with your printer before sending your final files for print.
Relationship between image size and resolution
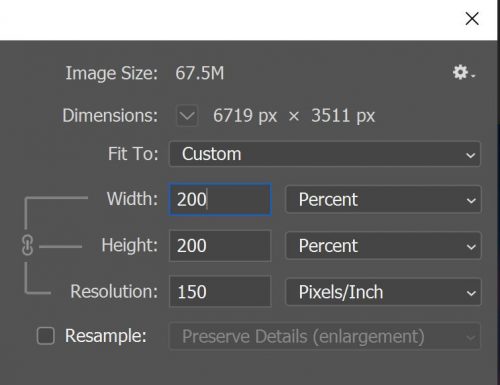
In Photoshop, you can see the relationship between image size and resolution in the Image Size dialog box (choose Image > Image Size).
Make sure to deselect Resample Image, because you don’t want to change the amount of image data in your photo. Then change width by 200%, height by 200%, and the resolution changes accordingly as shown below. Enlarging the image size to its duple will reduce the resolution to half.
What is Resampling?
To find a way to keep the resolution as it is, when enlarging the image size, Photoshop introduced the resampling algorithm. Resampling is changing the amount of image data as you change either the pixel dimensions or the resolution of an image. When you downsample (reduce the image size, it decreases the number of pixels), information is deleted from the image.
When you resample up (enlarge the image size, it increases the number of pixels, or upsample), new pixels are added. You specify an interpolation method to determine how pixels are added or deleted.
How to enlarge the image without losing quality
Photoshop uses different algorithms to resample, i.e. to add new pixels to the image in order to enlarge it while keeping the same resolution. The following is a list of these algorithms:
-
Bicubic Smoother
Bicubic Smoother was the best upscaling method we had back in Photoshop CS6 and earlier, and it does an okay job. Bicubic Smoother tries to clean up any problems by smoothing out the entire image.
-
Preserve Details – Enlargement
Preserve Details does a much better job of keeping important details in the image, But where Bicubic Smoother made things too soft, Preserve Details does the opposite. The image now looks over-sharpened.
-
Preserve Details 2.0
Preserve Details 2.0 uses advanced, “deep learning” artificial intelligence to detect and maintain important image details without over-sharpening anything else.
Example
To explain how to enlarge a photo, I will use the following photo
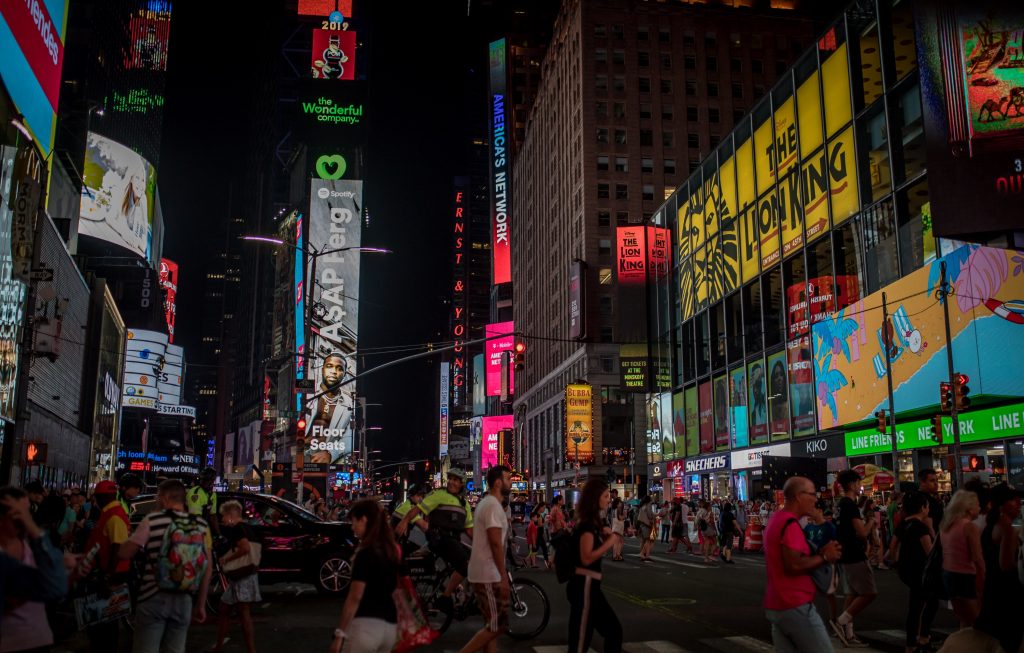
Image by Ehab Amin
The image size is 3000 X 1914 and the resolution is 300 ppi
Step 1
Open the photo in Photoshop, right-click on the background layer, and choose duplicate layer
The following window shows up
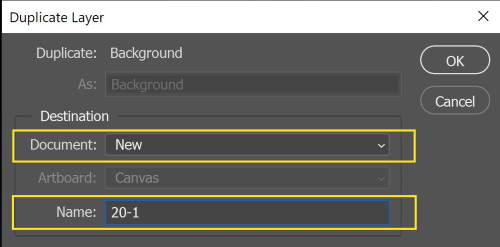
From Document, choose New. In addition, from Name give a name for the new document. Press O.K a new document is created.
Step 2
In the new document, click Image > Image Size
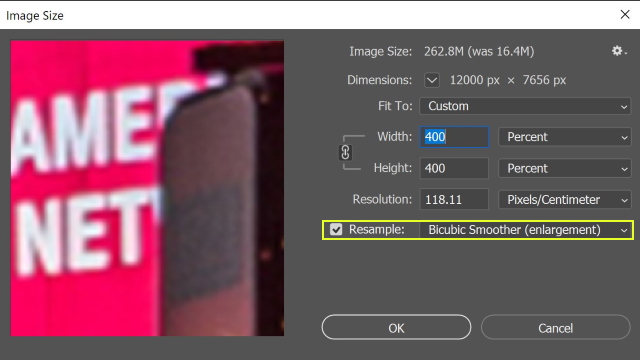
Type 400% for the width and choose the percent
Check the Resample box, and select Bicubic Smoother (Enlargement)
Then press O.K
The enlargement will be done, the final image size is 12000 X 7656 and the resolution is 300 ppi.
Comparing the three enlargement Algorithms
To see the differences between the three methods, I repeated the above steps for the other two methods, and then I zoom in at 100% for the three photos that have been enlarged with different algorithms. The result is shown below

It is clear that Preserve Detail 2.0 gives the best.
I think it is obvious that you can apply some sharpness to the photo. If you need any information about sharpening photos, you may Click Here.
The New Super-resolution Feature
Super Resolution is a new feature that has been added to Camera Raw 13.2 in March 2021 and will be coming soon available to Lightroom and Lightroom Classic.
The term “Super Resolution” refers to the process of improving the quality of a photo by boosting its apparent resolution. Enlarging a photo often produces blurry details, but Super Resolution uses an advanced machine learning model trained on millions of photos. Backed by this vast training set, Super Resolution can intelligently enlarge photos while maintaining clean edges and preserving important details.
The idea is to train a computer using a large set of example photos. Photoshop developers used millions of pairs of low-resolution and high-resolution image patches so that the computer can figure out how to upsize low-resolution images.
Super Resolution doubles the linear resolution of the photo. This means that the result will have twice the width and twice the height of the original photo, or four times the total pixel count, and keep the same resolution.
How to use Super Resolution
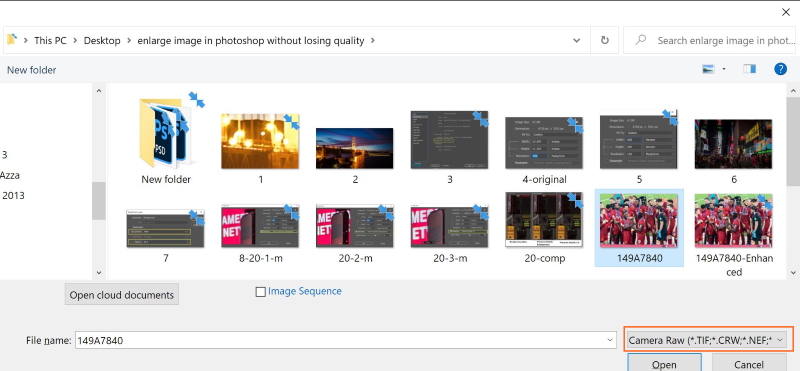
The super-resolution feature can be applied to any photo file format, but it is better to use it in a Raw file format.
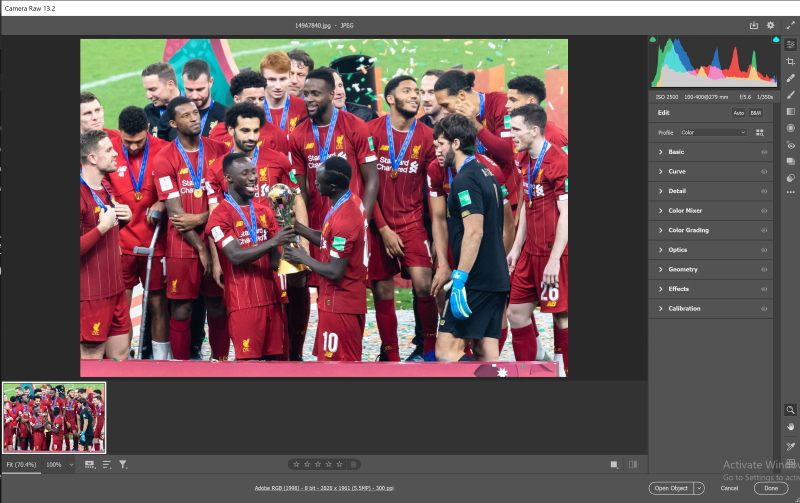
I’ll use the following photo, it is 2828 X 1961 (5.5 MP) – 300 ppi

Image by Ehab Amin
- Run Photoshop, then click File > Open As or use the shortcut (Alt + Shift + Ctrl + O)
- Choose the Camera Raw, and the photo file, press open
- The photo file will open in the Camera Raw window
- Right-click on the photo, and choose Enhance
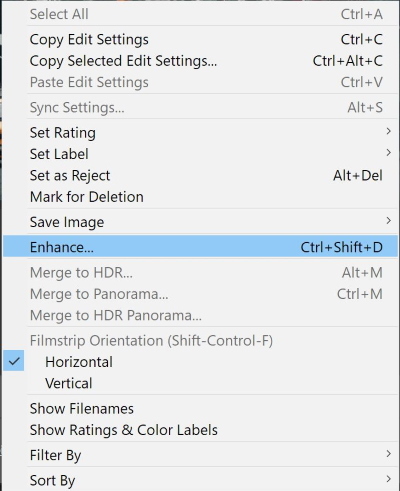
- The following window shows up, make sure that the Enhance box is checked, then press Enhance.
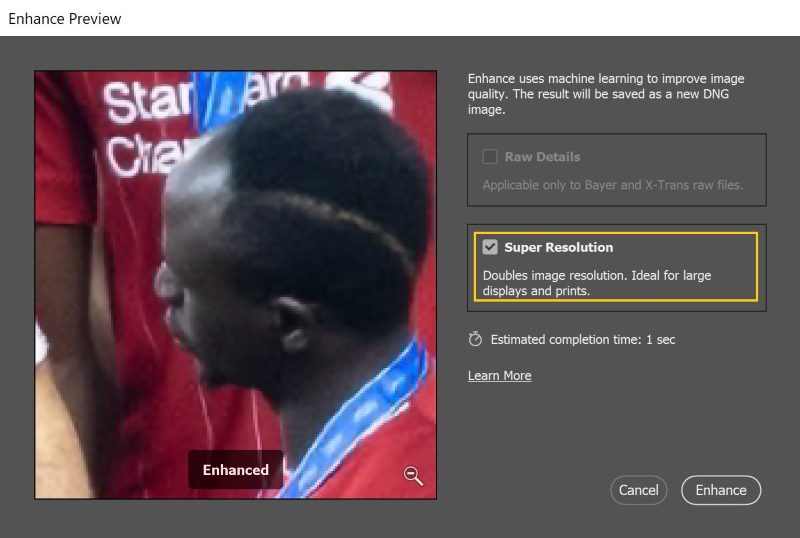
That is it!
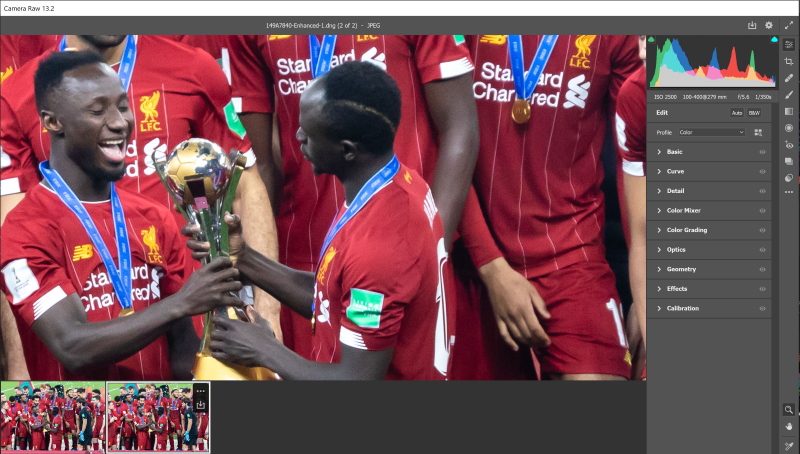
The new file is 5656 X 3922 (22.2 MP) – 300 ppi
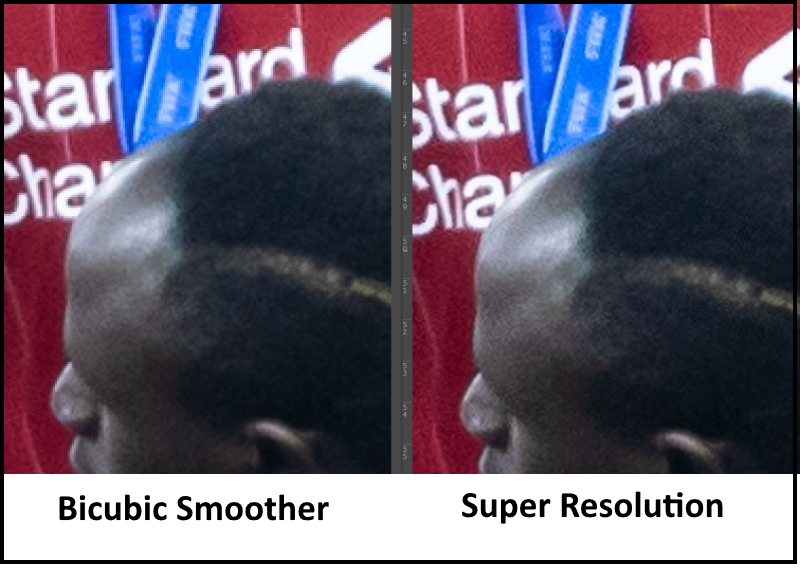
The comparison between the Bicubic Smoother and the Super Resolution method is shown below, It shows clearly that super resolution has done a much fantastic job.
Conclusion
Think of photo enlargement and “super-resolution” as a new option for those special photos and print projects that really need it. Please, don’t be tempted to apply Super Resolution on all your photos! It can produce very large files, which take up much bigger space on your computer disk
When applying the photo enlargement technique, use raw files whenever possible. If the source photo has artifacts, as often happens with highly compressed JPEGs or HEIC files, then these artifacts might become more visible.
Keep in mind that you need a faster GPU. Both Enhance Details and Super Resolution performs millions of calculations and benefit immensely from a fast GPU.
Are you looking for Photo editing resources or editing Services?
Some photographers are struggling to learn and master editing software like Lightroom or Photoshop, they found the editing process is taking too much of their time. Therefore, assigning editing tasks to an editing service may be the answer.
On the other hand, some others are looking for editing resources like actions, overlays, and textures to help them. For those I highly recommend paying a visit to my store, it has amazing professional photo editing tools.
Thanks for reading, I hope you enjoyed the article, in case you have any questions just drop them below & I will be happy to answer you.
The featured image by Ehab Amin
If you enjoy the site, don’t forget to subscribe, we will only inform you when a new article is posted.


This article was highly beneficial. In the past, I often found myself needing to improve the resolution of low quality photos, yet the outcomes were invariably unsatisfactory and blurry. Your guidance was very precise and I was able to obtain positive results with Photoshop; however, it must be an older version as it does not possess the Pres feature.
This is an excellent and informative post.
I have tried to enlarge photographs before, but have been so disappointed with the results.
Super resolution is therefore an excellent addition to Photoshop.
Thanks for stepping out the process very clearly, so I know exactly what I need to do and I will not be left scratching my head.
Thanks for sharing.
I’m very glad you liked the article, and thanks for the comment!
Great article. Many times I needed in the past to enlarge some low quality photos I had but most of the times the end result would be a blurry mess. You explained the steps very clearly and I managed to reproduce good results in photoshop but mine must be an older version as it doesn’t have the Preserve Details option. Only the Bicubic smoother one.
Thanks for your comment! I hope you can manage to get the last update (2021), you will be totally astonished by the outcome.