


The Vanishing Point command in Photoshop enables you to place an object, or to edits images that have perspective planes. The perspective planes can be the side of a box, or a floor in the home interior, or a wall in a building, etc. With Vanishing Point, you define and specify the planes in your images, those planes control the perspective of the edits you make, and then, by using a variety of techniques you can add or eliminate objects and apply edits by using painting, cloning, copying, pasting, and transforming tools.
In this tutorial, I will explain perspective and vanishing point principles, and then I will present to you the vanishing point tool in Photoshop and explore its options and how to use it. Finally, I will make more examples to show you how to place a photo of paint on a wall of an interior home image using Photoshop. Another two examples are provided for placing a text and a logo into photos of a phone box and a road.

What is perspective and vanishing point?
Perspective is the art of representing three-dimensional objects on a two-dimensional surface to give the right impression of their height, width, depth, and position in relation to each other.
There are typically three types of perspective drawing: one-point perspective, two-point perspective, and three-point perspective.
-
One-point perspective:
One-point perspective is often used for compositions that look at objects from the front.
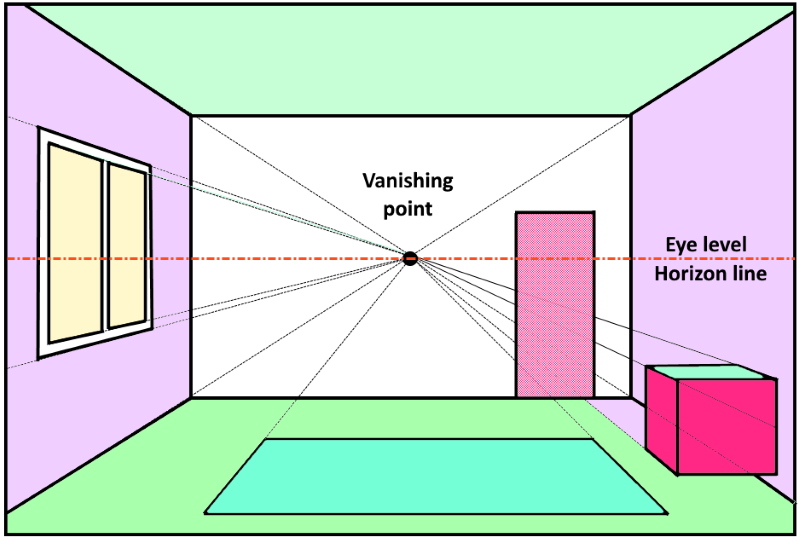
Lines extending from the foreground to the background gather (converge) at one point (to represent depth). The point of convergence is called the “vanishing point”. The vanishing point will always be on the horizontal line, or “eye level” of the scene, which represents the height of the eye or camera of the observer.
-
Two-point perspective:
A two-point perspective is used for compositions that look at objects at an angle. As it is close to what the human eye normally sees.
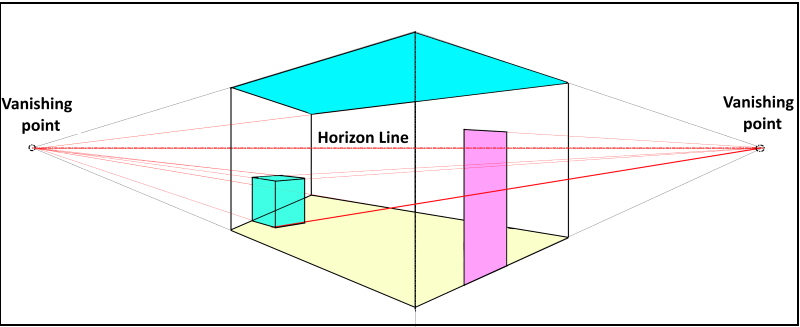
In two-point perspective, in addition to depth, lines representing width also converge.
-
Three-point perspective:
Three-point perspective is used for drawing compositions that are looking up at a large object or looking down from a high place.
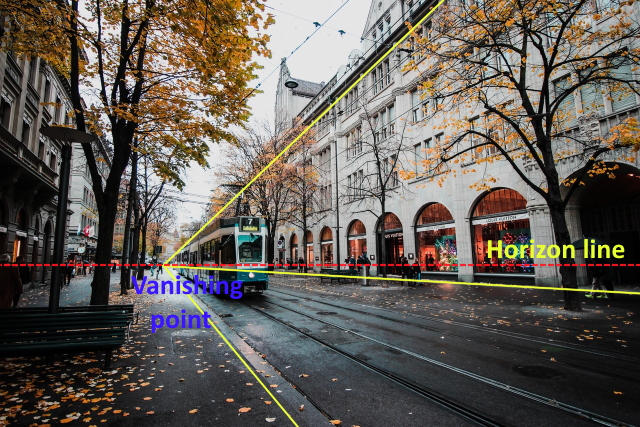
To determine the horizon and the vanishing point in a photo, try to find two leading lines and the intersection of them is the vanishing point. To define the horizon line, draw a horizontal line passing through the vanishing point. The photos show you this method.
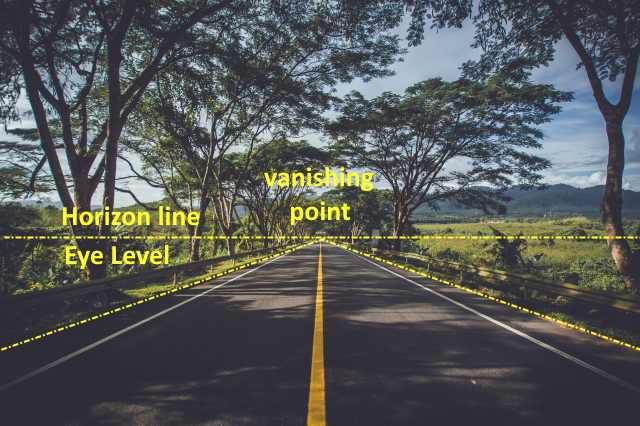
Photo by suzukii xingfu from Pexels
Photoshop Vanishing point Tool
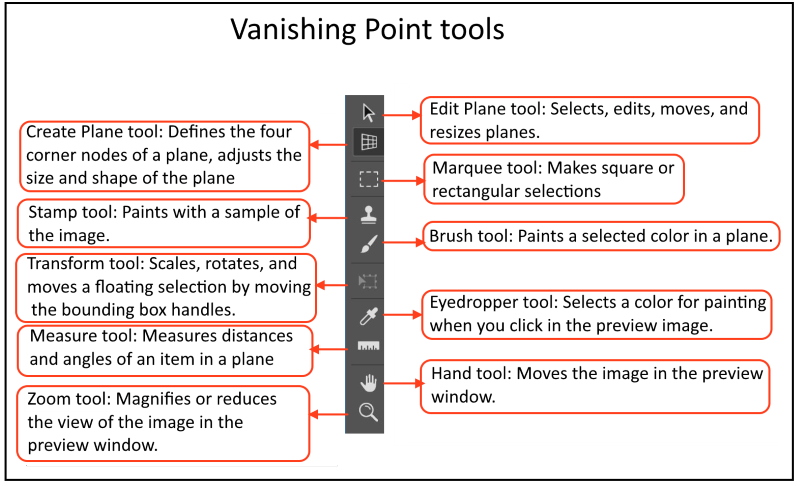
The Vanishing Point command contains tools for defining the perspective planes, tools for editing the image, a measuring tool, and an image preview. The Vanishing Point tools (Marquee, Stamp, Brush, and others) behave similarly to their counterparts in the main Photoshop toolbox. You can use the same keyboard shortcuts to set the tool options. Opening the Vanishing Point menu displays additional tool settings and commands.
You can access the vanishing point dialog box by choosing Filter > Vanishing Point
The vanishing point tools are summarized in the figure below
Remarks
- Placing the Vanishing Point results in a separate layer that preserves your original image.
- To paste an item from the Photoshop clipboard into Vanishing Point, copy the item before choosing the Vanishing Point command. The copied item can be from a different Photoshop document.
How to work with the vanishing tool
- Choose Filter > Vanishing Point.
- Select the Create Plane tool
- Define the four corner nodes of the plane surface. To reshape the perspective plane, drag a corner node. The bounding box and grid of a perspective plane is normally blue. If there is a problem with the placement of the corner nodes, the plane is invalid, and the bounding box and grid turn either red or yellow. When your plane is invalid, move the corner nodes until the bounding box and grid are blue.
- You can paste an item from the clipboard. The pasted item becomes a floating selection, which conforms to the perspective of any plane that it is moved into.
- You can scale, rotate, flip, flop, or move a floating selection by using the free transformation tool.
How to Place Anything into Perspective
Example 1 (pasting a selection from a photo into another photo with perspective)
This example shows the required steps to paste a painted photo with a frame into a living room photo.

Step 1
Open the paint photo, use the marquee tool to select the photo, and copy the selection into the clipboard (Ctrl + C)
Step 2
Open the living room photo
Step 3
Duplicate the layer (CTRL + J)
Step 4
Choose Filter > Vanishing Point
Step 5
Select the Create Plane tool
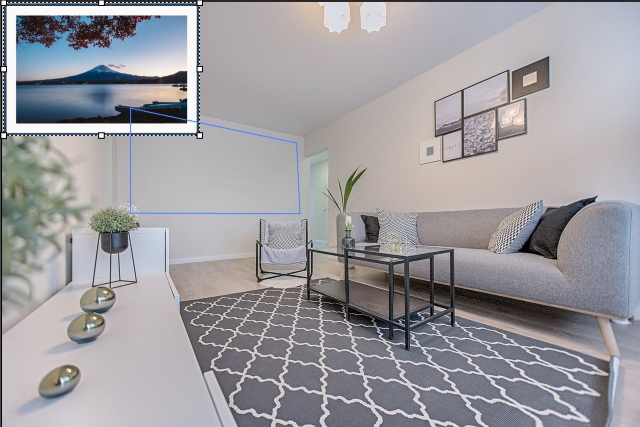
Step 6
Define the four corner nodes of the plane surface (make sure the color of the grid and the border are blue, if not readjust the nods positions until it turns blue)

Step 7
Past the image from the clipboard (Ctrl + V), and apply the transformation of the pasted image to resize it.
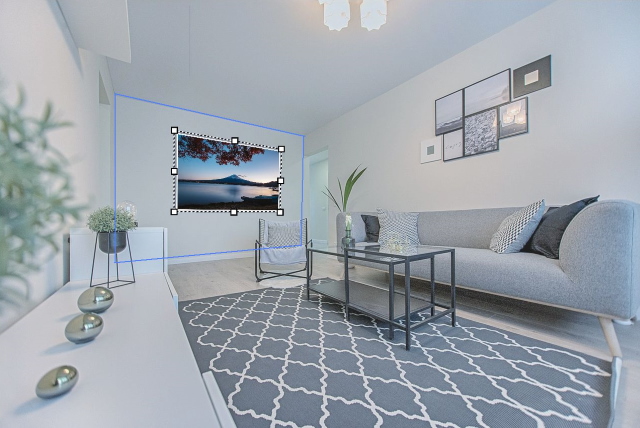
Step 8
Drag the image into the perspective plane

Step 9
Resize the image and position it as required
Step 10
If required fine-tune the image to adjust lighting and colors
The result is shown below


Photo by Vecislavas Popa from Pexels
The following are more example


Photo by Vecislavas Popa from Pexels


Example 2 (Adding text with perspective)
Instead of copying a photo and past it into another photo, you can do the same with text or a logo.
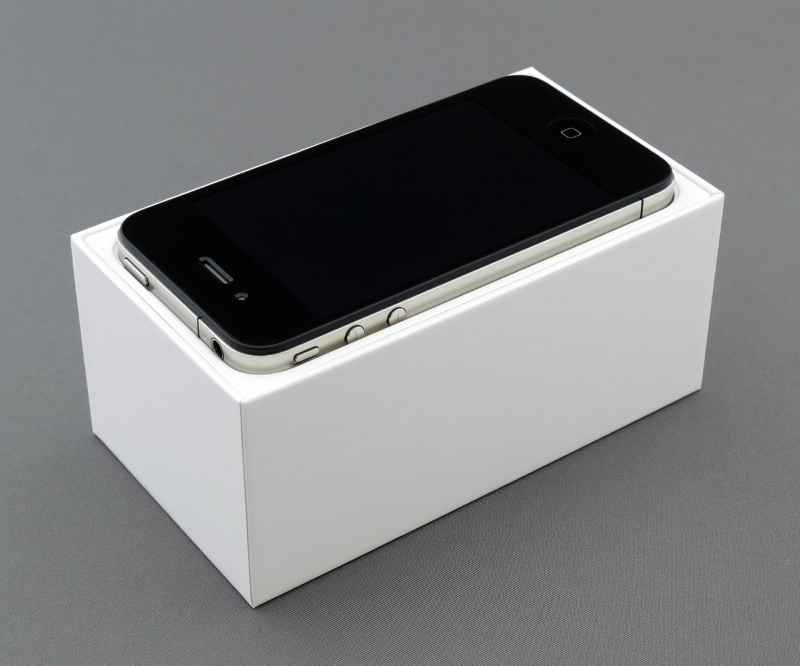

Photo by Brett Jordan from Pexels


Photo by Tirachard Kumtanom from Pexels
Example 3 (Resize a selection using the vanishing point and the horizon line)
You can resize a subject according to its position with respect to the horizon line.
- Determine the vanishing point (intersection of any two leading lines in the photo)
- Past the selection into the photo, and apply the transformation tool.
- Drag and move the anchor point until it reached the vanishing point
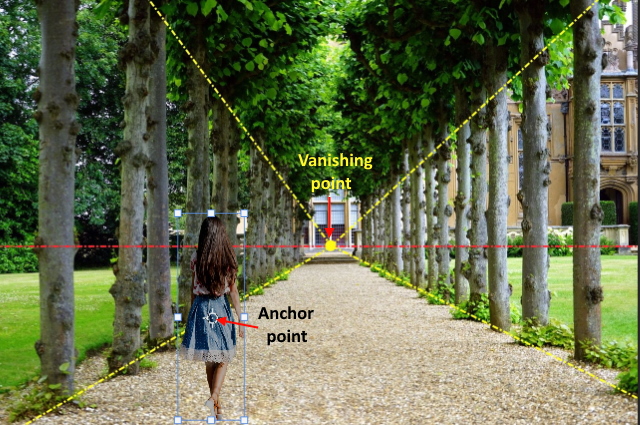
- At the corner of the transformation, tool click and hold the shift + Alt Key, and drag it towards the vanishing point
- The size of the girl will change according to the distance between the girl and the vanishing point
The below gif shows the idea.
Are you looking for Photo editing resources or editing Services?
Some photographers are struggling to learn and master editing software like Lightroom or Photoshop, they found the editing process is taking too much of their time. Therefore, assigning the editing tasks to an editing service may be the answer.
On the other hand, some others are looking for editing resources like actions, overlays, and textures to help them. For those I highly recommend paying a visit to my store, it has amazing professional photo editing tools.
In addition, you can check my editing tutorials, there are many tips and tutorials there.
Thanks for reading, I hope you enjoyed the article if you have any questions just post them below & I will be happy to answer you.
If you enjoy the site, don’t forget to subscribe, we will only inform you when a new article is posted.


I have be a fan a art works and photography for a long time and I haven’t really seen a clear article about vanishing point until now and this is a very clever and well defined one you have here and with the diagrams you have given here, it makes it much better and easier to understand it. I would be more than willing to see some more of this related topic in more articles.
Thank you! I am glad you liked the article
I was wondering about the vanishing point, I guess it’s the point where it’s the farthest from our view that we can’t see anymore through the image, right? Awesome input, especially the part where we can resize an object relative to it’s image with respect to it’s horizontal line, interesting. Just to make sure I got it right, I can minimize the object to make it look like it’s moving towards the vanishing point, right?
Thanks for the comment, I think you got it right!