

Photoshop offers many ways to sharpen photos. In this tutorial, we are going to explain in detail the three common methods to sharpen photos.
What is the difference between Contrast and sharpness?
Contrast is a term that describes the relative difference between light and dark areas. A low-contrast image looks “faded” or “washed out”. A high-contrast image is often said to have more “pop”.
Sharpness is about the edges in the image and making them more or less “defined”. A more defined edge is a sharper image. Image sharpening works by increasing contrast along the edges of your image. Photoshop considers an edge to be an area where there’s a big, sudden change in brightness between neighboring pixels.
it’s important to note that sharpening an image is not the same thing as adjusting the focus. Photoshop can not go back in time and change the focus point of your lens. A blurry image will always be blurry no matter how much sharpening you apply. Sharpening is about making the in-focus areas of your image look sharper.
General tips for better sharpening
- The best way to judge image sharpening is to view your image at the 100% zoom level.
- Sharpen your image on a separate layer. Use smart layers to edit sharpness non-destructively.
- Over sharpening the image can cause hellos around the edges and can increase the noise in your photo.
- Sharpening increases image contrast. If you find that highlights or shadows are clipped after you sharpen, use the layer blending controls to prevent sharpening in highlights and shadows.
- Reduce image noise before sharpening so that you don’t intensify the noise.
- Sharpen your image multiple times in small amounts.
- You can sharpen your entire image or just a portion using a selection or mask.
- If possible, judge your sharpening by outputting it to the final size. The amount of sharpening will decreases when you downsize your photo.
How to sharpen the image in photoshop
Method 1: using Unsharp Mask
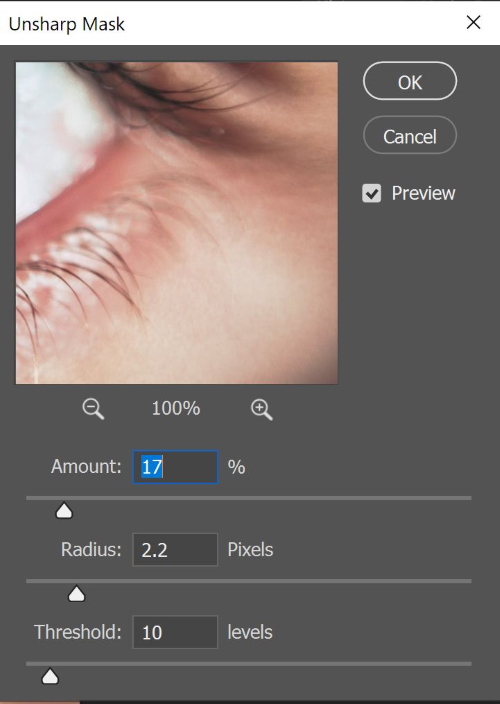
The Amount
It controls how much to increase the contrast of pixels. For high-resolution printed images, an amount between 150% and 200% is usually recommended.
The Radius
The slider is used to determine the number of pixels surrounding the edge pixels that affect the sharpening. The greater the radius value, the wider the edge effects. In addition, the wider the edge effects, the more obvious the sharpening.
For high-resolution images, a Radius value between 1 and 2 is recommended. A lower value sharpens only the edge pixels, whereas a higher value sharpens a wider band of pixels. This effect is much less noticeable in print than on‑screen because a 2‑pixel radius represents a smaller area in a high-resolution printed image.
The Threshold
It determines how different the sharpened pixels must be from the surrounding area before they are considered edge pixels and sharpened by the filter. For example, a threshold of 4 affects all pixels that have tonal values that differ by a value of 4 or more, on a scale of 0 to 255. So, if adjacent pixels have tonal values of 128 and 129, they are not affected. To avoid introducing noise or posterization try experimenting with Threshold values between 2 and 20. The default Threshold value (0) sharpens all pixels in the image.
Example 1
I will use the following image
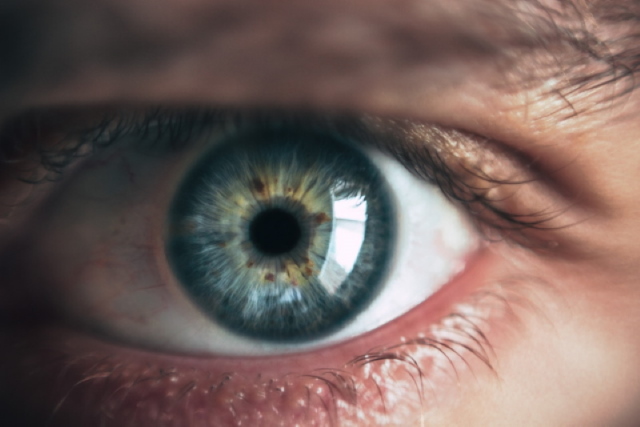
Photo by Victor Freitas from Pexels
Step 1
Open the photo file, and make sure to adjust the view to 100% (Ctrl + 1)
Step 2
Duplicate the background layer (Ctrl + J)
Step 3
In order to keep the color unchanged, desaturate the layer (Shift + Ctrl + U)
Step 4
Convert the layer to a smart object (Layer > Smart Objects > Convert to Smart Object)
Step 5
Click (Filter > Sharpen > Unsharp Mask), and use the Amount, the Radius, and The Threshold sliders to adjust the sharpness.
Step 6
Change the blending mode of the filter to “Luminosity”
The result is shown below
Another example
Photo by Lisa Fotios from Pexels
Method 2: using High pass filter
Because sharpening an image is all about increasing edge contrast. So, before we can increase contrast along the edges, we first need to find those edges. High Pass filter is an edge-detection filter. It looks for edges in the image and highlights them. Areas that are not an edge are ignored. High Pass works by filling the image with a neutral gray color. It then looks for edges in the image (areas with a sudden change in brightness between neighboring pixels) and highlights them by making the light side of the edge lighter and the dark side darker. Non-edge areas remain unaffected.
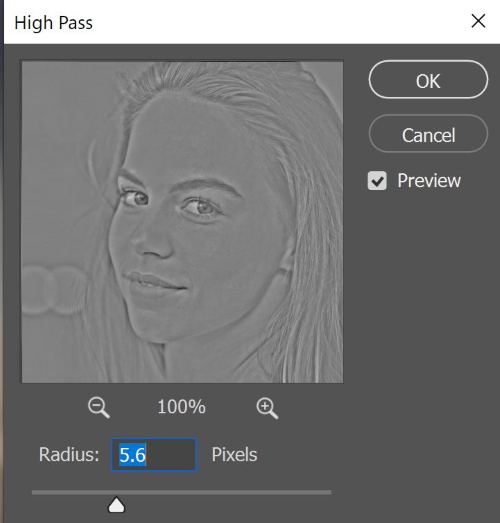
The Radius value affects the width of the edge. It controls the number of pixels extending outward from the edge. In other words, a Radius value of 1 pixel would mean that the High Pass filter is highlighting only a single-pixel along either side of an edge.
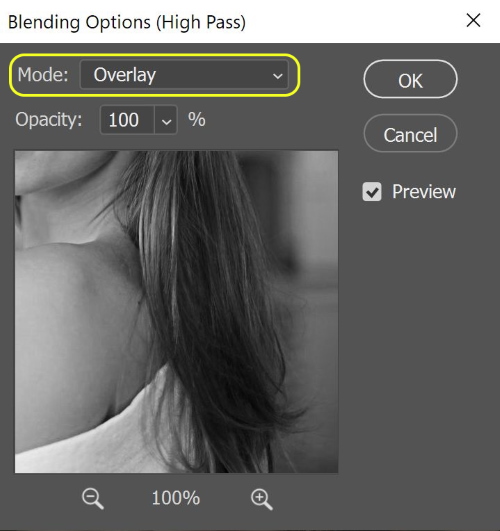
Once the edges are highlighted, we can then combine the High Pass results with one of Photoshop’s contrast-boosting blend modes to easily increase edge contrast without affecting other parts of the image. The two most commonly used blend modes for sharpening images with High Pass are “Overlay” and “Soft Light”. Overlay produces a higher contrast effect, resulting in a stronger amount of sharpening, while Soft Light gives you lower contrast and more subtle sharpening.
Example 2
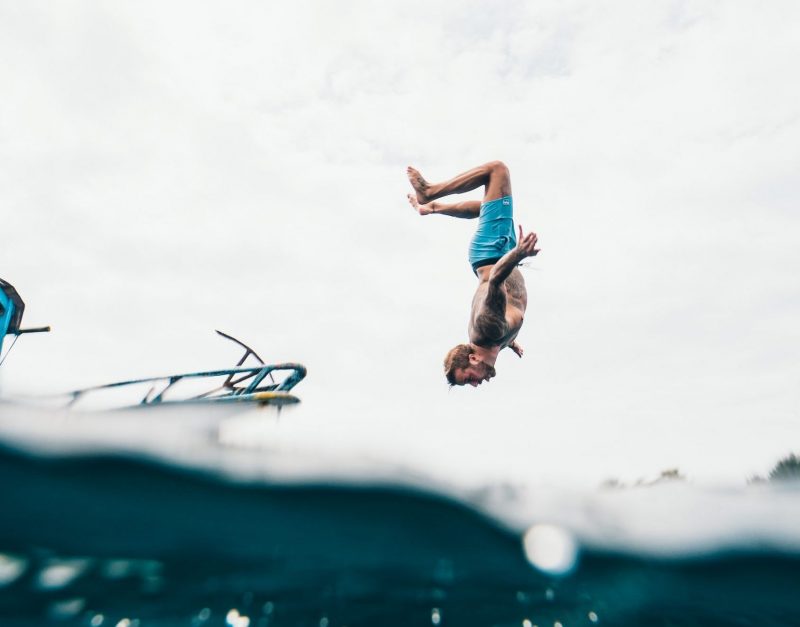
I will use the following image

Photo by Andrea Piacquadio from Pexels
Step 1
Repeat the steps from the previous example up to step 4
Step 2
Click Filter > Other > High pass
Adjust the Radius slider to define the edges.
Step 3
From the layer panel, double click the filter blending options

Step 4
To apply sharpness, from the blending options window, change the blending mode to “Overlay”, or “Soft Light”
Step 5
To apply a selective sharpness to different areas of the photo, we use a mask to limit the applied sharpness setting to the hair. (Black mask with the hair selection in white color)
Step 6
To apply another value of sharpness setting to the women’s eyes and lips.
Duplicate the layer (Ctrl + J), add a new mask to revels the eyes and the lips (White), and hide the rest of the photo (black)
Open the high pass filter again and redefine the edges of the eyes and the lips, and change the blending mode to “Overlay”, or “Soft Light”
The result is shown below
Another example

Photo by Arun Sharma on Unsplash
Method 3: using Smart sharpen filter
Smart Sharpen filter is better than Unsharp Mask; because the Smart Sharpen filter can detect edges, so it sharpens edges without sharpening noise. It also creates thinner, less noticeable halos around edges, resulting in a cleaner image. In addition, Smart Sharpen includes controls for fading the edge contrast in both the highlights and shadows, so your image looks sharper without losing detail.
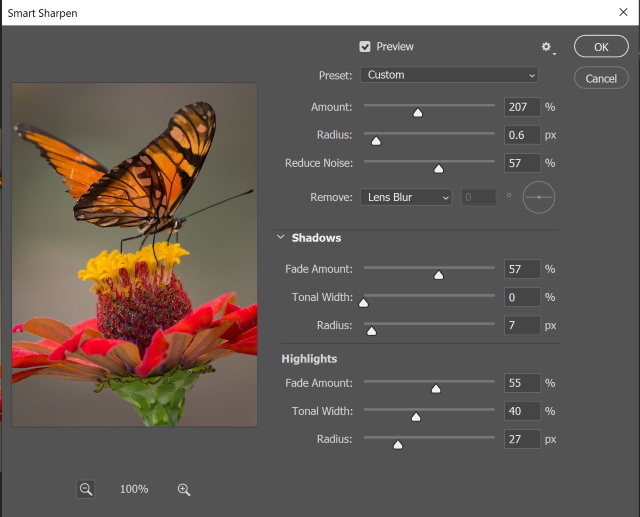
Amount: Sets the amount of sharpening. A higher value increases the contrast between edge pixels, giving the appearance of greater sharpness.
Radius: Determines the number of pixels surrounding the edge pixels affected by the sharpening. The greater the radius value, the wider the edge effects and the more obvious the sharpening.
Reduce Noise: Reduce unwanted noise while keeping important edges unaffected.
Remove: Sets the sharpening algorithm used to sharpen the image.
- Gaussian Blur is the method used by the Unsharp Mask filter.
- Lens Blur detects the edges and detail in an image, and provides finer sharpening of detail and reduced sharpening halos.
- Motion Blur attempts to reduce the effects of blur due to camera or subject movement. Set the Angle control if you choose Motion Blur.
Adjust sharpening of dark and light areas using in the Shadow and Highlight tabs. (Click the Advanced button to display the tabs). If the dark or light sharpening halos appear too strong you can reduce them with these controls, which are only available for 8‑bits and 16‑bits-per-channel images:
Fade Amount: Adjusts the amount of sharpening in the highlights or shadows.
Tonal Width: Controls the range of tones in the shadows or highlights that are modified. Move the slider to the left or right to decrease or increase the Tonal Width value. Smaller values restrict the adjustments to only the darker regions for shadow correction and only the lighter regions for highlight correction.
Radius: Controls the size of the area around each pixel that is used to determine whether a pixel is in the shadows or highlights. Moving the slider to the left specifies a smaller area, and moving it to the right specifies a larger area.
Example 3
I will use the following image
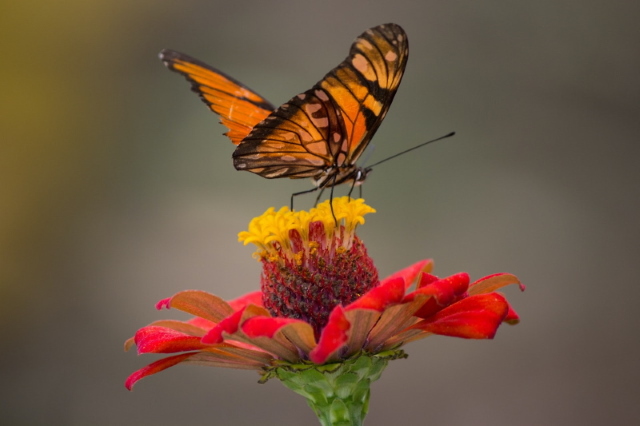
Photo by Leonardo Jarro from Pexels
The steps of this example are the same as mentioned in example 1, except we use the smart sharpen filter instead Unsharp Mask filter
Setting tips
- Amount values of between 150%and 200% work fine.
- Radius value of 1 to 3 pixels usually works great, when sharpening for print.
- The radius of 5 pixels to 1 pixel works better When sharpening for screen viewing, such as the web.
- To turn the edge detection feature on, set the Remove to Lens Blur.
- The default value of 10% is often all you need when setting the Reduce Noise slider
The result is shown below
Another example
Photo by Frans Van Heerden from Pexels
Thanks for reading, I hope you enjoyed the article if you have any questions just post them below & I will be happy to answer you.
If you enjoy the site, don’t forget to subscribe, we will only inform you when a new article is posted.


Thank you so much for this practical lesson on how to sharpen images in photoshop! Your examples really show how the technique can be used to make an image “pop” in specific places and make a much bigger overall impact on the viewer. This is a powerful tool to have in order to create much more effective imagery for work and for personal photos.
Thanks for your feedback
As I run an e-commerce brand, this is incredibly helpful! I didn’t realize high resolution photos would require an increase in contrast of 150 to 200%. The way you took the eye from somewhat dull to incredibly contrast is such an impressive feat. Thank you for all your advice and looking forward to more!
Thanks