

Optical and perspective distortion are the two types of distortions in photography. The optical design of lenses causes lens distortion; It is also called “lens distortion”. On the other hand, the perspective distortion is caused by the position of the camera relative to the subject or by the position of the subject within the image frame.
The aim of this article is to briefly explain each distortion type, and introduce to you how Photoshop can handle these distortions. I will discuss the two different tools available in Photoshop to correct photo distortion both manually and automatically. There are also many examples with illustrations and image samples to show you how to fix photo distortion.
What are the types of distortion?
The following are the common lens distortions:
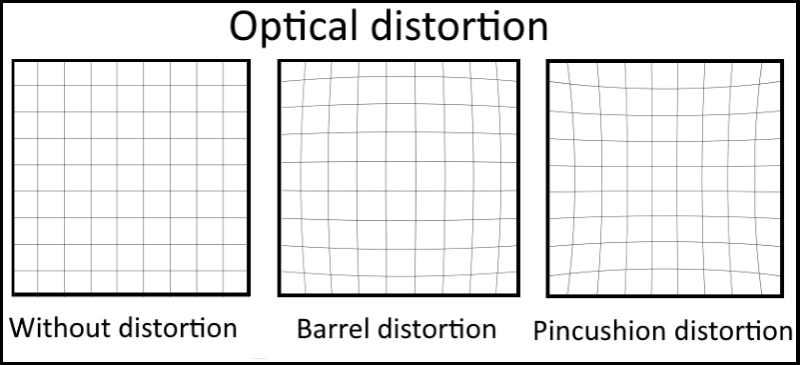
- Barrel distortion is a lens defect that causes straight lines to bow out toward the edges of the image.
- Pincushion distortion is the opposite effect, where straight lines bend inward.
- Chromatic aberration appears as a color fringe along the edges of objects, caused by the lens focusing on different colors of light in different planes.
- Vignetting is a defect that darkens the corners of an image due to light falloff around the perimeter of the lens.

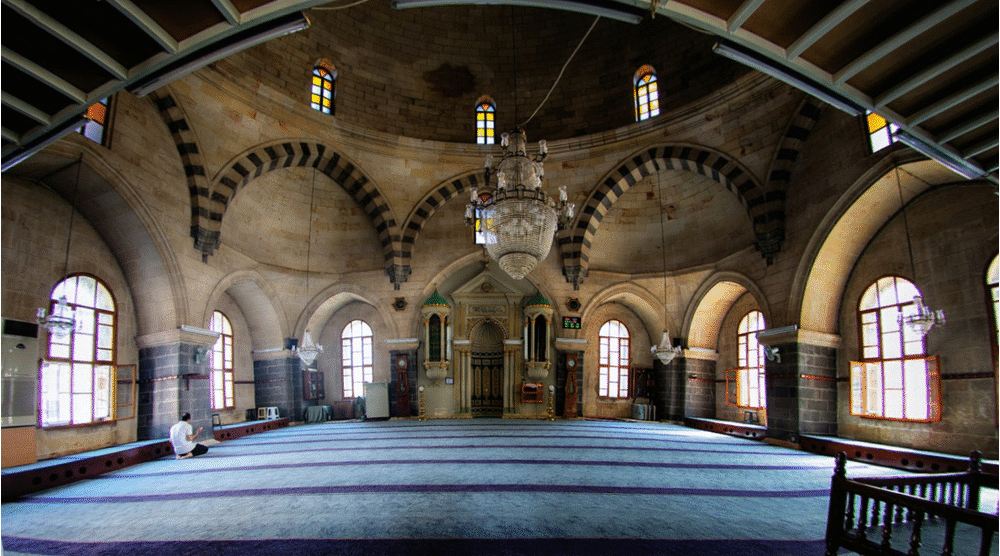
Photo by Ehab Amin
Photoshop tools for fixing distortion
Lens distortion
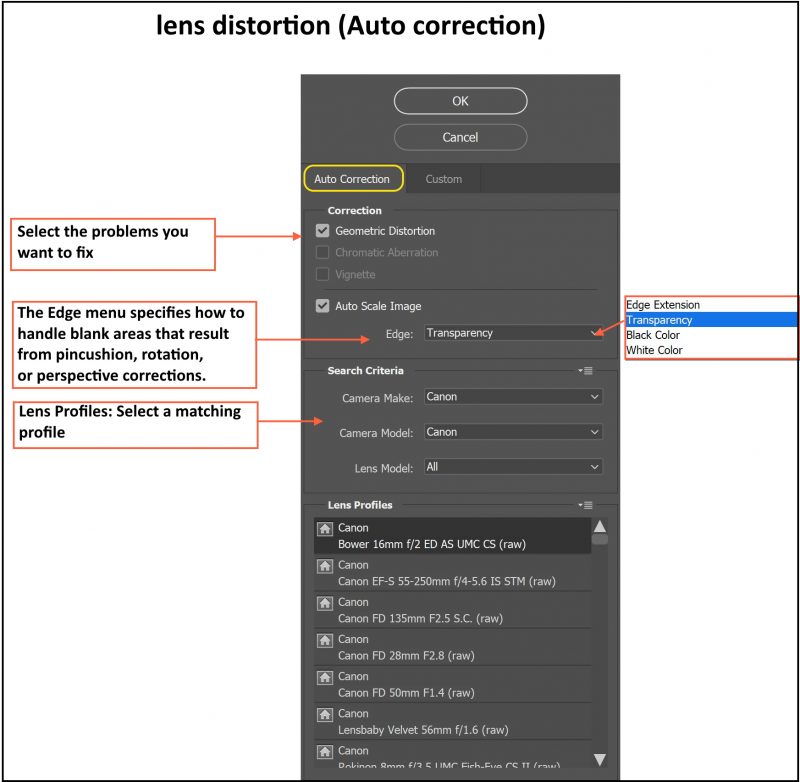
The Lens Correction filter fixes common lens flaws such as barrel and pincushion distortion, vignetting, and chromatic aberration. The filter works only with 8‑ and 16‑bit-per-channel images in RGB or Grayscale mode.
There are two main settings: Auto and custom corrections:
Auto-Correction
The default Auto-Correction option quickly and accurately fixes distortion. For proper automatic correction, Photoshop requires Exif metadata that identifies the camera and lens that created the image and a matching lens profile on your system. Adobe Photoshop includes numerous lens profiles, which you can use to correct common lens distortion.
Remarks:
- There are separate lens profiles for raw and non-raw files. Photoshop displays only the profiles available for the file type of the selected image.
- Best results occur when you apply lens profiles to raw files.
- When you apply a lens profile to a non-raw file, such as a JPEG, you can experience unexpected results.
How to use:
- Choose Filter > Lens Correction.
- In the upper-right corner of the dialog box, click the Custom tab.
- Set the following options
A sample photo is shown below after fixing lens correction

Photo by Roussety Gregory from Pexels
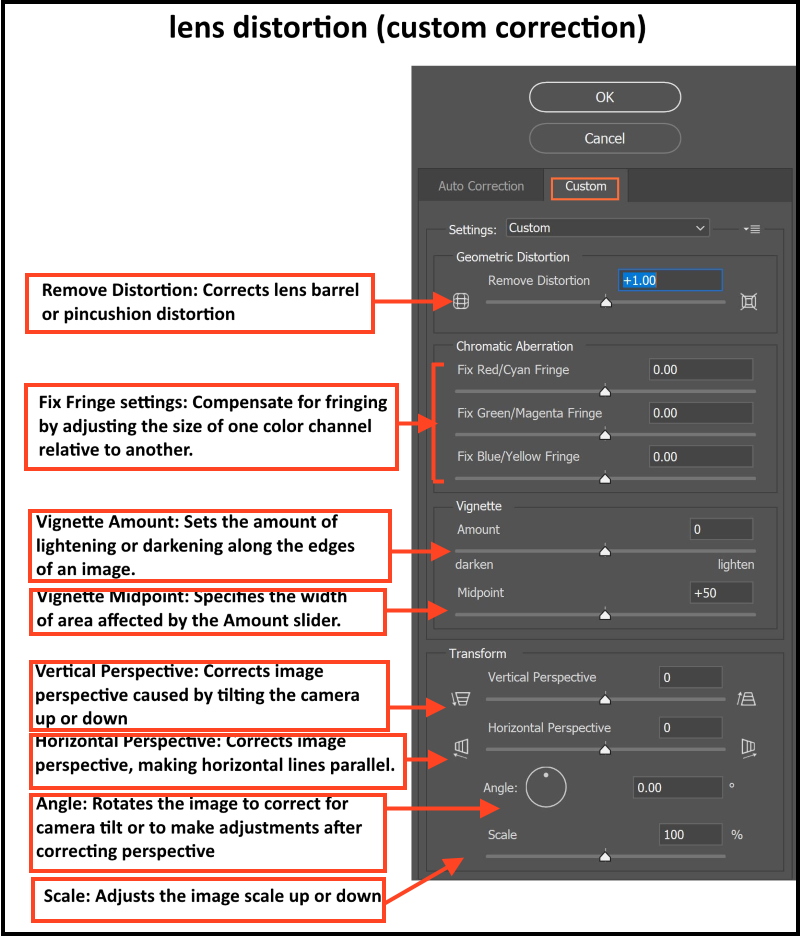
Custom Corrections
You can apply manual correction alone or use it to refine automatic lens correction.
How to use:
- Choose Filter > Lens Correction.
- In the upper-right corner of the dialog box, click the Custom tab.
- Set the following options
A sample photo is shown below after fixing lens correction
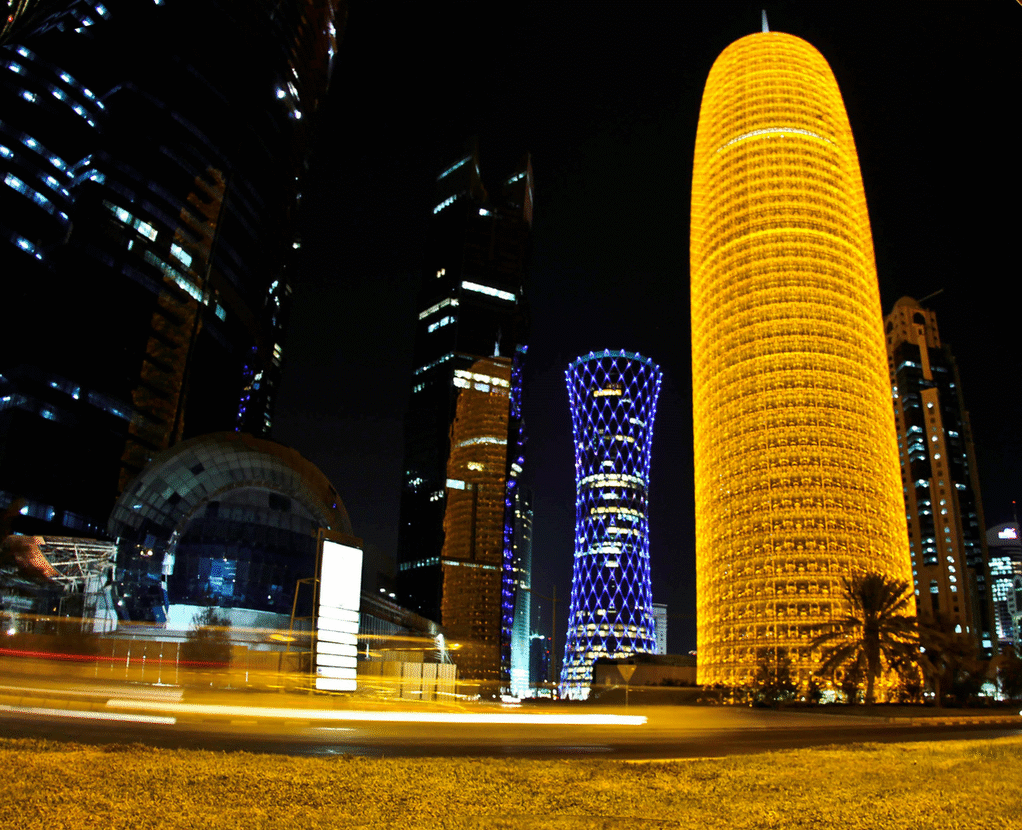
Photo by Ehab Amin
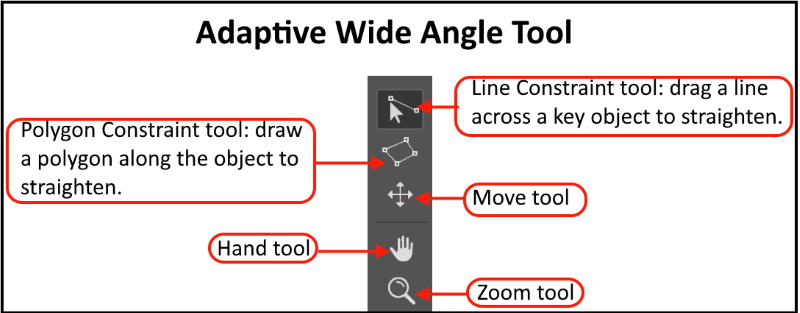
The Adaptive Wide Angle filter
You can use the Adaptive Wide Angle filter to correct lens distortions due to using wide-angle lenses and fisheye lenses. You can easily straighten lines that appear curved in panoramas or photos taken with fish-eye and wide-angle lenses. The filter detects the camera and lens model and uses the lens characteristics to straighten the images. You can also add multiple constraints to indicate straight lines in different parts of the picture.
Remarks
- It is the best tool for correcting extreme distortion
- You can also use this filter on images that do not contain camera and lens information
- You can edit the filter settings later (nondestructive), if you convert the layer where you apply the filter to a smart object
How to use:
The following is an example of how to use the adaptive wide-angle to fix distortion in the below photo:

Photo by mostafa meraji from Pexels
Step 1
Duplicate the layer: use the shortcut CTRL + J
Step 2
Convert to Smart Objects by Layer > Smart Objects > Convert To Smart Object. Or Press f5
Step 3
Choose Filter > Adaptive Wide Angle
The following tools appear at the top left of the screen
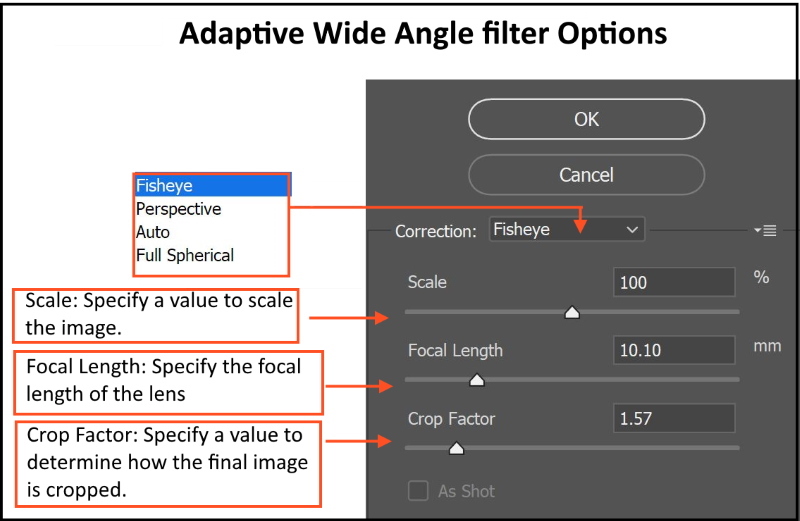
And the options menu to the right of the screen
Step 4
Choose a correction type from the menu: fisheye
Step 5
Choose the Constraint tool. Drag a line across a key curved object to straighten. To make an edge vertical: hold the Shift key and drag a vertical line
After the correction is complete, the picture may have several blank areas, as shown below
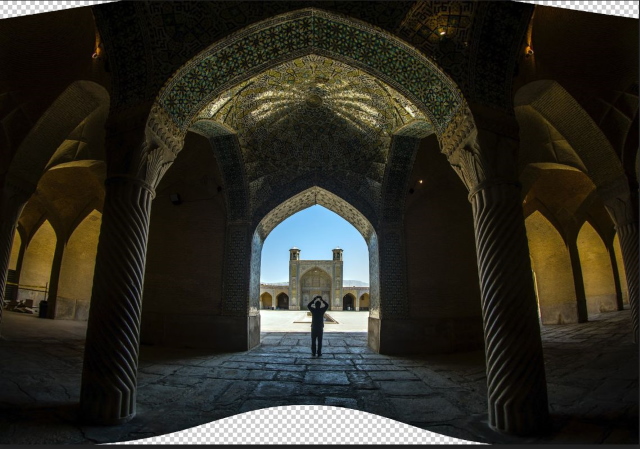
To fill these empty areas do the following
Step 6
Select the filled areas by pressing Ctrl + click the thumbnail of the layer
Invert the selection (to select the empty areas) by Select > Inverse or pressing Shift + Ctrl + I
Expand the selection: Select > Modify > Expand
The selection is expanded by 20 pixels as shown below

Select content-aware fill: Edit > Content-Aware fill
The final edit is shown below

More Examples

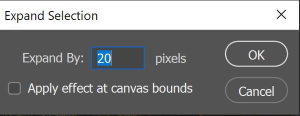
Photo by Ehab Amin
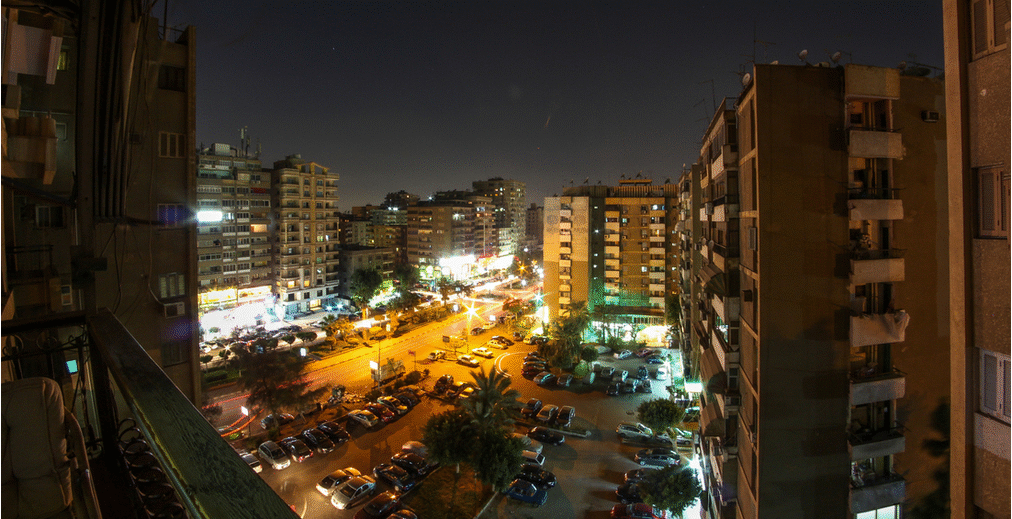
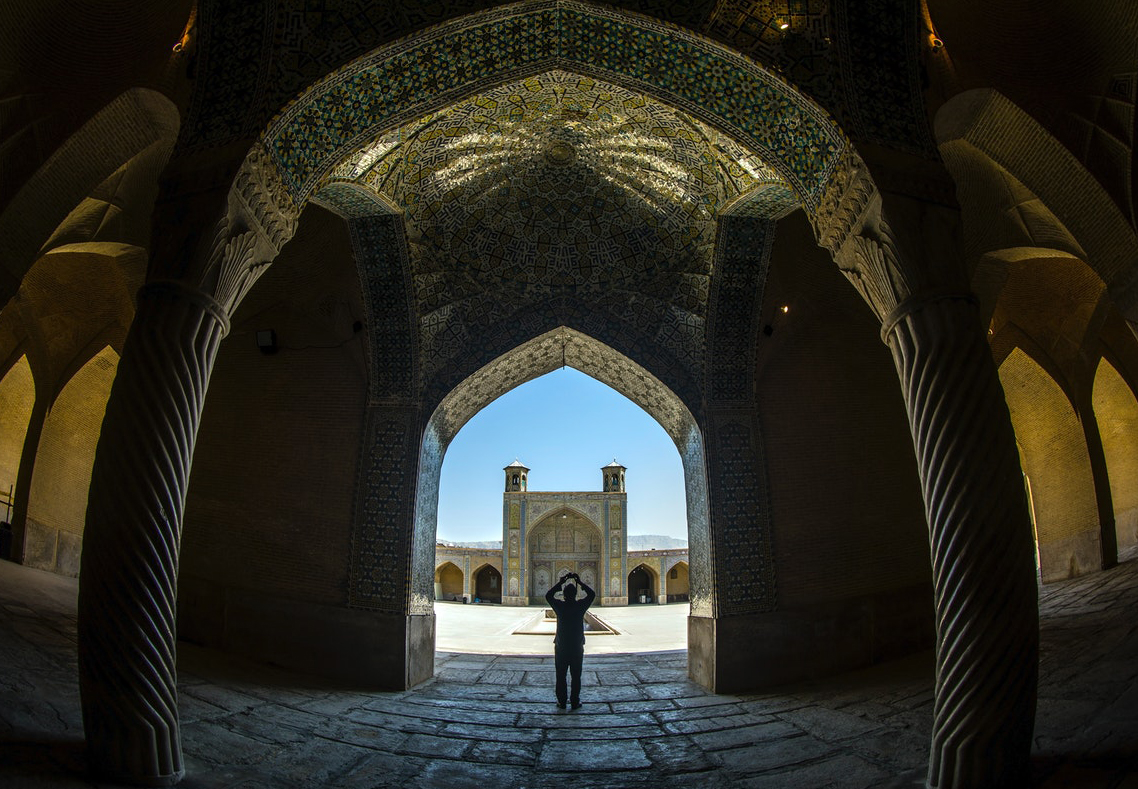
Photo by Ehab Amin
Photo by Ehab Amin
Thanks for reading, I hope you enjoyed the article if you have any questions just post below & I will be happy to answer you.
The featured Photo by Mehmet Turgut Kirkgoz from Pexels
If you enjoy the site, don’t forget to subscribe, we will only inform you when a new article is posted.


Hello there, Thank you very much for this mind blowing article. I am happy and feel lucky to have come across this information for free. I have loved photography since I was a kid and I have always played a little with Adobe photoshop and I keep facing a lot of issues including this one. Thank you for the perfect explanation you have given to enable one understand perfcetly. I never knew it wasnt as hard as this.
Glad you liked the article!
wow,
this amazing with all the little knowledge I have I have not even known is there anything like distortion in photography, I really appreciate those who made this article, because this has really opened my eyes, and with what I have read so far it will be a starting point into improving my skills by fixing distortion in my photos.
Thanks for the comment