


Sky Replacement is now easier than ever after the last update that has just recently launched (Photoshop 2021 ver. 22.0.0). The Sky Replacement feature automatically isolates the sky in your image from the foreground so you can replace the sky in a matter of seconds. Machine learning models powered by Adobe Sensei do the masking and blending for you and then harmonize the foreground of your image with the chosen sky!
Before this update, replacing the sky required multiple steps and careful fine-tuning in order to achieve a seamless look. Now you can save time and get the look you want by letting Adobe Sensei do the masking and blending for you.
The new sky replacement tool uses machine learning to automatically identify the foreground and background of a picture, saving people from creating complicated masks to separate the two. You can load in a number of dramatic preset skies, and the algorithms will automatically tweak the warmth and temperature of the foreground to match the new sky. If you add in a warm, golden sunset, for example, it’ll update the coloring of the rest of your picture to match.

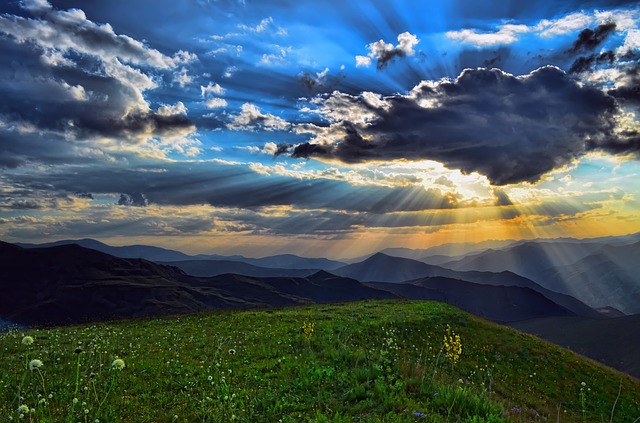
Image by Frank Winkler from Pixabay
Why you need a sky replacement tool
While sky replacement is still a contentious issue, it can mean a lot to many real estate photographers, wedding photographers who do outside events, and some landscape photographers who find it useful at times. The controversy will always be with us, and that’s a healthy thing.
How to replace the sky in your photo
Step 1
Open file
Step 2
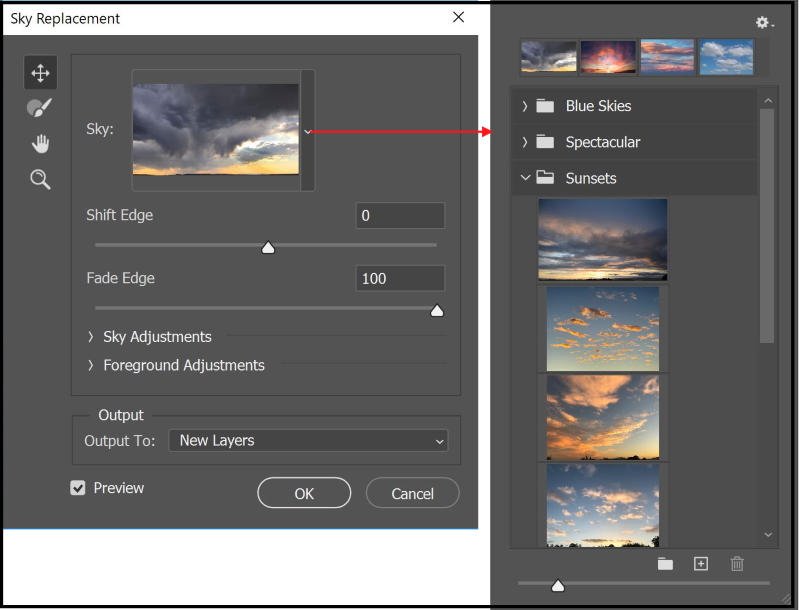
Select sky replacement tool by Edit > sky replacement
Pick up your favorite sky, you can also load and add a sky of your own.
Step 3
Adjusted the following parameters if required
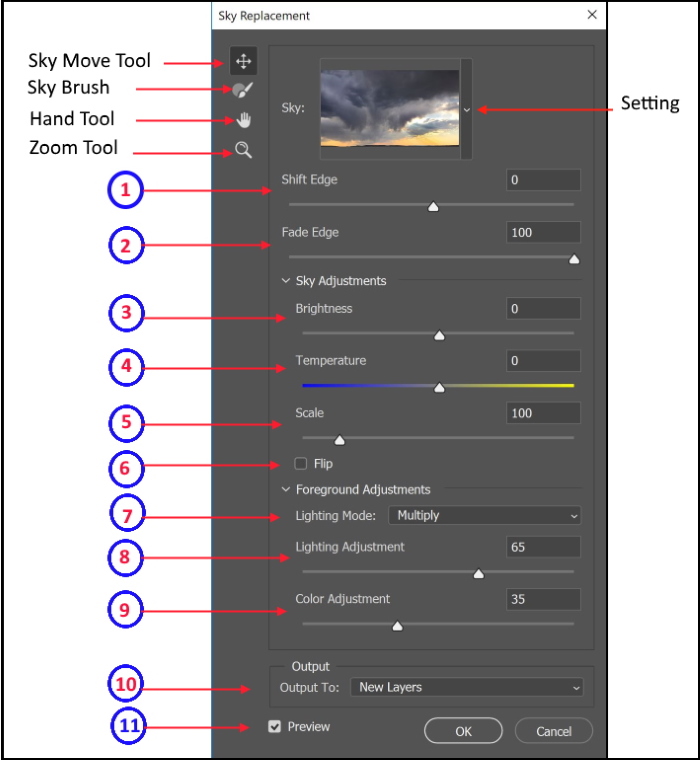
1- Shift Edge
Determines where the border between the sky and the original image begins
2- Fade Edge
Sets the amount of fading or feathering from the sky image to the original photo along the edges
3-Brightness
Adjusts the brightness of the sky
4- Temperature
Adjusts the temperature of the sky warmer or cooler
5- Scale
Resizes the sky image
6- Flip
Flips the sky image horizontally
7- Lighting mode
Determines the blend mode used for adjustments
8- Lighting Adjustment
Opacity slider that lightens or darkens the main image where it blends with the sky – a setting of zero will not make any adjustments
9- Color Adjustment
The opacity slider determines how strongly the foreground is harmonized with the sky colors – a setting of zero will not make any adjustments
10- Output
Allows you to select whether the changes to the image are placed on New Layers (named layer group with masks) or a Duplicate Layer (single flattened layer)
11- Preview
Allows you to see the changing you have done
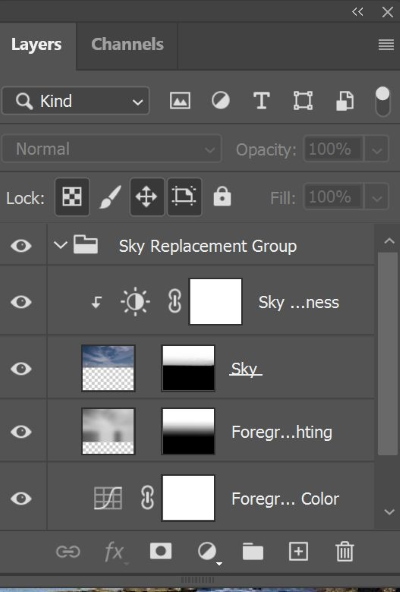
Step 3
When you’re done with the Sky Replacement window, and press O.K, the program will even split each adjustment into a series of layers and masks so that you can alter them later, as shown below in the layer panel.
Examples

Image by David Miller from Pixabay
Image by Dan Fador from Pixabay
Image by lumix2004 from Pixabay
Photo by Ehab Amin
Photo by Ehab Amin
Photo by THÁI NHÀN from Pexels
Photo by Ehab Amin
Are you looking for Photo editing resources or editing Services?
Some photographers are struggling to learn and master editing software like Lightroom or Photoshop, they found the editing process is taking too much of their time. Therefore, assigning the editing tasks to an editing service may be the answer.
On the other hand, some others are looking for editing resources like actions, overlays, and textures to help them. For those I highly recommend paying a visit to my store, it has amazing professional photo editing tools.
In addition, you can check my editing tutorials, there are many tips and tutorials there.
Thanks for reading, I hope you enjoyed the article if you have any questions just post them below & I will be happy to answer you.
If you enjoy the site, don’t forget to subscribe, we will only inform you when a new article is posted.


This looks like an amazing tool!! Looking at your pictures I can see the seamlessness of changing the sky to add a dramatic effect or just to clear up a few clouds. I like the fact that it will also subtly change the coloring in the entire picture to match. The program appears straightforward and easy to use (after a little practice). I have a couple of friends who are up and coming professional photographers so I’m going to forwrd this article to them!
Yes, it is an amazing tool, it facilitates sky replacement workflow to only a few steps. Thanks for your comment
Hi Amin, I truly enjoyed your article about sky replacement. The article is very informative and educative even though I’m not a photographer, but I have learned so much about sky replacement and adobe sensei. The part that caught my interest is those steps on how to replace the sky from your photo. Thank you so much for sharing this helpful information, and I’ll be visiting your site regularly for more posts.
Thanks for the comment, I’m very glad you liked the article, you are always welcomed