


Although 3D modeling is considered part of the art and design workflow, photographers can also use these Photoshop tools to edit and composite photos. In this article, I will overview the fundamentals of 3D image modeling. Then I will make some examples of each type of 3D modeling.
Fundamentals of 3D modeling
Each Photoshop 3D file consists of the following components:
-
Meshes
They provide the underlying structure of a 3D model. A mesh is often visualized as a wireframe, a skeletal structure built from thousands of individual polygons. In Photoshop you can view meshes in a variety of render modes. You can change its orientation and transform it by scaling along different axes. Depth maps are 2D images that use their luminance values to create 3D objects. Depth maps in Photoshop do alter the 3D geometry of an object.
-
Materials
A mesh can have one or more materials associated with it, which control the appearance of all or part of the mesh. The material in turn relies on subcomponents called texture maps, whose cumulative effect creates the appearance of a material. The texture map itself is a 2D image file that creates various qualities such as color, pattern, shininess, or bumpiness. One of the important textures is the bump map. Bump maps are grayscale images that allow you to fake detail in 3D objects. The detail that they generate is simply a lighting trick on the surface of 3D objects. The actual 3D geometry is not changed in any way.
-
Lights
You can add three types of lights to your 3D image: Infinite, Spot, Point lights, as well as Image-based lights that wrap around a scene. You can move and adjust the color and intensity of existing lights, and add new lights to your 3D scene.
3D object and camera tools
Use the 3D object tools to change the position or scale of a 3D model; use the 3D camera tools to change the view of the scene. While you manipulate the 3D model, the camera view remains fixed.
-
3D object tools
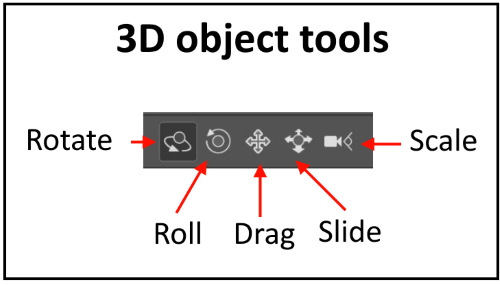
-
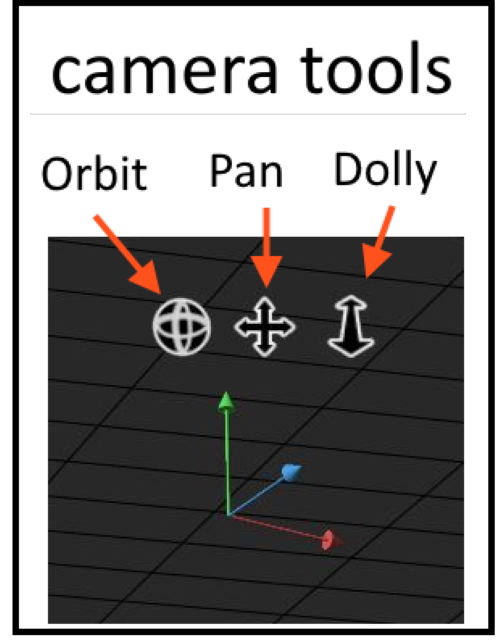
Camera tools
Create 3D objects from 2D images
You can use a 2D layer as a starting point, and then Photoshop can build a variety of basic 3D objects. After creating a 3D object, you can move it in 3D space, change the texture, add lighting, or merge it with other 3D layers.
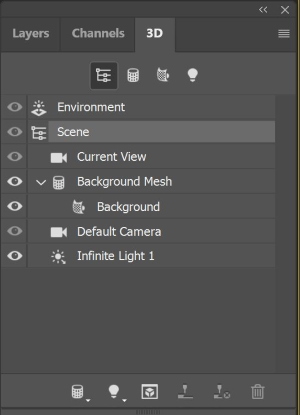
Make sure that the 3D is checked in the window panel.
#1- Create a 3D postcard
- Open a 2D image and select the layer you want to convert to a postcard. The following menu is shown.

- Choose 3d postcard, click create

- The 2D layer is converted to a 3D layer in the Layers panel. You can change the camera view, and add a light source.
#2- Create a 3D extrusion
You can add depth to your 2D text layer as follow
- Create a new file with the text you’d like to turn into a 3D image.
- From the 3D menu, choose 3D extrusion, click create
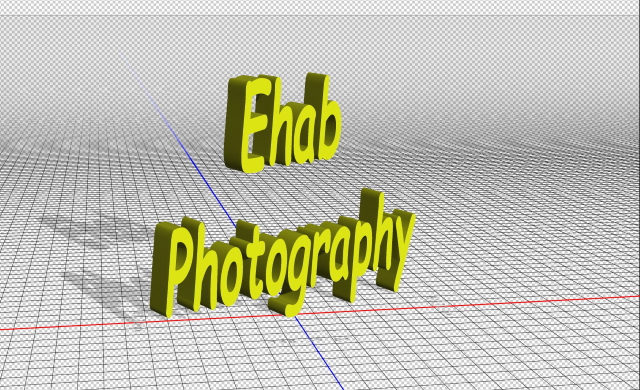
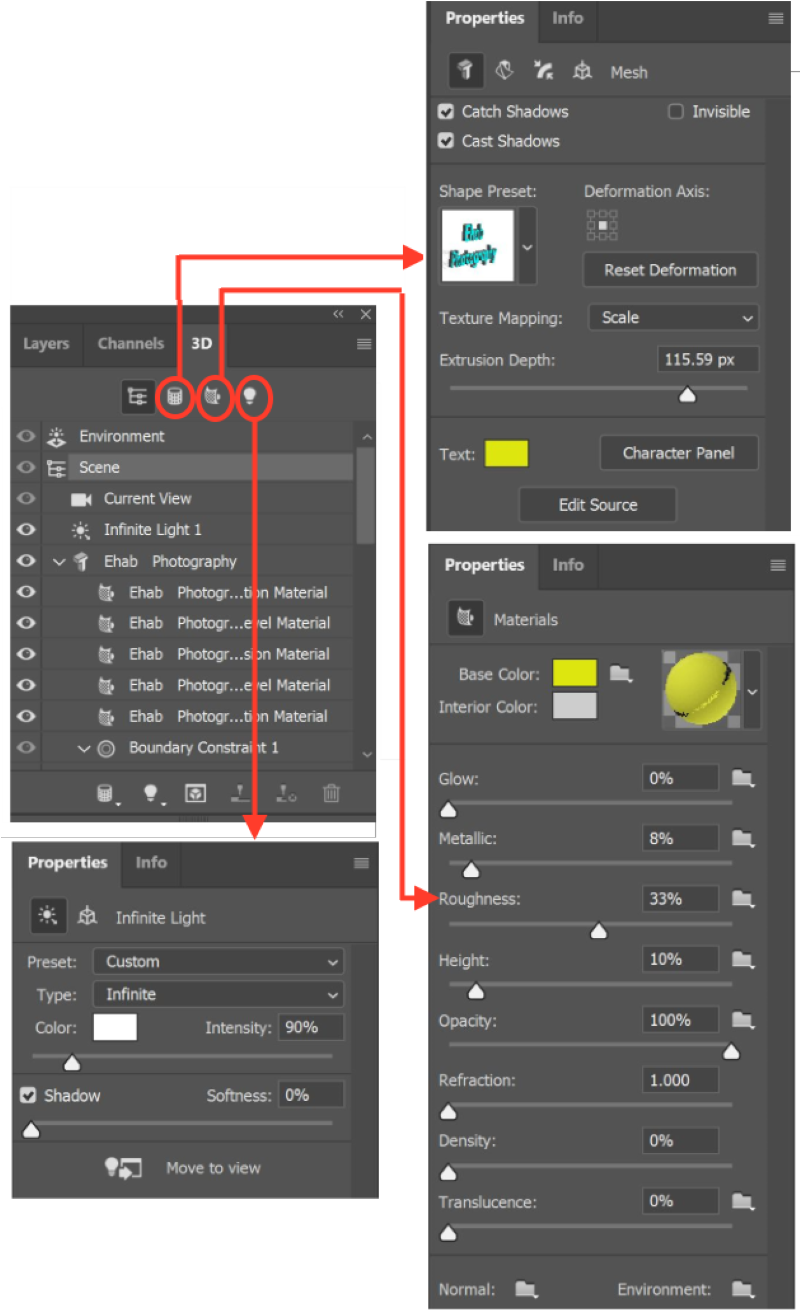
- The 2D layer is converted to a 3D layer in the Layers panel. Then you can choose mesh or material, or light to edit and adjust the properties of each of them. For example, you can change the depth of extrusion from the mesh properties, or change the texture from the materials properties widow; also, you can change the light direction and intensity from the light properties panel. The following are the properties panel for the three components of the 3D model (Mesh, Materials, Light)
#3- Create mesh from preset
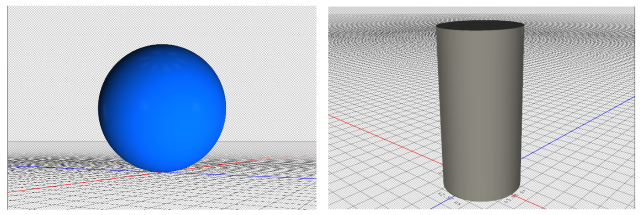
Photoshop offers a set of 3D shapes (donut, sphere, hat, cone, cube, cylinder, soda can, and wine bottle) you can choose one of them and build your 3D model. You can also add your own custom shapes to the shape menu.
- Open a 2D image and select the layer that you want to convert to a 3D shape.
- From the 3D menu, choose mesh from preset, choose the shape you want then click create
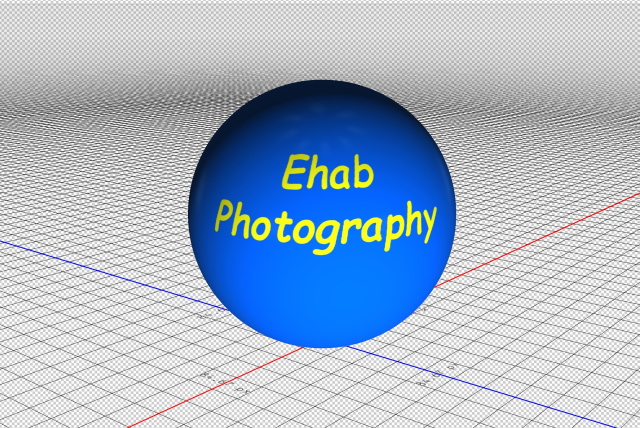
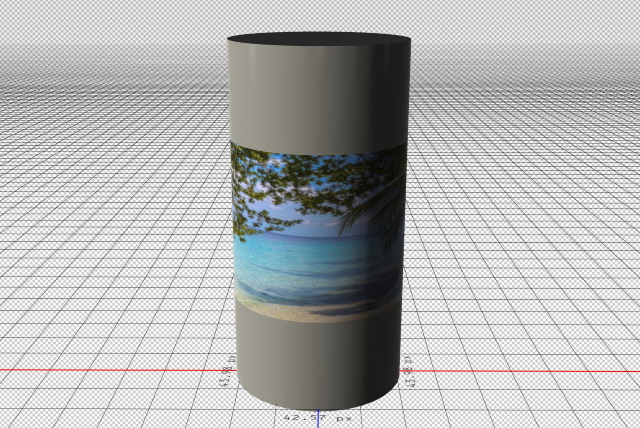
- The 2D layer is converted to a 3D layer in the Layers panel. Then you can choose mesh or material, or light to edit and adjust the properties of each of them.
- In the following examples, I changed the texture by adding text to the sphere and adding a photo to the cylinder
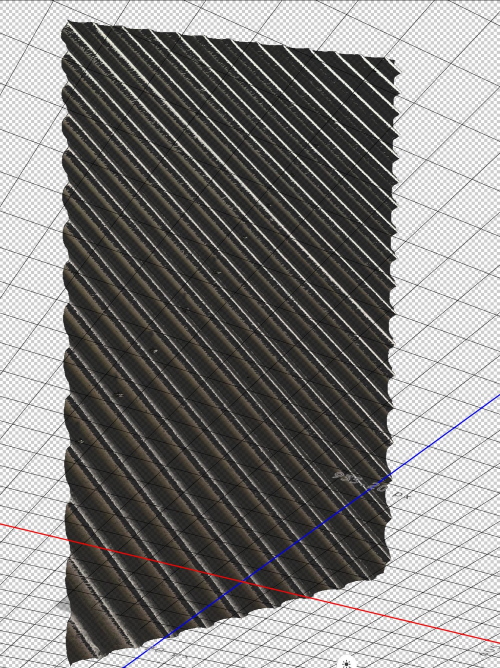
#4- Create mesh from the Depth map
The create Mesh from depth map converts an image into a depth map, which translates lightness values into a surface of varying depth. Lighter values create raised areas on the surface, darker values create lower areas. Photoshop then applies the depth map to one of four possible geometries to create a 3D model.
- Open a 2D image and select a layer that you want to convert to a 3D mesh.
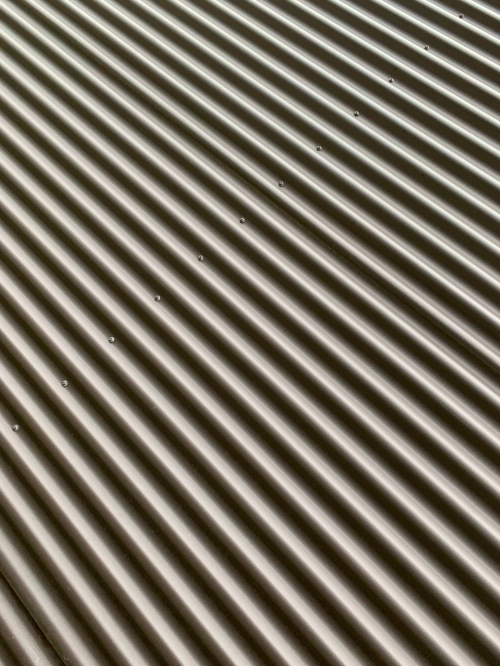
- Duplicate the layer
- To fine-tune the conversion, you may convert the image to grayscale mode. (Choose Image > Mode > Grayscale)
- From the 3D menu, choose mesh from the depth map, choose a plane to apply depth map data to a planar surface.
- Use the 3D object tools to scale the depth at the Z-axis.
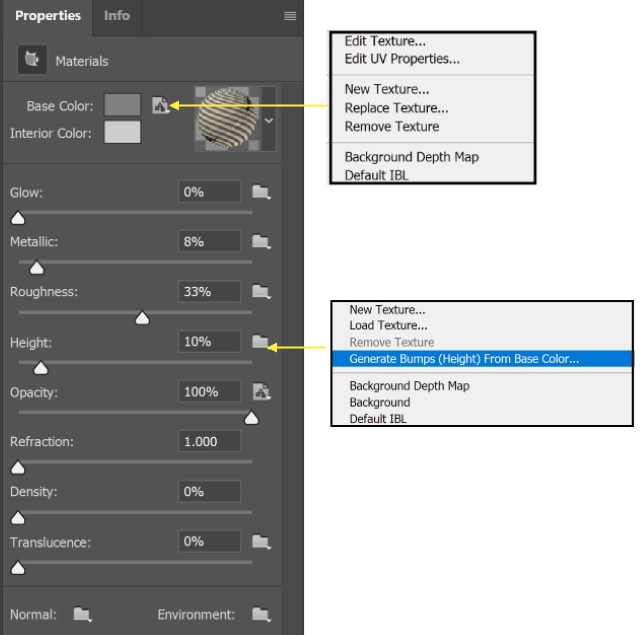
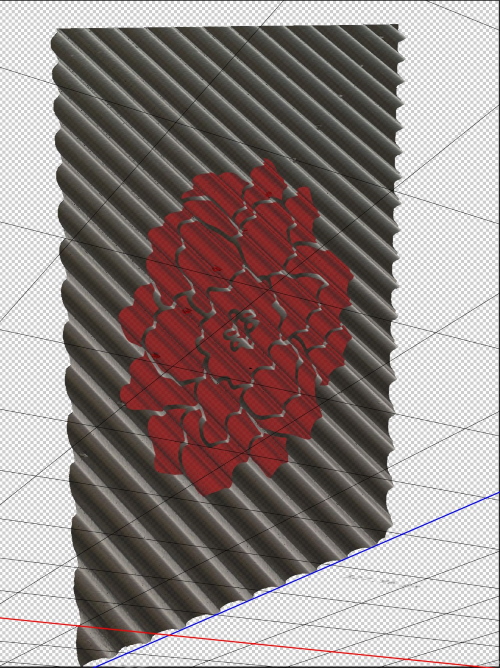
- To fine-tune the depth, you can create a bump map and change its height. Bump maps are image files that are used to simulate texture without actually affecting a 3D model’s underlying geometry. From the material layer properties, create a bump map
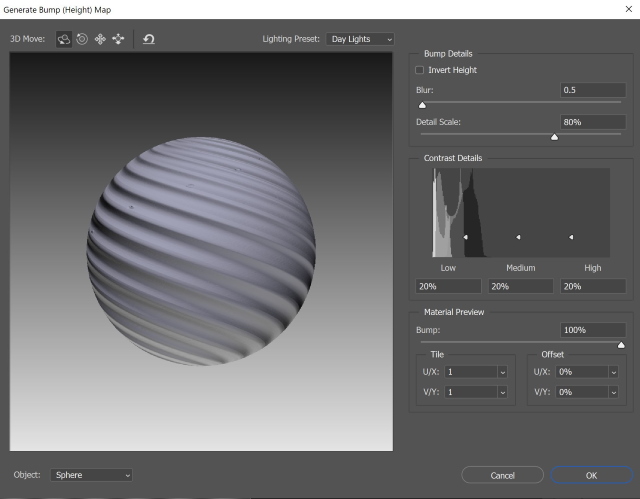
- The pump map window shows up, and you can make some adjustments
- From the 3D menu, choose light. Add a light source to the scene and adjust its direction and intensity by moving the handle.
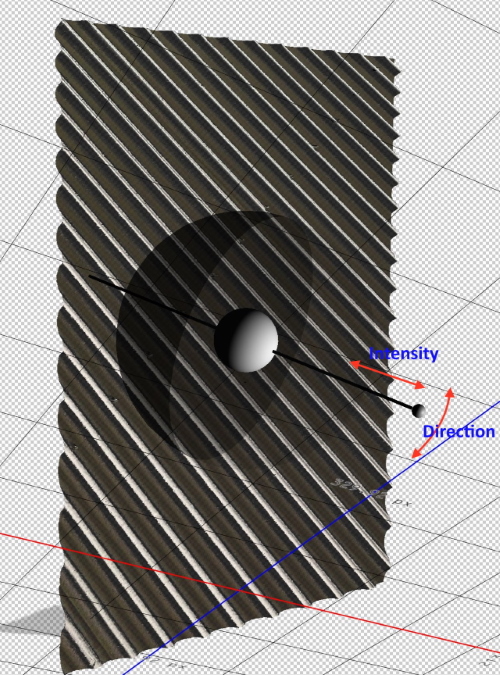
- The 3D model will look like the below image
- You can edit the background texture, from the icon beside the Base color in the Materials properties window. Choose edit texture, a new tap will open with the background. In this example, I add a shape of a flower to the background. Press Ctrl + S to save the new background. The modified texture is updated in the 3D model. The final 3D model is shown below
Another example:
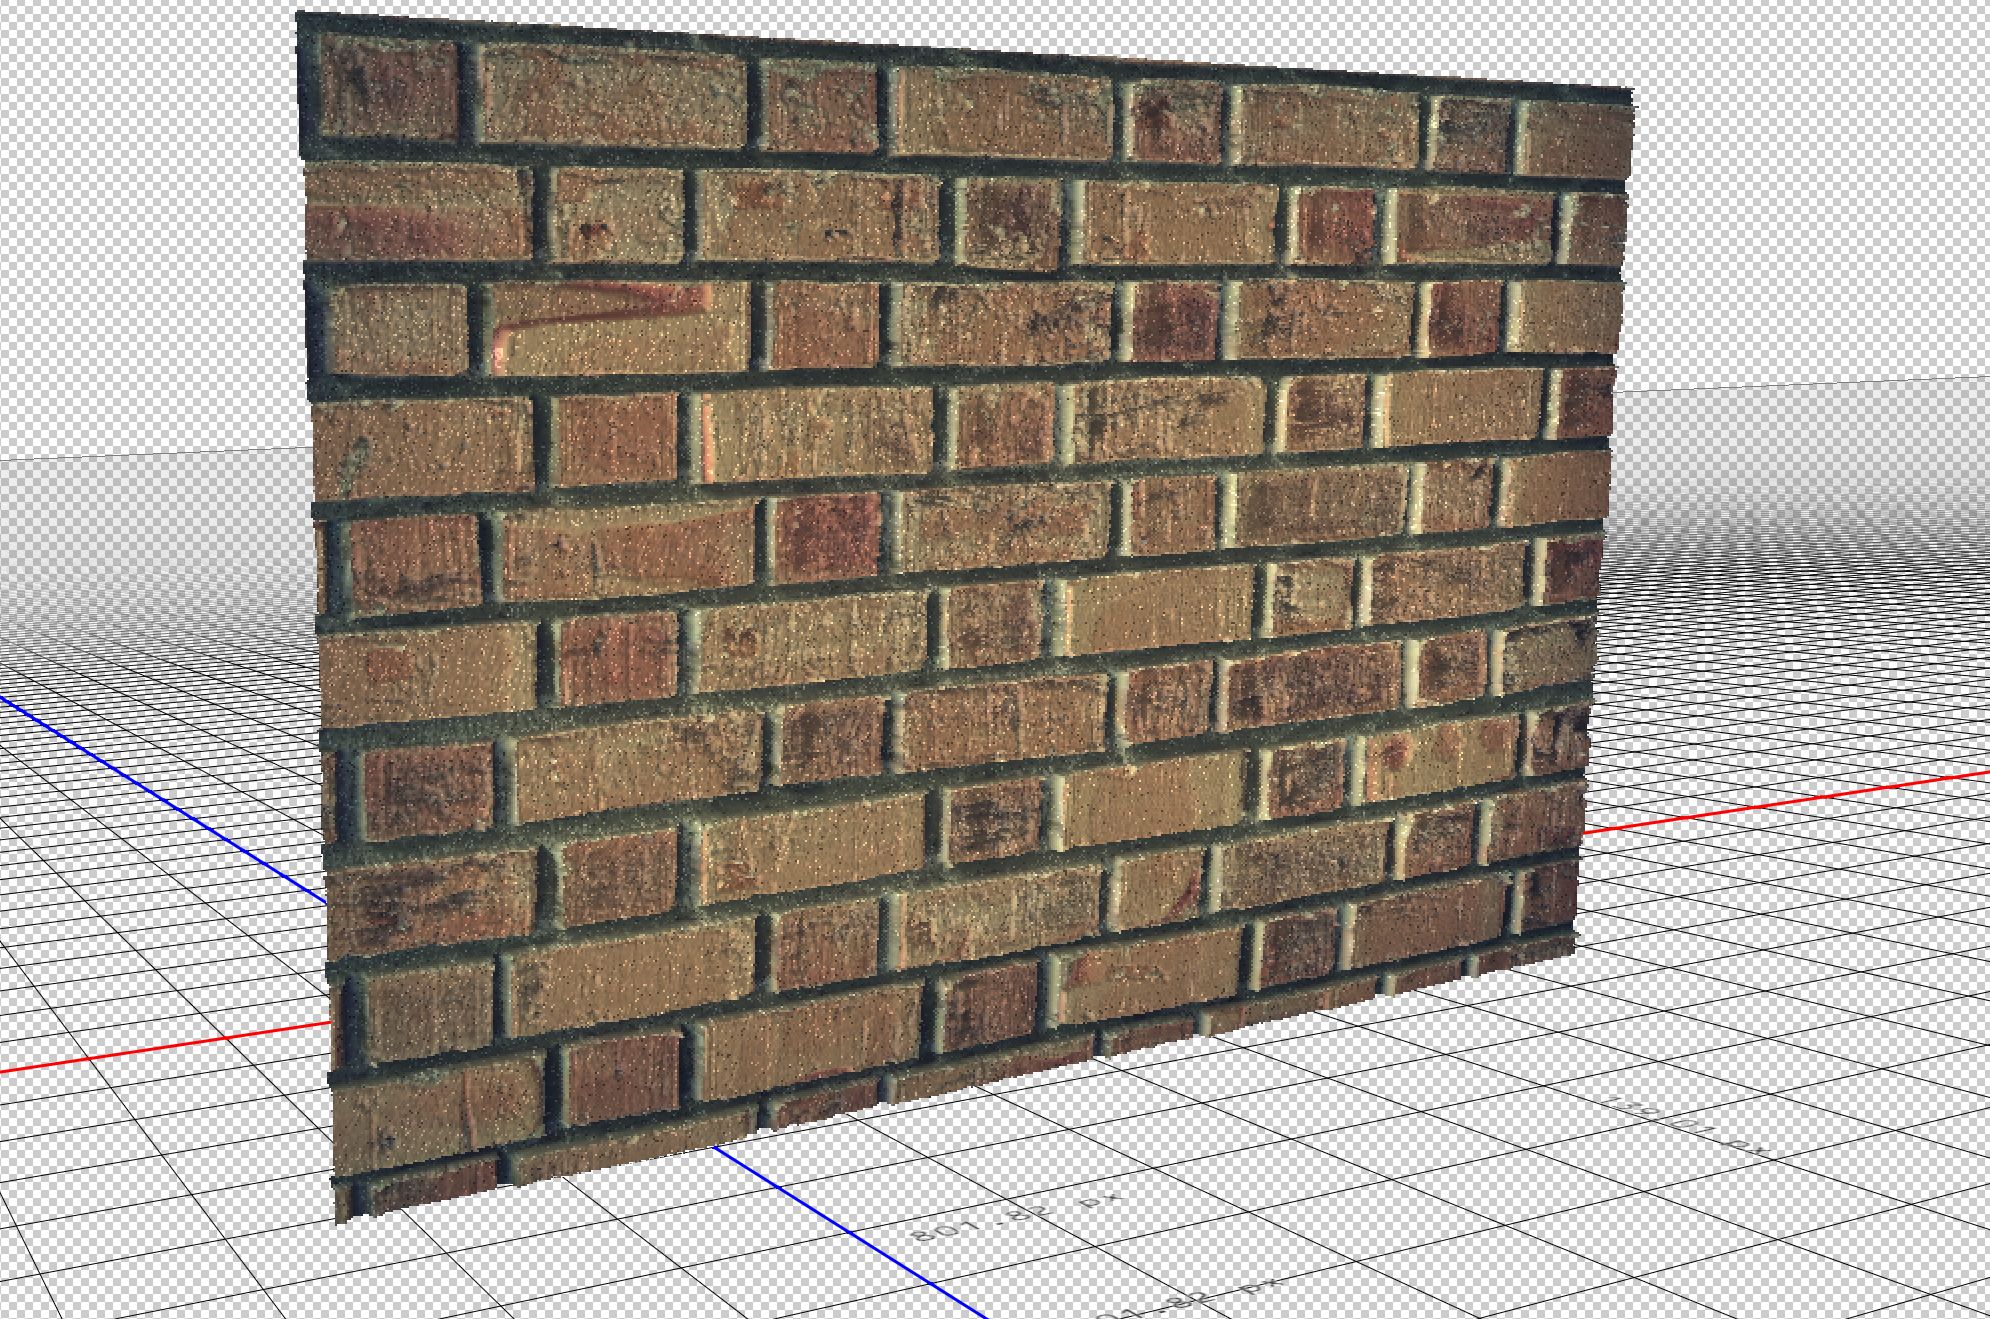
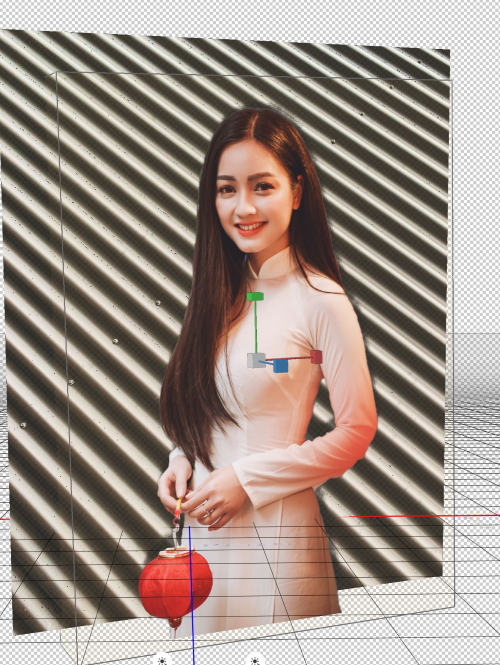
Combining two 3D photos
You can combine two 3D photos, as follow:
- Open the background 3D model, I used the background from the last example
- Open the subject photo as a layer
- Convert the subject layer to a postcard 3D model
- Merge the two layers by Layer > Merge layer
- Move the subject mesh layer in the z-axis to make prober distance between the subject and the background
- Add light
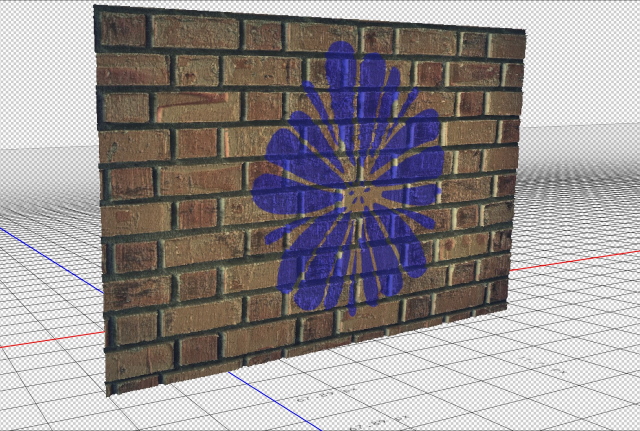
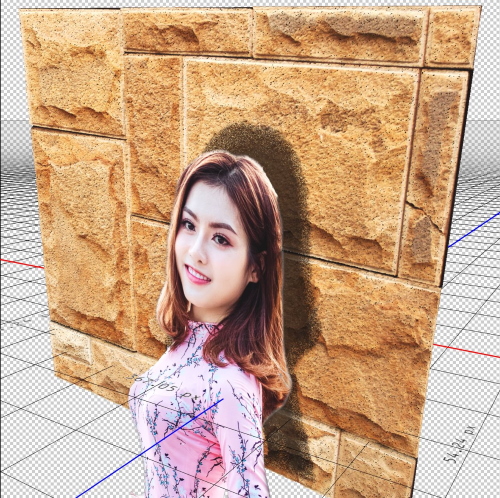
Another example
Remark
After finishing your composite, use the render key to finalized the 3D model. Depending on the complexity of your photos, the rendering process will take a considerably long time
Thanks for reading, I hope you enjoyed the article if you have any questions just post them below & I will be happy to answer you.
The used Photo in the examples by Tuấn Kiệt Jr. from Pexels
If you enjoy the site, don’t forget to subscribe, we will only inform you when a new article is posted.


Hello Hashem,
Thank you for much for sharing this informative article. Creating 3 dimensional images couldn’t have gotten any easier. I feel very lucky to have come across this and learn actually from this football. game. I had always been a fan of photoshop till I started to use it to start editting pictures then you appear. Thanks once again Amin.
Thanks for your nice comment
The make Mesh from profundity map changes over a picture into a profundity map, which makes an interpretation of delicacy esteems into a surface of fluctuating profundity. Lighter qualities make raised regions on a superficial level, hazier qualities make lower zones. Photoshop then applies the profundity guide to one of four potential calculations to make a 3D model.
Thanks for the comment