

Introduction
Achieving captivating and unique lighting styles for your portrait photos can significantly enhance the overall mood and impact of your images. By skillfully manipulating the position, types, and power of your light sources, you can create a wide array of visually stunning effects. Before delving into the various lighting setups and styles, let’s first review some fundamental definitions and terms essential to understanding portrait lighting.
Definitions
Key light
The key light is the first and usually, the most important light that a photographer will use in a lighting setup. The purpose of the key light is to highlight the form and dimension of the subject. The key light can be placed high or low producing different effects. The most common vertical position for the key light is slightly above the eye line; the nose should not cast a shadow on the lips. The main devices are flash or strobe and softbox or umbrella.
Fill light
The fill light may be used to reduce the contrast by filling the shadows with light to show some amount of detail typically seen by the eye in average lighting and considered normal. So using more or less fill light will make shadows seem lighter or darker than normal which will cause the viewer to react differently. The main devices are flash or strobe and softbox or umbrella, and reflector.
Background light
It is used to illuminate the background area of a set. The background light will also provide separation between the subject and the background.
Spill fill
The term “spill fill” refers to fill light that results from the footprint of light sources bouncing off surfaces in the shooting environment.
Backlight
Backlighting is the process of illuminating the subject from the back. It creates a glowing effect on the edges of the subject, while other areas are darker.
Lighting ratio
The lighting ratio refers to the comparison of key light to the fill light. The higher the lighting ratio, the higher the contrast of the image; the lower the ratio, the lower the contrast. Light is measured in foot-candles. A key light of 100 foot-candles and a fill light of 100-foot candles have a 1:1 ratio (a ratio of one to one). A key light of 800 foot-candles and a fill light of 200-foot candles has a ratio of 4:1.
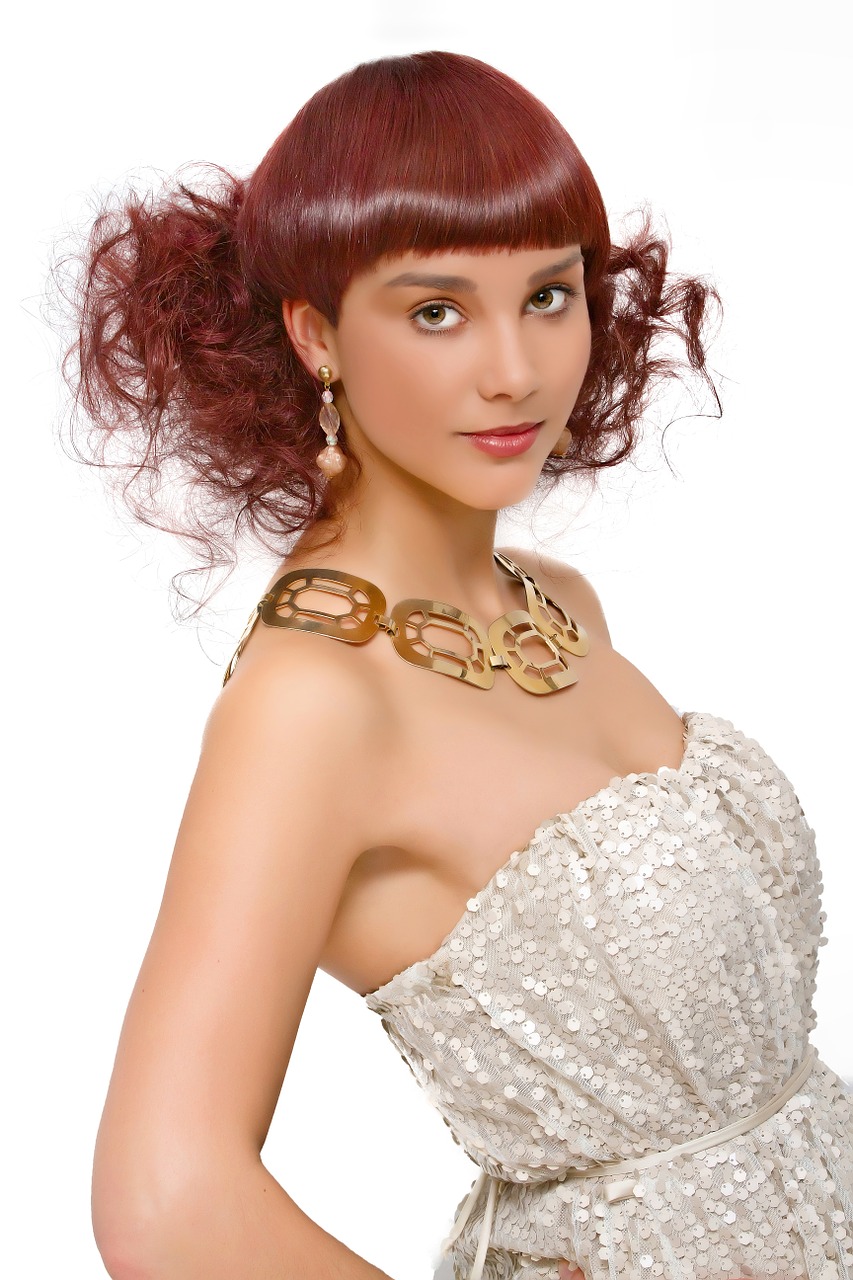
High-key lighting
High key is a style of lighting for photography that aims to reduce the lighting ratio present in the scene. It normally uses three-point lighting sources: a key light, a fill light, and a backlight for illumination.
Low-key Lighting
Low-key lighting often uses only one key light, optionally controlled with a fill light or a simple reflector. It is a necessary element in creating a chiaroscuro effect. Low key light emphasizes the contours of an object by throwing areas into shade while a fill light or reflector may illuminate the shadow areas to control contrast.
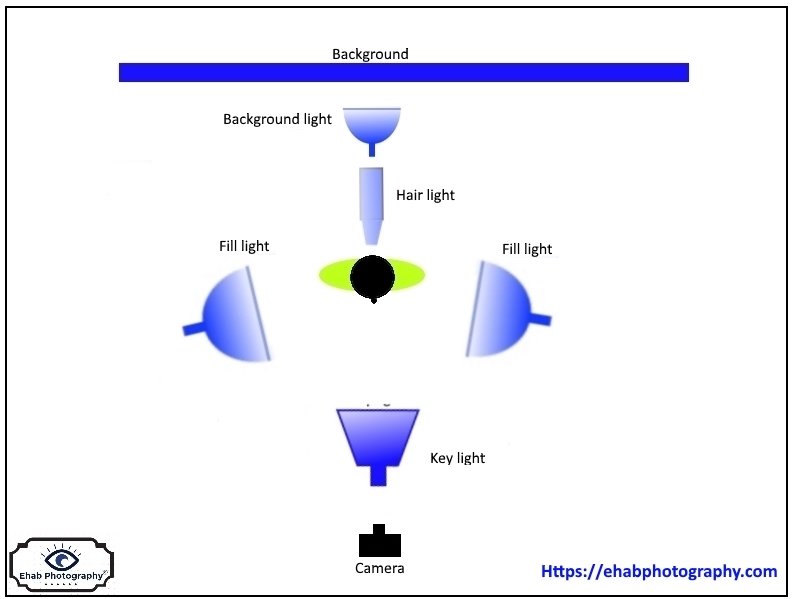
Examples of lighting setups
Setup 1: One light portrait
- This is a basic setup and it is used when you have enough ambient light.
- Place the light 45 degrees away from the camera.
- The light to be just above the model’s head and is slightly pointed downward.
- The flash power is adjusted according to the ambient light; be careful not to create hard shadows by having too much flash power.
- The closer the light, the softer the shadows will be and the less flash power will be required.
- A reflector is used to soften the shadow under the head or the nose.
- Hair and background lighting may be used.
Setup 2: Modified one light
This setup can be used when we do not have enough ambient light. It is the same setup as the one above but with an addition of two fill lights.
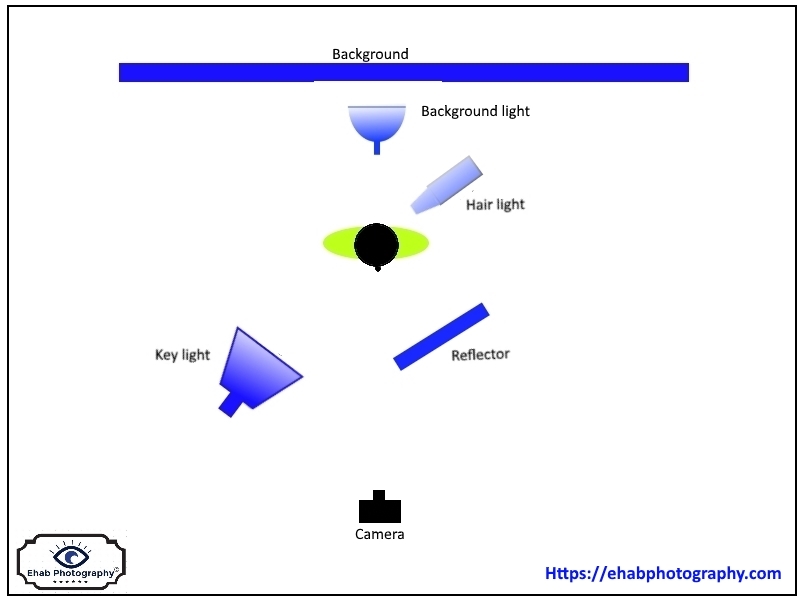
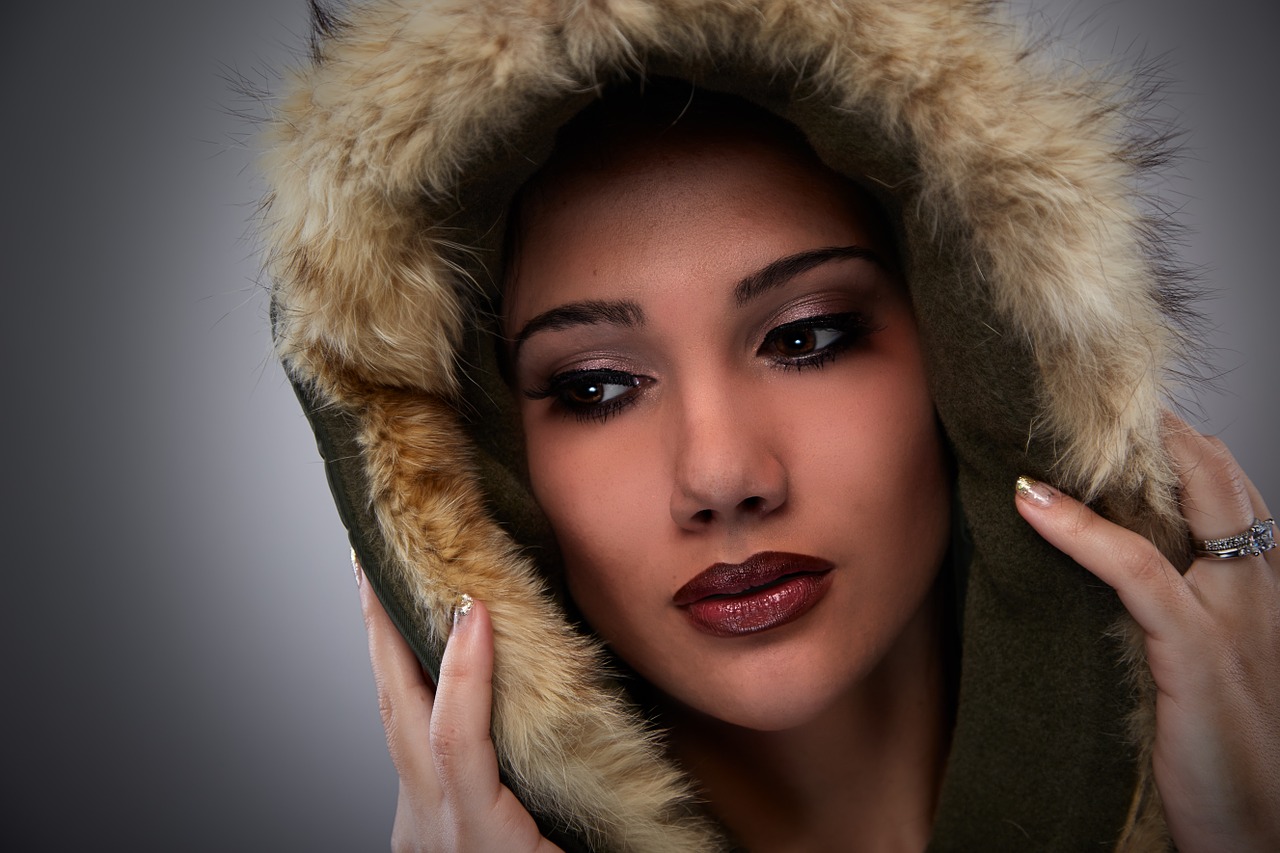
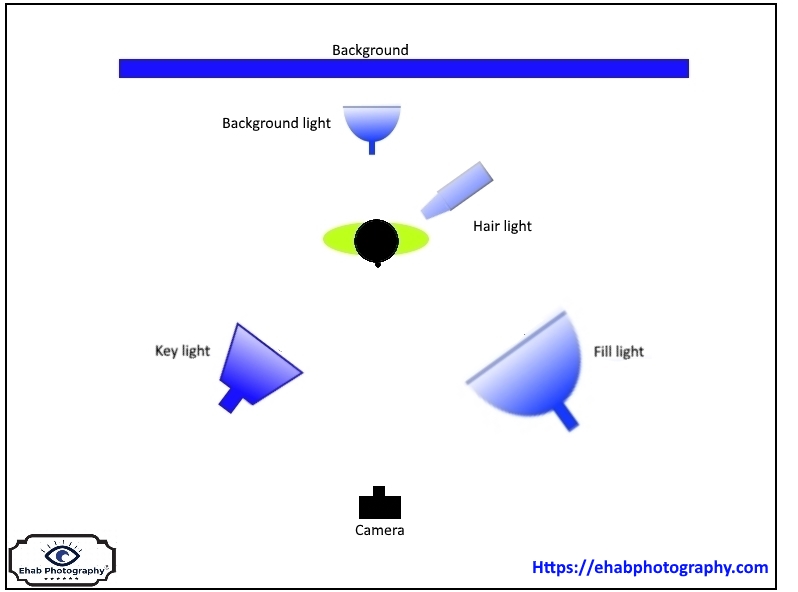
Setup 3: Butterfly portrait (Paramount)
You can easily identify butterfly lighting by the small shadow that appears under the model’s nose. It produces a symmetrical, butterfly-like shadow beneath the subject’s nose. It tends to emphasize high cheekbones and good skin. It is less commonly used on men because it tends to hollow out cheeks and eye sockets too much. The setup uses one key light, one fill light, and a reflector.
There are two setups,
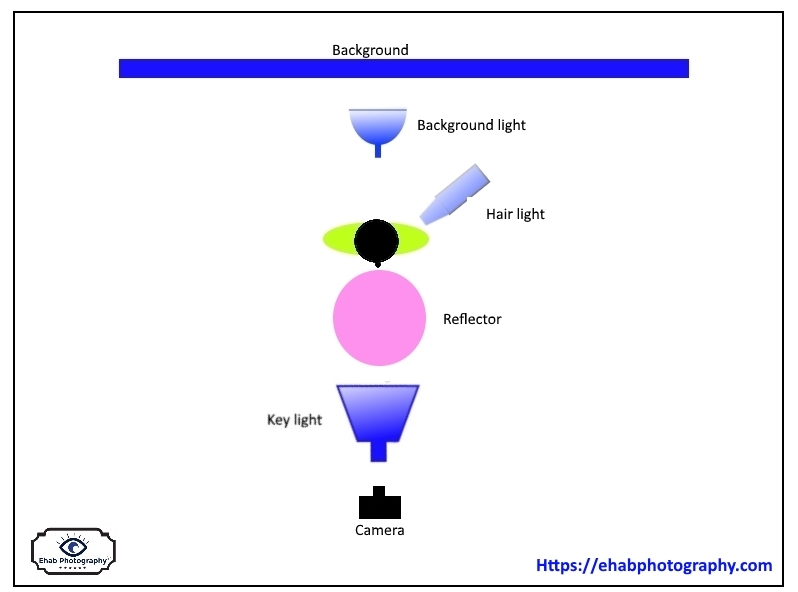
- The key light is placed in front of the model or at 45 degrees.
- The key light is placed high enough at about 2-3 meters.
- The fill light is placed at the subject’s head height
- A reflector is used to fill in the deep shadows on the neck and shaded cheek.
- A hair light is always used to highlight the hair.
- The background light is placed low and behind the subject, it will form a semicircle of illumination on the background.
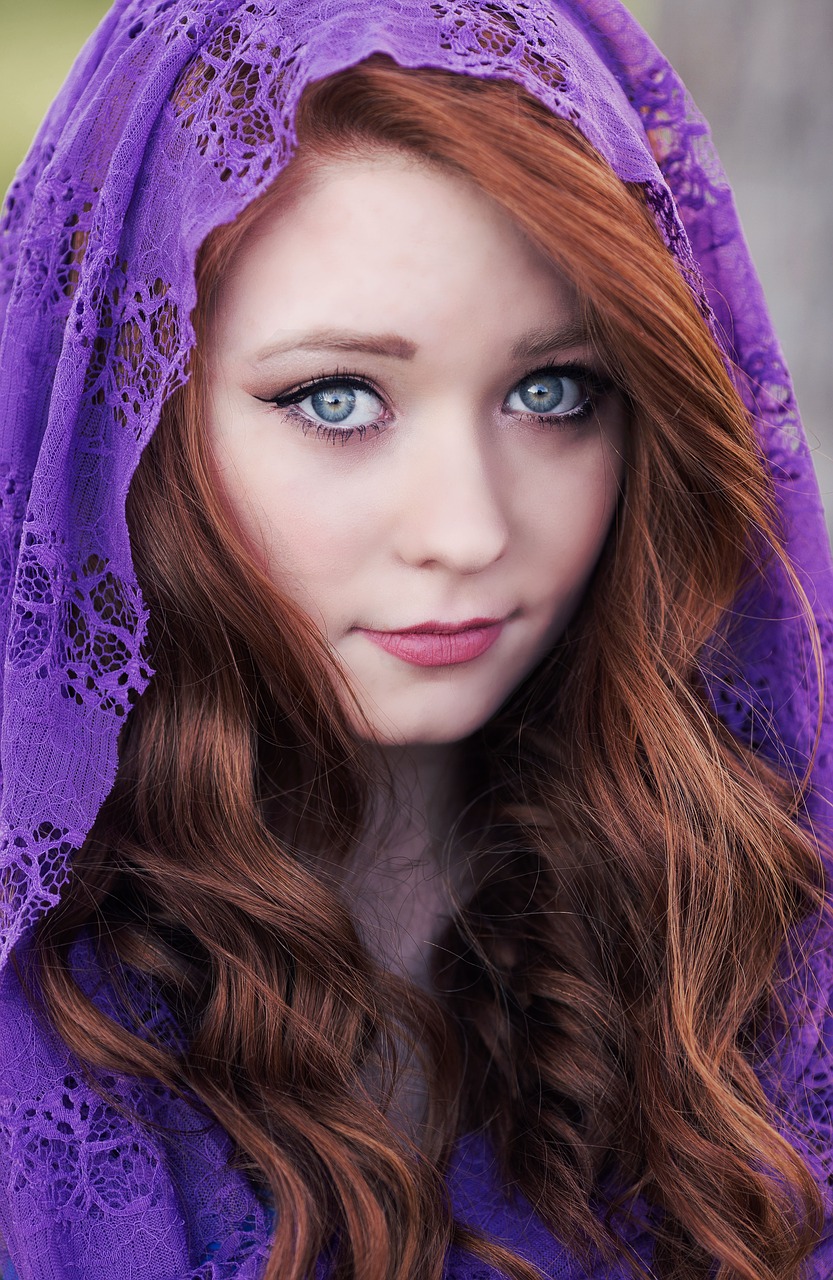
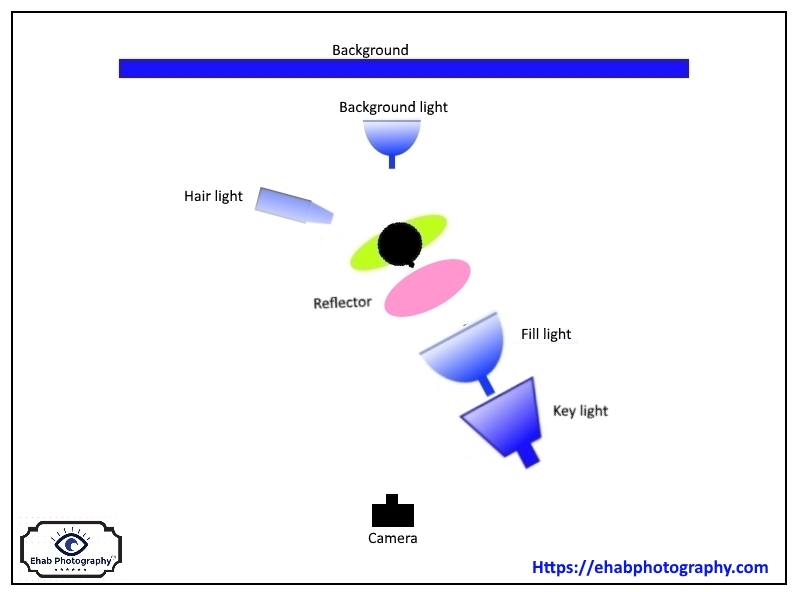
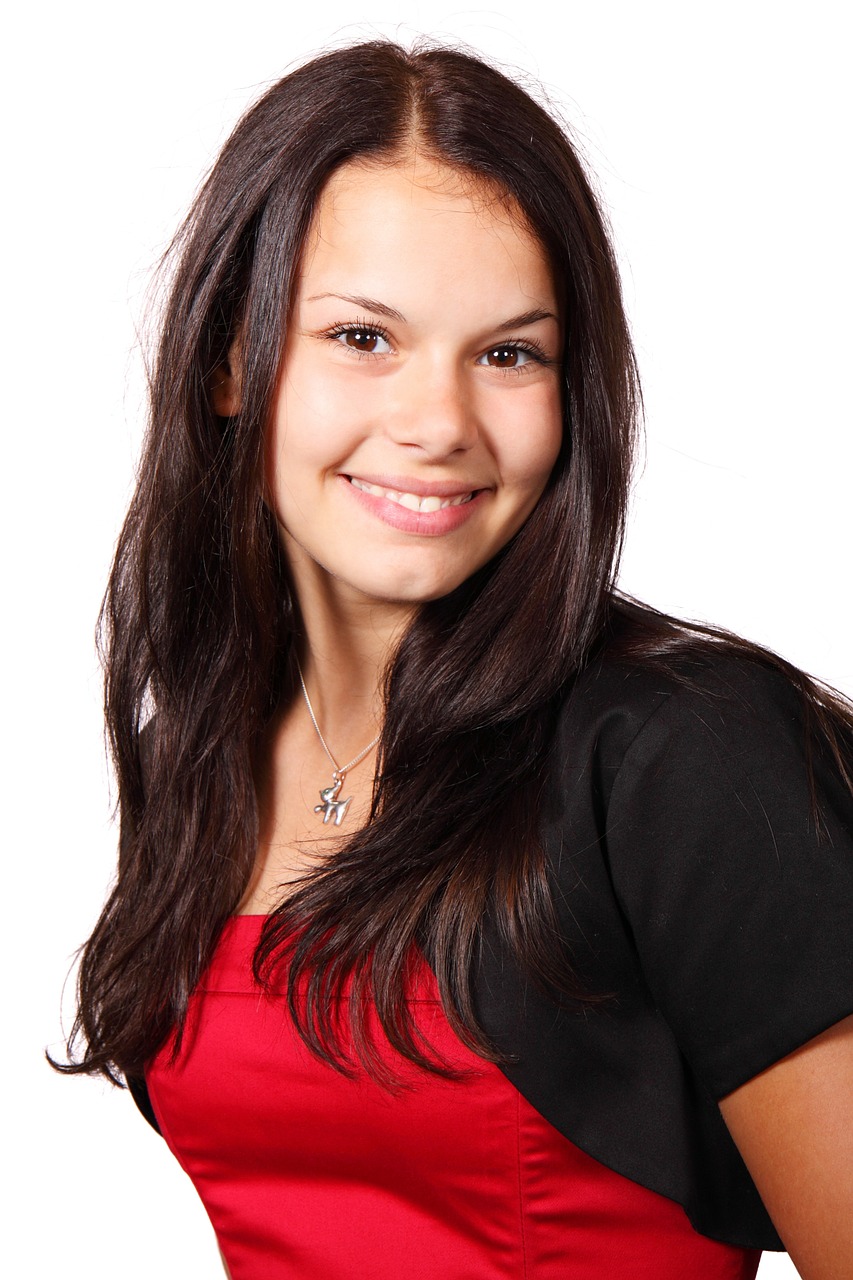
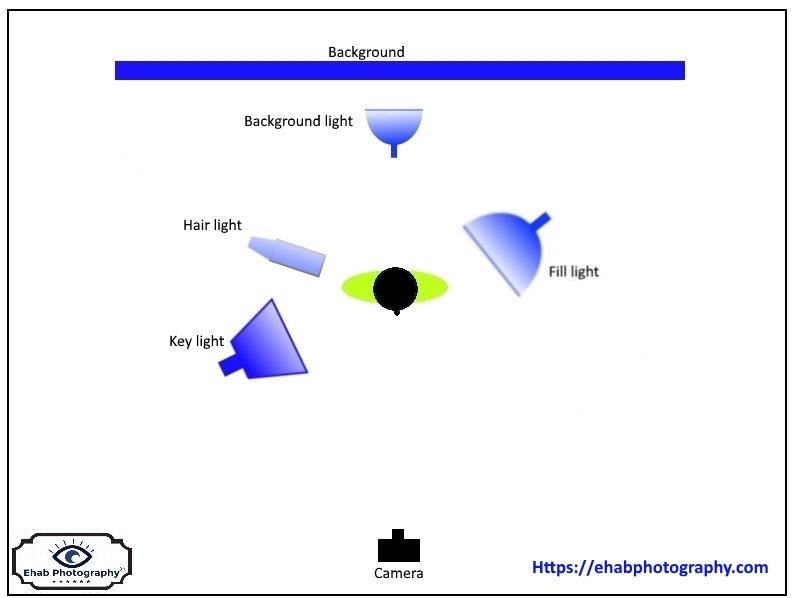
Setup 4: Rembrandt portrait
The Rembrandt style is characterized by the existence of a small triangle of light that appears on the opposite cheek from where the flash is placed. This type of lighting is dramatic. It is commonly paired with a weak fill light to accentuate the shadow-side highlight.
- Place the key light 45 degrees to the side of the camera; about 2 meters from the model.
- Raise the light 2.5 meters high.
- Place the fill light on the opposite side with a low flash power.
- Keep the fill light 1.5 meters from the model.
- Raise the fill light to be about eye level with the model.
- Fine adjustments of the lights will make all the difference in how it looks on the model.
- The fill light is placed on the opposite side of the camera from the key light and close to the camera-subject axis.
- The hair and background lights are used in the same way as they are in butterfly lighting.
Setup 5: Headshot portrait (split lighting)
Split lighting style is created by positioning the key light so as to illuminate only half the face of the subject. Split lighting divides the face into halves, one side highlighted, one side in shadow. It is preferred when shooting on darker backgrounds.
- The key light is moved farther to the side of the subject.
- Raise the key light up to 2 meters high.
- The fill light is placed on the other side of the camera and adjusted to low power.
- The light ratio between the key and the fill would be 6:1 or more. You may also spare the fill light.
- Place the hair light behind the model, up high, with a low flash power.

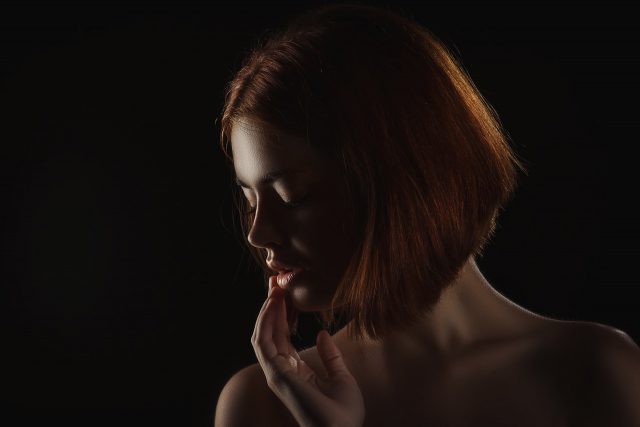
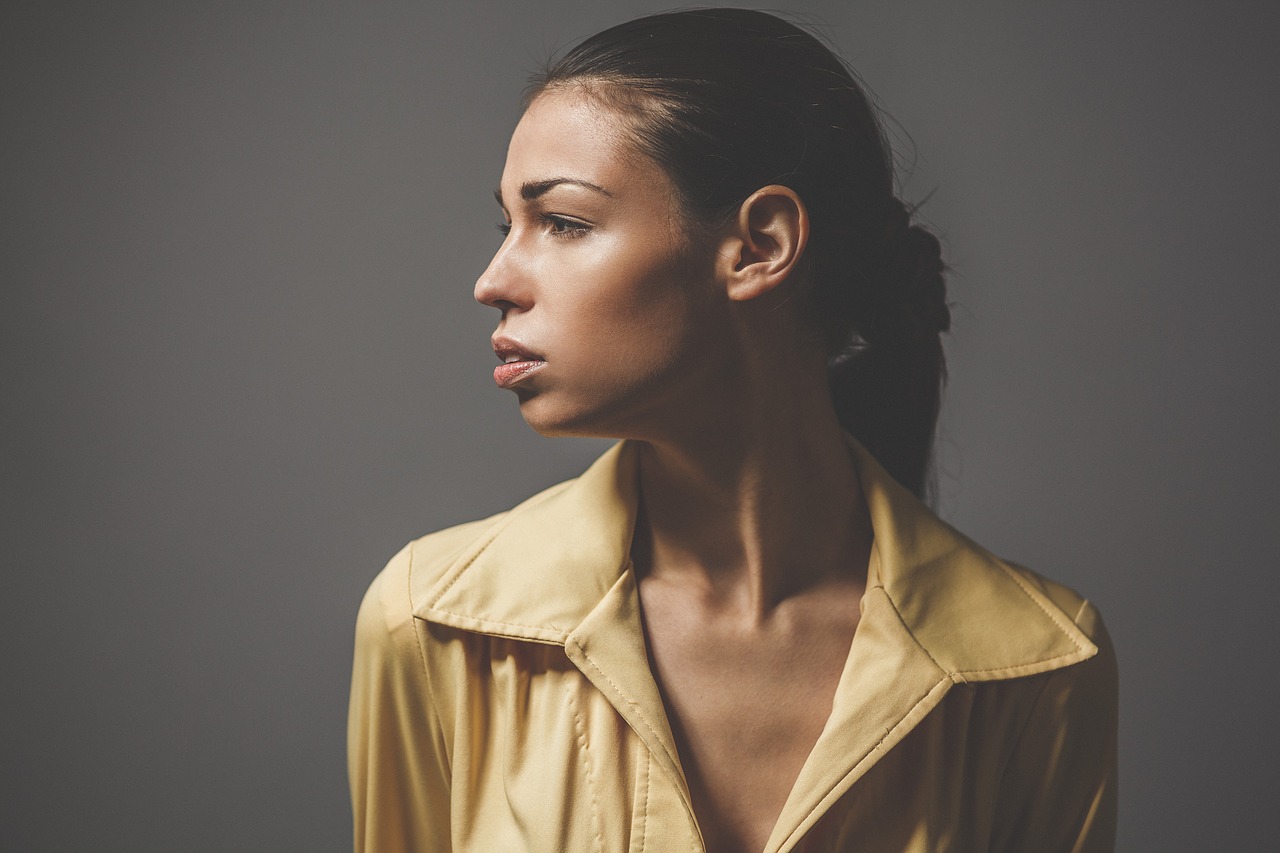
Setup 6: Profile portrait (Rim lighting)
Profile lighting (also called rim lighting) is used when the subject’s head is turned 90 degrees from the camera lens.

- The key light is placed behind the subject so that it illuminates the profile of the subject and leaves a polished highlight along the edge of the face.
- The fill light is moved to the same side of the camera as the key light.
- A reflector is used to fill in the shadows.
- A hair light can be used on the opposite side of the key light for better tonal separation of the subject’s hair from the background.
Related Post
Photography lighting techniques – softbox vs umbrella
Photography lighting techniques – All about light reflector
Thanks for reading the post, hope you found it useful, If you have any comments or questions about the subject, please write them down in the below box.
If you enjoy the site, don’t forget to subscribe, we will only inform you when a new article is posted.

I’m currently in the process of trying to fix my lighting problems with the photos I produce – I am very much amateur but I have been giving it a lot of effort recently. The tips you have here are great but I was looking at software to help out – mainly Lightroom and Adobe Photoshop. Do you feel that Adobe Lightroom can offer enough when compared to Photoshop? I have been told it’s an excellent option!
Thanks Chris for dropping by, yeah lightroom is great for fast, & simple photo adjustments 🙂
I really find it hard to take good photos sometimes, and now i know why? Its all about the lighting system you use. Its really fascinating how you can use the lighting and make ur images look different and better. I especially liked the split lighting one, really shows 2 different contrasts.
Thanks for your comment, I agree with you, the split lighting setup can produces an amazing photos especially when you manage to get the right light ratio between the key light and the fill light .