

While dentists already have a huge skill set to call upon, photography is an area many dentists forget. Good dental photography is essential to proper documentation and sharing information with others. Let’s take a look at how to get into modern digital dental photography.
Lens Choices
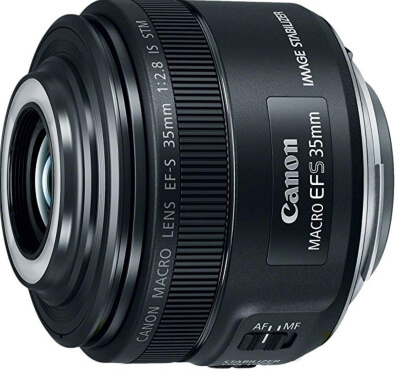
The body of your camera is relatively unimportant besides affecting the accessories you have access to. But choosing the right lens is one of the most important decisions you’ll make when getting into dental photography. Macro lenses are absolutely mandatory for getting sharp, detailed closeups of the surfaces of teeth, gum lines, cavities, among other things.
Macro lenses offer greater magnification compared to normal camera lenses and knowing the magnification ratio is essential. Many lenses advertised as “macro” offer 1:4 or 1:2 magnification ratios, which are often acceptable but not what a true macro lens can offer. True macro lenses have a 1:1 reproduction ratio, meaning the image they create is replicated life-sized onto the sensor.
The main disadvantage of macro lenses is that they usually have somewhat slow apertures of f/2.8 or so. Also when using the lens at macro distances (i.e. extremely close), you’ll need to stop the aperture down to get as much in focus as possible.
The depth of field (how much of a scene is in sharp focus) is razor-thin with macro lenses. If you’re photographing a flat surface, like the front of a tooth, it’s less important. But eventually, you’ll need to stop down the aperture to get more in focus. When shooting indoors at f/4, f/8, or even f/16, extra lighting and tripods become ever more important.
That being said, lenses should rarely be stopped down beyond f/11 or f/16. Depending on the sensor, diffraction starts to become an issue at smaller apertures. Diffraction robs images of sharpness despite the greater depth of field. The smaller your camera sensor, the faster diffraction tends to occur.
Most macro lenses are relatively long focal lengths; 60-105mm lenses give you and your client some breathing room while still providing excellent closeups of the oral cavity.
Some of the most popular macro lenses for dental photography include:
Canon EF 100mm f/2.8L IS USM Macro Lens
Nikon AF-S VR Micro-NIKKOR 105mm f/2.8G IF-ED Lens
Sony SEL90M28G FE 90mm f/2.8-22 Macro G OSS Standard-Prime Lens
Flash Units

Given the close-up nature of dental photography, it’s clear that traditional camera-mounted flash units don’t really work here. Instead, we need to look at the ring and dual flash units.
Ring flash units are the simplest and most affordable option. They typically use a ring of LED bulbs that attach directly to the front of the lens to provide illumination directly onto the subject. This pairs perfectly with the close minimum focusing distances and tight oral cavity that normally exclude standard flash units.
The downside is that ring flash units use a unidirectional light source that makes illuminating complex subjects challenging. Also, the reflective surfaces of teeth and oral tissue can reflect back too much light at times, reducing color, detail, and dynamic range.
However, the compact size and ease of use make ring flashes one of the most common choices in dental photography. If documenting oral surgery, for example, a ring flash will give you illumination with minimal fuss.
Dual flash units use a pair of adjustable mounted flash units to precisely adjust where and how much light you need. Rather than flat, unidirectional lighting, a dual flash unit provides more illumination into the subtle textures of the area in question. By orienting each flash unit at a 45-degree angle relative to the camera’s imaging axis, you’ll achieve near-perfect illumination for detail and color cast.
The only real downsides to dual flash units are the cost and weight. They take more time to set up and make adjustments to and are always more costly relative to a ring flash. Some specialty macro lenses also have built-in ring flash LED lights as well, which would allow you to pair both ring and dual flash as needed!
Both ring and dual flash units can be controlled either using a standard cable or wireless units. Most modern DSLR and mirrorless cameras even have smartphone apps that allow you to sync your phone to the camera and control the shutter.
Neewer 48 Macro LED Ring Flash Bundle is a great place to start if you’re looking at macro dental work.
If you’re looking at a dual flash instead, consider the YONGNUO YN24EX TTL Macro Ring Flash. While it uses a ring design, it includes two separate flash heads!
Camera Settings
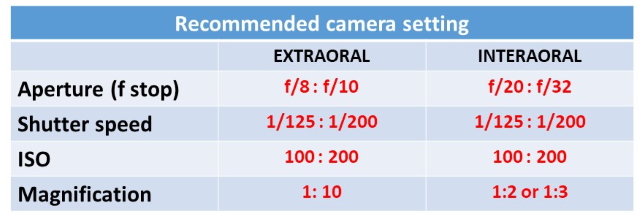
I recommend setting the camera and lens to manual mode, as it gives full control of exposure features: aperture or f/stop, shutter speed, ISO and magnification. Using the below settings simplifies the process greatly and will work for most clinical scenarios.
Most modern cameras have Auto White Balancing (AWB) which’s usually quite accurate in adjusting for the color temperature of available lighting. However, complex lighting environments such as daylight entering a room lit by tungsten lights can confuse the AWB. If you want to be as accurate as possible you’ll want to manually calibrate the white balance using an 18% grey card. While time-consuming, it ensures you get perfect whites for showcasing your client’s teeth.
Shooting in RAW is a flexible, less time-consuming way to make white balance adjustments. Modern cameras have extremely intelligent AWB systems. By using RAW you can make minor corrections in your software of choice and then export to JPEG. If you know your settings are already perfect, shooting JPEG is the best choice for high-quality dental photography. You’ll save time as well as space on your hard drives.
However, RAW photography also gives you more options for correcting improper exposure, which can happen easily when using flash on the moist, reflective surfaces of the oral cavity. An area blown out by flash can sometimes be spotted corrected in Photoshop, Lightroom, and other programs.
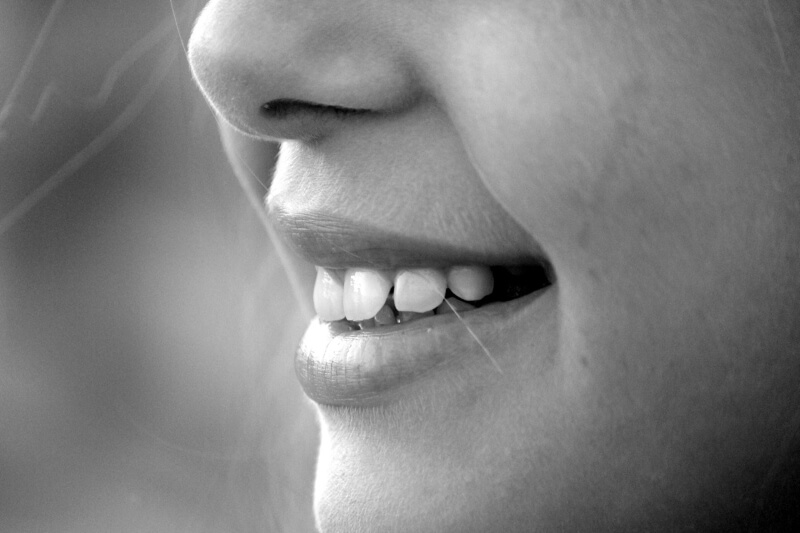
Image by John Oliver from Pixabay
Additional Accessories
There are tools beyond digital ones that can improve your dental photography. Dental retractors like these from Amazon lift the lip away and better expose your subject’s teeth for proper imaging. Self-retracting retractors improve frontal and occlusal shots while single-sided retractors are used for lateral views.
Occlusal and lateral mirrors are another tool that can help direct light for maximum exposure. Usually made of metal and glass, they come in a variety of reflective strengths ranging from 65% to 99% reflectivity. DBS makes quality mirrors perfectly suited for dental imaging.
Lastly, contrasts are used to create a black background for dental photography. Usually made of either metal or silicone and metal combined, contractors help specific subjects stand out relative to the oral cavity. Angzhili makes particularly nice dental contractors with engraved measuring units on the sides.
Conclusion
Dental photography is a combination of tight macro imaging and knowing the ins and outs of your camera accessories for good shots. As a gear-intensive discipline, it takes a bit of experimentation to find the right combination for your needs. But it’s also intensely rewarding and practical when done right!
Related Posts
The Macro Lenses Explained – Samples & Recommendations
Best Flash For Macro Photography
The Best Camera For Macro Photography
Thanks for reading, I hope you enjoyed the article if you have any questions just post them below & I will be happy to answer you.
If you enjoy the site, don’t forget to subscribe, we will only inform you when a new article is posted.


These are exactly the stuff my dentist works on me every 6 weeks when I do follow-ups for my braces. The mouth mirrors I must say are my least favorite because they really stretch beyond the capacity of your lips. But after 9 months, with chronological images, I could really see the new dental alignment. My teeth have never looked prettier on the picture! New photography techniques do make you appreciate small changes better *smiles*
Thanks Cathy for your input.
For one, I had no idea dental photography was a category of its own. But this article has provided total clarity for me. It is now easy to understand why in fact, it is a necessity. Clearly, macro lenses are indispensable to capturing good quality images. Also, dental photography tends to require a thorough understanding of the camera. This has been really informative. Thanks for sharing
Thanks Rhain, you are always welcome.