

Photoshop Skin Retouching is a common editing process that is usually carried out to enhance portrait shots. Removing small wrinkles around the eyes and mouth, blemishes, acne, and flyaway hairs that cover the face are common types of distractions that, when reduced or removed, can help preserve the more important details that make your subject unique.
In the following tutorial, I am going to show you a simple workflow to make your Photoshop skin retouching edit an easy task. You only need to use three Photoshop tools: the healing brush, spot healing, and skin smoothing neural filter.
So, let me explain the three tools before going to some examples.
-
The Healing Brush tool
The Healing Brush tool lets you correct imperfections, causing them to disappear into the surrounding image. You use the Healing Brush tool to paint with sampled pixels from an image or pattern. The main difference between the clone stamp tool and the healing brush tool is that the Healing Brush tool matches the texture, lighting, transparency, and shading of the sampled pixels to the pixels being healed. As a result, the repaired pixels blend seamlessly into the rest of the image. The options bar of the healing brush is shown below:
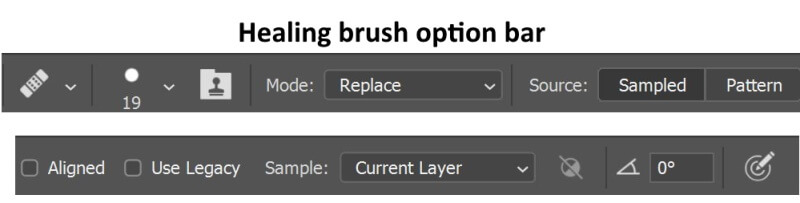
- Mode
Specifies the blending mode. Choose “Replace” to preserve noise, film grain, and texture at the edges of the brush stroke.
- Source
Specifies the source to use for repairing pixels. Sampled to use pixels from the current image, or Pattern to use pixels from a pattern.
- Aligned
Samples pixels continuously, without losing the current sampling point, even if you release the mouse button. Deselect Aligned to continue to use the sampled pixels from the initial sampling point each time you stop and resume painting.
- Sample
Samples data from the layers you specify.
- Diffusion
Controls how quickly the pasted region adapts to the surrounding image. Select a lower value for images with grain or fine details, or a higher value for smooth images.
HOW TO USE
To set the sampling point: position the pointer over an area of the image and Alt-clicking (Windows) or Option-clicking (Mac OS).
Drag in the image, the sampled pixels are melded with the existing pixels each time you release the mouse button.
-
The Spot Healing Brush tool
The Spot Healing Brush tool quickly removes blemishes and other imperfections in your photos. The Spot Healing Brush works similarly to the Healing Brush: it paints with sampled pixels from an image or pattern and matches the texture, lighting, transparency, and shading of the sampled pixels to the pixels being healed. Unlike the Healing Brush, the Spot Healing Brush doesn’t require you to specify a sample spot. The Spot Healing Brush automatically samples from around the retouched area. The options bar of the healing brush is shown below:
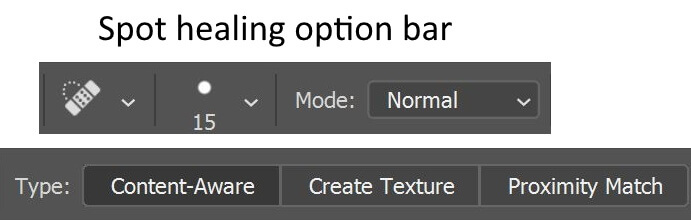
- Proximity Match
Uses pixels around the edge of the selection to find an area to use as a patch.
- Create Texture
Uses pixels in the selection to create a texture.
- Content-Aware
Compares nearby image content to seamlessly fill the selection, realistically maintaining key details such as shadows and object edges.
HOW TO USE
Click the area you want to fix, or click and drag to smooth over imperfections in a larger area.
-
Skin Smoothing (Neural Filters)
The new skin-smoothing filter is added to Photoshop in the 2021 update. It quickly smoothes blemishes, skin spots, and acne with one click.
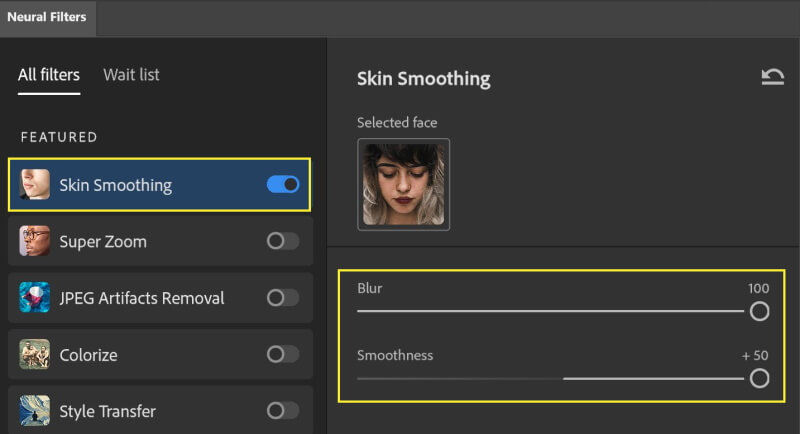
- Blur slider
The blur control adds or removes blur based on a 0-100 scale that determines the blur of the details on the subject. This is the primary control for acne removal.
- Smoothness slider
Smoothness is controlled on a -50 to 50 scale and is used to remove harsh contrast such as shadows and highlights. This will be the primary control for blemish removal.
HOW TO USE
Click on Filter > Neural filter, then activate the Skin smoothing filter. Adjust the blur and smoothness sliders.
Skin retouching example
Example 1:
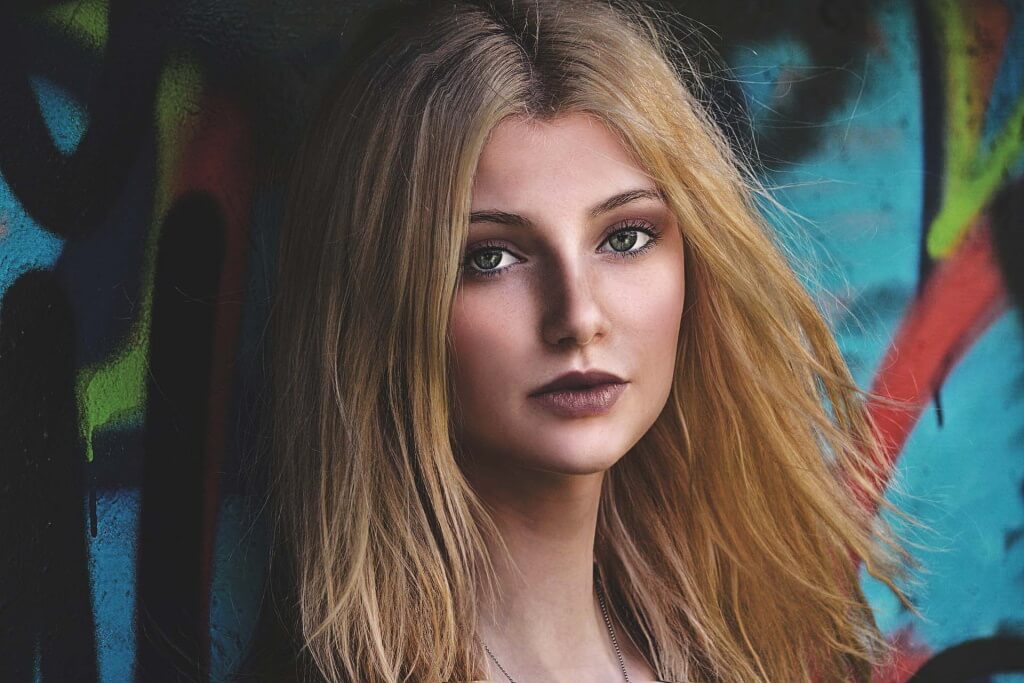
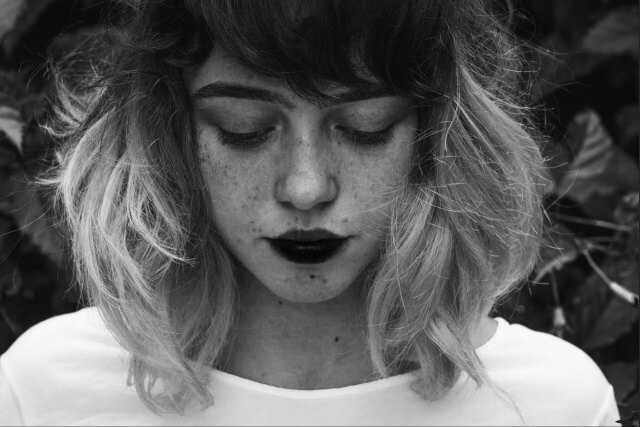
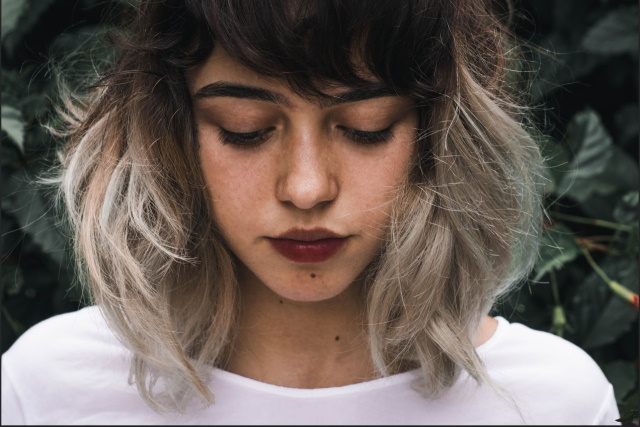
I will use the following image

Photo by Lola Russian from Pexels
Step 1: Healing Blemishes
- Open photo in Photoshop
- Duplicate the background layer by pressing (Ctrl + J)
- Rename the layer “Healing Blemishes”
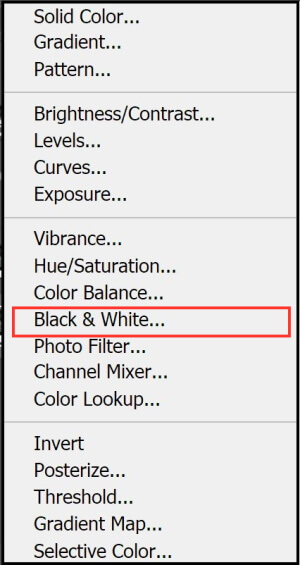
To clearly see and locate the blemishes in the photo, we need to add a check layer
- Click “create new adjustment layer”, choose “black & white”
From the property panel
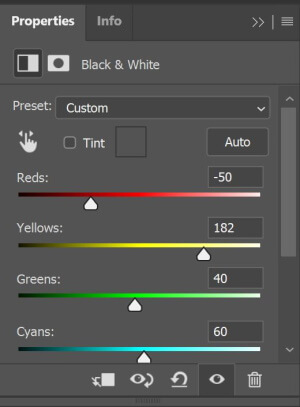
- Reduce the red slider, and increase the yellow slider
Now all the blemishes are visible
To remove the blemishes
- Select the spot healing tool, from the toolbar

From the property panel of the spot healing
- Choose the brush size (to be slightly larger than the blemish size)
To change your brush size, press the right bracket key (]) on your keyboard to make the brush larger or the left bracket key ([) to make it smaller.
- Make sure the Type option in the Options Bar is set to Content-Aware
- Click on any unwanted skin blemishes with the Spot Healing Brush to remove them. Photoshop will instantly “heal” the blemishes by replacing the problem texture with good skin texture from the surrounding area.
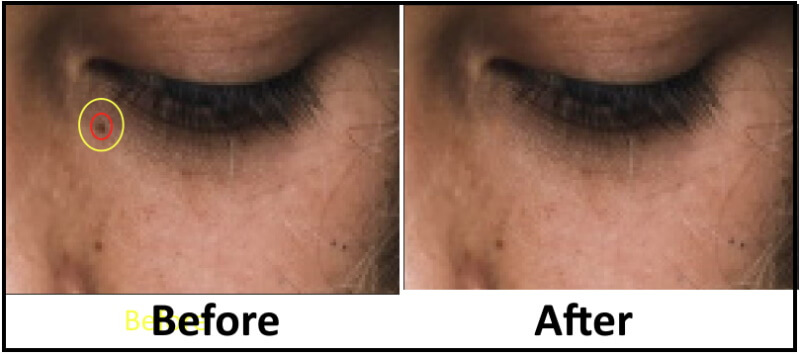
Keep doing the last step until removing all the blemishes.
The result is shown below

Step 2: Removing the dark circle under the eyes
After removing all the blemishes, the next step is removing the dark circle under the eyes
- Make a copy of the “healing blemishes” layer
- Name it “Removing dark circle”
Choose the Dodge tool from the toolbar
From the options menu of the dodge tool
- Choose highlights from the Range
- Adjust the brush size, and the exposure
- Paint over the dark circle under the model eyes to lighten it
The result is shown below
Step 3: Smoothing the skin
- Make a copy of the “Removing dark circle” layer
- Name it “skin smoothing”
- Convert the layer to smart filter by clicking Filter > Convert to Smart Filter
- Click Filter > Neural Filters
The following menu pops up
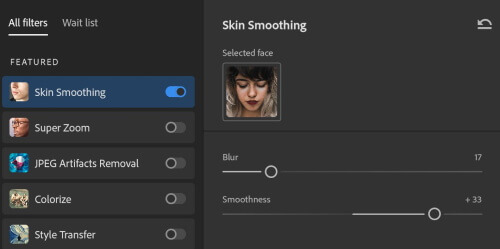
- Activate the skin smoothing filter
- Adjust the Blur and Smoothness sliders
- Choose Smart filter as output
- Press O.K

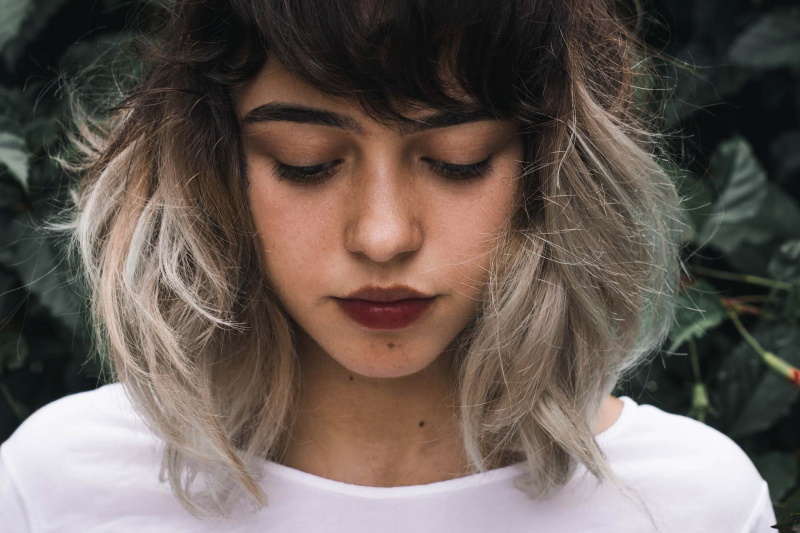
The result is shown below
Example 2


Photo by Tembela Bohle from Pexels
Example 3
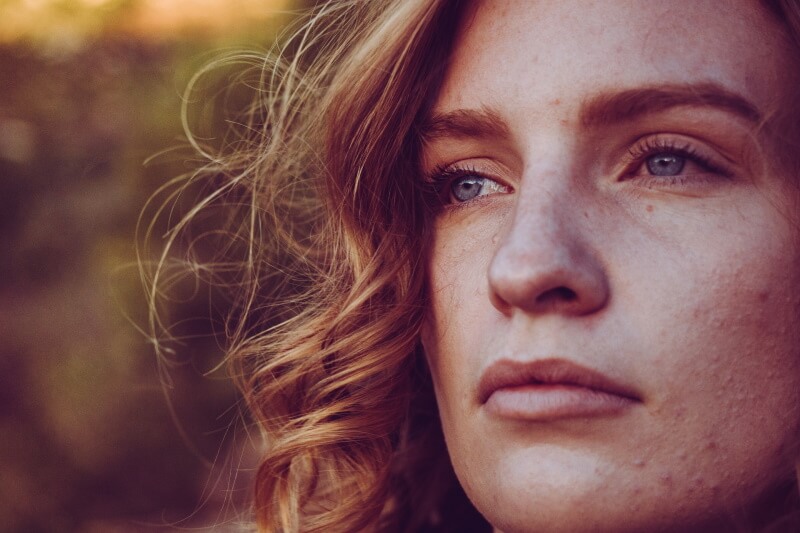

Photo by Lola Russian from Pexels
Example 4


Are you looking for Photo editing resources or editing Services?
Some photographers are struggling to learn and master editing software like Lightroom or Photoshop, they found the editing process is taking too much of their time. Therefore, assigning the editing tasks to an editing service may be the answer.
On the other hand, some others are looking for editing resources like actions, overlays, and textures to help them. For those I highly recommend paying a visit to my store, it has amazing professional photo editing tools.
In addition, you can check my editing tutorials, there are many tips and tutorials there.
Thanks for reading, I hope you enjoyed the article, in case you have any questions just drop them below & I will be happy to answer you.
If you enjoy the site, don’t forget to subscribe, we will only inform you when a new article is posted.


Educative article, I only know about The Spot Healing Brush tool now I know more really educative article. Am actually a beginner in editing pictures thanks for the education.
Thanks for the comment
My first introduction to skin retouching was back in high school when senior photos were still taken with film and retouched manually. It wasn’t always a perfect result, but the graduating class appreciated that their acne issues could be hidden from yearbook photos.
I love how easy you make the photoshop process look with 3 critical tools to get the job done. Thanks for the helpful explanations and illustrations of how they work!
Glad you like the article, thanks for your comment.