

In the field of photography, lighting plays an inevitable role in shaping the subject and defining the essence of the image. As photographers we continually use the interplay of light and shadow to bring life to our subjects, creating moments frozen in time Whether you’re a seasoned professional or someone who’s interested in starting out, we understand the types of light and their impact on your photography to maximize the quality and emotional resonance of your shots can In this exploration of the art of light in photography, we will explore the intricacies of light sources, their unique properties and how they can be manipulated into stunning images
what are the different types of light in photography?
Natural and artificial light
Natural lighting can be thought of as available light, such as that produced by the sun or the moon. Artificial lighting is produced via another source, such as a studio strobe, Speedlight, LED light, your camera’s pop-up flash, or even a streetlight or lamp.
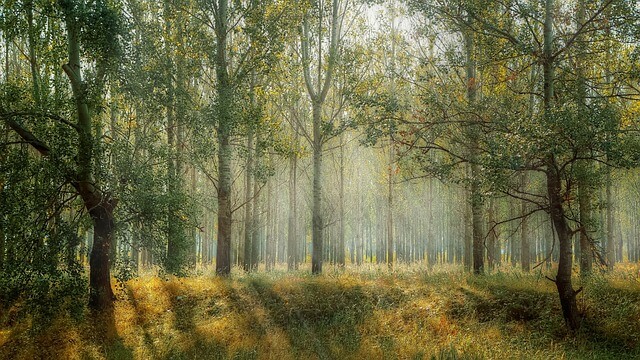
Natural light is abundant, very easy to find, and above all it is free. Its intensity and quality vary during the daytime, location, and season, and also vary according to weather conditions. Midday sunlight tends to produce high-intensity light with neutral white colors and extremely high contrast, while at golden hours of sunrise and sunset, the sunlight has less intensity, and very warm colors and medium contrast.
Artificial lighting costs money but gives you the ability to manipulate and control every aspect of your photoshoot. You can control the intensity, quality, color, and direction of your light sources. Professional-grade artificial lighting sources will also need to be held in place with light stands, and possibly even modified with umbrellas, beauty dishes, and softboxes. Not to mention that using artificial lighting needs more experience and knowledge.
Characteristics of light
In photography light have four characteristics; I will discuss them in the rest of the post.
Intensity of Light
Light intensity is at the heart of photography. Low light forces a photographer to increase exposure time or open up the lens aperture, and sometimes both. While many modern cameras have light metering built-in it’s still advantageous to know light levels around the subject, especially for studio or portrait photography. So it is very important to know what the light intensity is. And what are its types?
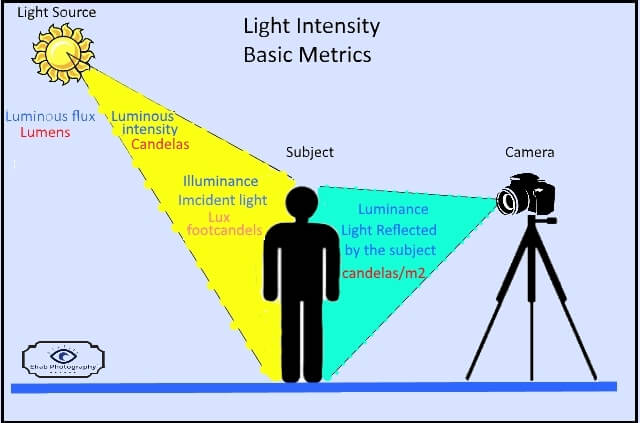
There are three different types of light intensities as shown in the photo below:
-
Luminous Flux and Intensity = Light Coming from a Source
Luminous flux
The amount of light being given off by a particular source, in all directions, is called luminous flux (or “luminous power”) and is a measure of the total perceived power of light. It is measured in lumens. Lumens are a useful metric for comparing how bright a light source is. For example, a 60W incandescent bulb has a luminous of 850 lumens.
Luminous intensity
The amount of light that travels in certain directions from the source is called the “luminous intensity” and is measured in candelas. A candle emits about one candela in all directions (this candle would emit a total of 12.6 lumens).
-
Illuminance = Light Falling on a Surface= Incident light
The amount of light falling on a surface is “illuminance”, and is measured in lux (metric unit = lumen/m2) or foot-candles (English unit = lumen/ft2). 1 foot-candles equals 10.8 lux. This value does not depend on the material properties of the surface being illuminated. This is what a light meter measures. A typical value of the sunlight illuminance on a sunny day is 11000 lux, and on an overcast day is around 1000 lux.
-
Luminance = Light Reflected from a Surface
Luminance is the light reflected off of surfaces and measured in candelas per square meter (cd/m2), or Nits (in imperial units). Luminance is what we perceive when looking at a scene, or when using a camera. The quality and intensity of the light that reaches our eye does depend on the material properties of the surfaces (color, reflectance, texture). This is what the camera metering system measures.
How to handle light intensity in photography
You meter the intensity of light by using a light meter or your camera metering system and figure out the appropriate exposure.
In situations with intense light, you will generally want to keep the ISO low, the shutter speed high, or the aperture small (large f-number). One or more of these adjustments will serve to lessen the intensity of the light recorded by your camera, thus preventing blown-out images (overexposed). Also, the use of ND filters will add more control to the high-light intensity condition
On the other hand; shooting in an environment with less light (low light), you boost your ISO, slow your shutter speed, or open up your aperture. Each of these adjustments allows more light and will help you avoid having underexposed photos.
Quality of light
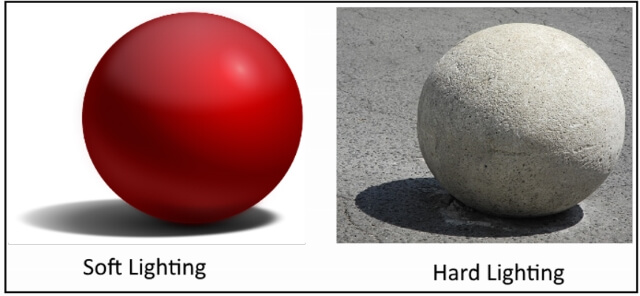
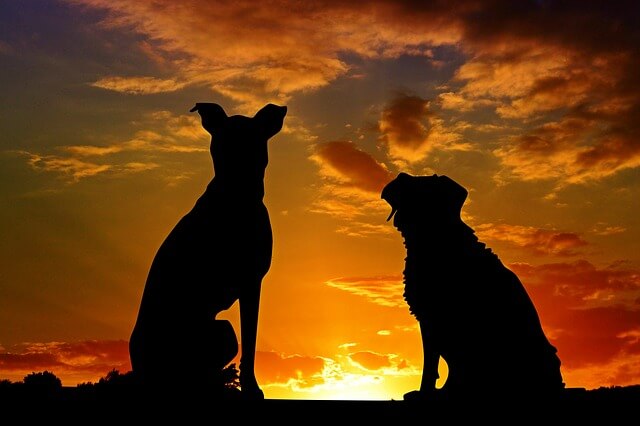
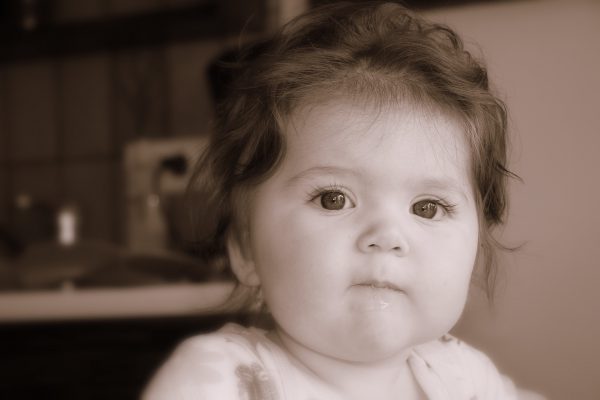
The quality of light is a feature of light that can’t be measured by numbers, but we can describe it, based upon visual perception; light is classified into soft or hard. The softness of light is a measure of how gradually the transition is within the shadow of your photo. If the transition in the shadows appears to be steep, the light is hard. If the transition is gradual, the light is said to be soft. The below photo may clarify the concept. Remember that the power or the intensity of the light source has absolutely nothing to do with the softness or hardness of the light. Soft lighting can be achieved with a flash on full power or on its lowest power setting. The same is also true of hard light.
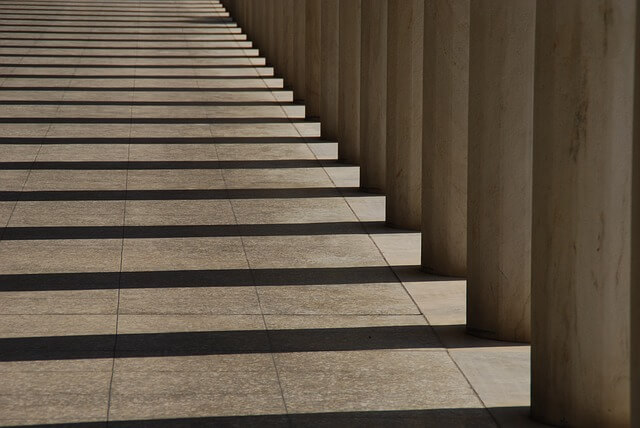
Hard light
Hard lights are most easily identified by the shadows that they cast rather than the way they rest upon a subject. Anything illuminated by the rays of a hard light will be accompanied by a clear, dark silhouette of a shadow.
Hard light is often considered to be not very good light, although it depends entirely on the look you’re after. Hard light can work extremely well for some images and ideas. The photo below shows a case where using hard light gives a more dramatic effect to the photo.

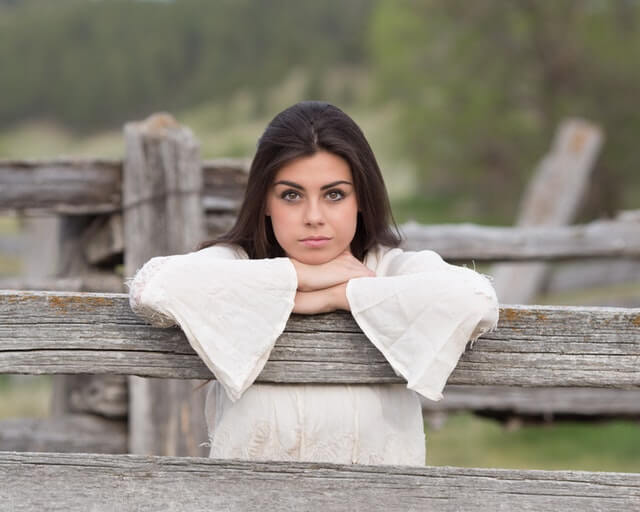
Soft light
Soft light is generally considered to be more friendly and flattering to your subjects. It’s used often with portraits. The images are meant to be inviting, warm and welcoming. Soft light produces the opposite effect as the shadow loses definition and becomes more muted. This is the kind of light photographers chase during the golden hour of daylight.
Two factors affect the softness of light: The first is the size of the light source in relation to the subject. The larger the light source, the softer the light cast on the subject.
The second factor is the distance between the light source and the subject. The farther a light source is placed from the issue, the more complex the light will become.
Color of Light
Light isn’t typically crystal clear, contrary to what we perceive with our eyes, it actually has a color to it and that color can vary under certain conditions. The camera lens and sensor can see it. A photograph taken in deep shade, for instance, may have somewhat of a blueish hue to it; this is a shot we would refer to as being cool. Conversely, the golden light of sunset would translate into a warm shot.
A basic understanding of color temperature and white balance will give you greater creative control over your photography.
In short, color temperatures are measured on the Kelvin scale and range from roughly 1000K on the warm, red end to 10,000K on the cool, blue end of the scale. As a point of reference, daylight and electronic flash fall into the 5000 to 5500°K range; tungsten/incandescent bulbs are rated at about 2500°K to 2800°K.
Depending on what type of lighting you are using on your subject, Color temperature causes some undesirable color casting in your shots. To ensure that your photos are accurate representations of the scenes you are shooting, you will have to adjust your white balance either on camera or in post-processing.
Direction of light
After discussing the light intensity, quality, and color the last feature associated with light, is its direction. In-studio photography, it is much easier to direct the light source in any direction you want. Perhaps close it to your subject or get it farther away. Each position of the light source with respect to your subject will create a different illumination and shadow on the scene. For studio portrait photography, my post >>Photography Lighting Techniques – Portrait Lighting Setup<< contains some well-known light setups.
In outdoor photography, the case is very different. You can’t move the main light source (sun), but instead, you will have either to wait for the suitable time of the day or change the subject position to get the required impact on your photo.
The following are some examples of light direction types:
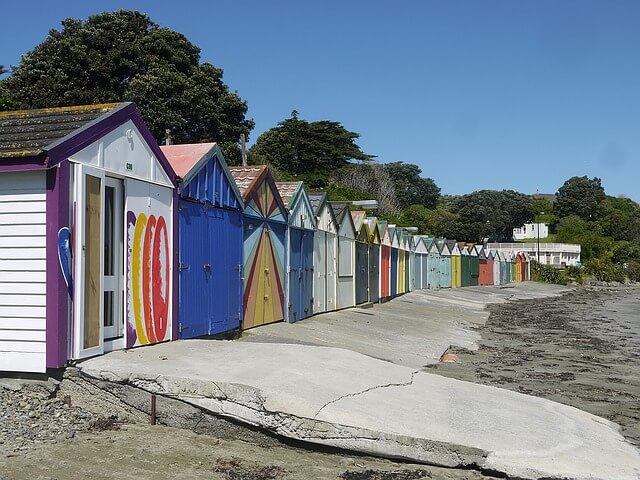
Flat (front) light
When you have your light source facing directly at the front of your subject, this is flat lighting. Flat lighting on a face will mean that your subject is well lit and you are unable to see any shadows along their face, the same things apply to landscape photography, as shown in the below photo.
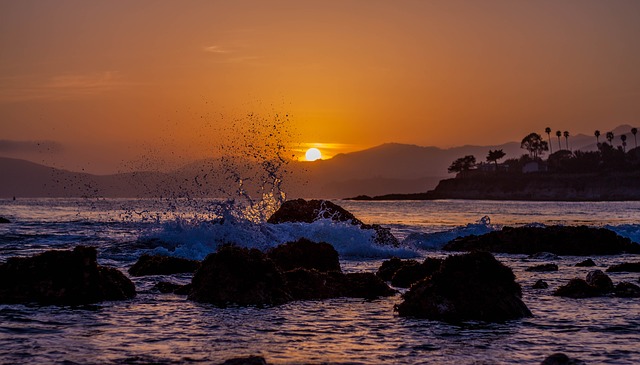
Backlight
The backlight is just that, light that comes from behind your subject. This is commonly seen in photos from the beloved golden hour, when the sun is low on the horizon and starting to set, but can be done at all hours of the day. That is how you can create a semi-silhouette or a complete silhouette photo, as shown in the below photo.
Sidelight
When you have your light source coming directly from any side of your subject, it is called a sidelight style.
There are many other types and ways to direct your light to the subject and achieve a different lighting style. I just mentioned only three types as examples.
Related posts
- Photography Lighting Techniques – Softbox Vs Umbrella
- Photography Lighting Techniques – All About Light Reflectors
- Photography Studio – Setting Up Home Photography Studio
Thanks for reading, I hope you enjoyed the article if you have any questions just post below & I will be happy to answer you.
If you enjoy the site, don’t forget to subscribe, we will only inform you when a new article is posted.


Thanks for sharing informative article.
I enjoyed reading about light with photography. The graph that showed light intensities from all positions was very interesting. I didn’t know about different light names. I am curious as to how mobiles can be used more advantageously with light when there aren’t any light settings to change when shooting. Only the editing after which can change the outcome of the photo taken.
Photography is about controlling the light, so it is important to understand its type. Thanks for your comment.
I have always wandered how the light is monitored in photography. I have worked as a model for some photographers, but never understood the light talk that was always around me. I am also curious as to how mobile phones balance light when your taking photos. I know sometimes I am looking to take a picture and it isn’t the same as what I was seeing with my naked eye. I find I am tilting the phone to get the light to change on the subject. Do you have any suggestions with mobile phones for understanding light, when we can’t adjust them?
Thank you.
Unfortunately, I can’t answer your question because I have very little experience in smartphone cameras, sorry for that, and thanks for your comment
while modern technology in cameras has taken alot of the guess work out of taking great pictures, I have come to realize that there is still much skill involved in the whole process.
When selecting a wedding photographer, she was able to explain many of the intricacies with regards lighting and how it affects the quality of the photos and why good photographers are so expensive…..experience. Understanding the various light types in my opinion is key in taking great photos but playing around will provide the platform to see for yourself how best to apply what techniques.
Rich
Thanks for the comment