


This article is about how we can place an image into a frame or a shape in post-processing, especially in Photoshop CC by using three different methods:
- Using the Frame Tool
- Using the Shape Tool
- Using readymade frames
However, we will start by explaining the above-mentioned tools.
-
The Frame Tool
In 2019, Adobe Photoshop CC introduces a brand new tool to Photoshop’s Toolbar known as the Frame Tool. The Frame Tool is designed to make placing images into shapes both simple and intuitive, especially for users who are new to Photoshop.
How to use the Frame Tool
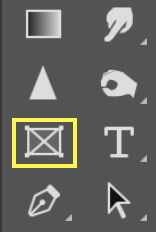
- Select the Frame Tool from the Toolbar the frame tool
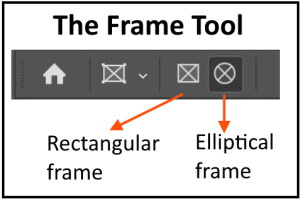
- In the Tool Options bar, choose a rectangular frame or an elliptical frame.
- Draw a new frame on the canvas.
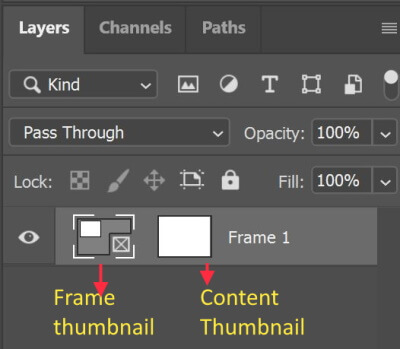
In the Layers panel, frames are represented by a Frame layer type. The frame layer displays two thumbnails – a frame thumbnail and a content thumbnail.
Frame and its content can either be selected together or separately allowing you to transform the frame and its content independently.
How to fill the content?
To fill the content, or replace its existing content, do any one of the following:
- Drag an image from the Libraries panel into the frame in the Canvas area or over the frame layer in the Layers panel.
- Drag an image from the local disk into the frame in the Canvas area.
- Select a frame. From the menu bar, select File > Place Linked or Place Embedded. In the dialog box that appears, select an image that you want to place in the selected frame.
How to add a stroke to a frame?
- In the Layers panel, select the frame layer.
- Open the Properties panel (Window > Properties)

Set the following under Stroke options:
- Set frame stroke type as solid color, gradient, or pattern.
- Set an angle to rotate the frame stroke pattern and easily change its orientation.
- Set frame stroke width (pixels).
- Set alignment type for stroke – inside, center, outside.
Useful Tips
- To draw a perfect square hold the shift key while drawing a rectangle
- To change the size of the frame drag any handle.
- To keep the same aspect ratio of the frame while changing its size hold the Ctrl Key and drag the corner handles.
-
The Shape Tool
Photoshop comes with the ability to draw and edit vector shapes easily. You can also convert your vector shape to a raster or pixel-based shape.
How to use the Shape Tool?
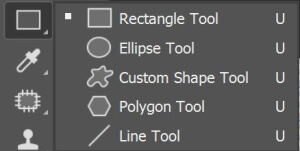
From the toolbar, right-click the Shape tool group icon to bring up the various shape tool options: Rectangle, Ellipse, Triangle, Polygon, Line, and Custom Shape.
- Select a tool for the shape you want to draw.
- Set shape tool options
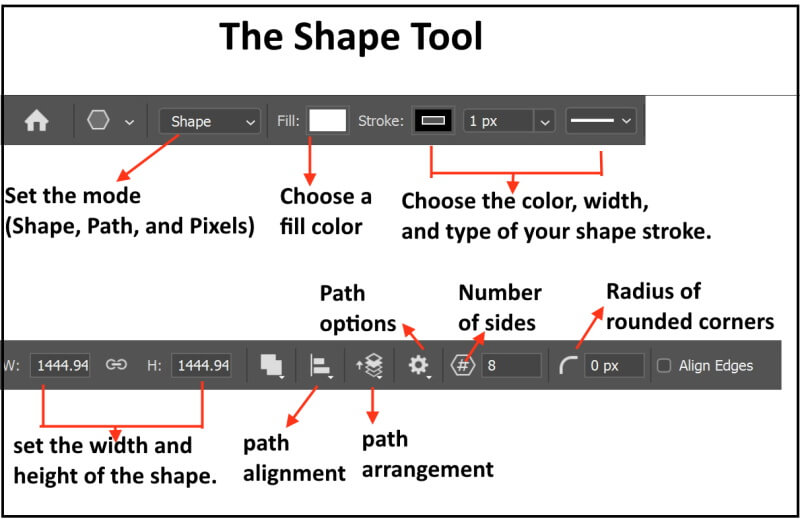
- Draw a shape. Use the handles to adjust the shape
- With your shape layer selected, use the Move tool to move the shape
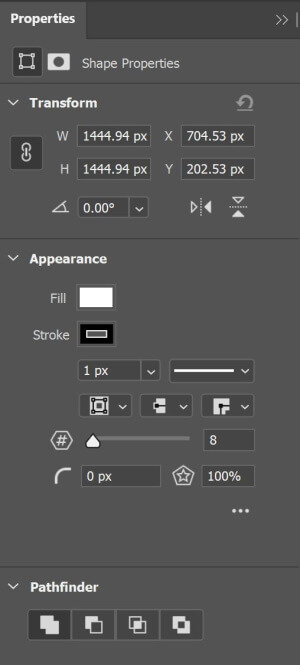
- You can easily edit your shape properties directly using on-canvas controls or accessing Shape Properties under the Properties panel.
Useful Tips
- Holding the Shift key while moving a handle makes the shape change in proportion.
- Holding the Alt key while moving a handle makes the shape change from the center.
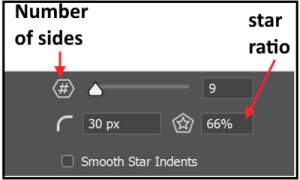
- To draw a star, first, draw a polygon, set the number of sides, and the star ratio from the property panels of the shape.

Placing Images into Frames
Example 1: using the Frame tool
- Open a new document in Photoshop
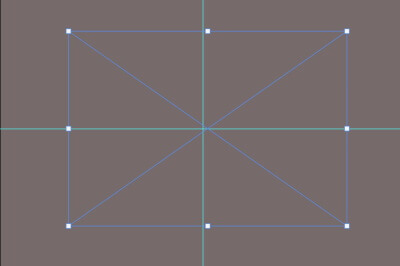
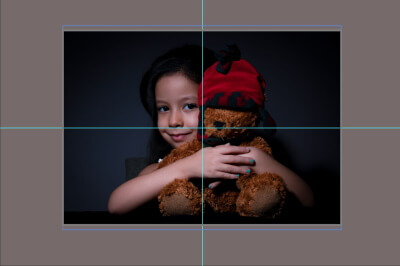
- Draw a guide to locating the center (drag the vertical and horizontal rulers to the middle)
- Select the frame tool, then the rectangular frame
- Draw the frame, adjust its size and position
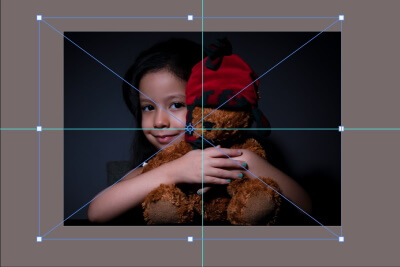
- Insert an image: File > Place impeded, then choose the image from your computer.
- Press (Ctrl + T) to resize and position the photo inside the frame
*
- To add a stroke, open the property panel of the frame, then set up the stroke (type, width, align)
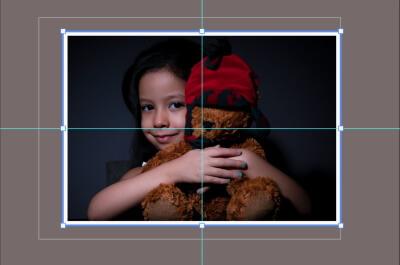
- Clear the guides: View > Guides > Clear Guides
The final photo is shown below

The same steps are followed to place a photo in square, elliptical, and circular frames as shown below.

Example 2: Using the Shape tool
- Open a new document in Photoshop
- Draw a guide to locating the center (drag the vertical and horizontal rulers to the middle)
- Select the Shape tool, then the Polygon tool
- Set the shape options from the top menu.
- Draw the shape, adjust its size and position

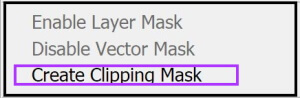
- Insert an image: File > Place impeded, then choose the image from your computer. The image is placed in a new layer
- Right-click on the image layer and add a Clipping mask
- Press (Ctrl + T) to resize and position the photo inside the shape
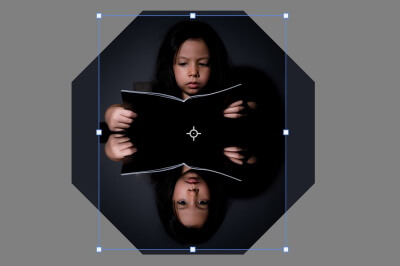
- To add a stroke, open the property panel of the shape, then set up the stroke (type, width, align)
- Clear the guides: View > Guides > Clear Guides
The final photo is shown below

The same steps are followed to place a photo in different shapes as shown below.

Example 3: using a readymade frame
Many stock sites like Pixabay, pngtree offer readymade frames for downloads. When searching for a frame it is important to look for a photo that has a PNG format. PNG is short for Portable Network Graphic, a type of raster image file. It’s a particularly popular file type with web designers because it can handle graphics with transparent or semi-transparent backgrounds.
The ability to save transparent backgrounds makes it easier to place a photo inside the farm or the shape.
In this example, I will use the following frame.

- Open the frame in Photoshop
- Add a new layer
- place a photo (File > Place Embedded)
- Move the photo layer under the frame layer
- Adjust the photo position and size
- Use the Elliptical Marquee tool or the Rectangular Marquee tool to select part of the photo to show up inside the frame.
- Add a mask
- Add a Solid Color Adjustment layer and move it under the photo layer to add color to the rest of the photo
The result is shown below

The following are more examples

Are you looking for Photo editing resources?
If are looking for editing resources like actions, overlays, and textures, I highly recommend paying a visit to my store, it has amazing professional photo editing tools.
In addition, you can check my editing tutorials, there are many tips and tutorials there.
Thanks for reading, I hope you enjoyed the article, in case you have any questions just drop them below & I will be happy to answer you.
If you enjoy the site, don’t forget to subscribe, we will only inform you when a new article is posted.


Hi Amin
OMG I love this new framing tool. Thank you so much for the detailed instructions, my frustrated self would have spent a while going through the help section! I particularly love the Readymade frames, they are simply gorgeous. I have so many memorable photos on my phone. It would be so amazing to create these frames. Thank you so much!
Shelley
Hi Shelly
I am delighted that you find the article helpful to you, and thanks for your comment
Thank you very much for this detailed post about valuable images frames. I really need frames for images sometimes. But at that time I did not find a good one. But you have shown a good way. And you have explained it well in the video. I will definitely save this and keep it. Keep posting like this.
Thank you for your feedback, glad you like the article