

Both Photographers and viewers will commonly agree that photos with a sharply focused subject and a blurred background appear more attractive and professional than those where everything is equally in focus.
Typically, this technique can be done in-camera and can be achieved by choosing the proper camera and lens settings and by composing the shot in a certain way. This look is known as shallow depth of field. It can help you make your “subject” more prominent within the composition and allows you to add light bokeh. However, for some reason, you may not be able to get the background of your photo properly blurred, as you want. Here comes the magic of the editing software, Photoshop offers a variety of blur filters that can do the job perfectly.
In this article, I will go through the different types of blur filters and explain their options, then I will make an example, systematically, and finally, there will be more examples.
Types of blur filters
Field blur
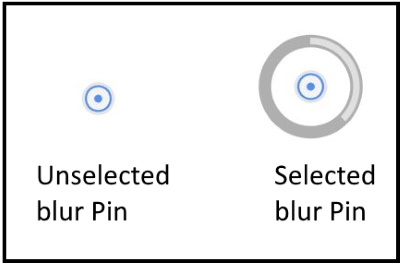
Use Field Blur to build a gradient of blurs, by defining multiple blur points with different amounts of blur. Add multiple pins to the image and specify a blur amount for each pin.
The final result is the combined effect of all blur pins on the image. You can even add a pin outside the image, to apply the blur at corners.
- Choose Filter > Blur Gallery > Field Blur.
- A Field blur pin is placed on the image. Click the image to add additional blur pins.
- Click a pin to select it, and do one of the following:
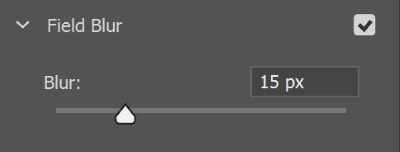
- Drag the blur handle to increase or decrease the blur. You can also use the Blur Tools panel to specify a blur value.
- Drag the pin to a new location.
- Press Delete to remove it.
The before and after photos of applying the field blur filter are shown below.
Image by Rondell Melling from Pixabay
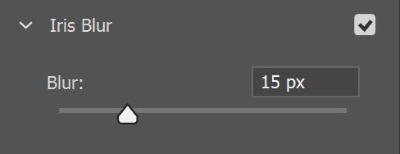
Iris blur
Use the Iris blur to simulate a shallow depth-of-field effect to your picture, irrespective of the camera or lens used. You can also define multiple focus points, an effect almost impossible to achieve using traditional camera techniques.
- Choose Filter > Blur Gallery > Iris Blur.
- The default Iris blur pin is placed on the image. Click the image to add additional blur pins.
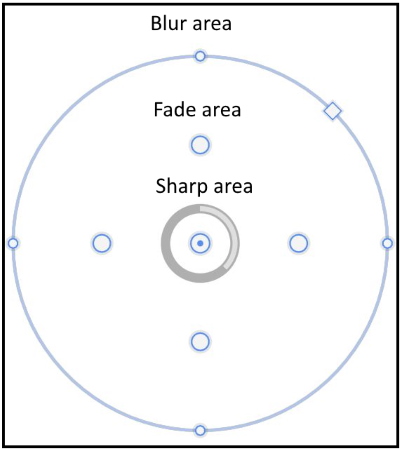
- Drag the handles to move them to redefine the various areas.
- Drag the blur handle to increase or decrease the blur. You can also use the Blur Tools panel to specify a blur value.
The before and after photos of applying the iris blur filter are shown below.
Photo by Ehab Amin
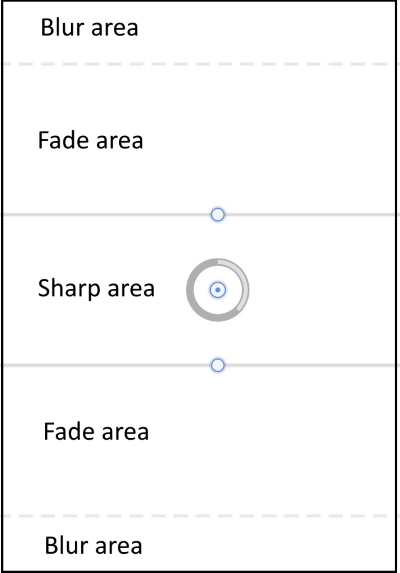
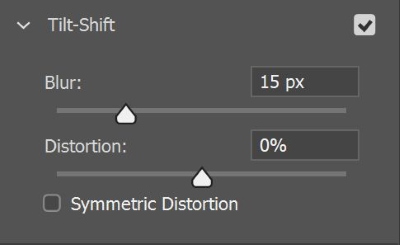
Tilt-Shift
Use the Tilt-Shift effect to simulate an image taken with a tilt-shift lens. This special effect blur defines an area of sharpness and then fades to a blur at the edges. The Tilt-Shift effect can be used to simulate photos of miniature objects.
- Choose Filter > Blur Gallery > Tilt-Shift.
- The default Tilt-Shift blur pin is placed on the image. Click the image to add additional blur pins.
- Drag the blur handle to increase or decrease the blur. You can also use the Blur Tools panel to specify a blur value.
The before and after photos of applying the Tilt-Shift blur filter are shown below.

Photo by Ehab Amin
Path blur
Using the Path Blur effects, you can create motion blurs along paths. You can also control the shape and amount of blurring.
- Choose Filter > Blur Gallery > Path Blur.
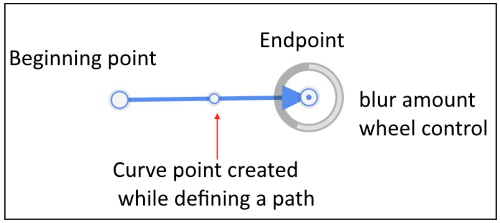
- In the Blur Tools panel, under the Path Blur section, specify whether you want to apply a Basic Blur or a Rear Sync Flash blur. A Rear Sync Flash blur simulates the effect of a flash fired at the end of an exposure.

- Specify the following settings:
- Speed: Adjust the Speed slider to specify the amount of path blur you want to apply to the image. The Speed setting is applied to all path blurs in the image.
- Taper: Adjust the slider to specify a taper value. A higher taper value lets the blur trail off gradually. The Centered Blur option helps create stable blurs by centering the blur shape for any pixel on that pixel.
- In the Motion Blur Effects tab, specify the following settings:
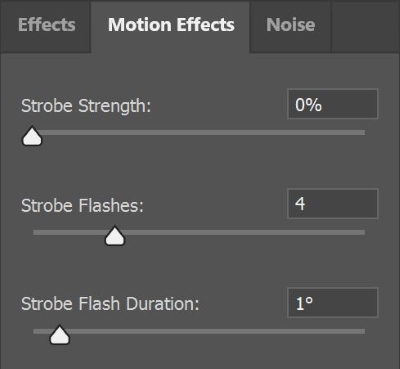
- Strobe Flashes: Set the number of exposures of the virtual strobe flashlight.
- Strobe Strength: Determine how much blurring is displayed between strobe flash exposures.
An example of applying the path filter on a photo is shown below
Photo by cottonbro from Pexels
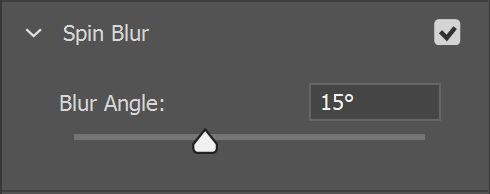
Spin blur
Using the Spin Blur effect, you can rotate and blur the image around one or more points. The spin blur is a radial blur measured in degrees. Photoshop lets you work with center points, blur size and shape, and other settings, all while viewing a live preview of the changes.
- Choose Filter > Blur Gallery > Spin Blur.
- In the Blur Tools panel, under the Spin Blur section, use the Blur Angle control to vary the amount of blurring. You can either specify an angular value (0-360°) or adjust the slider.
In the Blur Effects panel, on the Motion Blur Effects tab, specify the following settings:
Strobe Flashes: Set the number of exposures of the virtual strobe flashlight
Strobe Strength: Determine how much blurring is displayed between strobe flash exposures. Strobe Strength controls the balance between ambient light and the virtual strobe flashlight.
Strobe Flash Duration: Let’s you specify, in degrees, the length of a strobe flash exposure. Strobe Flash Duration controls the length of the blur for each flash exposure in terms of angular distance along the circumference.
An example of applying the spin filter on a photo is shown below
How to blur the background
The method I used consists of selection and separating the main subject from its background by mask, then making another rough selection in a separate layer and fill it with the background, finally apply the blur filter to this layer.
Step 1
Open photo in Photoshop
Step 2
Unlock the layer by clicking on the lock symbol
Step 3
Duplicate the original layer. By right-clicking on the layer and choose the Duplicate layer.
Step 4
Select your subject. Select > Subject
Step 5
Refine selection using any selection tools by adding or subtracting from the original selection.
Step 6
Use the Select and Mask Tool. Select > Select and Mask.
Step 7
Choose the view, and adjust the opacity according to your background. Use the refine edge tool to finalize the selection.
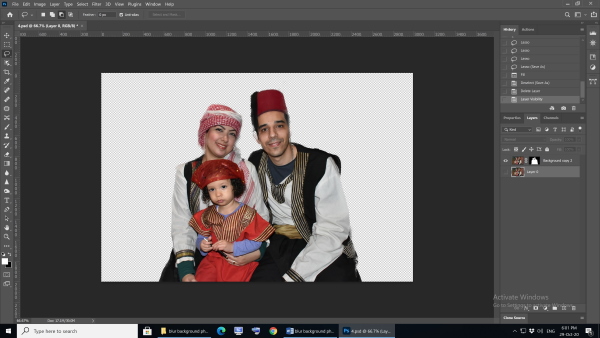
Step 8
Choose the output to New Layer with Mask, then press O.K, the layer will look like the photo below:
Step 9
Duplicate the original layer. By right-clicking on the layer and choose Duplicate layer.
Step 10
Make a rough selection using the lasso tool
Step 11
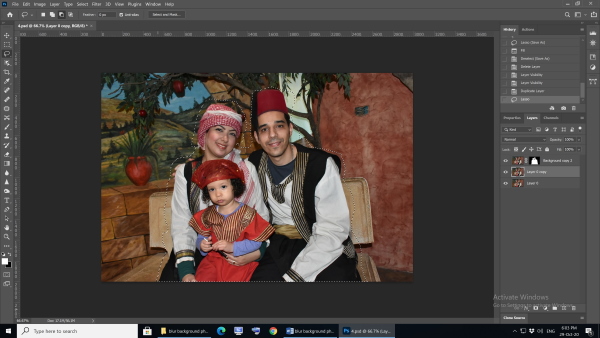
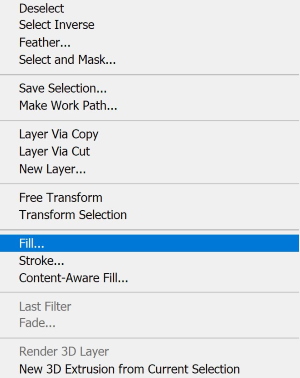
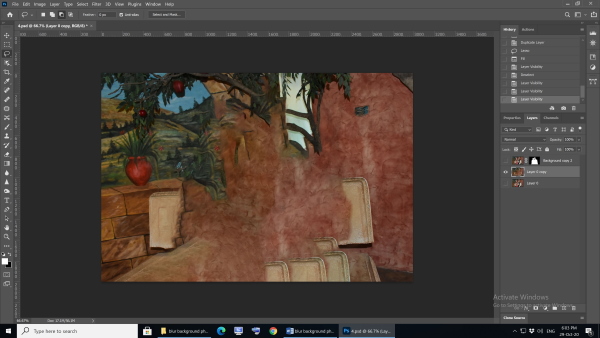
Fill the selection by right-clicking the layer and choose fill. Choose content-aware from the popup menu
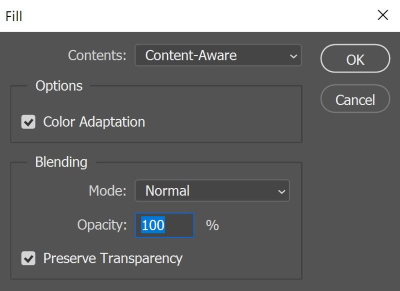
The layer will look like the photo below
Step 12
Convert the layer to a smart layer (to allow you to edit any filter you going to apply) by right-clicking the layer and choose Convert to the smart layer.
Step 13
Select Filter > Blur Gallery > Field Blur and adjust the blur from the slider as required and then press O.K
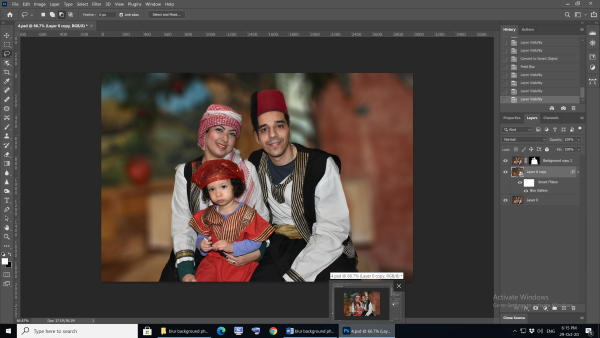
The before and after photos are shown below
Photo by Ehab Amin
Examples
The following are more examples of blurring the background of some photos. The original photos are accredited below each photo.

Photo by Anastasiya Gepp from Pexels
Photo by Artem Beliaikin from Pexels
Photo by Alasdair Braxton from Pexels
Related posts
What Are The Selection Tools In Photoshop?
What Is A Mask In Photoshop? – A Complete Beginner’s Guide
Best Way To Select Hair Photoshop
Thanks for reading, I hope you enjoyed the article if you have any questions just post them below & I will be happy to answer you.
If you enjoy the site, don’t forget to subscribe, we will only inform you when a new article is posted.

Hello Amin, thanks so much for this wonderful post where you give us some very wonderful information on how to use blur on my pictures using Photoshop. This is something that is didn’t even know before and I think that it will be very nice for me to be able to us it. The names on my photoshop are a little different though. I see radial blur and guasian blur. Are these different,?
Hi Jamie
Thanks for your comment. The article only described the filters in the filter gallery. However, there are 11 more types of blur, they are under the filter > Blur menu
I love the portrait setting on my iPhone. The first time I used it was because my daughter asked me when I was taking a picture of my granddaughter. Why? Because the area behind her was a mess! I’ve been in love with the setting ever since.
I like the fact that the focus is immediately on the subject. It makes my pictures look classy and professional. I had no idea there were different types and degrees of blur but from looking at your examples, I can see why they would be useful. I think the Iris blur would be fun to work with because of the ability to blur or define different areas. I think the strobing, spin blur would make me dizzy!
Thanks for sharing!
Thanks for your nice comment