

All of us enjoy great landscape photography. Sometimes, these photographs can be a bit dull if they don’t have any special effects. In order to make landscape photos more interesting, you need to master certain skills that require creating special effects.
In this article, we are going to show you how to create the misty water effect. If you want more tips on how to create special effects, as well as other helpful guides for beginners, be sure to check out Creative Photo Connect. Here you can find many interesting tutorials and tips that are going to help you master the art of photography.
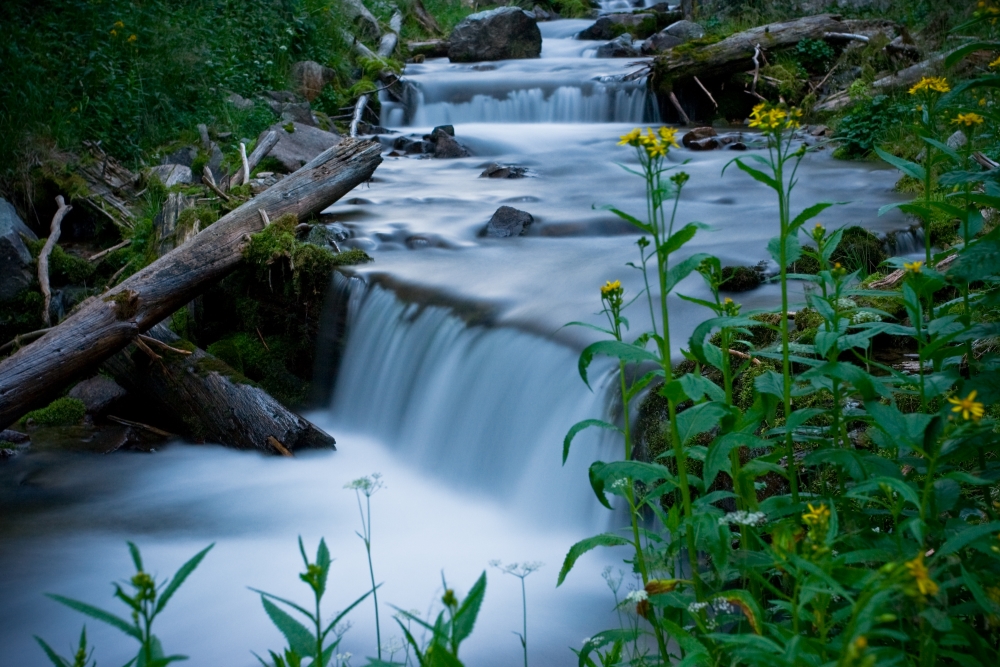
What is the Misty Water Effect?
The misty water effect is created by the waves of water. The longer the exposure time, the better the effect. When you create the misty effect, what you actually do is allow the camera to shoot a long exposure time. Because of this, the water has time to move over the rocks or sand and go back. Its movement is the one that creates the illusion of misty water.
What you need
Before you decide to create this effect, prepare all the necessary equipment. Also, make sure to check the weather forecast beforehand and pick a day when it is not raining or when there is no mist outside. The clearer the sky, the better. Also, don’t shoot the photo in the middle of the day. It is best to take these pictures in the afternoon or at sunrise.
You are going to need a DSLR camera, a tripod, and a shutter release cable. Also, you might need to use neutral density filters if you want to shoot in bright daylight. The tripod is very important in order to create this effect because you need to keep the camera very still.
The Scene
Pick the water source you want to shoot and move around it to find the best spot. You need to take photos before you try this effect in order to find the right composition. Also, try taking photos in the same spot at different times of the day to see where the light sets.
Prepare the camera
The next step requires you to put the camera on the tripod and secure it. After that, you need to select the settings on the camera to get a clear shot. The shutter speed is the most important setting because it is the one that creates this effect. You need a shutter speed of ½ second or longer. If you want a super silky and misty effect you need to select a longer shutter speed.
You also need to put the camera in manual mode by pressing the M button on the camera. Most DSLR cameras have this option. The ISO should be set to 100 and the aperture to f/22. Once you select your focus point you can begin taking photos.
The Misty Water Effect
After you’ve prepared the equipment and selected the focus point, it is now time to start taking photos. At first, you might take the photos a bit shaken or you might forget to set the camera on manual. The auto-focus could ruin the photos. Don’t worry, try to take as many photos as you can and always change the settings a bit. After that, see which one has the desired effect and try taking more photos with the same settings.
A natural density filter cloud come in handy when there is too much light. Use an 8-stop natural density filter if you are shooting in the afternoon. If you are shooting in a forest or at sunset you can use a 1 stop natural density filter. Also, it is easier to use a shutter release cable when trying to obtain the misty water effect. If you push the shutter release button on your camera you might shake the camera and ruin the photo.
These are a few tips that can help you create the misty water effect. In order to get the best photos, try out different settings on your camera and see which one works. Also, you can try this technique in different spots to create interesting and unique photos.
Image source: Wikipedia
This blog post was sponsored by (Creativephotoconnect.com)