

Serious and professional photographers make a color calibration of their monitors to make sure that the photos and images they are creating and editing on their computer will look the same when they are printed or shown on screen. When you edit photos on a non-calibrated display, you run the risk of making edit decisions based on the wrong colors. You don’t want to spend hours choosing the perfect subtle color scheme only to see a mismatched mess on someone else’s monitor or coming out of a printer; you need to calibrate your monitor so that what you see is what you get. So, by calibrating your monitor, you are standardizing it, Any photo you edit on your calibrated monitor should look the same on any other calibrated monitor, and should also print with little or no adjustment, and it should come back from the lab and look as you expected. So don’t miss out on an important step that can make a huge difference to your photos, always calibrate your monitor at regular intervals.
Prepare your monitor for calibration
You have to do some tasks before you begin the calibration process:
- Make sure that your monitor is warm and stable by turning it on at least a half-hour before calibration.
- Set your monitor’s resolution to its native, default screen resolution.
- Make sure that you are calibrating your monitor in a room with moderate ambient lighting. The room doesn’t need to be in total dark, but you should avoid the falling of direct light on your monitor, sharp glares and color casts should be avoided.
- You got to know well the control menu of your monitor and how to adjust its different parameters.
How to Calibrate Your Monitor
There are three ways to calibrate your monitor, you can use your operating system, or use online tools, or use a hardware tool. First I would like to mention that the first two methods depend to some extends on the judgments of the person who is doing the calibration, but the third one is the rather more standardized process.
-
Using your Operating system
For Windows 10 users, the calibration tool can be found by opening the Settings app. Click the System selection in the main menu, then pick Display in the next menu. Once you have Displayed open, scroll to the bottom and click Advanced Display Settings. Once again, scroll down until you see Color Calibration, and then click on that.
Follow the on-screen instructions to calibrate your display’s gamma, brightness, contrast, and color balance settings as shown in the following photos:


For Mac OS users, the Display Calibrator Assistant is located in the system preferences under the Displays tab. Mac’s step-by-step instructions will walk you through the calibration process. Follow the on-screen instructions to choose your display’s brightness, contrast, native gamma, target gamma, and target white point. Click Continue and save the calibration profile.


-
Using online tools
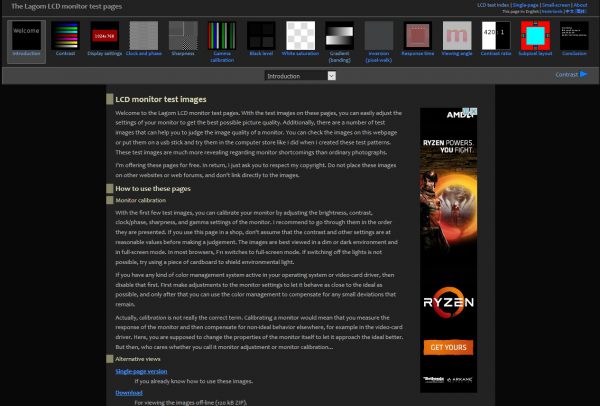
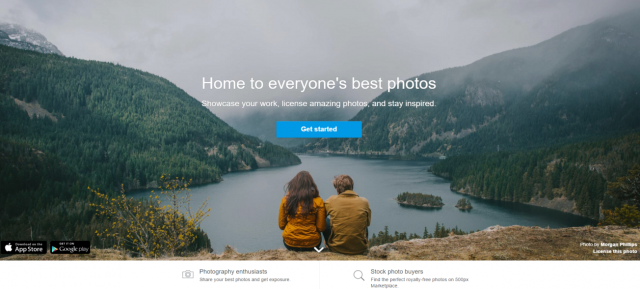
There are many web-based calibration tools that help you manually adjust your monitor settings and colors, the following are some of them:
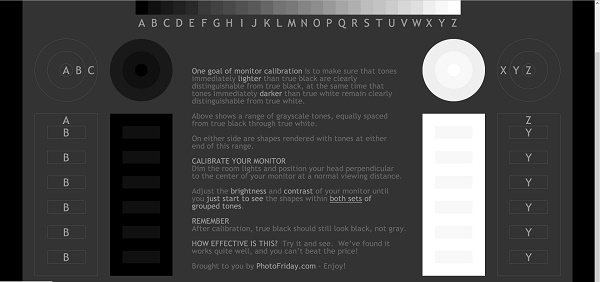
It is one of the better calibration websites out there. The site has interactive tests to help you adjust your monitor’s screen colors and to see if your monitor can produce smooth gradients.

It is a simple tool that is designed to help you calibrate the brightness and contrast of your screen, use your monitor setting menu to adjust brightness and contrast until the transition of tones from black to white is clearly distinguishable on the screen.
The website allows you to adjust various things such as contrast, sharpness, Gamma calibration, black level, white saturation, gradient (blending), and much more.
-
Using colorimeter hardware
The previously mentioned methods of calibration processes rely on an individual’s perception of color and are therefore open to subjectivity based on how you see different colors and will vary to a great extent from one person to another. To bypass this dilemma, ensure your monitor is calibrated to its true potential, and create a standard calibrating process that does not depends on human factors, you should go for one of the calibrating devices available in the market.
A calibrating system usually comprises a package that includes calibration software to install on your computer, a calibration device (a precision colorimeter) that plugs into the USB port and reads directly from the monitor screen, and simple step-by-step instructions. All the devices mentioned in this article can be used to calibrate multiple display types, are Mac/PC compatible, and detect changes in the ambient light viewing conditions for the most consistent results. Color calibration hardware/software packages are available in a wide variety of configurations and sizes, and prices.
Steps for calibrating monitors using a colorimeter
- Make sure you have done the pre-calibration steps (mentioned at the beginning of the post).
- Install the included software.
- Connect the calibration colorimeter to your computer by plugging it into the USB port and hang, attach or point it at the monitor screen as indicated in the manual.
- Start the program and follow the prompts.
- If the software needs some initial setting of the monitor, typically recommended starting points are Luminance, 120; Gamma, 2.2 for PCs, 1.8 for Macs; color temperature, 6500K; Color display, 24-bit.
- As the program runs, the monitor screen will display a sequence of patterns that includes colors, color scales, brightness and grayscale targets, which are used to calculate an ICC profile and save it to your computer.
- Recalibrate regularly.
If you make (or intend to make) money from photography, here are my recommended three systems, you can choose from:

Product Highlights
- Ergonomic: 3 Integrated Functions
- Advanced Filter and Optical Systems
- For Virtually All Modern Displays
- Field-Upgradeable for Future Technology
- Rotating Diffuser Arm / Tripod Mount
- Easy and Advanced Modes
- Ambient Light Measurement/Smart Control
- Flare Correct
- Intelligent Profiling for Color Accuracy
- Automatic Hardware Adjustment
X-Rite i1 Photographer Kit

Product Highlights
- Fast Calibration Speed
- NTSC/PAL SECAM/ Rec.709/Rec.220/ DCI-P3
- Multiple Display & Workgroup Matching
- Calibrator Supported by Atomos Monitors
- White Balance Target
- 24-Patch Classic Target
- Enhancement Target
- Professional, Custom Camera Profiles
- Dual Illuminant Profile Creation
- Capture a Consistent White Point
Datacolor Spyder5Elite
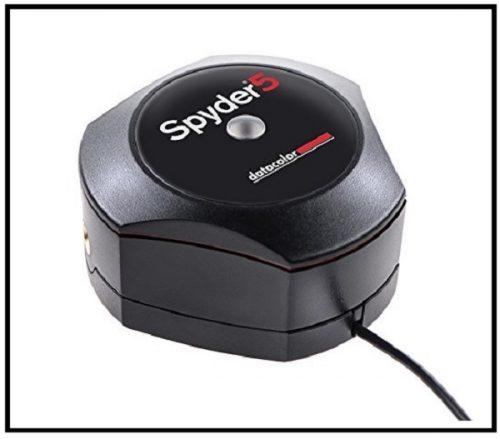
Product Highlights
- Calibrate Monitors, Projectors, Laptops
- Studio Match Assistant
- Includes Color Probe
- Unlimited Calibration Settings
- User-defined and REC. 709 Settings
- 5 Ambient Light Settings
- Before and After Evaluation
- Video and Print Standards
- Advanced Display Analysis
- Comes in a Reusable Box / Case
Related posts
Thanks for reading the article, hope you find it useful and informative. If you have any questions, just drop them in the box below and I will be glad to respond immediately.
Also, don’t forget to subscribe, we will notify you if there is a new post.

Thanks for this great article Amin! I didn’t know that there was hardware available to calibrate a computer monitor or even online tools.
I thought the only method you could use to calibrate was your operating system, but you’re right. If you think about how men and women see colour differently then you’ll know the struggles that will come with calibrating using a human. It just makes sense to use hardware.
Thanks again man!
Thanks for the comment, calibrating the computer monitor is essential, especially if you are going to print your photos.