

Learning how to print a photo is important because there’s something beautiful and special about a physical print. When we look at a printed image or flip through an album we really slow down and appreciate it, rather than clicking through thousands of digital files without even stopping to really look.
What You Need to Know about Photo printing
Choosing the right printers
The most important issue is the printed photo quality which is a direct concern of the printer’s technology. There are only two printing technologies today that can print at true photo quality: inkjet and thermal dye, although Laser technology is getting better at printing photos, it is well behind inkjets on that score.
Two categories of inkjets usually do better than drugstore-level quality: dedicated photo printers and near-dedicated photo printers. Dedicated photo printers, a category that also includes thermal dye printers, are limited to small-format photos, which usually means a maximum 4- by 6-inch photo size, although some print panoramic sizes and some print photos as large as 5-by-7 inch.
Near-dedicated photo printers are aimed at serious photographers, both amateur and professional, and are among the top-level inkjets you can buy. They’re near-dedicated because they can typically print at sizes up to about 13 by 19 inches.
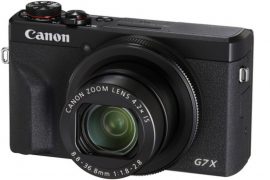
You can review my post “What is The Photo Printer- Top 5 to choose from!”, it will help you a lot when you decide to buy a printer.
The difference between Dots Per Inch (DPI) and Pixels Per Inch (PPI)?
The terms Dots per Inch (DPI) and Pixels per Inch (PPI) are commonly used to describe the resolution of an image. However, the terms do not mean the same thing and there are distinct differences between the two:
DPI refers to the number of printed dots contained within one inch of an image printed by a printer.
PPI refers to the number of pixels contained within one inch of an image displayed on a computer monitor.
Both PPI and DPI are units to describe the output resolution of an image when displayed on a screen (PPI) or printed out on paper (DPI). If you divide the image size (total number of pixels of the digital image) to this output resolution, you can determine the size of which the image is shown on-screen or printed out.
For example, an image with 3000×2000 pixels, printed with an output resolution of 300dpi will have a print size (width) of 10 Inch (3000 pixels / 300dpi)
Most digital cameras will have an image size setting in the camera menu. For the best picture quality, use the highest image size setting available on the camera when taking pictures.
Standard printing paper sizes
Imperial units
Print size (in) Image size (pixels)
3 x 5 900 x 1500
4 x 6 1200 x 1800
5 x 7 1500 x 2100
8 x 8 2400 x 2400
8 x 10 2400 x 3000
8.5 x 11 2550 x 3300
9 x 16 2700 x 4800
11 x 14 3300 x 4200
11 x 16 3300 x 4800
If you want to calculate another size, just multiply the number of inches in your intended print size by 300 and that’ll give you the pixel dimensions (assuming your printer is set at the standard 300 pixels per inch).
- Metric units
ISO Standard Image size (pixels)
A0 9933 x 14043
A1 7016 x 9933
A2 4961 x 7016
A3 3508 x 4961
A4 2480 x 3508
A5 1748 x 2480
A6 1240 x 1748
A7 874 x 1240
If you’re using the metric system and want to convert centimeters to pixels, multiply the number of centimeters by 118.11.
Types of printing paper
Printing Paper has two main characteristics its weight density and finish. Weight density is measured in GSM or “Grams per Square Meter” and will have an effect on how stiff the paper feels. A low weight, between 120-150 GSM is common for brochures and some lower-quality poster prints, but you’ll need to look at printing your photos on at least 150-200 GSM weight paper for standard prints, and 200-300 GSM for keepsake prints. Galleries might even print photos at a heavier, +300 GSM weight to ensure the print is particularly hardy and suitable for long-term storage.
Photo paper also comes in a wide range of finishes. A ‘finish’ refers to the coating applied to the paper during production. The commonly available finishes of printing papers are:
Glossy paper has a shiny finish that makes prints appear brighter with more vibrant colors. While they look high quality, the gloss on the paper also produces a reflection that can obscure your photo.
Matte paper is a good choice when you want to avoid distracting reflections. Good matte papers produce darker blacks than glossy papers, which results in better contrast. The quality matte paper also shows finer details than its glossy counterparts, so keep this in mind if you want your print to show a lot of texture and detail.
Luster paper (satin, pearl, and sometimes semi-gloss) is a premium finish on heavier paper. Luster paper is typically the top choice for photographers because it offers vibrant colors of glossy paper with a finger-resistant finish of matte. Its repeating texture looks like the surface of an orange and hides minor scratches and scuffs. Luster paper also isn’t as reflective as some other paper types, which lessens glare and shine and makes the image easier to see at all angles.
Metallic paper has a rich, distinctive metallic look, almost like the image was printed on a sheet of metal. Although this type of paper is normally more expensive, a metallic finish can make images really pop.
Tips for printing photos
Shoot in RAW
It’s always a good idea to turn off compression, when you want the best possible photo quality and save the photo file in RAW format. Even more important, however, is that you should never edit a compressed photo on your computer and then save it back to a compressed format. JPG is a loss compression scheme, which means it loses information every time you save the file and recompress it.
Shoot at high photo size
You can set your digital camera to record in various sizes from large to small, or high to low. Saving your photos as small as possible takes up less room on a memory card, but if you are planning to print your photos use all the megapixels your digital camera can offer. The more megapixels in an image, the higher the resolution, the better the photo will look.
Calibrate your monitor
Sometimes the colors in your image look great on your monitor but don’t look as awesome when your image is printed out. This is because your monitor displays color using red, green, and blue (RGB) and mixes those colors to make a color palette. Printers use cyan, magenta, yellow, and black (CMYK). In order to make sure your prints match your display, you need to calibrate your monitor.
Check my post “The Color Calibration – How to Calibrate Your Monitor” for more information.
Make Basic adjustments by your editing software
You can get more control over basic features like cropping, resizing, and color management, as well as far more sophisticated editing tools, with a photo-editing program. Firstly, you will need to level the color of the image, using the histogram tools to just clip it at both ends. This ensures depth in the blacks and good clean whites. The mid-tone is really your X-factor, but just be aware that you have detail throughout all tones if that is the look you are after. Be careful if you make it too light, the image could appear milky. While if you make the mid-tones too dark the image could appear muddy.
Secondly, you can adjust the Saturation and the hue of the image to achieve the color pallet you require. Often you can go between the levels and saturation, and make small tweaks as the image takes shape.
Thirdly, you can adjust contrast, sharpness, and resize the photo to the required printing size.
Print from your editing program.
For the best quality prints, copy your photos to your computer and print from a photo-editing program. Photo printers aimed at professionals generally don’t offer direct printing. With some printers, a photo-editing program will also let you print higher-resolution photos than you can when printing directly from a camera or memory card.
Edit copies, not originals
You can edit an image in two ways: Destructively and Non-destructively. With destructive editing, you overwrite the original pixel values, and can’t go back and change things later. With non-destructive editing, you use Adjustment Layers, Smart Objects, and other tools and techniques to modify the image without overwriting the original data.
Another approach is to make a copy of your original photo and do all the edits you want on the copied photo leaving the original one untouched. In any case of mistakes, you may go for the original one.
Don’t Use Resize feature to Enlarge a Photos
Most of the Photo editing software lets you resize an image. It is fine to make a photo smaller, but you should never use this feature to make a photo larger. Doing so will only turn your photo into something heavily pixelated.
There is software, however, that’s specially designed for photo enlargement purposes. One is SmillaEnlarger, an open-source application that’s available for free. Another one, which also can enlarge the photo without sacrificing resolution, is “A Sharper Scaling”
Use the “proof” feature of your editing software
Professional photo editing software like Adobe Photoshop has a proofing feature, which allows you to make adjustments based on a preview of what the program thinks the printed image will look like.
Set your printer for the paper you’re using.
One printer setting deserves special attention. Make sure that the printer (for direct printing) or printer driver (for printing from a computer) is set for the type of paper you’re actually printing. More than one manufacturer has told me, based on calls to tech support, that the single most common mistake people make is not changing the paper type setting to match the paper.
Match aspect ratios.
Another key component to watch when printing photos are to make sure the image you want to print has the same aspect ratio as the paper on which you’ll print the photo.
Make a test print of a photo
A test print is a simple way of gauging the difference between what’s on-screen and what’s on paper. This allows you to make adjustments and understand the difference in output between the screen and printer. For example, if the photo comes out too dark, you could increase the brightness in Photoshop. The same goes for color, sharpness, and contrast.
These simple tips will significantly improve the quality of your printed photos. Without making these adjustments it is likely that your print photos will look dull, lifeless, and blurry. Once you’ve used these tips, however, you should be able to print out photos that are will look great.
Related Posts
What is The Photo Printer- Top 5 to choose from!
Thanks for reading the article, hope you find it useful. If you have any questions or comments, please write it down in the box below, and I will gladly answer.
Don’t forget to subscribe, you will be notified if there is a new post.


I absolutely love photography. In fact my father-in-law was a photographer/printer back when film was still used. I have to say this whole business of digital photography still confuses me a bit, but your explanation of dpi and pixels really cleared things up. I will definitely follow your blog for more tutorials in the future.
Many thanks for your nice comment, willing to see you again!