

Layers are probably the single most important addition to Photoshop since the original version, but layer masks are a close second. There are two types of masks: clipping masks and layer masks. These two tools are closely related in concept but very different in application. In this post I will start by discussing layers masks, which are generally what people are referring to when you hear them discuss Photoshop masking, then we will discuss the needs to use them, how they work, and some applied examples.
Layer opacity controls the transparency of the entire layer at once; a mask gives you more control over specific areas. If you want the entire layer to be at 90%, you would lower the opacity, as shown in the following example:
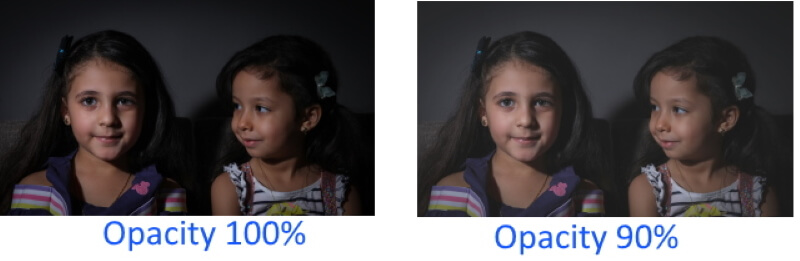
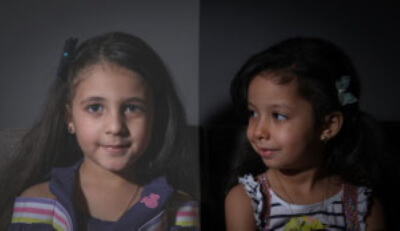
If you want just a specific area of a layer to be at 90%, say the left side of the photo you would use a mask as shown in the following example:
So, What Is a Mask?
A mask is a way to apply any editing effect to a specific portion of an image. Mask uses black, grey, and white to do his job. If you paint a portion of the mask with black color it will hide the corresponding portion of the image and make it invisible, in other words, it makes it opacity zero. If you paint a portion of the mask with white color, it will show the corresponding portion of the image and make it visible. The color that you paint tells Photoshop how opaque to make the pixels at that point. White means 100% opacity and black means 0% opacity. So, simply white reveal and black conceal.
Types of a layer mask
There are two types of Adobe Photoshop layer masks:
- A layer mask is also known as a pixel mask is a resolution-dependent image created with the painting and selection tools. Essentially a layer mask is a greyscale image where solid black represents complete transparency and white represents the visible elements; shades of grey represent levels of transparency.
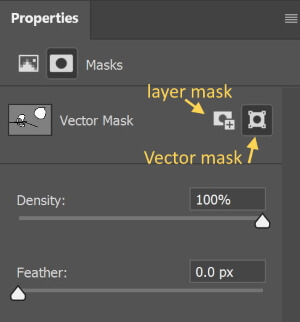
- A vector mask is a resolution-independent object created with a pen or a shape tool that contains anchor points. A vector mask represents a path where the object clips out the contents of the layer. We can also use the Adobe Photoshop properties panel to refine the mask with the same options as the layer (pixel) mask.
How to create a mask?
To create masks you can use the add mask button at the bottom of the Adobe Photoshop layers panel; this button can create layer (pixel) and vector masks.
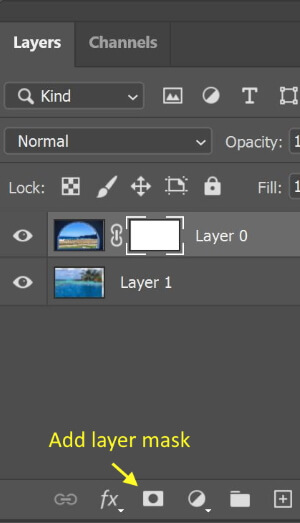
You can also use the Adobe Photoshop properties panel to edit the mask, you have options to change the opacity to let more or less of the masked content through, invert the mask or refine the mask edges by feathering, etc.
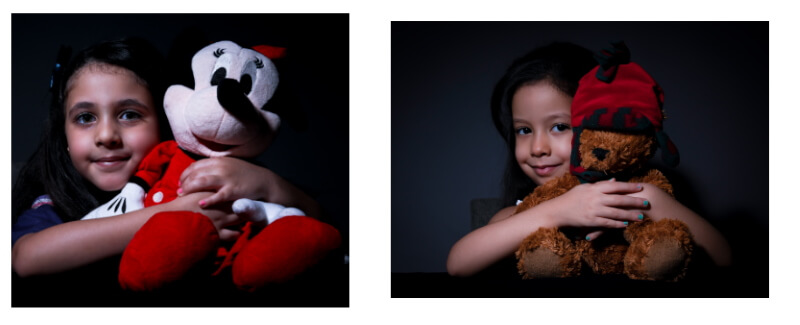
An example using a layer mask
- Load the following two images into Photoshop
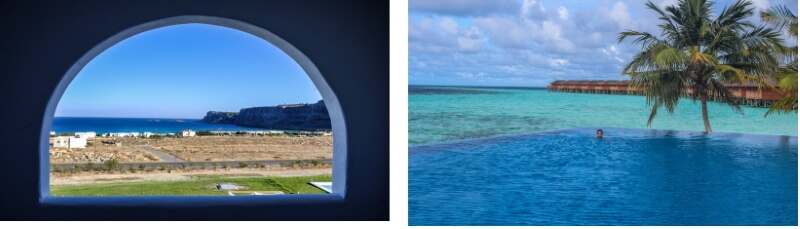
- Copy the second image, and past it as a layer in the first image
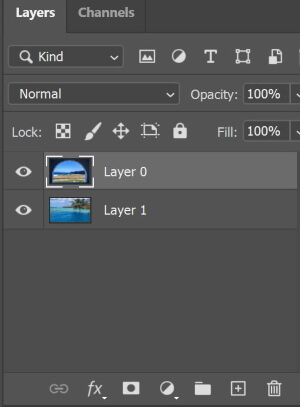
- Create a mask on the top layer with white color.

- Paint with black color on the top image.
- It will conceal part of the top image and reveal what is behind it from the below image.
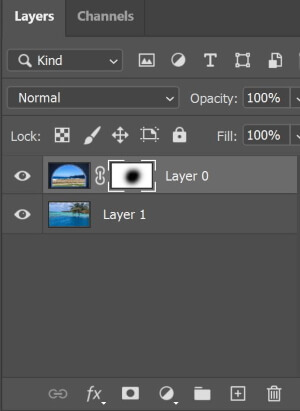
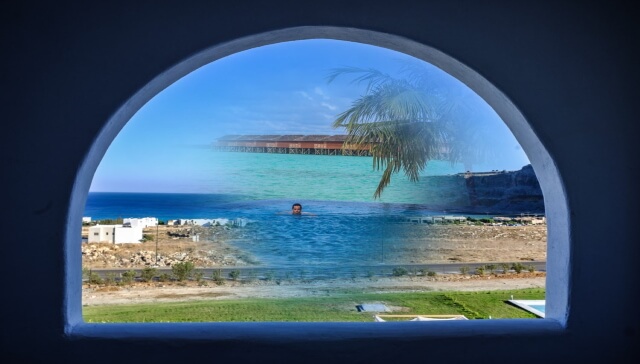
- Continue painting with black inside the window.
The result is shown below

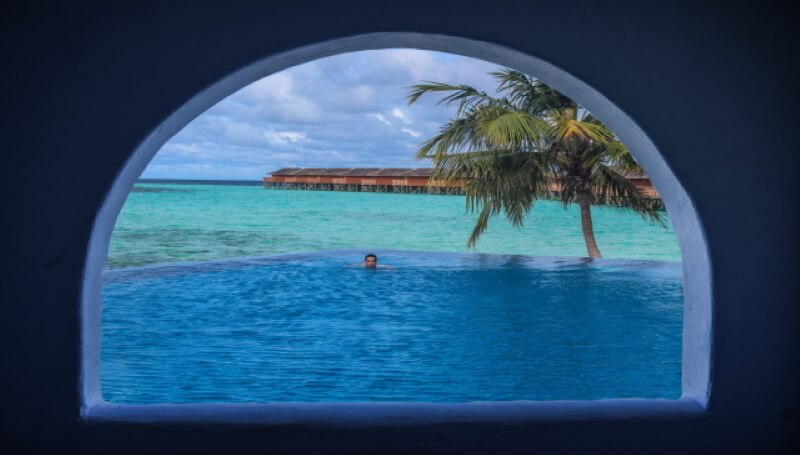
Photo by Ehab Amin
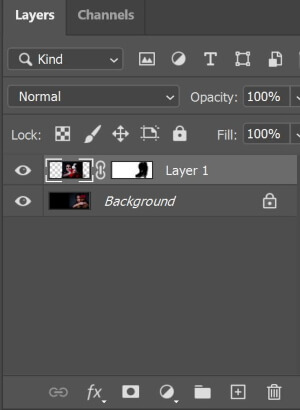
Layer masks chain link
When you create a layer mask, a chain link is shown between the layer thumbnail and layer mask thumbnail. Quite simply, this chain-link means that if you move the layer image on the canvas, the layer mask will move around with it.

How to modify a layer mask?
To select the mask click on the mask thumbnail on the image layer, you can then modify the mask with the paint or vector path selection tools. To disable, enable, or delete the mask right click on the mask thumbnail. Use the properties panel to control Density, Feathering, and refine the Mask.
An example using a clipping mask
Clipping masks simply borrow transparency from the layers used to make them. In the following example, our goal is to cut or “clip” the fancy layer to be in the shape of the letters of the text.
We will use two layers: a black layer and a fancy layer.
- Choose the black layer and with the text tool from the toolbar type some text.
- Make the fancy layer on the top
- Choose the fancy layer and from the layer, menu click to add a clipping mask.

The result is shown below
Why not use the eraser tool instead of the mask
When you are using the eraser tool do not forget that this tool is destructive, it erases pixels and you cannot bring them back. However, using a layer mask is a non-destructive way of editing, you hide pixels not deleting and you can easily undo or modify their effect.
Applied examples
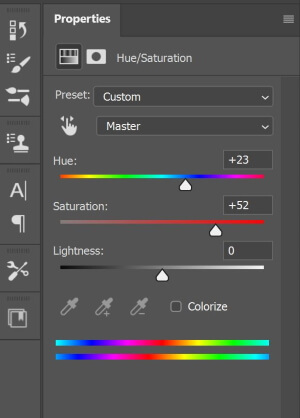
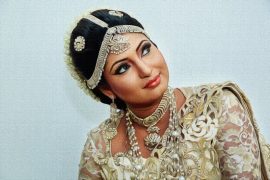
Using a mask to change the hue and saturation of a part of a photo
- Select an image layer in the Layers panel.
- Click the Create new fill or adjustment layer button at the bottom of the Layers panel. Choose Hue/Saturation in the pop-up menu. A Hue/Saturation adjustment layer, with a white layer mask thumbnail, appears in the Layers panel above the layer you selected. The Properties panel displays Hue/Saturation controls for this adjustment layer.
- Click on the adjustment layer mask (remember that black hides the adjustment; gray partially shows the adjustment, and white shows the adjustment). Start painting on the girl with black.
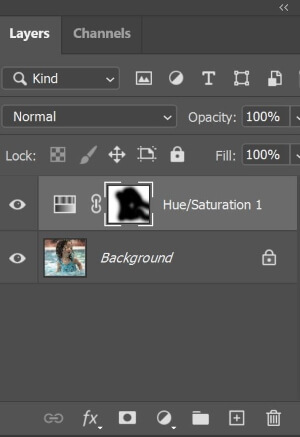
- Click on the adjustment layer, in the Properties panel, drag the Saturation slider to the right to increase color saturation. This adjustment now affects the entire photo on the layer below except the girl.
The before and after is shown below
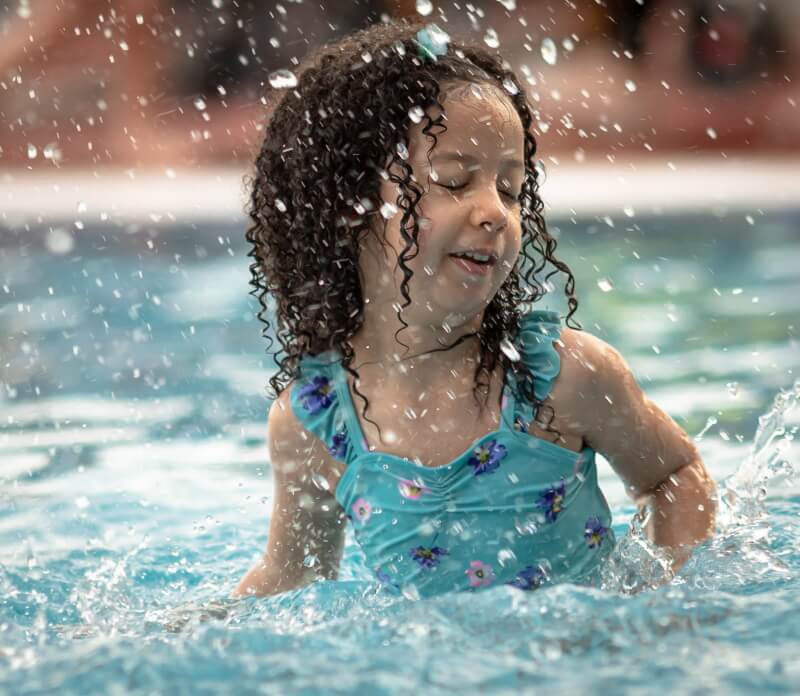
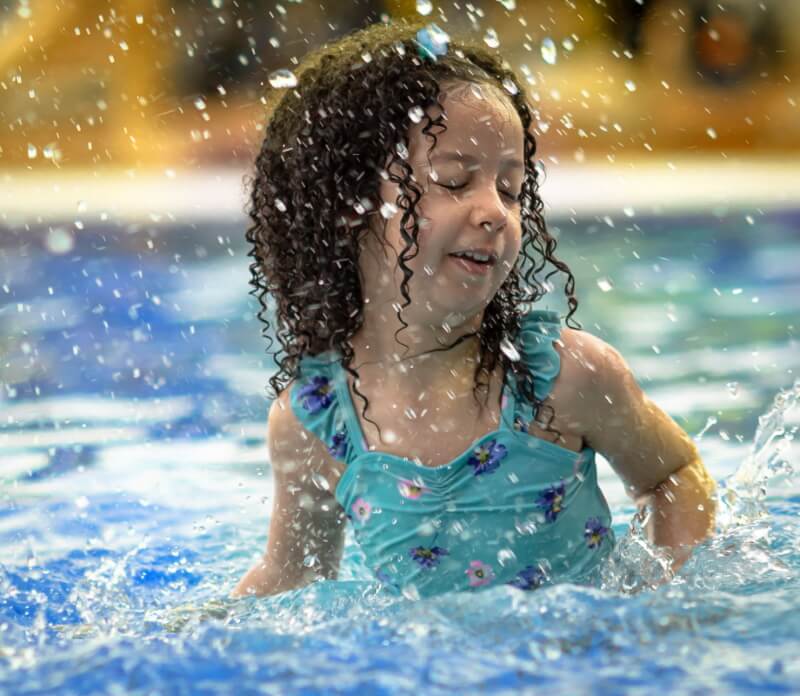
Photo by Ehab Amin
Using a mask to change the brightness/contrast of a part of a photo
Use the same steps as the above example but choose the brightness/contrast adjustment layer instead of the hue and saturation adjustment layer.
The before and after is shown below


Photo by Ehab Amin
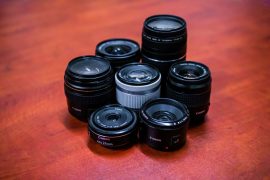
Using a mask to make a composite photo
Open the two photos that you want to compose.
Copy one of them and past it as a layer in the second one
Click the Add layer mask button in the Layers panel to add a layer mask to the active layer.
Select the Brush tool and set black in the Foreground color box.
Adjust the size of the brush. the left or right square bracket key on the keyboard.
Make sure the layer mask is active.
Paint with black over the image where you want to hide the layer with the layer mask to see the layer below.
The final composes photo is shown below.


Photo by Ehab Amin
Useful shortcuts
- X (Switch Colors) — swap your foreground and background colors. Very handy when working with masks.
- D (Default Colors) — reset your foreground and background colors to black and white, respectively.
- Ctrl + ‘+’/’-‘(Zoom In/Out) — quickly zoom in or out without changing your current tool.
- Shift + Click Mask (Enable/Disable Layer Mask) — when working with masks it’s typically done in small increments. Disabling the mask allows you to check the results of your masking against the original.
- Alt + Click Mask (Toggle Mask Visibility) — Doing this will bring up the mask as a grayscale image so you can see what you’re working with. Useful if you have areas that need to be filled in or smoothed out.
- Ctrl + Click Mask (Load Mask as Selection) — Selects the white part of the mask (grays are partially selected). Useful if you want to duplicate a mask or it’s inverse. Using Ctrl + Click on a layer without a mask will select the non-transparent pixels in that layer.
- Alt + Click Mask (Toggle Mask Visibility) — Doing this will bring up the mask as a grayscale image so you can see what you’re working with. Useful if you have areas that need to be filled in or smoothed out.
- Ctrl + Click Mask (Load Mask As Selection) — Selects the white part of the mask (grays are partially selected). Useful if you want to duplicate a mask or it’s inverse. Using Ctrl + Click on a layer without a mask will select the non-transparent pixels in that layer.
Conclusion
To sum up, there are two primary types of masks in Photoshop: layer masks and clipping masks. Layer masks use values of gray to assign levels of transparency to specific portions of a layer or group of layers while clipping masks use the transparency of one layer to define that of a different layer or group of layers.
Are you looking for Photo editing resources or editing Services?
Some photographers are struggling to learn and master editing software like Lightroom or Photoshop, they found the editing process is taking too much of their time. Therefore, assigning the editing tasks to an editing service may be the answer.
On the other hand, some others are looking for editing resources like actions, overlays, and textures to help them. For those I highly recommend paying a visit to my store, it has amazing professional photo editing tools.
Thanks for reading, I hope you enjoyed the article if you have any questions just post them below & I will be happy to answer you.
If you enjoy the site, don’t forget to subscribe, we will only inform you when a new article is posted.


This is a nice and educating article. I do not have an idea on how to go around Photoshop. But I have a younger sister who does. She is studying multimedia technology, and makes use of Photoshop and other photo, audio and video editing softwares. She’s definitely going to love the content and information in this article. So, I would love to make it known that I would be sharing this article with her.
Thank you Kelvin
Hi! What an amazing tutorial! How I wish I can learn how to use these different masks in Photoshop. I tried using Photoshop before. Since I have no formal training on how to use it, I rely solely in watching YouTube videos and learn the basic of using layers and removing backgrounds. I love Photoshop since the quality of the output image is always good.
It is only that I easily get overwhelmed with many tools that I do not actually know how to use. I am happy seeing this article and would be surely looking forward to more of your tutorials. Thank you.
Hi Joy
I appreciate your comment very much, I have to acknowledge that photoshop is not easy to learn, and it has a tremendous number of tools. However, the important thing is that you do not have to learn all its tool, but only the tools you indeed need it for your editing task. Wishing you all the best.