

Sports photography can be one of the hardest forms of photography to master, but with time, patience and practice you will be creating professional looking images every time. I will be giving you some tips on how to shoot sports photography; I hope they are useful and helpful to you to improve your sports photos dramatically! Let’s get to it.
Understand and Learn the Sport
You need to have a strong and instinctive understanding of a sport to really shoot it well. Because a big part of sports photography is about anticipating action. If you know a lot about the sport you are taking photos of as anticipating where the ball or the action may be is going to help you get the best shots possible. Follow the action with your camera, ensuring that you are zoomed in close enough to have the majority of the frame be the player themselves.
It is highly advisable to do some research and know the sport that you are planning to shot; it will provide a big lift for your images.
Have the Right Gear
Sports photography, unlike any other type, requires the biggest and most expensive equipment available. This allows you to shot from anywhere around the stadium, including the end zones in football, creating the perfect head-on shot. Most sports photographers at events use at least two camera bodies. Why would you even need two bodies? Because with the fast pace of sports, there’s no time to change lenses, by the time you change lenses, even if you’re really fast about it, you’ve already missed the shot, so Try to carry more than one body, and switch bodies (use a long lens on one body and a shorter or wide-angle lens on the other). Even if you have to borrow or rent a body for the game, it’ll make a big difference when it comes to getting those crucial shots. Additionally, if you want to capture video footage of part of the game, having a second camera will come in handy so that you can record on one and shoot images on the other.
The key to capturing the perfect shot in sports comes down to relatively few things.
1-The Camera
You can shoot sport with just about any camera, but some cameras offer special features that can give you a very good chance to catch the exact and perfect shot. These features may include the following:
-
High shutter speeds
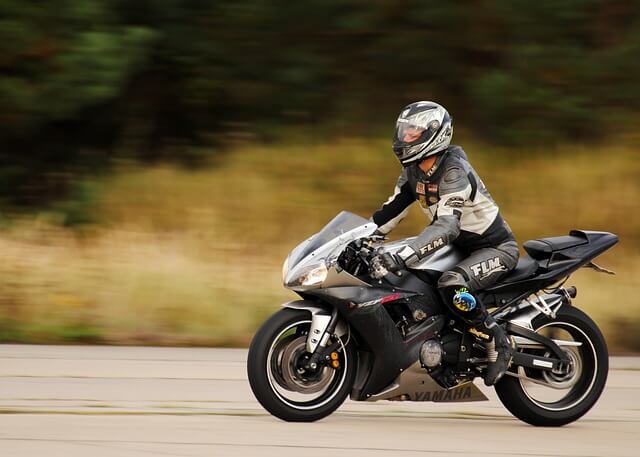
Most consumer-level digital cameras can shoot at shutter speeds up to 1/1000th of a second, which usually is plenty fast enough to stop the action of a moving subject. But when you are shooting very high-speed action, such as motorsports, typically you’ll find that 1/1000th of a second isn’t fast enough to freeze the action properly. So using a fast camera, for example, the Canon EOS 7D Mark II gives you a max shutter speed of 1/8000sec, which is eight times faster.
-
High frame rates
Continuous Shooting mode known as ‘burst’ mode is a feature that allows you to take multiple photographs within a short timeframe and in rapid succession. The speed of a camera’s Continuous Shooting mode is based on how many photos the camera can take within one second – such as 10 frames per second. The higher frame per second is the more chances that you will find the perfect shots among the taken ones.
-
Fast autofocus system
If you’re into sports photography or anything that uses the AF tracking and continuous focusing abilities of your camera, then phase detection AF works better.
You may check my post “Best Canon Camera for Sports Photography” for choosing sports DSLR cameras.
2- The lenses
When looking for good glass for sports photography, consider these factors:
-
Fast lens:
A fast DSLR lens is one that has a low aperture f-number (Lenses with wider apertures) it allows you to freeze the action. For example, a lens with a max aperture of f/2.8 is faster than one with f/4-5.6.
-
Fast autofocus:
A fast lens motor is also important so that the lens can autofocus quickly. For example, Canon offers a range of ring USM lenses that automatically focus quicker than without a USM motor.
-
Focal length
The focal length will depend on how close you can get to your subject (i.e. the type of sport you are shooting) as well as how much cropping you can get with your body. Because a cropped sensor is smaller than a full-frame sensor, full-frame lenses attached to a cropped camera will give the lens a field of view like a longer lens.
-
Image stabilization (IS & VR)
Image stabilization and vibration reduction are useful but keep in mind that the system prevents camera shake at slower shutter speeds, and obviously slower shutter speeds are not our concern in sports photography. However, IS/VR is very good for low-light situations (indoor sports photography). So if you are planning on using your lenses for more than sports, you may wish to consider getting a lens with IS.
-
Zooms
In most scenarios, you’re going to need a zoom lens to cover the action in your frame most efficiently. With that said, you’ll want to avoid buying a zoom lens that only covers a standard range, such as a 24-105. Instead, opt for a longer zoom like a 70-200.
You may check my post “Best Canon Lens for Sports Photography” for choosing sports lenses.


3- Tripod
In the interest of getting the sharpest sports photography images possible, it’s also advisable to use a tripod or monopod. Heavy lenses are very difficult to hold steady. You will also find that camera shake becomes a lot more of an issue when you start to use long focal-length lenses.
A good tripod with an easy-to-use head or a monopod fixed to the tripod collar of your lens will help to solve this problem.
4- Extra Memory Cards
When taking Sports photos, you normally shot many photos and in the end, you choose from them the accepted ones, if you add to this that you are shooting with the RAW file format it is obviously clear that you are consuming a big amount of your memory space. So you should make sure that you have an extra storage capacity. You should have a couple of memory cards available.
5- Extra Batteries
The Autofocus system in digital cameras consumes your camera battery in a much faster way especially when they are used with long lenses. You have to ensure that your camera’s batteries are fully charged and that you have a spare set.
Be Prepared with a Suitable Bag
Once you are on the sidelines or in the middle of the action, you should have an easy way to access your lenses and equipment. You may check my post “Top Rated Camera Bags – The Best 6 in 2018”, or you may consider a good belt system. The belt system allows you to quickly change between lenses and keep all your compact flash cards together in a safe place.
Position yourself correctly
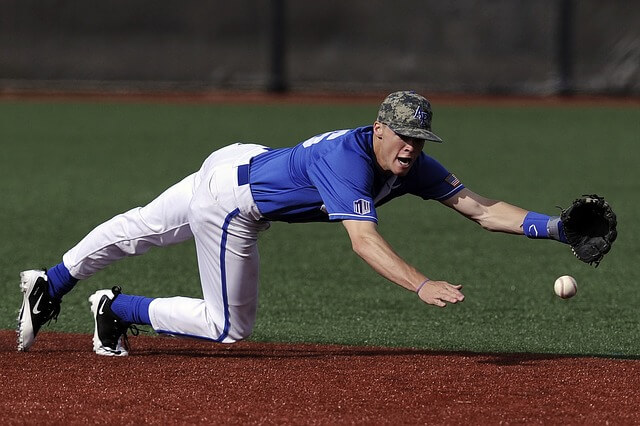
It very important that you position yourself correctly in the field because it is very difficult to move around when the game starts. For outdoor sports, you can position yourself with the sun behind your back. This ensures that a lot of light is hitting your subject out on the field of play, which reverts back to letting as much light in as possible and freezing the action with those fast shutter speeds.
For any sport, being able to get to the same level as the players can dramatically improve your images. Shooting from the same level will allow you to capture the player’s faces, emotions, and actions better. This is the absolute key to a great photo. If you can’t get onto the same level as the players due to restrictions at the venue, shooting from above can also yield some very dramatic images.
While using a shallow depth of field can help to isolate your subject, you should still try and avoid distracting backgrounds. If you can, get to your location early to look for a position that gives you a view free from cluttered backdrops. This will give your images much more impact.
Here are some indoor sports photos


Use the proper camera setting
-
Shot in a RAW format
Shooting in RAW format will give you much greater flexibility in post-processing, especially if you’re dealing with some tricky lighting; it’ll be much easier to correct white balance, as well as recover highlight and shadow detail.
-
Use Aperture Priority Mode.
There are various exposure modes on a typical DSLR: Automatic, Program Automatic, Shutter Priority, Aperture Priority, and Manual. When you set the camera’s aperture in aperture priority mode you are allowing the camera to determine the shutter speed. On a bright sunny day, this is usually the best setting to use. Many professionals sports photographers use aperture priority mode. What you are looking at doing in this mode is setting a very large aperture, which is a small f-stop number, such as f/2.8 or f/4. This will ensure that the most possible light is allowed in, which in turn tells the camera that fast shutter speed is needed for the correct exposure, thus helping to freeze the action.
-
Use a Fast Auto-focus and Burst Mode
To allow the camera to keep up with the fast movements of the players you want to set it to continually focus on our subject or subjects. And to increase your chances of capturing the right and exact moment, you also set your camera to take multiple images, usually referred to as “frames per second” or “burst”. If you have the option to set how many frames per second you would like your camera to take, always set it to the maximum
-
Consider using a manual pre-focus Technique (In certain circumstances)
With some sports, it is best to set a manual pre-focus. If you are photographing the high jump, for example, you know exactly where the athlete will pass over the bar. You can set the lens to manual focus and focus on the bar. Press the shutter button as the athlete passes through this point.
-
Use Back-Button Focus
What back-button focus does is remove the focus actuation from the shutter button and instead assign this function to a button on the back of the camera (AF-ON). The use of this feature gives you the following benefits:
- No More Refocusing Every Time You Let Go of the Shutter
- No Need to worry about switching between a single shot and continuously focusing
- No need to switch the focus method (Manual Focus Switch Isn’t Needed)
For further reading check my post “Back Button Focus for Canon- What is it and how to use it”
-
Consider Using High ISO/ Auto ISO
In most indoor sports photography, the lighting isn’t so great, so raising the ISO on your camera will allow you to shoot at a higher shutter speed, giving you a better chance of getting the perfect shot. Professional sports photographers use a shutter speed of around 1/1000 of a second and more to stop motion. During the day this is ok. At night, however, you may need a faster F-Stop than your lens is suited for. To compromise, you increase the ISO of your camera to allow your camera to see more light.
In the past, higher ISO meant more noise in your photos. With newer camera systems, though, pictures look great even at higher ISO levels. Also, you can deal with the noise in post-processing.
Auto ISO can be very useful when shooting sports, especially if you’re trying to shoot at a certain shutter speed to freeze the action and the lighting changes. A good example is if you’re shooting in a stadium, and half of the pitch is in the shade while the other half is in the sunlight. Taking different shots at both bright and shaded areas can be difficult. Setting your camera to Auto ISO and it will detect such changes and adjust the sensitivity accordingly.
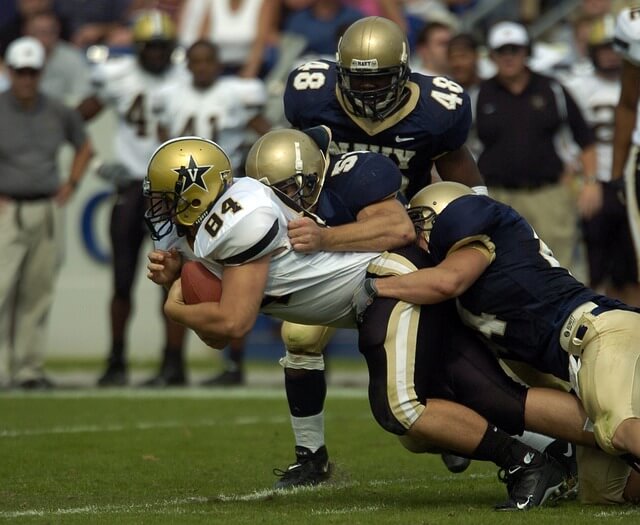
The following are some outdoor sports photos


Try something different
You should try a different shutter speed sometimes. Slow shutter speed can give you a cool blurry background shot. Shooting at 1/100 of a second or 1/80 of a second allows the player to be in focus and sharp but the background to be very blurry and creates a cool effect.
Another way to ‘freeze’ the image is to use a relatively slow shutter speed (1/30 second, for example) and swing the camera to follow the movement of the subject. This is called ‘panning’. The aim is to keep the subject in the same place in the viewfinder so that it appears sharp. The panning of the camera blurs the background, giving a strong sense of movement.
If your lens has Image Stabilization, depending on the lens there may be a switch on the side of the barrel which can improve your panning shots. Normally the switch is in Mode 1 which offers stabilization in both vertical and horizontal directions. Switch to Mode 2 and stabilization is then given only in a vertical direction only; perfect for panning action shots.
It’ll take a bit of practice, but panning can be pretty easy once you get the basics right, and the results can be striking.

Control your Chimping
The Wikipedia website defines Chimping as “A colloquial term used in digital photography to describe the habit of checking every photo on the camera display immediately after capture.”
There isn’t anything inherently wrong with chimping, but as with so many things in life, it’s all about your timing. You never want a chimp in the middle of the action, you should always be ready to catch the unexpected event that might happen while you are checking your shots. Simply you can wait for the right moment to check.
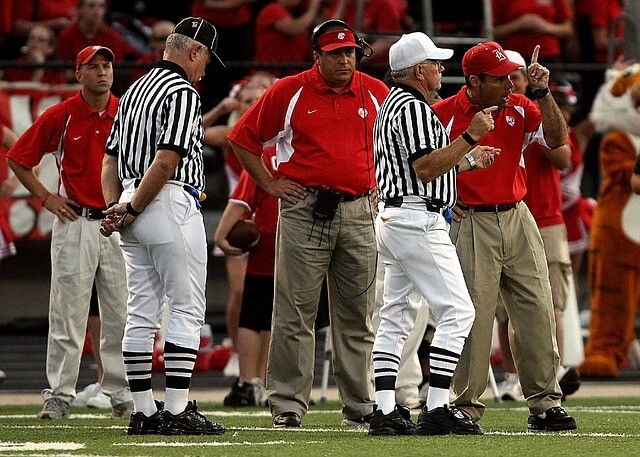
Keep Shooting After the End of the Game
Don’t stop shooting just because the play is over. Keep your eye on your viewfinder for a little bit longer because that’s when any emotion (jubilation, anger, or even a fight) is likely to happen. It can be a coach arguing with a ref, or a manager running out of the dugout to give the umpire the “what for,” so be prepared to keep shooting after the play and you might capture some real fireworks.
Don’t Miss the action off the field
Fans, coaches, mascots, and food vendors make interesting subjects that compliment your run-of-the-mill sports photos. Make your audience feel immersed in the event by capturing the little details that are too often ignored by photographers. Photograph the venue and details within the venue. Take pictures of corner flags or starting blocks, basketball hoops, or a pile of tennis balls. Try to isolate important elements of the sport.
Do some post-processing
A bit of cropping and a few lighting adjustments can do wonders to your images. Take a few minutes to touch up your best shots for a good presentation. If you are looking for Photo editing resources or editing Services, read the following paragraph:
Some photographers are struggling to learn and master editing software like Lightroom or Photoshop, they found the editing process is taking too much of their time. Therefore, assigning the editing tasks to an editing service may be the answer.
On the other hand, some others are looking for editing resources like actions, overlays, and textures to help them. For those I highly recommend paying a visit to my store, it has amazing professional photo editing tools.
In addition, you can check my editing tutorials, there are many tips and tutorials there.

Related Posts
Best Canon Camera for Sports Photography
Best Canon Lens for Sports Photography
Basketball Photography Tips – Indoor Sports Photography Guide
Thanks for reading, I hope you enjoyed the article if you have any questions just post them below & I will be happy to answer you.
If you enjoy the site, don’t forget to subscribe, we will only inform you when a new article is posted.


Wow, this post is full of really valuable advice on getting the perfect sports shots! As it is titled “Sports Photography Tutorials” I guess it makes sense, but you have managed to provide a very detailed list of requirements, recommendations, and helpful tips within your article.
The many shots throughout supported the points you were highlighting too, so I found myself reading through the entire post in anticipation with what was to come next. That does not happen often for me and is a testimonial to your effectiveness as a teacher.
I do not do many shots in these situations, but I DO take action images of events, family, and even some for business. These tips, suggestions, and why you are recommending something will undoubtedly help me for the future shoots that I get involved with.
The explanations of how the settings work and which to consider using, plus the explanations of what effect they will have is going to provide me with ample grist for using my sessions as trial and error plus learning opportunities. I have bookmarked your site, as there is so much valuable content here (I just was looking at one of your lens reviews, which was also of this high-quality)!.
Hi Dave
I would like to thank you for your comprehensive comments, glad that you like the article and the site. I really appreciate your opinion and evaluation of the site. You are always welcomed, hope to see you again.
Wish you all success