


Understanding how to expose an image properly is a prime aspect that all photographer needs to know. A good photographer should be able to capture photographs of the ideal brightness, including high levels of detail in both the shadows and highlight areas. Your camera uses a light meter to figure out the correct exposure settings for any scene, they are called Metering modes. Like most automatic camera features, you do have some control over how it works.
Before discussing how the camera meters the entering light falling on the camera sensor, let us briefly defined what is the correct exposure, and the factors that control that light amount.
What is Correct Exposure?
The act of having ‘correct exposure means your combination of settings between aperture, shutter speed, and ISO speed has produced a perfectly exposed image. When nothing is blown out (highlights) or lost in shadow in an image, it has achieved correct exposure.
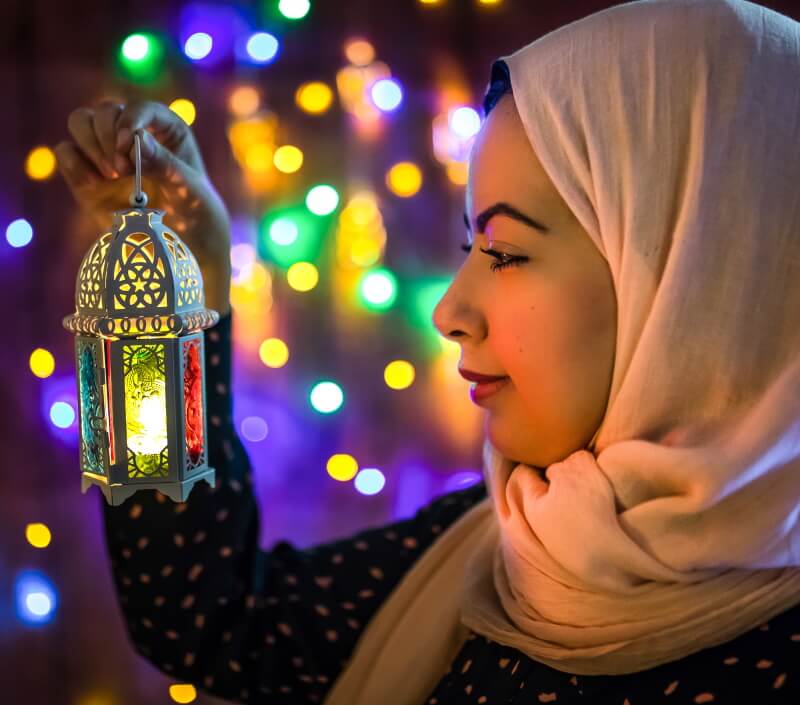
Photo by Ehab Amin
Factors controlling the exposure
There are four major factors that determine how a camera will capture an image with good exposure. These factors are light, aperture, sensitivity, and time.
-
Light (illumination)
It refers to the actual illumination from the scene that enters the camera. A camera must adapt to the incoming light whether through manual adjustments or automatic electronics. The available light is quite different between nighttime, indoors, cloudy, and sunny conditions. In addition, the illumination, which enters the camera, is also affected by light-colored or dark-colored subject matter. This light can come from any source: the sun, a table lamp, a strobe, or the moon. A scene requires some sort of illumination in order to take a photo. Each type of light source is different from another and there can even be noticeable variation seen from just one source of light (such as the sun can change it light from one moment to the next). Your camera has to register these differences and adapt to them. It’s your camera’s job is to capture an image with the best possible exposure; it does this by “reading” the illumination present and using it to decide the optimal combination of aperture, shutter speed, and ISO.
-
Shutter speed
It indicates the amount of time the shutter of the camera is open, as the light falls on the sensor. This configuration can be a whole or fractional number. All camera models use a standardized number series. A series starts with thirty seconds and ends with its thousandths. The shortest shutter interval for cameras is 1/8000 second. For simpler cameras, it may be smaller.
- Aperture
It changes the amount of light recorded by the sensor of the camera. For this purpose, the lens is equipped with a technical device that can smoothly adjust the opening. When setting the aperture to the position of the minimum digit, the lens is fully open. Depending on the type of lens, these can be f/1.2, f/2.0, f/2.8. With f/16, f/22, or f/32 aperture, the light will enter the image sensor through a small hole in the center of the lens, which reduces the amount of light.
-
ISO
This is the sensitivity of the camera’s sensor or the ISO. Setting a high level of sensitivity allows for smooth shooting under challenging conditions.
A high ISO setting negatively affects the quality of the image, since with increasing sensitivity, digital noise increases throughout the field of the frame. The image is covered with colored dots, the number of which increases with increasing sensitivity.
Selecting the appropriate combination of light, shutter speed, aperture, and sensitivity usually comes down to a choice of which secondary effect is most important.
- If the low grain is most important, pick a low sensitivity first
- If stopping the action is most important, set a short shutter time
- If isolating the subject from the background, open up the aperture
- If the shadows and color are critical, control the incoming light
What is Metering?
Metering is how your camera determines what the correct shutter speed and aperture should be, depending on the amount of light that goes into the camera and the ISO. Back in the old days of photography, cameras were not equipped with a light “meter”, which is a sensor that measures the amount and intensity of light. Photographers had to use hand-held light meters to determine optimal exposure. Obviously, because the work was shot on film, they could not preview or see the results immediately, which is why they religiously relied on those light meters.
Today, every DSLR has an integrated light meter that automatically measures the reflected light and determines the optimal exposure.
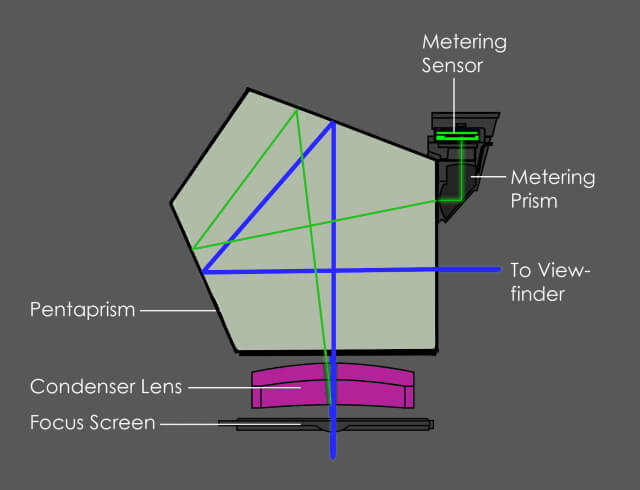
Light is reflected from a scene or subject through the lens; it hits the mirror in front of the imaging sensor and is reflected up to the camera’s focusing screen then it is reflected through the pentagon to the viewfinder, and metering sensor as shown in the below diagram
Since 2009, Canon has used a 63-zone iFCL (intelligent Focus, Colour, and Luminance) metering sensor in almost all of its EOS cameras (the exceptions being the 1-series bodies and the EOS-M). For a modern Canon camera, this is increased to 384-zone.
Digital cameras have an automatic exposure (AE) feature that automatically decides how much to expose the image (i.e., how bright the shot will be). In an AE mode, when you half-press the shutter button, the camera will automatically determine the aperture and/or shutter speed values and therefore provide the (camera-determined) correct exposure. The feature that helps the camera to determine which aperture and shutter speed to set does so by measuring the brightness of the subject and this action is called “metering”.
Camera metering modes
The most common metering modes in digital cameras today are:
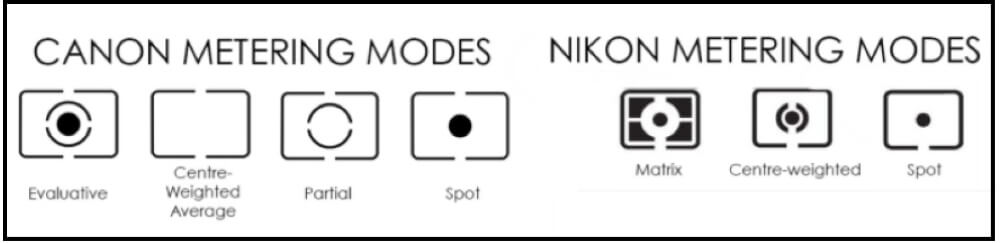
- For Canon camera:
Evaluative Metering, Center-weighted average metering, partial, and Spot Metering
- For Nikon camera:
Matrix Metering, center-weighted, and spot metering modes.
Let’s look at the different metering modes and when to use them.
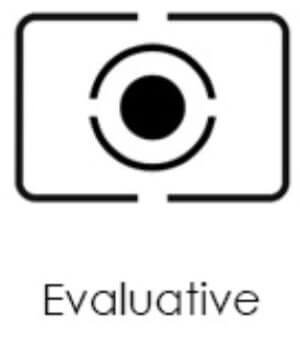
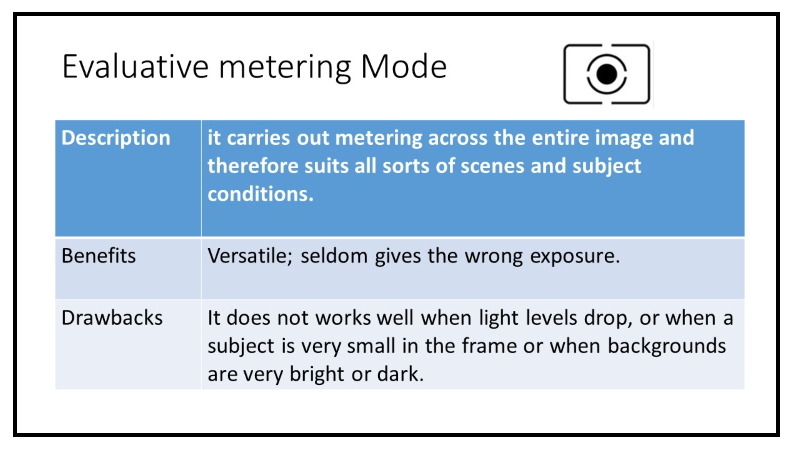
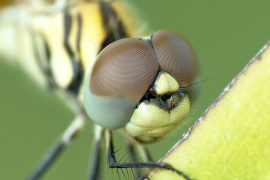
Evaluative metering mode
In Evaluative mode, this sensor not only measures the brightness of a scene across all metering zones but also takes into account colors and which parts of the scene are in focus. Then the camera uses a metering algorithm to determine the combination of aperture, shutter speed, and ISO required to make an exposure.
The evaluative mode works well when there’s enough balanced light, however, it can struggle when light levels drop, or when a subject is very small in the frame or when backgrounds are very bright or dark.
If you are taking a shot of a snowy landscape, or a bird flying across a pale sky, the image is likely to come out too dark, or underexposed. This is because the meter treats a bright subject as being a mid-tone subject that is receiving too much light, and as a result, it reduces the exposure, that is why ice-white snow can be recorded as pale grey. In addition, the reverse is true of a subject that is darker than mid-tone. The meter sees this as a mid-tone subject that is not receiving enough light, so it increases the exposure in order to brighten things up. The result is an overexposed picture. For example, black cats appear dark grey, and night skies look washed out.
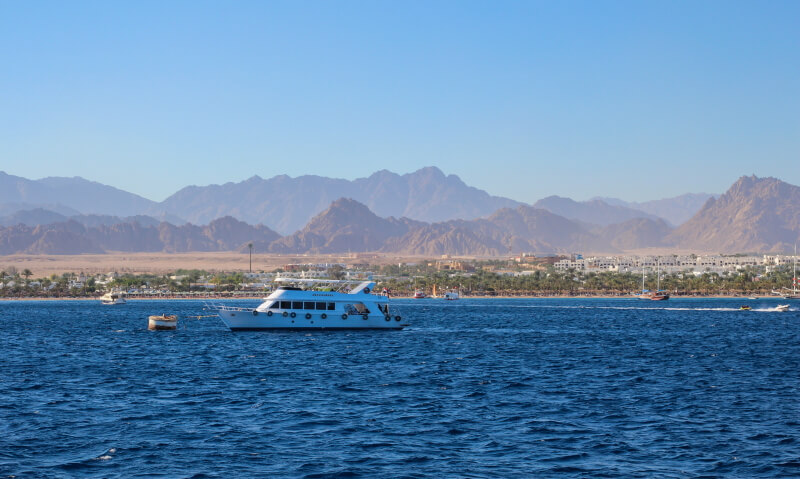
Photo by Ehab Amin
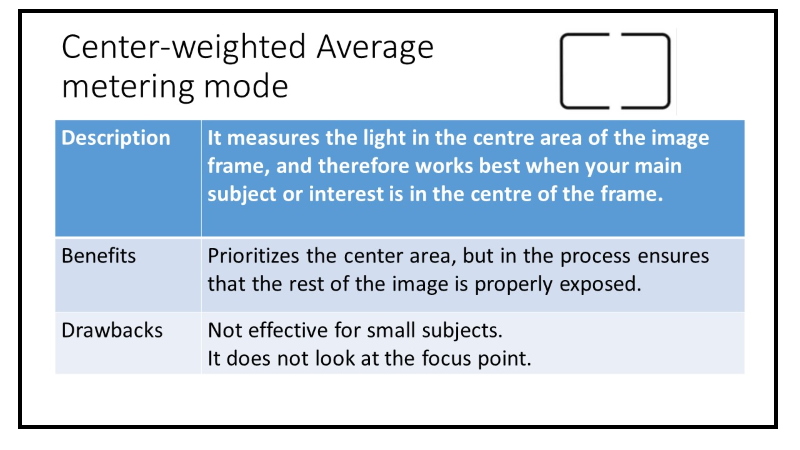
Center-weighted average metering mode
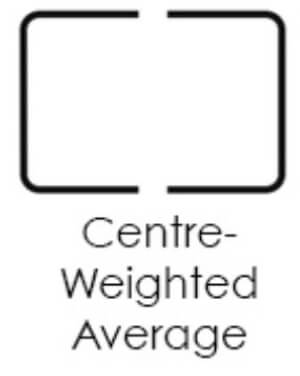
Center-weighted Metering evaluates the light in the middle of the frame and its surroundings and ignores the corners. Compared to Evaluative Metering, Center-weighted Metering does not look at the focus point you select and only evaluates the middle area of the image.
Use this mode when you want the camera to prioritize the middle of the frame, which works great for close-up portraits and relatively large subjects that are in the middle of the frame. For example, if you were taking a headshot of a person with the sun behind him/her, then this mode would expose the face of the person correctly, even though everything else would probably get heavily overexposed.

Photo by Frank Cone from Pexels
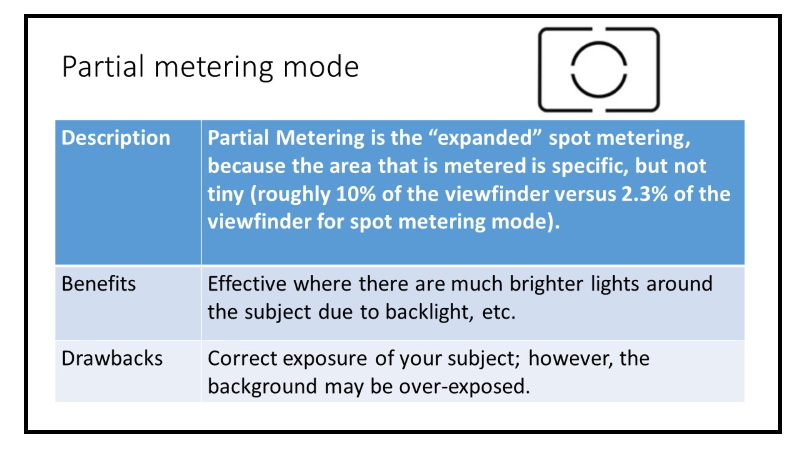
Spot Metering mode
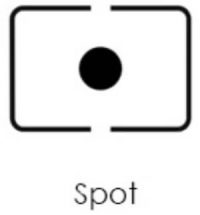
Spot Metering only evaluates the light around your focus point and ignores everything else. It evaluates a single zone/cell and calculates exposure based on that single area, nothing else. You may use this mode if you are shooting for example bird photography because the birds mostly occupy a small area of the frame and you need to make sure that you expose them properly, whether the background is bright or dark. Because the light is evaluated where you place your focus point (the bird), you could get an accurate exposure on the bird even when the bird is in the corner of the frame.
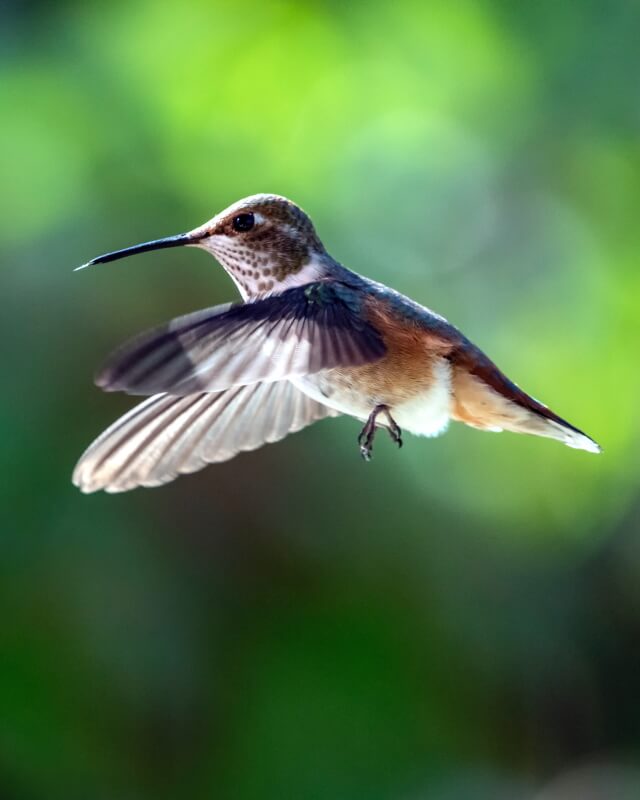
Photo by Andrea Piacquadio from Pexels
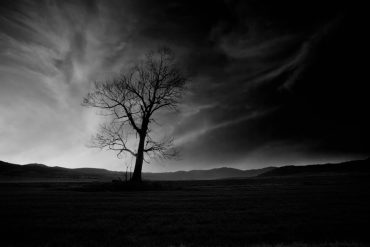
Partial metering mode
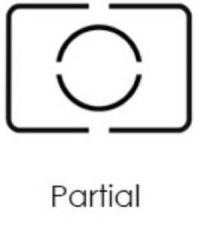
Partial Metering is a camera-metering mode in which the metering is weighted at the center of the viewfinder (unlike center-weighted in which the camera averages the exposure based on the reading at the center). You can think of Partial Metering as “expanded” spot metering, because the area that is metered is specific, but not tiny (roughly 10% of the viewfinder versus 2.3% of the viewfinder for spot metering mode). Partial metering is best used when your subject is overly backlit and you want to get a quality exposure of the subject. Partial metering will enable correct exposure of your subject; however, the background will be over-exposed. Partial metering will give you more control of the exposure in a particular region of the photograph.
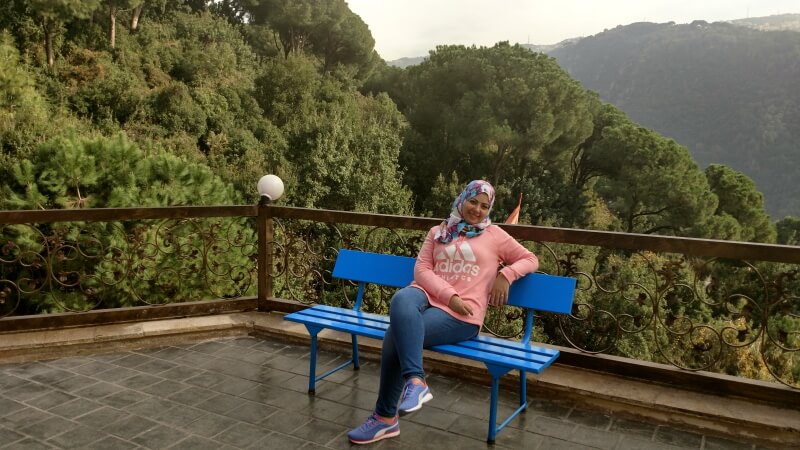
Photo by Ehab Amin
Conclusion
The following table summarizes Canon metering modes and their benefits and drawbacks

Remarks
With Evaluative metering, the exposure setting will be locked when you press the shutter button halfway and focus is achieved. In the Partial metering and Center-weighted average metering modes, the exposure is set at the moment the picture is taken. (Pressing the shutter button halfway does not lock the exposure.)
Related posts
What Are The Different Types Of Light In Photography?
How To Use Gray Card To Get Proper Exposure And Color
What Is Aperture In Photography
What Is Shutter Speed In Photography
Photography Light Meter – Camera Metering Vs Handheld Metering
How To Use Histogram In Photography
Thanks for reading, I hope you enjoyed the article if you have any questions just post them below & I will be happy to answer you.
The featured photo by Ehab Amin
If you enjoy the site, don’t forget to subscribe, we will only inform you when a new article is posted.
[mailerlite_form


This is a beautiful write up. The information is well detailed. There are some work that we see as not a really big deal but after reading through this article, I got a clear cut of photography and cameras. The metering mode has a light meter to figure out the correct exposure settings for any scene. Reason why some photographs are not appealing. I sincerely love this
Thanks for your comment, glad you liked the article.
I’m not a photographer but as a graphic designer, I find myself often trying to take professional photos which often don’t look the way I originally imagined them to. Thanks for your tips on how to get the right exposure. I never really understood all the different modes on the camera and that’s probably the reason for my rubbish shots!
Thank you for your nice comment