


Introduction
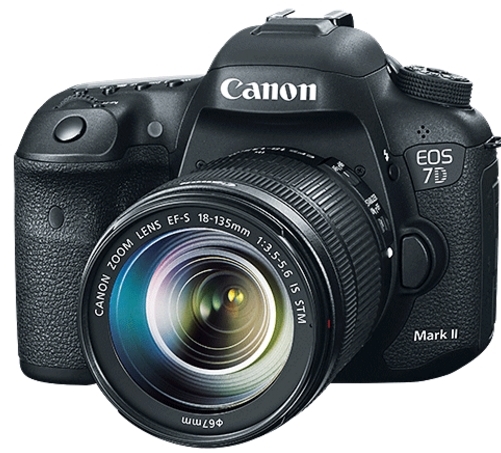
Understanding what is autofocus is a key step towards becoming an advanced photographer, as you can greatly change the look of an image by changing the autofocus setting. Whether you are shooting with an entry-level or professional DSLR, knowing how to use autofocus system effectively is essential to get sharp images. A badly-focused, blurry image can ruin a photograph and you cannot repair it in post-processing. Autofocus has gotten better and better over the last decade and even the cheapest entry-level DSLRs are now equipped with rather complex autofocus systems. So, how do the modern camera autofocus systems work? Let’s go over a few basics.
Types of Autofocus system:
There are two types of AF (Autofocus) systems, Active and Passive. But before we proceed, you should know Which Autofocus System your camera has? , check your camera manual. As a general rule SLR cameras with interchangeable lenses typically use the passive autofocus system and Cameras without interchangeable lenses typically use active infrared, and you can see the emitter and the sensor on the front of the camera.
-
Active Autofocus
The “Active AF” system works by shooting an infrared or visible light beam on your subject, then bouncing that light back to your camera to figure out the distance between the camera and the subject. Once the camera knows what that distance is, it instructs the lens to adjust focus based on this information.
The disadvantages of this system are that. It can only be used for close distances (less than a few meters) and it is only used for still subjects. The nice thing about Active AF is that it can be used in very poorly-lit environments.
-
Passive Autofocus
The “passive Autofocus” either uses special sensors within the camera to detect contrast from the light that goes through the lens or uses the camera sensor itself to detect contrast in the image. What does “detect contrast” mean? This simply means that it tries to look for sharpness in a particular part of an image. If it is blurry, the AF system will adjust the lens focus until sharpness/contrast is achieved. The process of autofocusing generally works as follows:
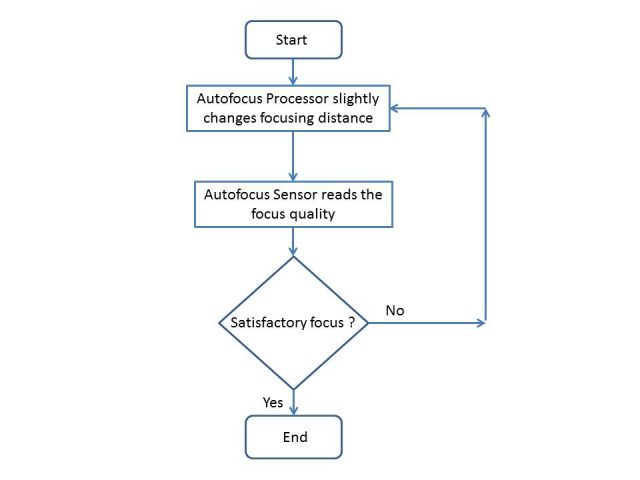
This entire process is usually completed within a fraction of a second. For difficult subjects, where there is no apparent contrast in the scene like if you focus on a clear sky or a white wall, the camera may fail to achieve satisfactory focus and will give up on repeating the above sequence, resulting in failed autofocus. This is the dreaded “focus hunting” scenario where the camera focuses back and forth repeatedly without achieving a focus lock.
The three most important factors influencing autofocus are the light level, subject contrast, and camera or subject motion.
Your DSLR camera may have an “AF Assist” lamp in front of the camera, it is not an “Active AF” beam, all it does is fire direct light at your subject like a flashlight would, so it still relies on your camera’s “Passive AF” system.
Autofocus Points
Autofocus points are what the camera uses to focus on a subject. You’ll probably first notice them when you press the shutter halfway. Many cameras will emit a “beep,” and some of the AF points will light up (often in red or green color) in the viewfinder or on the display screen.
-
The number and layout of focus points
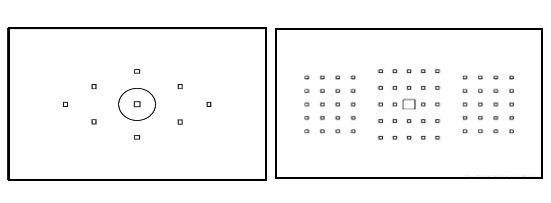
The robustness and flexibility of autofocus are primarily a result of the number, position, and type of autofocus points made available by a given camera model. High-end SLR cameras can have 45 or more autofocus points, whereas other cameras can have as few as one central AF point. Two example layouts of autofocus sensors are shown below:
-
The type of focus points
There are two types of AF point sensors available, vertical and cross-type. Vertical sensors are one dimensional and they only detect contrast on a vertical line. Cross-type sensors are two-dimensional and they can detect contrast both on vertical and horizontal lines, which makes cross-type sensors much more accurate than vertical sensors. So, the more cross-type sensors your camera has, the better and more accurate autofocus is going to be.

Autofocus modes Types
There are two Autofocus modes you have to do some setting among both of them, the first is AF mode (the choice is made according to the movement or stillness of your subject, and the second is AF area mode (the choice is made according to the position of the sensor you want to use in focusing).
AF Modes
-
One Shot Focusing Mode (One-Shot AF – Canon)
It represents a single-focus capability. In this mode, when you depress the shutter release halfway, the camera focuses on the subject just once – there’s no continuous adjustment. This mode saves battery power and is ideal for subjects that aren’t moving.
-
Continuous Focusing Mode (AI Servo AF – Canon)
This mode is used for Continuous Focus and it is most useful for keeping moving objects sharp within the viewfinder as you track the object. In Continuous focusing mode, the camera detects the subject’s movements and refocuses accordingly to keep the object sharp as a tack.
-
Automatic Autofocus Mode
In this mode, the camera’s focusing computer jumps back and forth between One-Shot AF and AI Servo AF (Canon) depending on the situation.
AF Area Modes
-
Manual AF single Point Mode (Canon)
You work with one AF point only, and that point can be moved manually anywhere within the points of AF array.
-
AF Point Expansion Mode (Canon)
A cluster of 5 total AF points (four points surrounding one primary AF point), which can be manually moved anywhere within the points array.
-
Zone AF (Canon)
Looks almost the same as AF Point Expansion, but behaves differently. It’s a grouping of AF points, which can be moved to any of nine pre-defined locations.
-
Automatic AF Point Selection Mode (Canon)
The automatic AF point mode is identified by the thin black borders or brackets that surround the entire AF area. All AF points are active; the camera automatically selects the active AF point to use.

Tips for improving AF functions in a low light situation
- Turn on the AF assist feature.
- Use the center focus point.
- Search for contrast and edges in the scene.
- Turn on some light, or use a flashlight directed to where you focus.
- Take care of camera shake (use a tripod)
- Keep your shutter speed relatively high.
- Try focusing in Live View mode using Contrast Detect. (If you are using a tripod)
- If AF fails to function use manual focus.
When should you use manual focus?
Manual focus rings are still available on most SLR cameras. For example, when taking a photo of an animal behind bars in a zoo, the autofocus camera might focus on the cage bars instead of the animal. On most consumer-grade autofocus cameras, use manual focus when:
- You have a zoom lens on an active autofocus camera, and your subject is more than 7 meter away.
- You have a passive autofocus camera and the subject has little or no detail, like a white shirt with no tie or clear sky.
- You have a passive autofocus camera and the subject is not well lit.
Sometimes manually focusing your lens is quicker than trying to use any of the autofocus methods, or when the AF fails to focus. Many landscapes, macro and architecture photographers shoot with manual focus lenses.
Related Posts
Manual Focus In Digital Camera- Manual Focusing Vs Autofocusing
How To Calibrate Your Lens- Enhance Autofocus Accuracy
Finally, thanks for reading the post, hope you found it useful and informative. I am waiting for your questions and comments.
If you enjoy the site, don’t forget to subscribe, we will only inform you when a new article is posted.


love the picture of the owl, pity you didn’t give the photographer recognition
Hi, me again!
I was wondering (after reading the last post) whether it was better to trust the Autofocus to deliver a higher level of Acutence when taking a crowded picture or is it better to adjust it manually?
Like you said, sharpness is the key, so which would be better?
Hi Ryan
There isn’t any fixed rule, it depends, if you are shooting for example a street photography and want to catch the event cause it wouldn’t happen again then go for auto. but if have enough time like the situation of landscape photos, it is probably your chance to create your unique photo.
Thanks for the comment