

Adobe Photoshop Lightroom is one of our most loved photography directors, because of its excellent picture processing, complex, non-damaging color correction, effective noise reduction, and programmed correction of defects for a wide range of lenses. The raw configuration support is truly user-friendly, as well, with general updates for newer cameras. The menu is productive and responsive, with filtering, and complex guide plotting.
Adobe has remained faithful to the winning formula, this version 5 accompanies a choice of new and improved instruments, however, there are no spectacular changes to the interface or work process. It has been out over a year now because Adobe does not require annual updates for this specific package.
How Adobe photoshop lightroom 5 works?

This service is quite different from conventional photo-editing tools. It has an integrated and complete workspace, created especially for importing, editing, sharing or managing your photos and albums.
Furthermore, from a photographer’s point of view, it is equipped with all the adjustment and enhancement tools one may need to create great pictures, and even some more unique advantages.
In the first place, the adjustments are non-damaging. This means that if you do not like the final result, you can go back to the original image at any time, you can simply reverse, remove or re-edit the photograph.
Secondly, it brings the advantage of editing raw files directly, without needing an extra conversion process.
Thirdly, Adobe Photoshop Lightroom 5 is a full-powered image tool for cataloging and organizing or searching thousands of images, with the help of IPTC metadata, EXIF data, and smart collection or more.
With the appearance of Lightroom 5, the crossover to Photoshop is even larger, due to the major enhancements Adobe has made to the editing tool, and because of two completely new tools.
So, let us introduce you with the improved and new features and let’s discover how they can work to your advantage.
New and welcomed improvements
1-Advanced Healing
The previous Lightroom versions also had a spot removal tool. It worked fine to eliminate sensor dust spots yet it was less useful for cloning out items.
You could do it by utilizing various spots, yet it was time-consuming and perhaps less effective.
Presently you can paint over sporadic objects and then leave Lightroom to locate the ideal hotspot for your repair.
Nevertheless, if you don’t like the final outcome, you can remove the area you’re repairing and also the source.
This Advanced Healing Brush works in two modes: in Clone mode, where it does a straight duplicate of the clone source, and in Heal mode. However, the Heal mode is more interesting as it tries to coordinate the tones and shades of the area you’re modifying.
Regardless of the fact that it not as controllable as the Spot Healing Brush or Clone Stamp instruments in Photoshop, the Advanced Healing Brush is a considerably closer and sufficient option for most repairs.
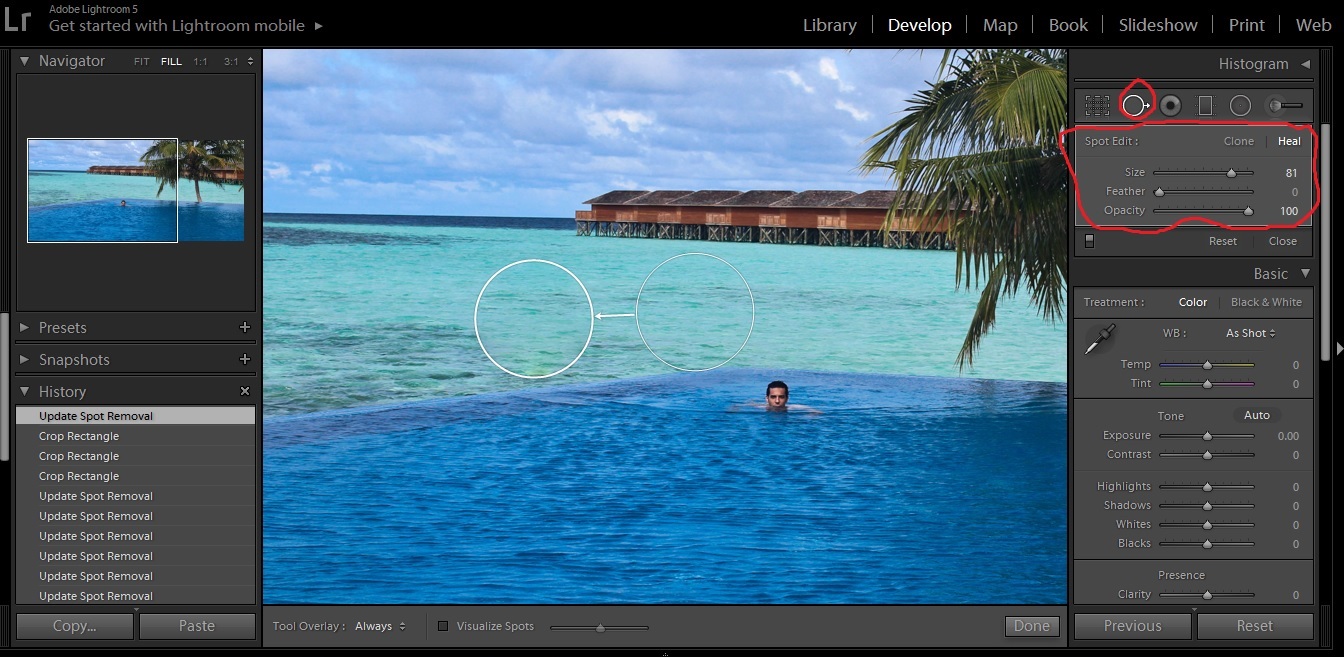
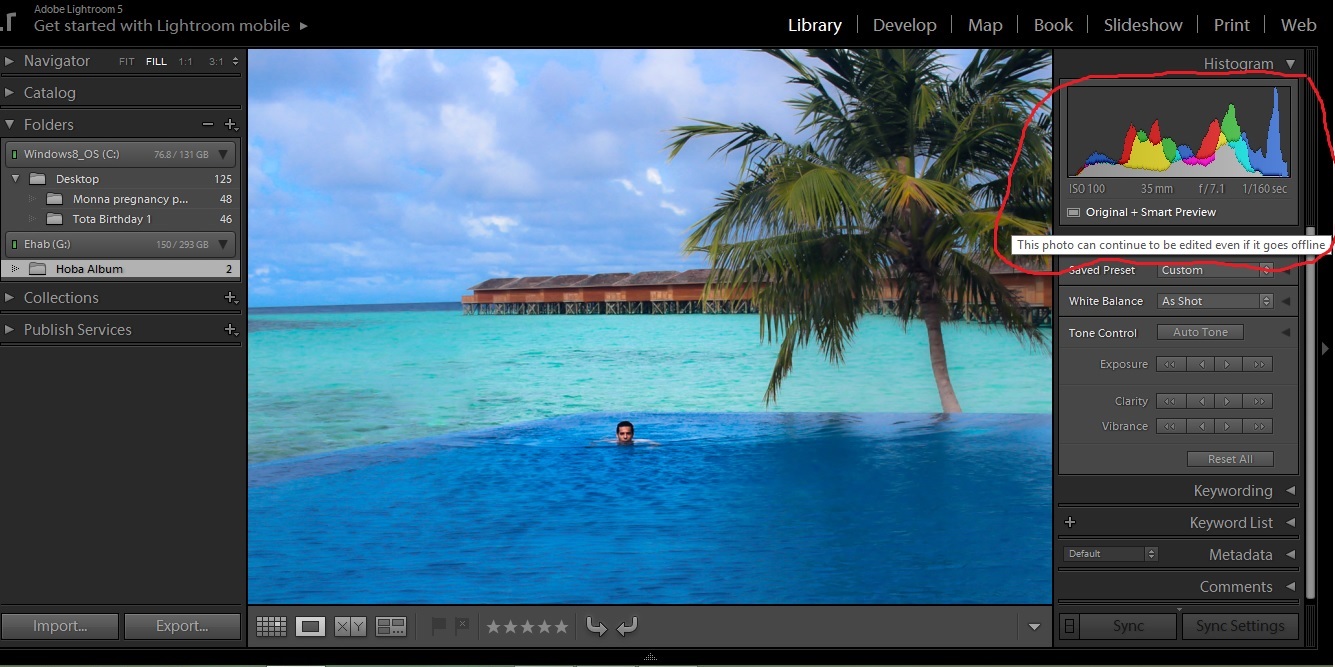
This is a photo of me in Maldives, by using the healing tool I can adjust sea color & remove the dark blue color
This is another motivation to stay with Lightroom for editing images, as opposed to relocating your photograph to Photoshop and back once more.
2-The upright tool
Adobe Lightroom had some tools for the correction of lens distortion, utilizing custom profiles, and also perspective distortion, in addition to vertical and horizontal correction sliders.
Yet, the Upright tool can distinguish vertical and horizontal skew in your pictures and alter either or both with one click of a button.
Regularly, with tools like these, you find that they could fail as frequently as they succeed and you require the right kind of picture for them to work. Not this time.
The Upright tool is astoundingly successful at revising perspective distortion. Even better, if it doesn’t discover any, it allows your photo to remain unchanged.
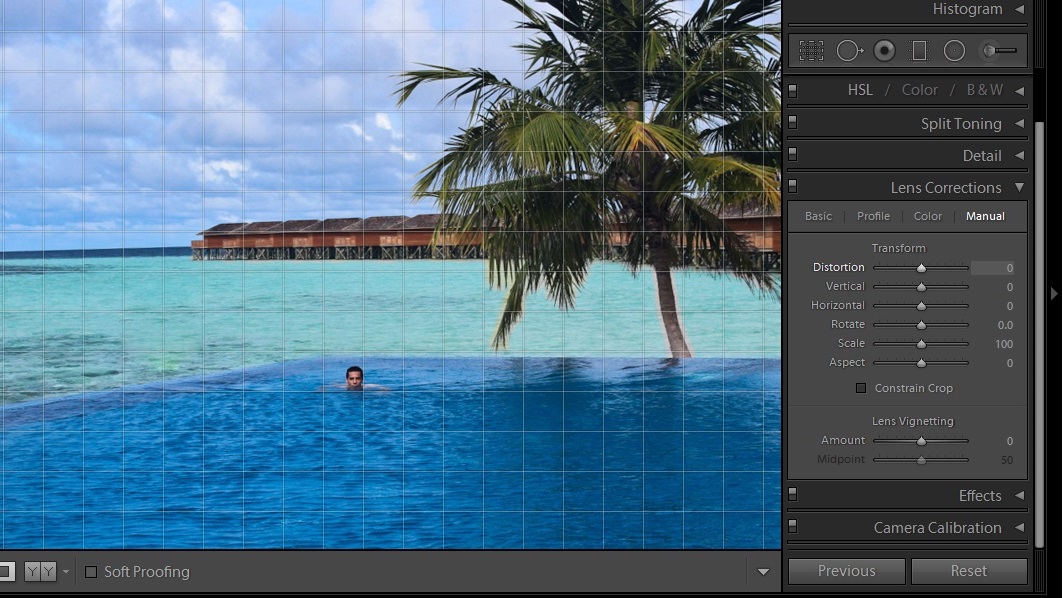
Lens correction panel contains(Basic,Profile,Color & manual)
3. The new radial gradient
The Radial Gradient instrument is intended to offer you some assistance with focusing attention on the subject.
You may like to consider it a sort of profoundly customizable vignette control.
You can likewise alter the cover so that the alterations occur inside the marquee as opposed to outside it, and with this particular version, you can utilize a few Radial Gradients on the same picture, not only one.
It works really well, despite the fact that the transfer between balanced and non-balanced ranges is excessively sharp, and you can feel a modification has been made – particularly when you see the pictures at thumbnail size.

Example for using the Radial filter for sharpening the area surrounds me
4- Smart previews
You can now make Smart Previews even in an offline editing mode. As such, you can keep your firsts on an outer drive, yet keep editing your photographs even when this drive is not connected. Smart Preview records are in the format of Adobe Digital Negative (DNG), and occupy around 4 megapixels and 1MB each.
It’s presently possible to join recordings and images in slideshows, with music, and after that transfer HD movies for review on basically any gadget.
You can now additionally add page numbers to your books. It is less demanding to add content to your Books by means of the new Text tab.
The capacity to make and spare user templates appears as though it could be just as helpful. This empowers you to make a custom design for the pages.
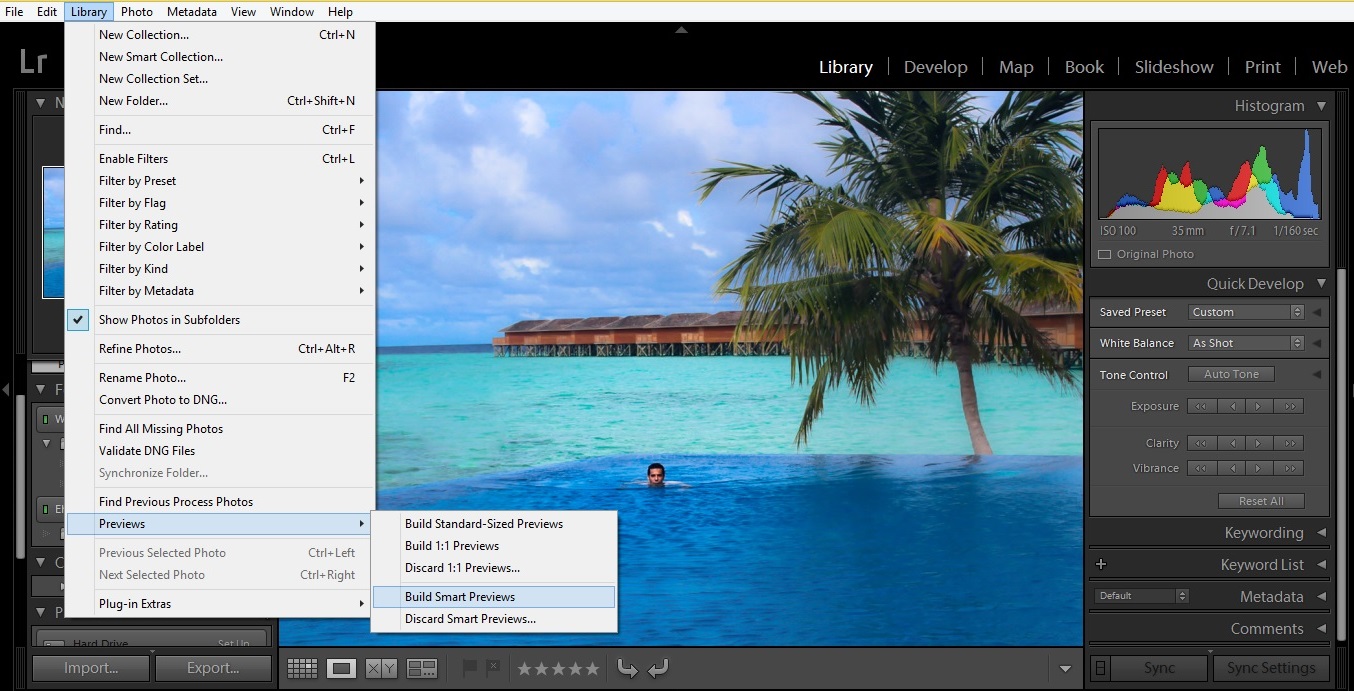
This feature will be useful for you if you are traveling a lot as you don’t need to bring big hard drives with you
Lightroom 5 mobile:
One of the new components that Adobe has presented since the appearance of Adobe Photoshop Lightroom 5 is Lightroom Mobile, which gives you a chance to sort out and edit your photographs from your iPad, iPhone or Android gadget. Any modifications you make from your cell phone are synchronized with your PC through the cloud. The administration isn’t accessible with the standard Lightroom, but only with Creative Cloud plans.
To begin, you first need to sign Lightroom desktop into Lightroom Mobile, and afterward, pick which Collections you need to adjust the account. There’s no distributed storage limit, in spite of the fact that Adobe says that you could fit approximately 60,000 photographs on a 128GB iPad.
You do not get a duplicate of the full photograph, either, with Adobe making a small, mobile portable variant of the photograph. All things considered, the Lightroom Mobile is to a greater extent a tool for working with your most recent photographs than one for transferring and uploading your whole collection.
Conclusion
Everything else about Lightroom 5 is truly amazing. Picture processing was already very good, and now it is better than anyone might have expected. Furthermore, the mapping and printing capacities are perfectly designed, as well.
To sum up, Adobe Photoshop Lightroom 5 remains elegant and fast and delivers quality for amateur and professional photographers alike. You may check the pricing plans for Adobe Lightroom CC.
Customers Ratings: [usr 4.4]
Check all my reviews here
Thanks for reading & if you have any comments just post below & I will be glad to help you.
If you enjoy the site, don’t forget to subscribe, we will only inform you when a new article is posted.


I’ve never actually heard of Photoshop Lightroom in all my years of digital art. It sounds excellent. Also seems to be pretty good value – a fair bit cheaper than Photoshop usually is.
Great review – I really like how you demonstrate the program in the images.
Your site is looking great by the way. I will return some time. I am looking to buy my first camera soon and will definitely be looking for some reviews and tutorials!
Hannah.
Thanks Hannah, glad that you liked the post & the website.
Adobe Photoshop is very reputable and popular photo-editing program because it has been around a long time. Due to the cost of buying a software, I don’t bother with investing any money into it. But I do like to read about Photoshop to see what’s new improvement or features it has.
I like how you demonstrated each features (Advanced Healing, The Upright Tools, etc) with sample of images. Your article is easy to follow and understand.
Thanks Tina for your input.
This is a great page. You Explain everything very well and clearly know what you are talking about!this would be a perfect Article on Adobe Photoshop Lightroom5. Wonderful Job!
Thanks Anthony.
Hi
I am a dentist and sometimes need to take photos of a patient’s teeth to show my dental laboratory so we can get the shade perfect for a patient’s crown.
The problem is all sorts of things can interfere with getting the shade right, like the flash bleaching the shade of the teeth or the camera being “smart” and adjusting things automatically to adjust for other things like the background colors and brightness in the room which can also give an incorrect shade.
Do you have any tips for which camera to use to take good close-up pictures of teeth and how to get the settings right so that the shade of the tooth on the picture is the same as in my dental chair?
Thanks for these excellent articles!
David
Hello David, thanks for your comment, for the dental photography i will recommend Canon G16 camera, and regarding the settings you can get the perfect lighting by using the onboard flash and the attached diffuser.