

Elevate your photographs from ordinary to extraordinary through the magic of color grading. In this guide, we’ll unravel the intricacies of color grading in Photoshop, unlocking the power to infuse your images with mood, atmosphere, and a touch of cinematic finesse. Explore the art of enhancing hues and tones to convey emotion and style, as we embark on a journey through the essential techniques that will breathe life into your visuals.
Color correction and color grade have often been used loosely for each other. However, they are two different processes in photo editing. Color correction is an editing process that adjusts white and black levels, exposure, contrast, and white balance to bring overall color in line with the human eye.
While color grading is an artistic process of adjusting color in a photo to create a stylized tone and mood. It sets the final look and feel of an image. Color grading enhances your story by manipulating colors to create a new tone or mood or to achieve a certain look to tell the story.
The process of color grading is about adding color information on top of existing color values, and not changing them. There are many ways to do it; in this tutorial, I will discuss three of them with examples.
Method 1: Using Photo Filter
You can use a Photo Filter to modify color while preserving the original image. There are two ways to load and apply the Photo filter: the first way is to use Photo Filter as an adjustment layer. Open an image in Photoshop, Then, click the Adjustment Layer icon in the Layers panel and choose Photo Filter.
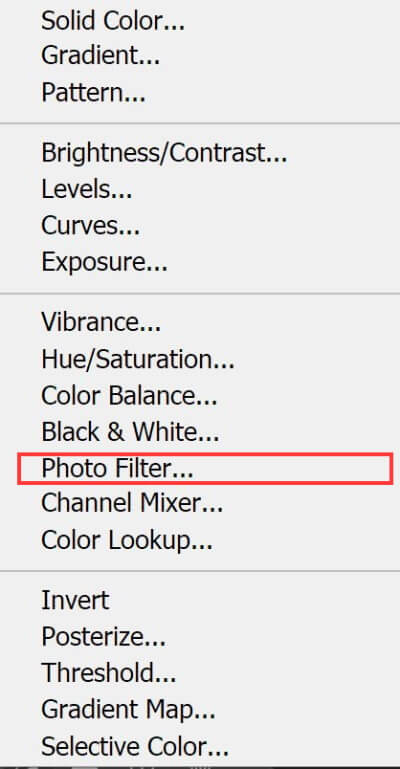
The second way is by applying a photo filter as a direct adjustment (Image > Adjustments > Photo Filter). However, applying it as an adjustment layer is more flexible because it gives you the ability to readjust the photo filter settings, provides a layer mask you could use to affect only part of the photo, and protects the original photo from direct changes.
Example 1
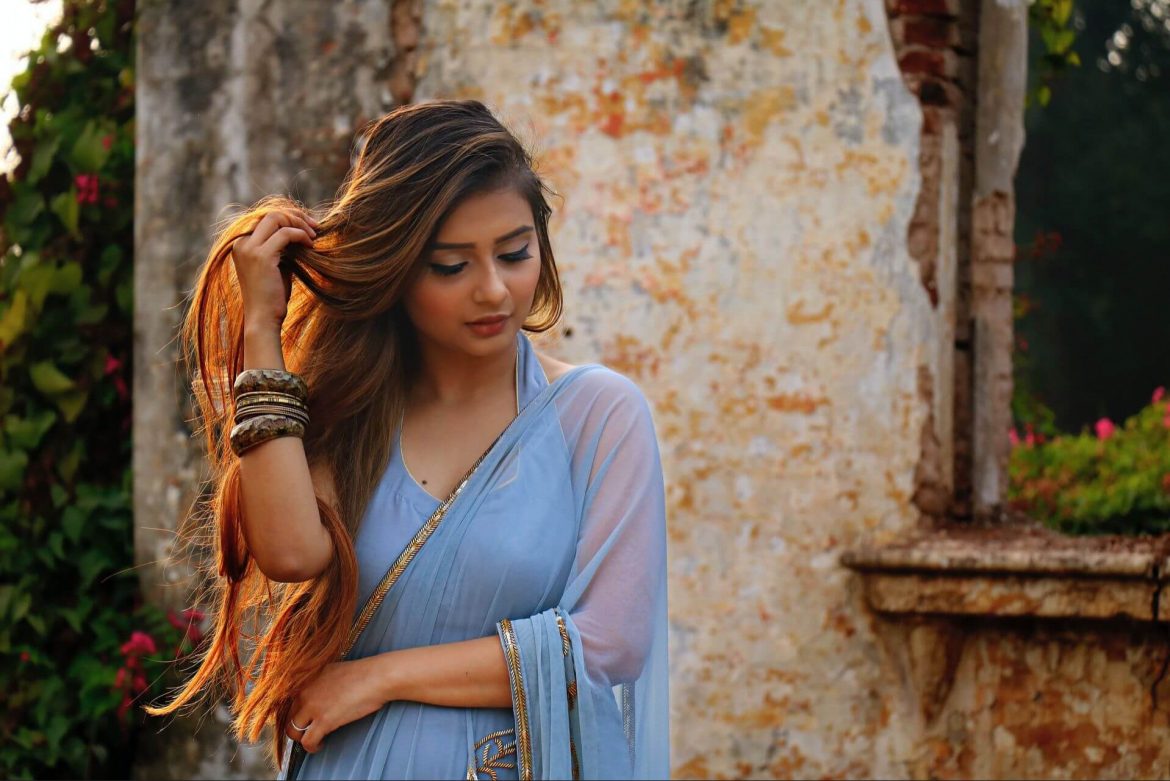
To apply a cooler color grading I will use the presets found in the Photo Filter command.
Open the photo in Photoshop; add Photo Filter as an adjustment layer
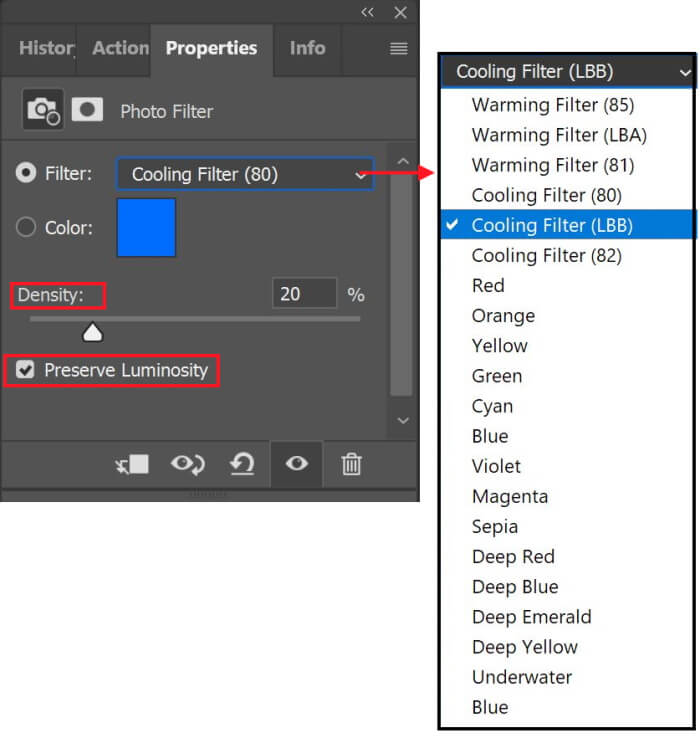
From the property panel of the filter
Click the Filter menu and select a cooling filter, I will cool the photo down with a bit of blue using one of the available cooling Filters. Alternatively, you may click the color square and choose a color in the Color Picker to create your own custom color Photo Filter.
To adjust the intensity of the Photo Filter I use the Density slider. I checked the Preserve Luminosity box, to keep the brightness of the image the same even after the color changed.
The before and after images are shown below
Example 2
The original photo by Jordan Bergendahl from Pexels, I apply the same previous method, the before and after images are shown below
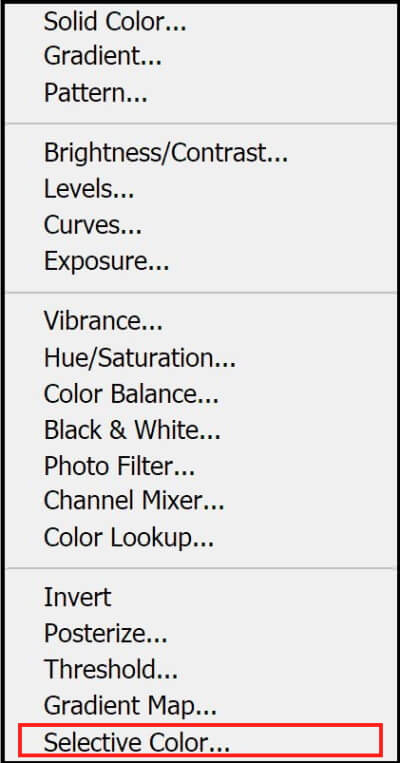
Method 2: Using Selective Color
Selective color correction is a technique used by high-end scanners and separation programs to change the number of process colors in each of the primary color components in an image. You can modify the amount of process color in any primary color selectively without affecting the other primary colors. For example, you can use selective color correction to dramatically decrease the cyan in the green component of an image while leaving the cyan in the blue component unaltered.
Example 3
To apply a cooler color grading (cinematic effect) I will use the Selective Color adjustment layer as shown below.
Open the photo in Photoshop
Add a Selective Color adjustment layer
From the property menu, select Neutral from the color drop menu, and make sure to check the Absolut box.
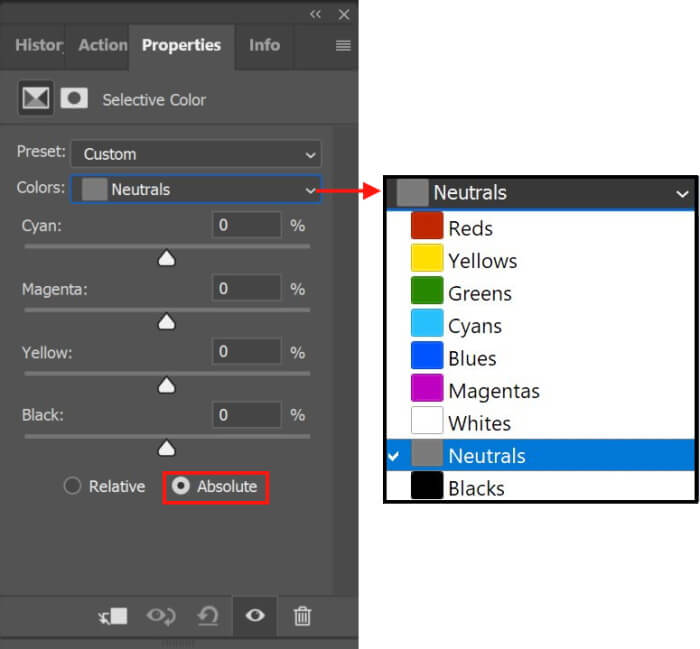
Make the following slider adjustment:
- Move the Cyan slider to 10%
- Move the yellow slider to -10%
- Move the black slider to 5%
To reduce this effect from the skin tone, select Red, and make the following slider adjustment:
- Move the Cyan slider to -10%
- Move the yellow slider to 10%
Select Yellow, and make the following slider adjustment:
- Move the Cyan slider to -10%
- Move the yellow slider to 10%
- Move the Magenta slider to 5%
To add some contrast, move the black slider to 5%
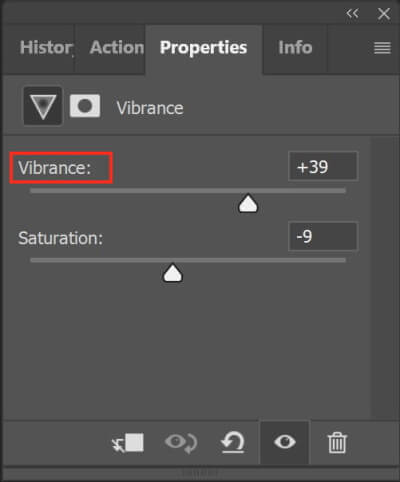
To make the colors pop up more, add Vibrancy adjusting layer
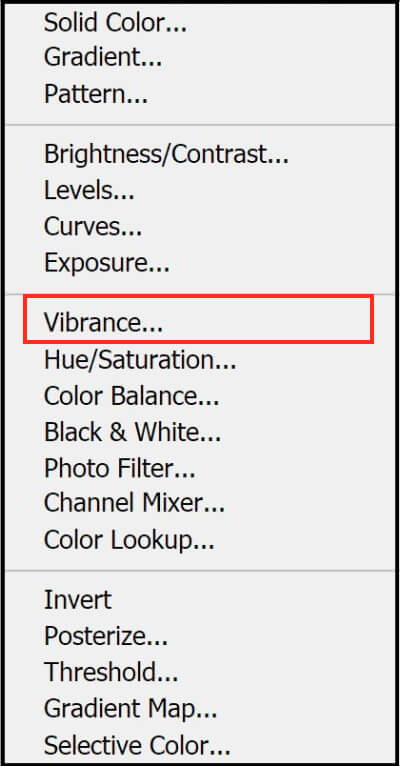
In addition, move the vibrancy slider to 30
The before and after images are shown below
Example 4
The original photo by Warren Wong on Unsplash
I apply the same previous method, and the before and after images are shown below
Method 3: Using Camera Raw Filter
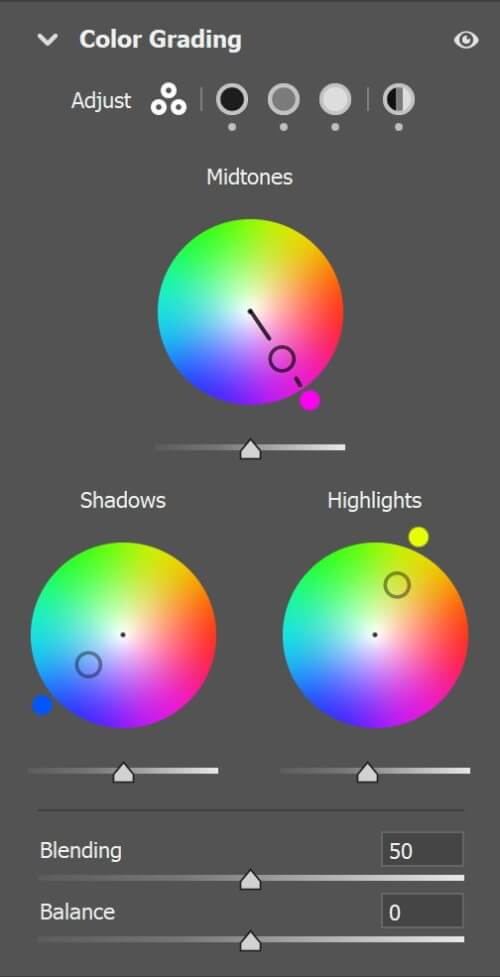
Adobe updated the Camera Raw filter by adding a new Color Grading section. The section comprises of three wheels, which individually control the hue and saturation of the shadows, mid-tones, and highlights.
Example 5
Open the photo in Photoshop, and duplicate the layer (Ctrl + J)
Convert the layer to a smart object so that you can work non-destructively and have the ability to readjust any filters, effects, and layers applied to it.
Choose Filter > Camera Raw Filter to access the filter.
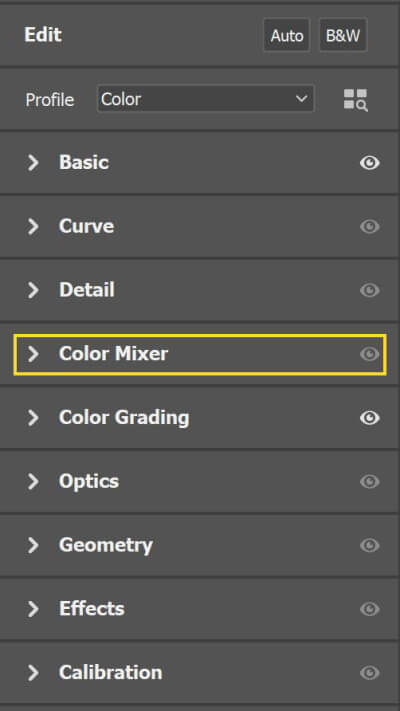
Expand the Color Grading tab where you will find three color grading wheels for the Shadows, Midtones, and Highlights.
Adjust the Shadows, Midtones, and Highlights color wheels to change the color of the portrait.
How to use the color wheels?
The handle inside the wheel controls both hue and saturation. The distance from the center controls the saturation. When the handle is in the center of the wheel, saturation equals zero (no color tint). When the handle is at the edge of the wheel, saturation equals 100.
Similarly, the handle’s angle on the wheel sets the hue. There is an additional handle on the edge of the wheel; this is a dedicated hue-only handle.
The Blending slider allows you to adjust the amount of overlap between the Shadows and Highlights. The value set to zero minimizes the amount of overlap, and the value set to 100 maximizes the overlap.
The Balance slider balances the effect between the shadows, midtones, and highlights. Values less than zero increase the effect of the Shadows while values greater than zero increase the effect of the Highlights.
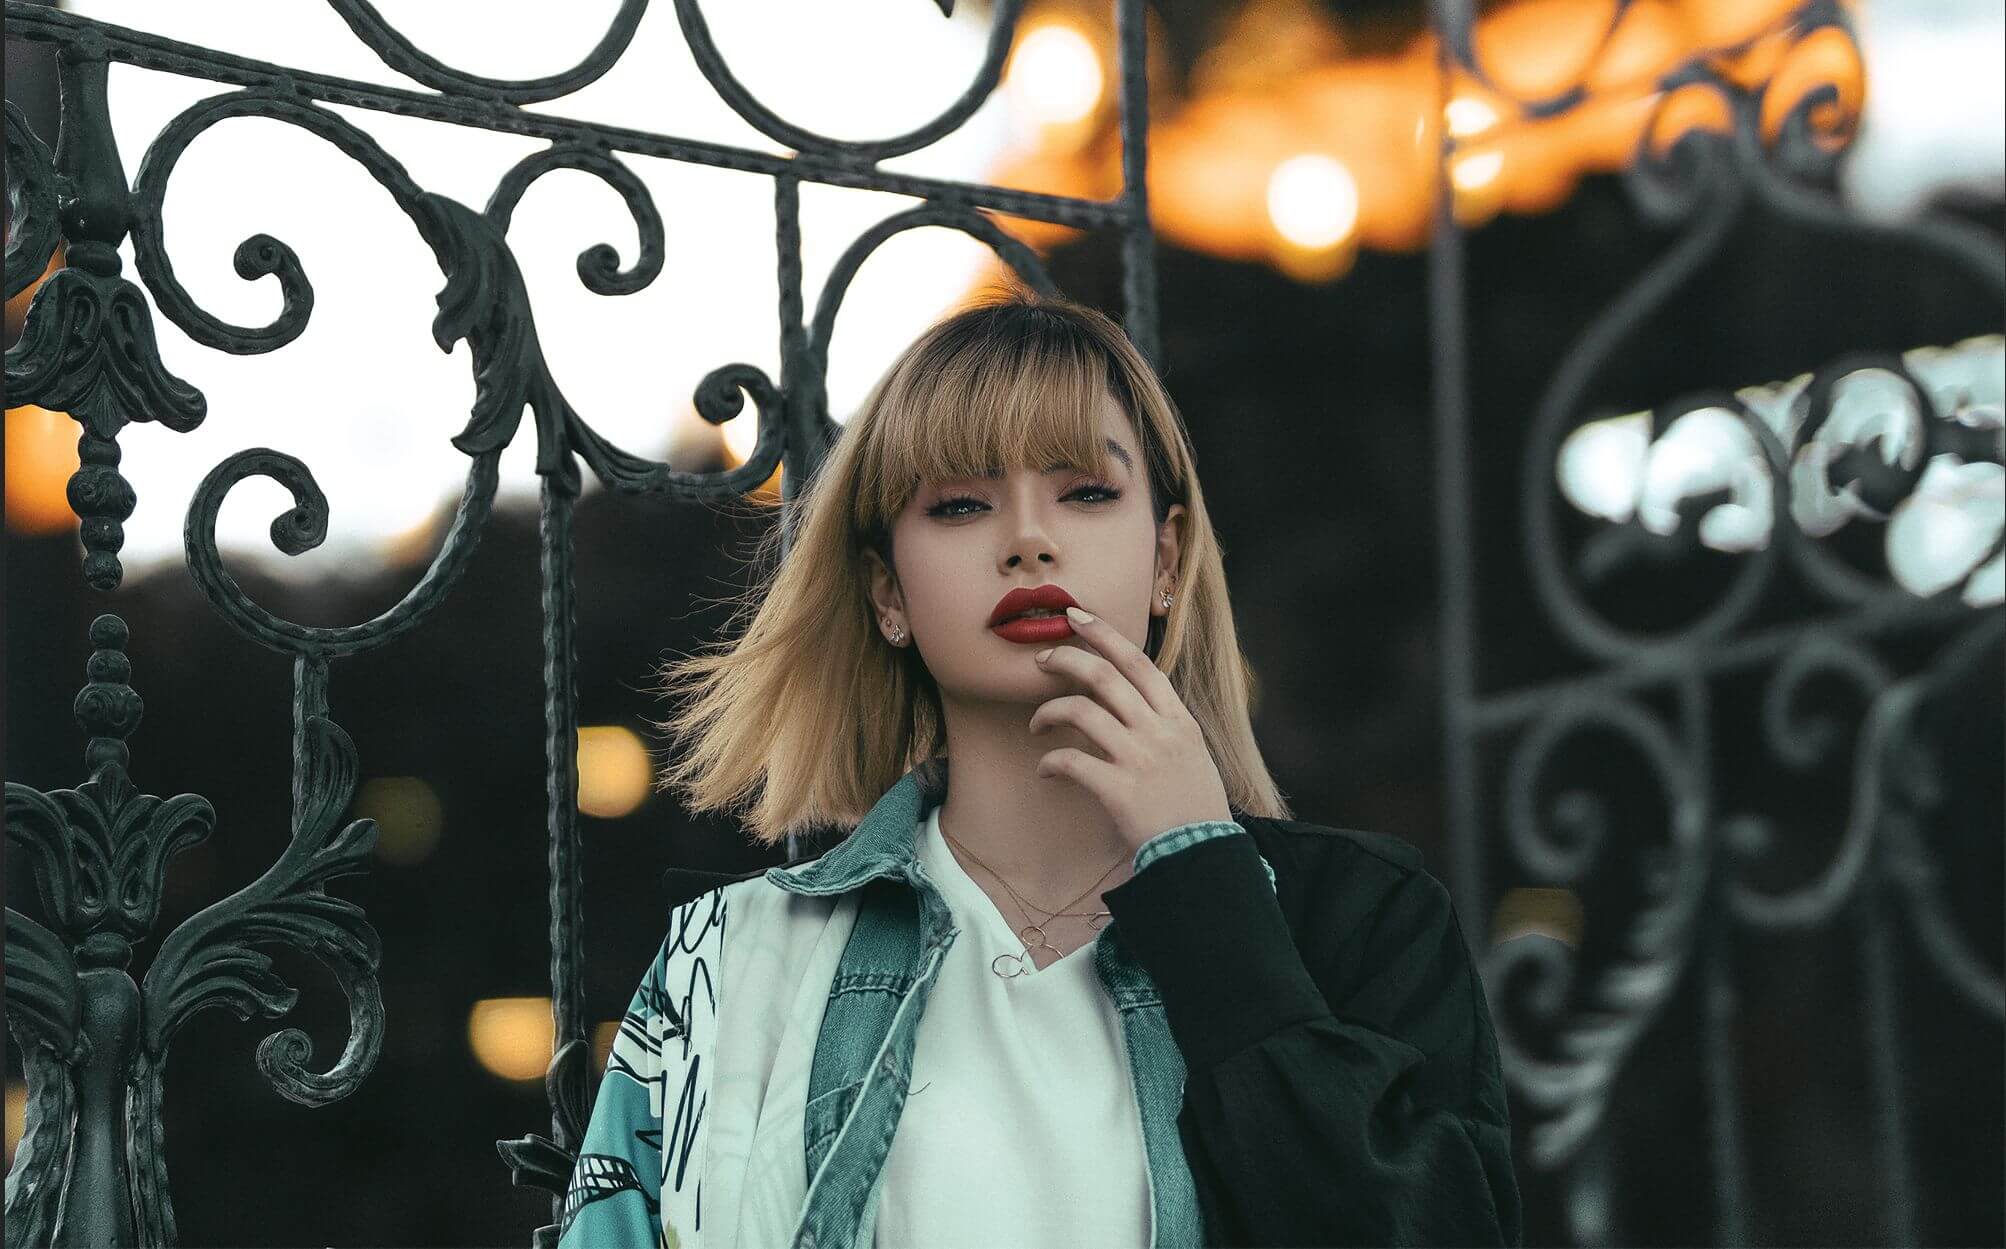
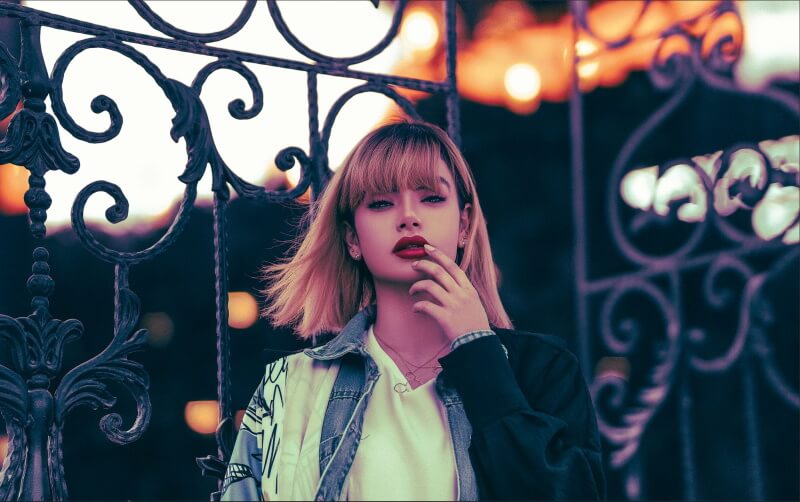
In this example, I added blue to the shadows, yellow to the highlights, and magenta to midtones.
The original photo by Amirhesam Golzar from Pexels, the before and after photos are shown below.
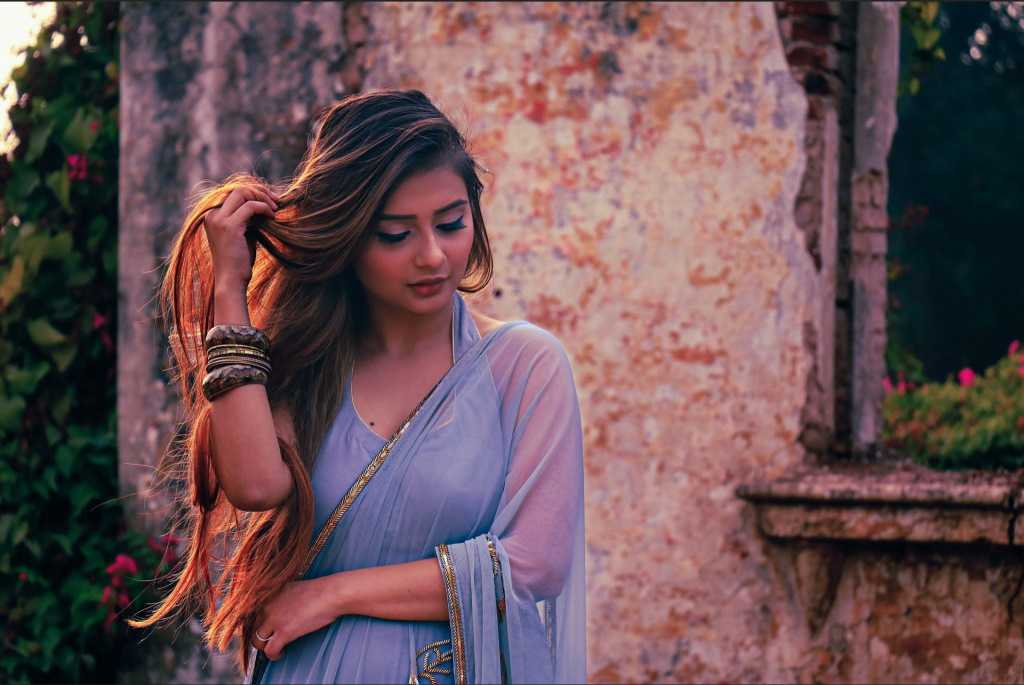
Example 6
The original photo by Samarth Singhai from Pexels, the before and after photos are shown below.

Thanks for reading, I hope you enjoyed the article, in case you have any questions just drop them below & I will be happy to answer you.
If you enjoy the site, don’t forget to subscribe, we will only inform you when a new article is posted.


I actually like your website because it teaches me how to edit my won pictures. I pay a lot of money to editors so that they can do it for me. I can save so much money just by doing it myself. You are such a lifesaver, thank you so much for your articles. I appreciate it
Hi Daniel
Thanks for your valuable comment, and I’m very glad you like the article.
Hey,
As I am used to reading and reviewing your interesting articles, this article is again a bull’s eye.
I think many photographers can learn a lot from this. Of course, I will recommend your site to some friends of mine who are amateur photographers. I really enjoy trying those tips.
As a non-photographer, it even starts to itch for me but I already have a lot of time too short for everything I do…
With best regards,
Thanks for your feedback