If you are interested in learning how to make a photo collage in Photoshop, then you are in the right place. Individual photos capture single moments in time, but a photo collage can tell a whole story, archiving a treasured family holiday.
There are collage maker apps in the market out there, but Photoshop CC will give you even more control. It allows you to complete the whole process using just one app. Photoshop is one of the most commonly used apps for this type of work.
In this Photoshop tutorial, I am going to explain two methods to do photo collages.
What is a photo collage?
The word “Collage” is from the French word “coller”, which means “to glue” or “to stick together”; A photo collage is a collection of pictures that are put together to make a single picture. Traditional art involved cutting pictures into pleasing shapes or trimming out specific images for placement, but digital photo manipulation opens many new possibilities, including blending images to make a seamlessly realistic picture.
How to create a photo collage
To make a memorable collage, the pictures used should be related in some way and, taken together, tell a story. Family history collages are common, depicting the various stages of a family as the children grow. Anything memorable or special might be used as the subject of a collage. To be interesting, pictures should be chosen for maximum impact and the overall effect should reflect the personality and evoke a mood.
There are different ways to create a photo collage, in this article I will explain two methods.
Method 1: Using a Clipping mask
The idea of this method is to create a black rectangle or circular shapes that cover the entire canvas, then copy each shape into a separate layer. After opening the required photos in separate layers, arrange the layers in such a way to make a layer of the black shape below of a photo layer. Then convert each photo layer into a clipping mask, so the photo over the black shop will show only inside the black shape. The following example will systematically illustrate this method.
Step 1
Open a new document with the required size, and resolution or you can pick one of the customs documents on the left window.
File>new or use shortcut (Ctrl + N)

Step 2
Draw your templet
View>new Guide or View>New guide layout

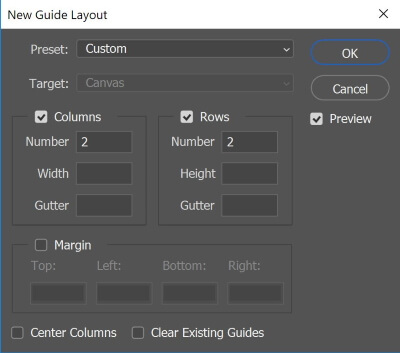

You can show and hide the guide from View>show>Guide or use a shortcut (Ctrl + 😉
Step 3
Select the top left square using the marque tool, and copy it
Edit>Copy or use shortcut (Ctrl + C)
Step 4
Paste the copied selection into a new layer
Edit>Past or use shortcut (Ctrl + V)
Step 5
Repeat copying and pasting for the other rectangular shapes.
Step 6
Make a circular selection of templet layer, copy, paste as above
The layers are shown below
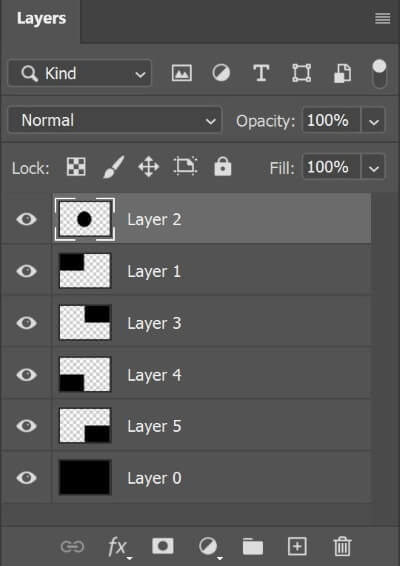
Step 7
Open the photo files that will be included in the photo collage
File>Open or use short cut (Ctrl + O)
Step 8
All the photos will be opened in separate documents. We need to copy each one and past it in the main document as layers.
Click on the first document, select all (Ctrl +A), copy the selection (Ctrl + C), and click the main document and past it (Ctrl + V)
Step 9
Repeat for the other photos
Step 10
Move and arrange the layers such that a layer with a photo will be on the top of a layer with a black shape. The layout will as shown below.
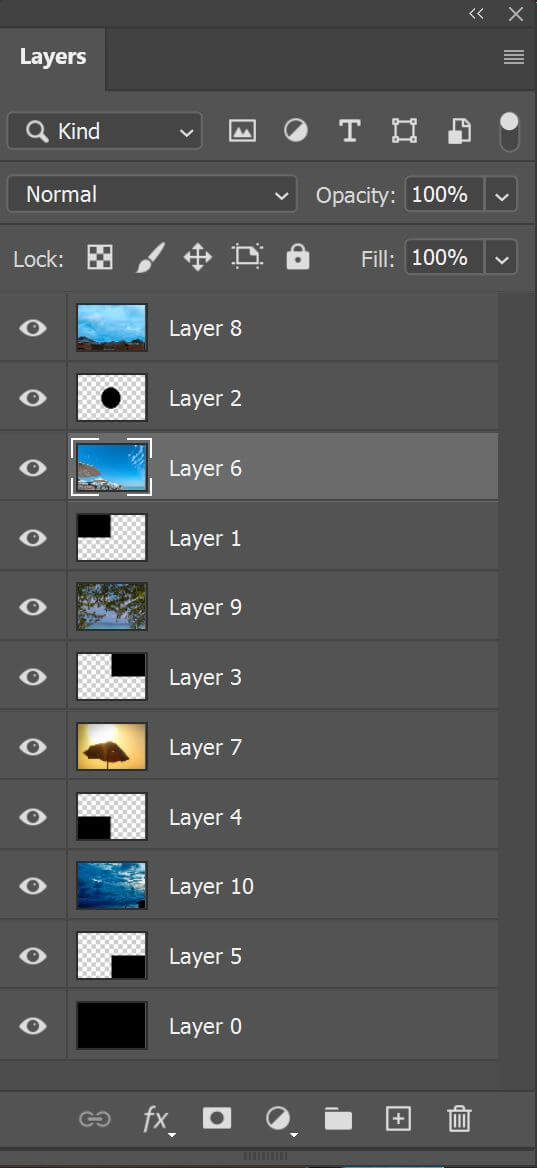
Step 11
Right-Click on the top photo layer and convert it to a clipping mask.
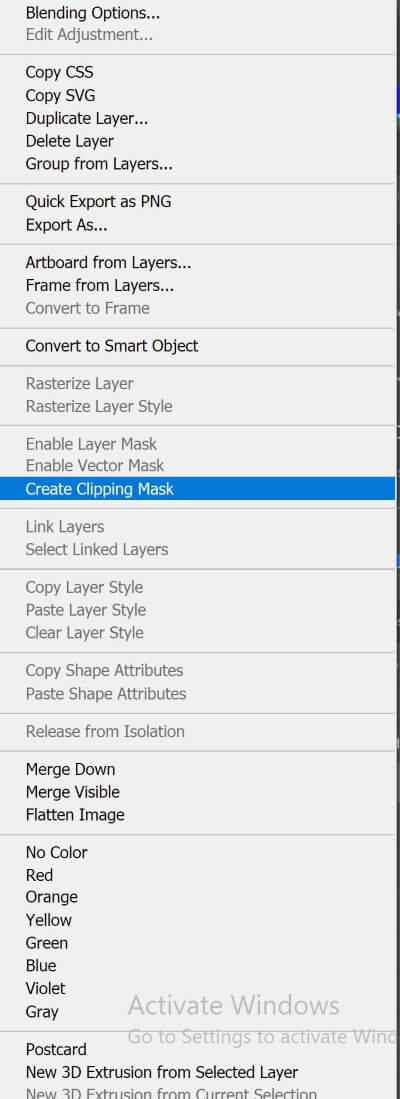
Step 12
Click the top photo layer and use the free transform (Ctrl + T) to resize and move it within the shape. Remember to use the shift key to maintain the aspect ratio of the photo.
Step 13
Repeat step 12 for the rest of the photos.
Step 14
To create a border around each photo. Click on a layer with a black shape, and add a layer style: stroke.
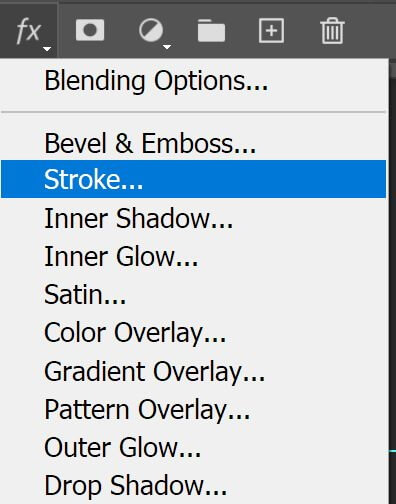
Adjust the border color and size
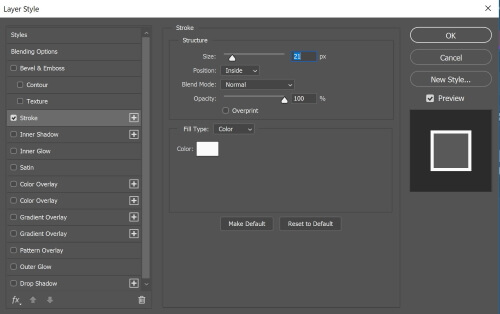
Step 15
Repeat for all the other layers with black shapes. Alternatively, you can copy and paste the layer style. Right-click on the stroke icon and choose copy layer style, then click on the other layer and again right-click then choose paste layer style.
The final collage photo is shown below

Photo by Ehab Amin
Another example also is shown below.

Photo by Ehab Amin
Method 2: Using Past special
This method depends on using a layer mask to show a photo in a certain selected area. I will use some steps from the first method.
#1
Draw templet [Follow steps 1 and step two from method 1]
#2
Open the photo files that will be included in the photo collage [follow step 7 from method 1]
#3
Copy the photo you want to paste (Ctrl + C)
#4
Using the marquee tool, select the area where you want the copied photo to be placed.
#5
Now, we will use the “paste into” command. This command will paste the photo in the selection by creating a layer mask.
Edit>past special>past into or use shortcut (Alt + Shift + Ctrl + V)

#5
Use the free transform (Ctrl + T) to resize and move the photo within the selection. Remember to use the shift key to maintain the same aspect ratio of the photo.
#6
Repeat the above steps for the rest of the photos.
#7
To create a border around each photo. [Follow steps 14, 15 from method 1]
#8 the final arrangement of the layers will look as below:
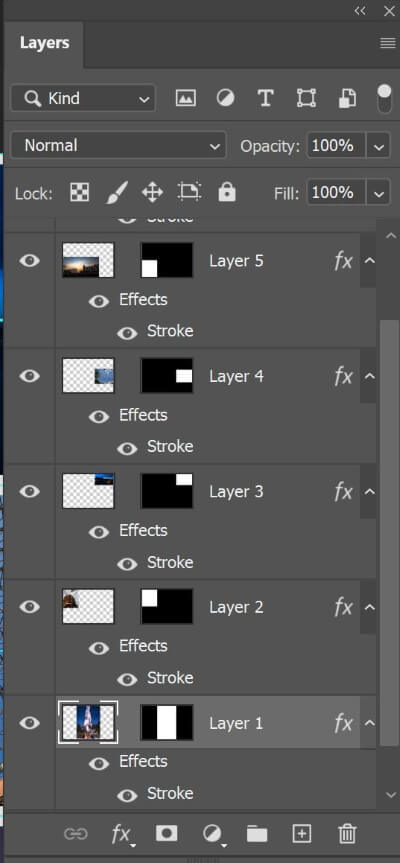
The final college is shown below
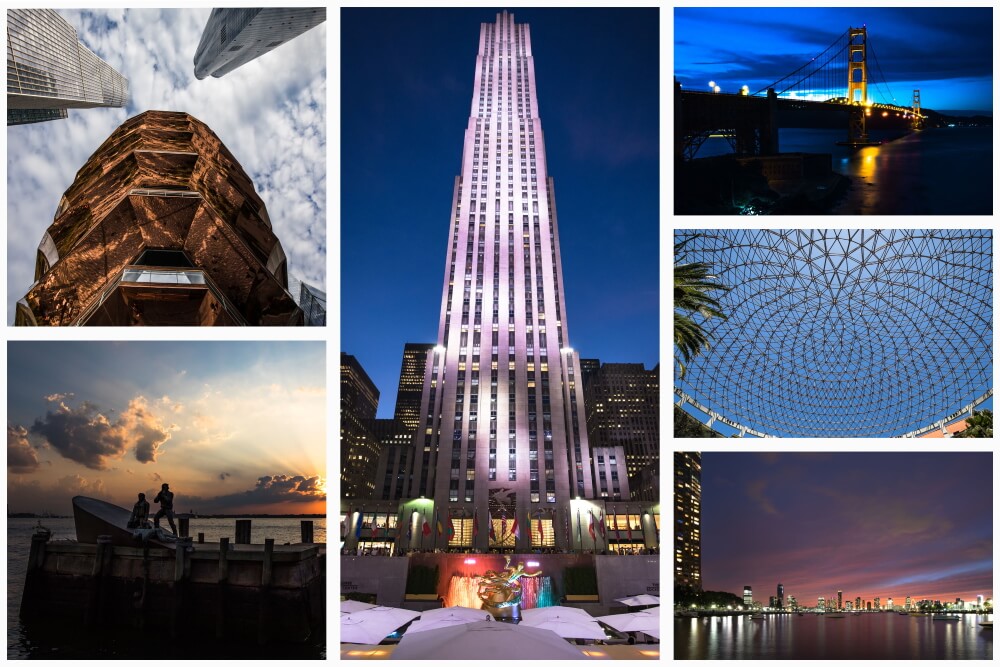
Photo by Ehab Amin
Another example also is shown below.
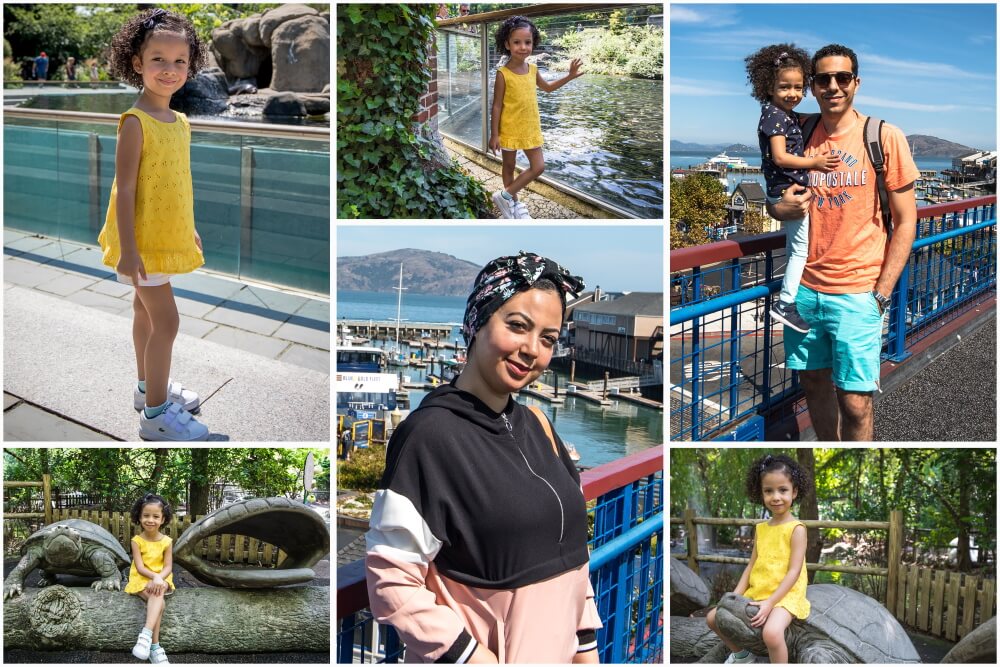
Photo by Ehab Amin
Photo collage concepts can be used to create art photo, here is an example
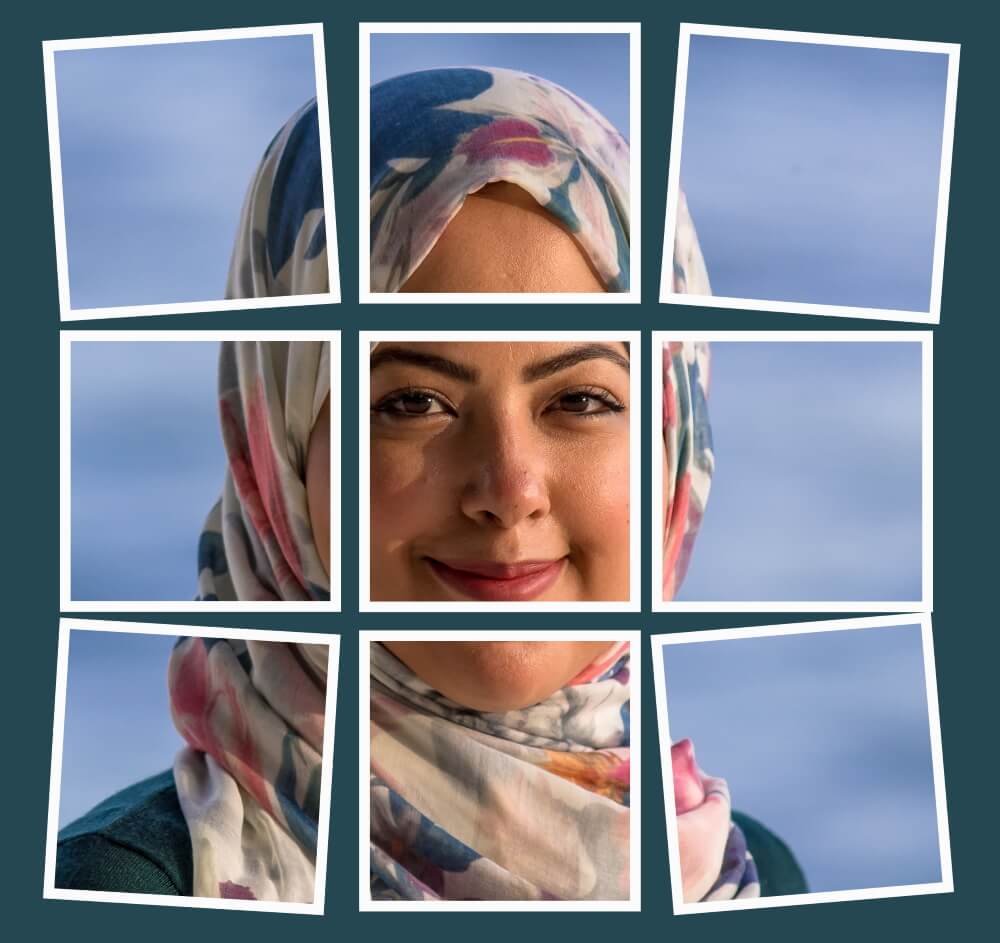
Photo by Ehab Amin
Are you looking for Photo editing resources or editing Services?
Some photographers are struggling to learn and master editing software like Lightroom or Photoshop, they found the editing process is taking too much of their time. Therefore, assigning the editing tasks to an editing service may be the answer.
On the other hand, some others are looking for editing resources like actions, overlays, and textures to help them. For those I highly recommend paying a visit to my store, it has amazing professional photo editing tools.
In addition, you can check my editing tutorials, there are many tips and tutorials there.
Thanks for reading, I hope you enjoyed the article if you have any questions just post them below & I will be happy to answer you.
If you enjoy the site, don’t forget to subscribe, we will only inform you when a new article is posted.


Wow. An article on Photoshop. This is article is going to be very helpful for my younger sister. She’s studying multimedia technology and she makes use of photo, audio and video editing softwares. She has been given an introduction to Photoshop, but still needs to learn more. I’m sure she’d be very happy to learn more about Photoshop from this article.
Glad you liked the article, thanks
New to Photoshop and needed a layman guide. I saw the steps I’ve been missing all these while to get the perfect collage – borders! Now I know it’s hidden under the stroke function. The last concept of an art photo was interesting. Will attempt that with a different subject in mind. Thanks for the simple to understand tips!
Thank you for your feedback