


Stretching an image means resizing the image into arbitrary aspect ratios or dimensions while preserving the visually prominent features of the photo. You may want to stretch an image for aesthetic reasons, or you want to meet some publisher requirements. In addition, we all have photos that we wish had a wider composition, either because we didn’t own the right lens or because we saw the new potential for it in post-processing. With this easy Photoshop method, you will learn how to stretch the edges of an image without distorting the subject. You need first to know three tools to do the job, so let us start by explaining them, and then I will provide you with a step-by-step explanation of this method. Finally, there will be more examples at the end of the post.
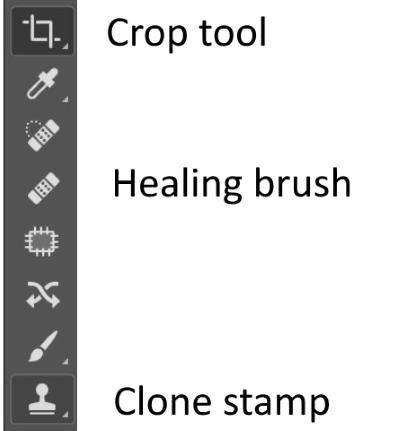
Crop tool (with a content-aware fill)
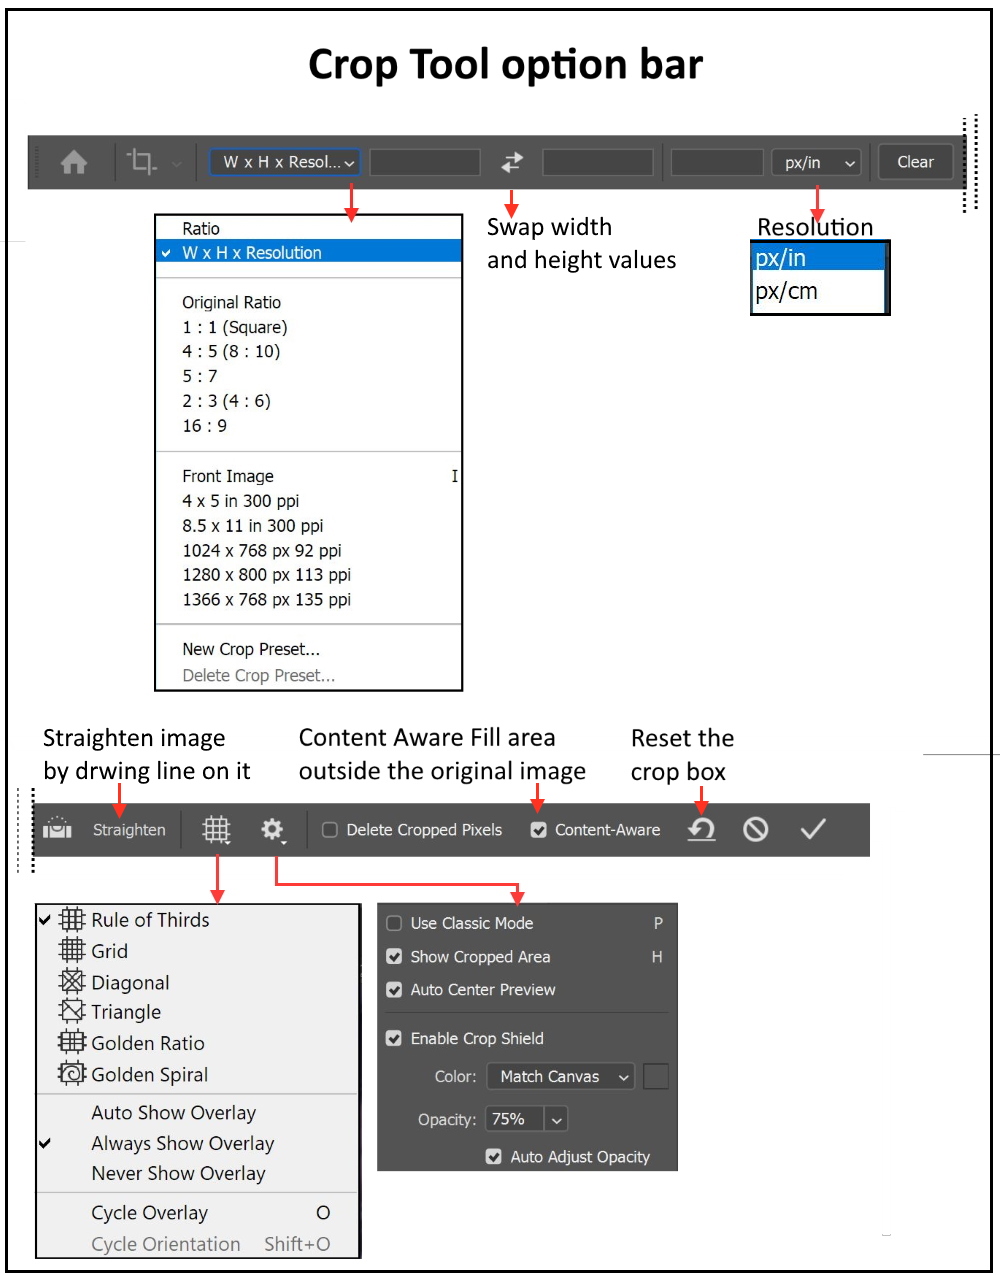
You can use the Crop tool to crop and straighten photos in Photoshop. The Crop tool is non-destructive, and you can choose to retain the cropped pixels to optimize the crop boundaries later. The Crop tool also provides intuitive methods to straighten a photo while cropping.
Photoshop now (since Photoshop CC 2015.5 release) uses content-aware technology to intelligently fill in the gaps when you use the Crop tool for straightening or rotating an image or expanding your canvas beyond the image’s original size (stretching the image)
How to use the crop tool
- From the toolbar, select the Crop Tool.
- Crop borders will be displayed on the edges of the photo.
- Drag the corner and edge handles to specify the crop boundaries in your photo.
- Specify the Crop options:
The Clone Stamp tool
The Clone Stamp tool paints one part of an image over another part of the same image or over another part of any open document that has the same color mode. You can also paint part of one layer over another layer. The Clone Stamp tool is useful for duplicating objects or removing a defect in an image.
How to use the Clone Stamp tool
- Select the Clone Stamp tool.
- Choose a brush tip and set brush options for the blending mode, opacity, and flow in the options bar.
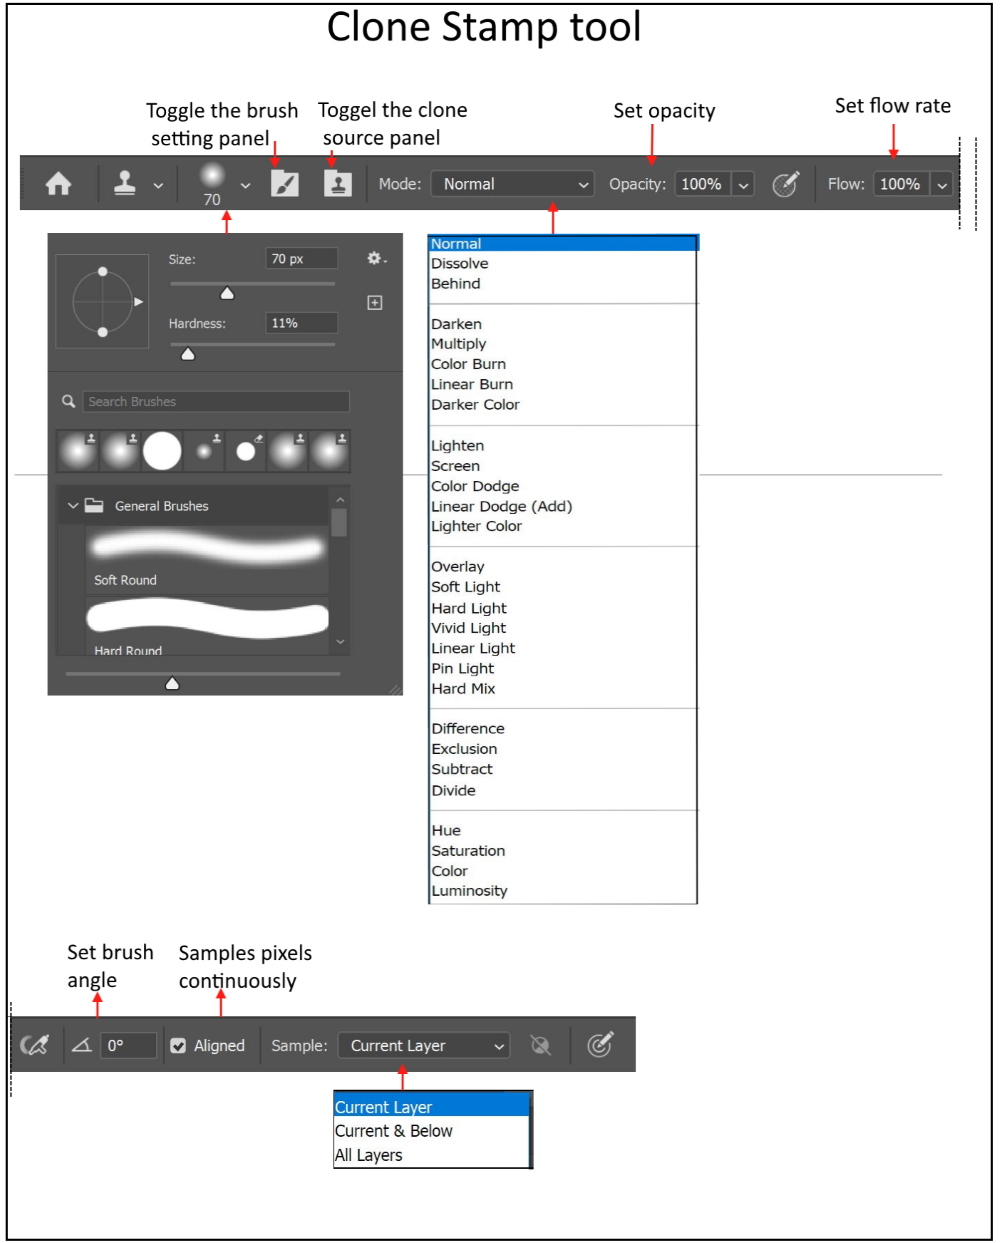
- Set the sampling point by positioning the pointer over an area of the image and Alt-clicking (Windows) or Option-clicking (Mac OS).
- Drag in the image. The existing pixels are replaced by the sampled pixels
The Healing Brush tool
The Healing Brush tool lets you correct imperfections, causing them to disappear into the surrounding image. Like the cloning tools, you use the Healing Brush tool to paint with sampled pixels from an image or pattern. However, the Healing Brush tool also matches the texture, lighting, transparency, and shading of the sampled pixels to the pixels being healed. As a result, the repaired pixels blend seamlessly into the rest of the image.
How to use the Healing Brush tool
- Select the Healing Brush tool
- Set brush options in the pop‑up panel
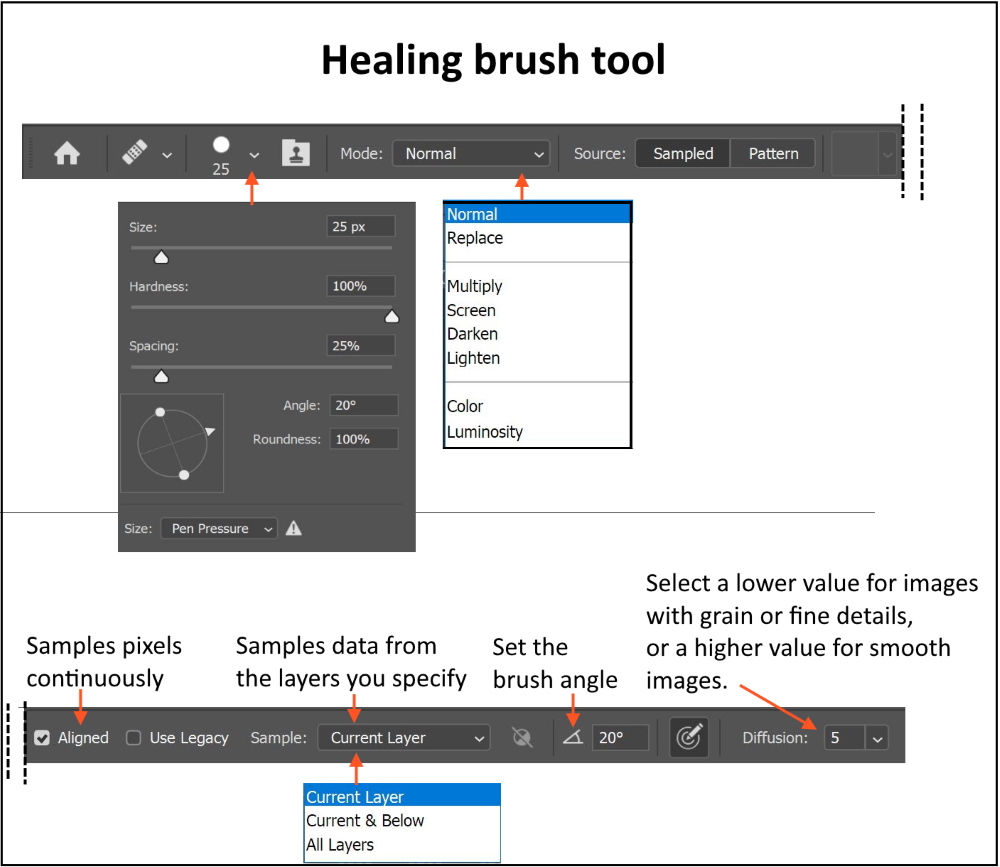
- Set the sampling point by positioning the pointer over an area of the image and Alt-clicking (Windows) or Option-clicking (Mac OS).
- Drag in the image. The sampled pixels are melded with the existing pixels each time you release the mouse button.
What the Difference is between the Healing Brush Tool and the Clone Stamp.
While they both have similar uses, there is a difference in how these tools get the job done. Both of these tools let you select a sampling point. The clone stamp paints a complete copy of whatever you select. However, the Healing Brush Tool keeps the Highlights and Shadows of wherever you’re painting and only paint the Color and the texture of your sampling area. This makes the Clone Stamp much more suitable for areas with defined edges since the Healing Brush will only blur the Color and you may end up with messy, smudged edges.
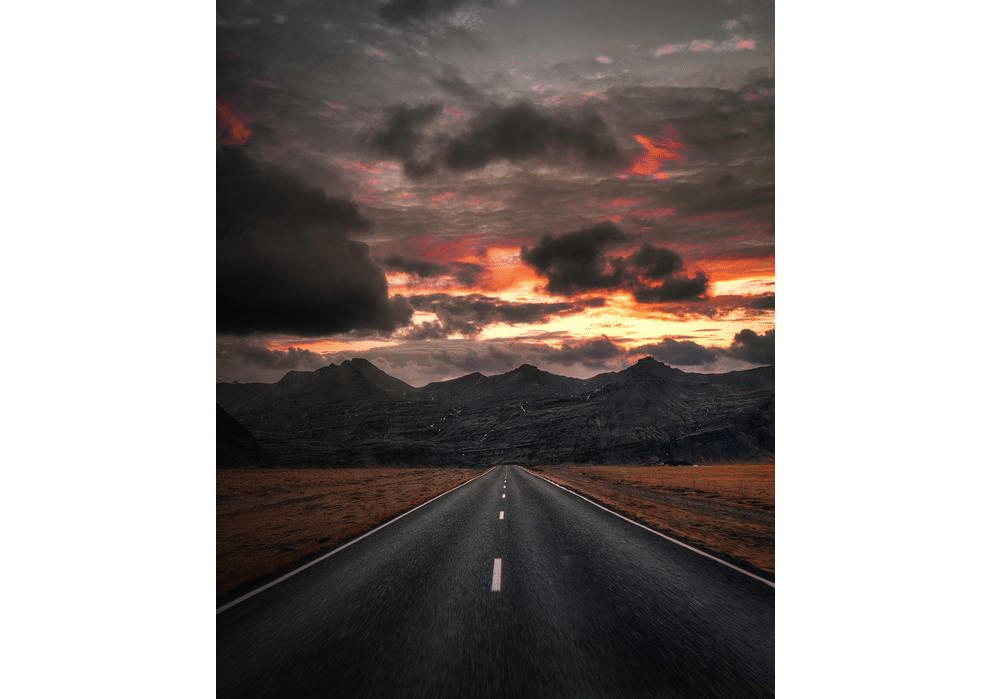
Photo by Benjamin Suter from Pexels
How to stretch a photo
Use the crop tool to increase the canvas to the required dimensions, check the content-aware option box, and carry out the crop. The empty spaces will be filled with samples of the original photos. Then use the clone stamp tool, and/or the healing brush tool to retouch the final photo.
Step 1
Open photo file
Step 2
Choose the crop tool, or press the keyboard shortcut C.
Use the crop handles in the corners or sides of the crop box to change the size of your crop. In this example, I hold the Alt key and drag the middle crop handle outside the photo to stretch the canvas to the required new dimensions
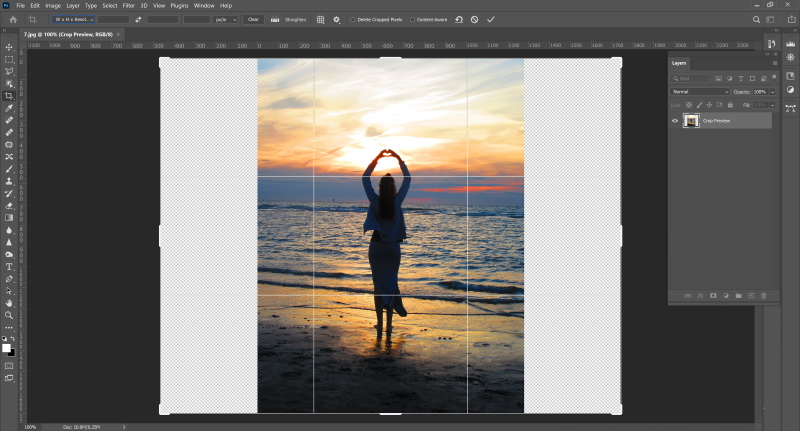
Step 3
Make sure you check the content-aware box, then complete the crop.
Step 4
Photoshop will carry on by filling the empty spaces with samples from the original photo.
The result is shown below

You can see that there are some imperfections and some repeated patterns in the stretched photo as shown below.
Step 6
Use the clone stamp tool and healing brush tool to enhance these imperfections and remove the repeated patterns.
The before and after are shown below

More examples
Here are some more examples using the same technique

Photo by James Wheeler from Pexels

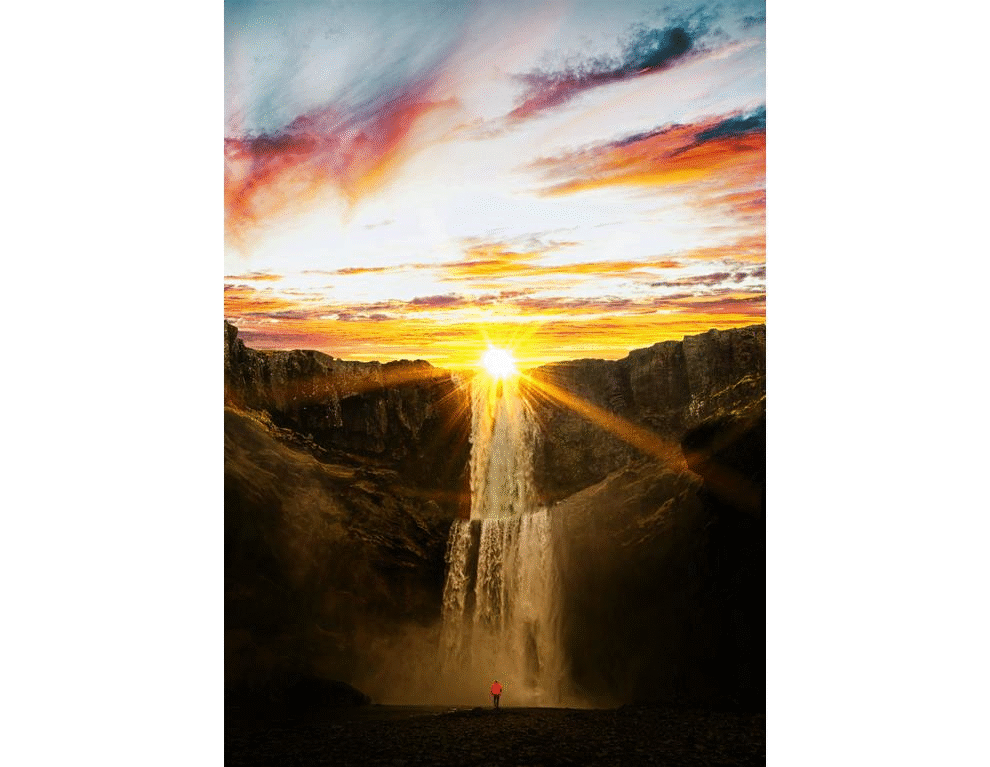
Photo by Sachin C Nair from Pexels
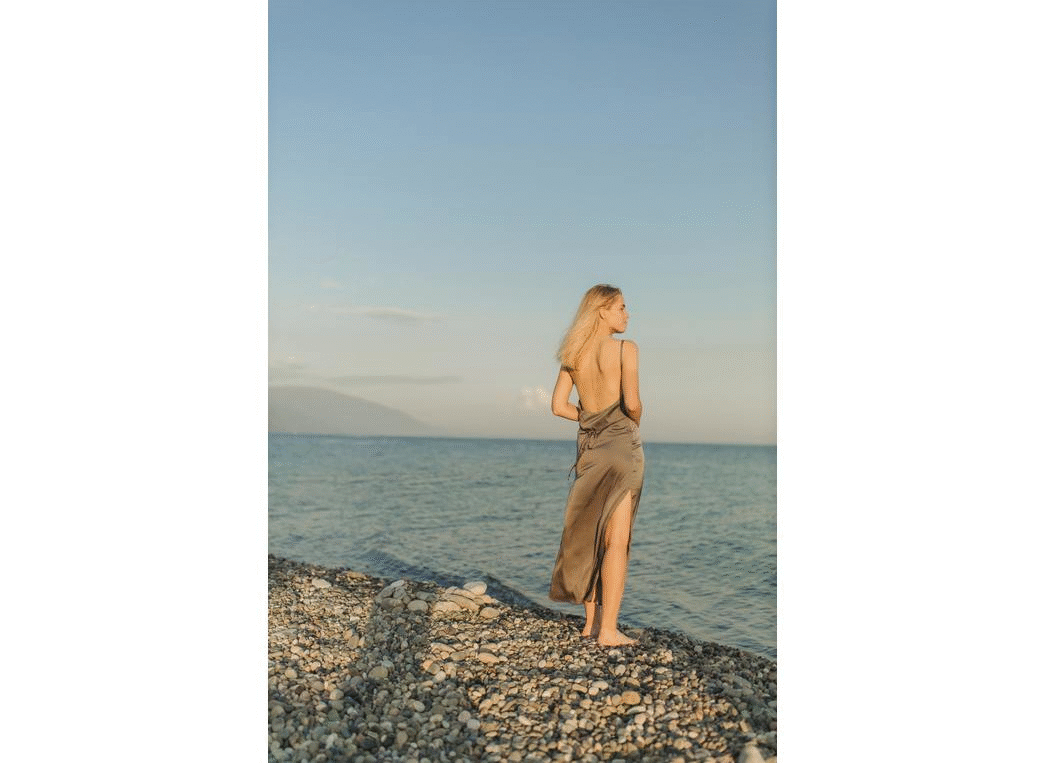
Photo by Anastasia Shuraeva from Pexels
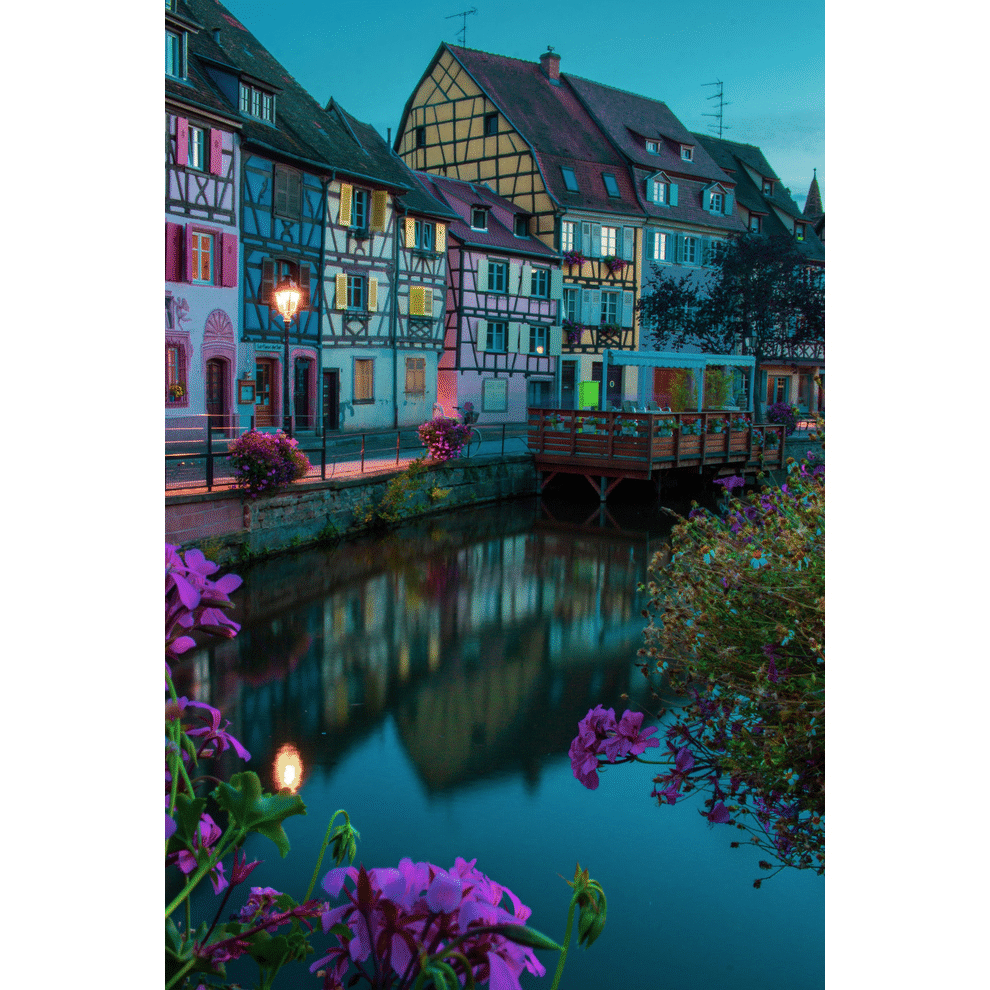
Photo by Vincent M.A. Janssen from Pexels
Thanks for reading, I hope you enjoyed the article if you have any questions just post them below & I will be happy to answer you.
The featured photo by Liger Pham from Pexels
If you enjoy the site, don’t forget to subscribe, we will only inform you when a new article is posted.


Hello there!
You’ve got a very helpful piece on photography there. I am glad to see this article because it actually emphasize on the aspect of photography I’ve always had issues with us which is about stretching an image. I am not a professional photographer but I have basic knowledge about the field but I always have challenges in stretching an image.
I believe I can do better in stretching an image henceforth, thanks.
Thank you for your comment
Good tips and tricks on using the features in Photoshop. I am not great with editing photos, so I may be asking silly questions here, if you don’t mind. Looking at the examples, especially the image with the road (just below the header “What the Difference is between the Healing Brush Tool and the Clone Stamp.”, is the smaller image the original image and the larger image is the one where you use the clone stamp function to do so? I am so amazed if that is the case because the extended part looks quite different from the original image? Apologies if I sounded silly, but this is so fascinating for me.
Hi Richard
Thanks for your comment, Yes the smaller image is the original photo, and the extended area is filled automatically by the software (using Content-aware fill) when you extend the image, sometimes you may need to fine-tune the extended part.