


In the following tutorial, we are going to explain one important Photoshop blending option, the “Blend If” sliders. It is really very easy to use, and not only can it give you much better-blending results than anything you could get using the standard layer blend modes, but it also gives you more control.
In the following sections, I will explain What is “Blend If” in Photoshop? and how to use it,
What is Blend If?
The “Blend If” blends one layer into another based on the content (brightness and colors) of either of the two layers. “Blend If” masks out part of a layer based on the luminosity of pixels (brightness). It can be used, for example, to replace a sky, replace the background, add texture to text, and compose photos without having to make a complex selection.
How does it work?
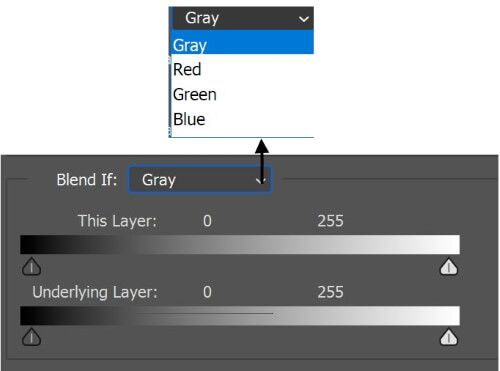
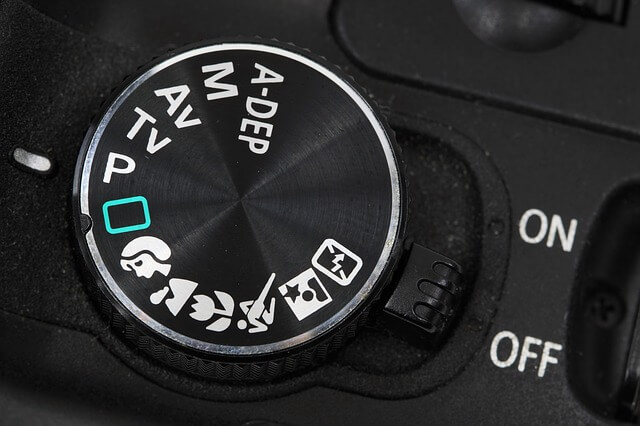
You can access the blend if command by duple clicking the active layer, the following layer style menu opens, and you can find the two sliders as shown below.

-
This Layer
The first (top) slider is named “This Layer”. It has a gradient inside it running from black on the left to white on the right and has little black and white handles on either end. This slider affects the layer you currently have selected in the Layers palette.
If I use the image of a simple gradient from black to white as my active layer

Moving the black and white sliders will cause areas of the currently selected layer to disappear (clip) from view.
If you move the white slider toward the middle, the highlights (areas with high brightness) will gradually disappear and turns into transparent pixels.
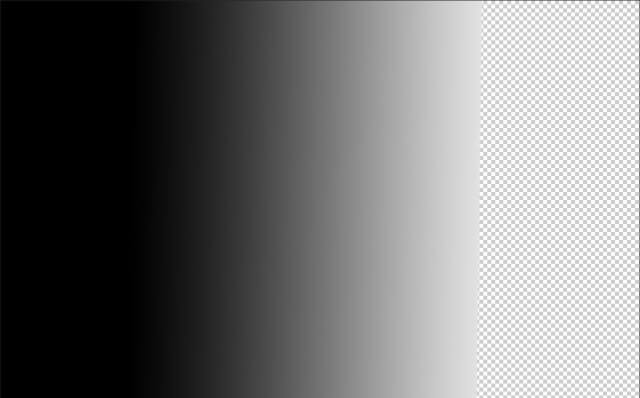
On the other hand, if you move the black slider toward the middle, the shadows (areas with low brightness) will gradually disappear and turns into transparent pixels.

-
Underlying Layer
The “Underlying Layer” slider also has a gradient inside it running from black on the left to white on the right and has little black and white handles on either end. However, it affects every layer below the currently selected layer.
Moving the sliders of the bar on the bottom will cause areas of the layer(s) below the currently selected layer to show (appear) through the selected layer.
I will use the following images in separate layers, where the top one is:

In addition, the bottom one is:

The layer panel will look like the below snapshot

If you move the white slider of the Underlying Layer toward the middle, the highlights (areas with high brightness) of the underlayer image will gradually show.

On the other hand, if you move the black slider toward the middle, the shadows (areas with low brightness) of the under layer image will gradually show.
Splitting the Slider Bars in Two
To smooth out the blending and create a feathered transition between the two layers, hold down the Alt (Win) / Option (Mac) key and drag the slider. Holding down the Alt/Option key causes the slider to split in half, as we can see here:

You can drag both halves independently of each other until creating a nice transition.
Using “Blend if” with colors
The RGB color system is one of the most well-known color systems in the world. It combines red, green, and blue light to create the colors we see on our TV screens, computer monitors, and smartphones.
When using the “blend if” as explained in the above sections, we use it to control the visibility based on the brightness of the pixels. The good news here is you can also control the visibility of pixels according to their color.
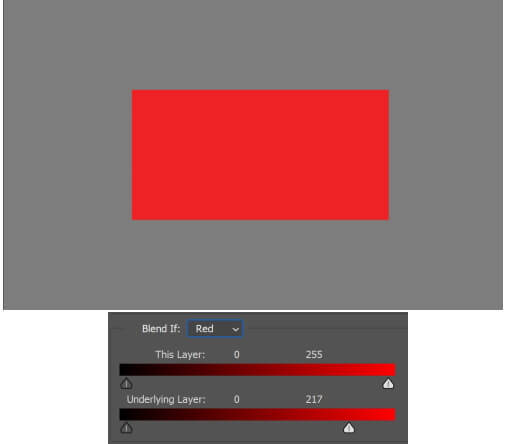
From the “blend if ” menu choose the required color, and follow the same steps to make it show or disappear. I will use the following two photos:
In separate layers, with the solid color photo on the top, from the “Blend If” menu
I choose the red color, and I use the “blend if”, the result is shown below, only the red color is shown, and the rest of the colors are disappearing.
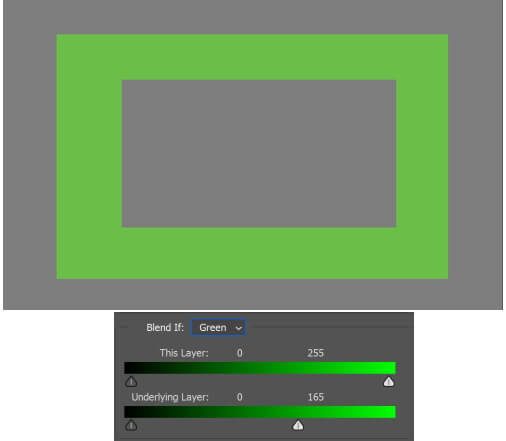
Then, I choose green, and I use the “blend if”, the result is shown below, only the green color is shown, and the rest of the colors are disappearing.
The same goes for the blue color, the result is shown below

Important Remarks
Occasionally you will find that using the Blend If sliders to blend two layers also results in some unwanted transparency appearing elsewhere in the image. If this occurs, you can use content from the background layer to fill the transparent areas, or you may use a mask to cover the unwanted transparency.
Examples of using the “Blend if”
-
Text effects
In this example, I am going to show you how to add a background texture to a text layer to make it looks more realistic. I will use the following photo:
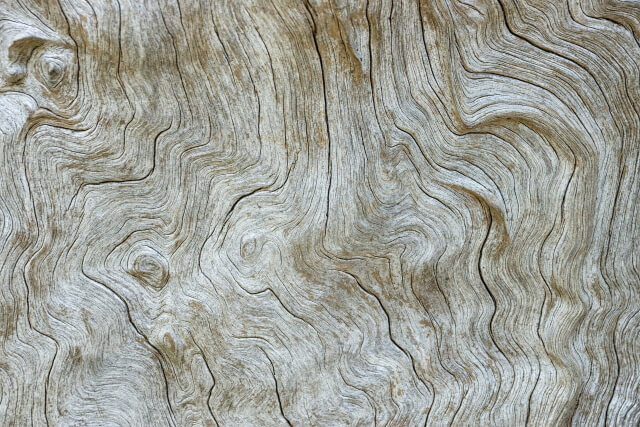
Photo by Peter Aschoff on Unsplash
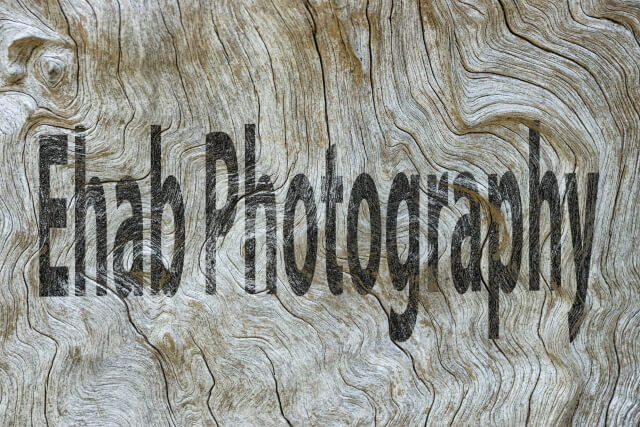
Add a text layer, and type “Ehab Photography”, resize the text size.

To show some shadows of the wood texture in the text layer, I use the “blend if” and move the black slider of the underlying layer. You may also split the handle to add a smooth transition, as shown below:
-
Composing two photos
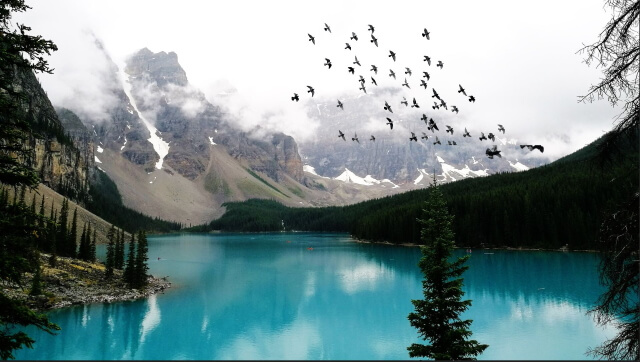
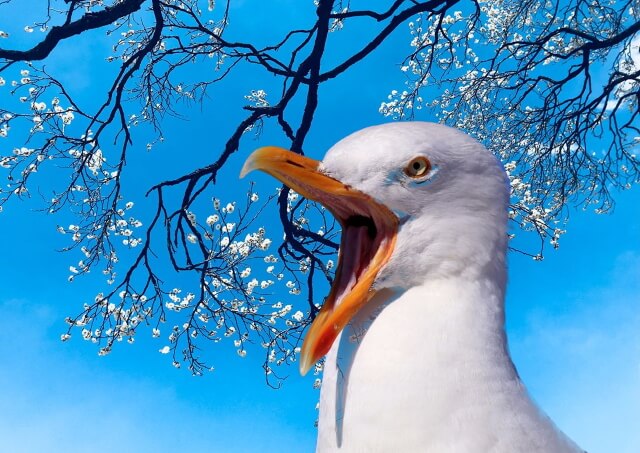
The goal of this example is to add the bird photo to the landscape photo to form a composite photo.
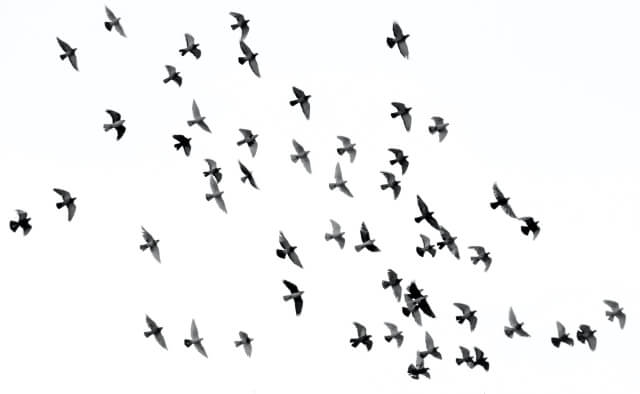
Photo by Mehdi Sepehri on Unsplash
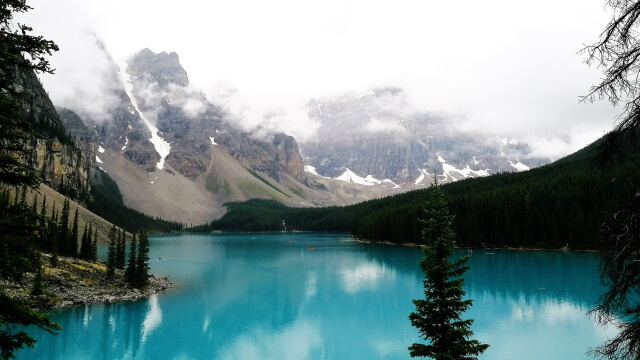
Photo by Danyu Wang on Unsplash
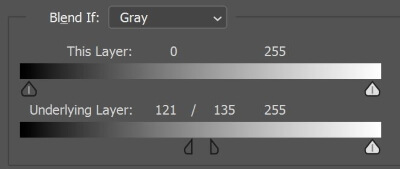
Since the birds are dark and the background is light, I will use the shadow slider in the “blend if” menu to make the birds show in the landscape photo without showing the white background.
The final image is shown below
-
Changing the sky
Although Photoshop has recently added an automatic tool to replace the sky in your image, using “blend if” is also easy and effective.
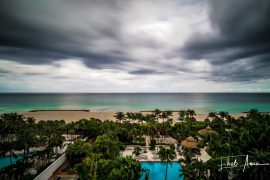
The below images are used in this example
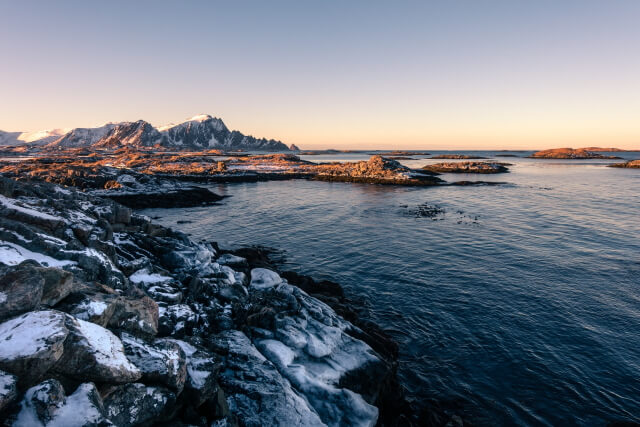
Photo by Pascal Debrunner on Unsplash

In the “blend if” menu I use the blue color channel to show the underlying sky image
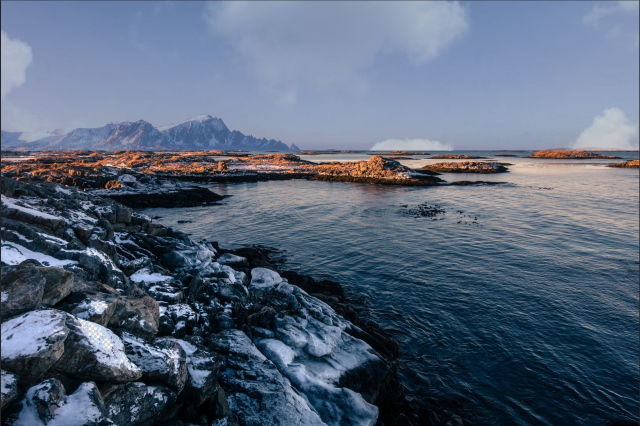
The result is shown below
Another example
With the same sky photo of the previous example, I will use the below photo
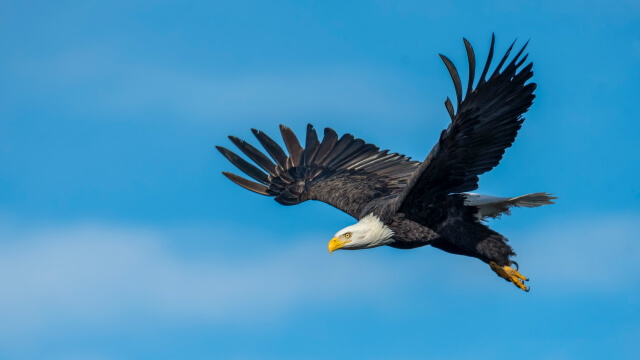
Photo by Frank Cone from Pexels
In the “blend if” I use the blue color channel to show the underlying sky image
The result is shown below
-
Changing the background
Now, let us go for another example, changing a background of a photo is done by separating the foreground from the background using any selection tools, then replacing it. Again, using the “blend if” can be much easier and faster.
The below images are used in this example


Photo by Nguyen Tran from Pexels
In the “blend if” I use the blue color channel to show the underlying image
The result is shown below
Thanks for reading, I hope you enjoyed the article, in case you have any questions just drop them below & I will be happy to answer you.
The featured Photo by Frank Cone from Pexels
If you enjoy the site, don’t forget to subscribe, we will only inform you when a new article is posted.


HI Amin.Thank you for very interesting article. I’m just starting my adventure with Photoshop but Im constantly surprised how powerful this tool is and how many options it provided for photo editing. Blending method you described is much more sophisticated than one I was using before and for sure I will use your detailed tutorial to learn it.
Thanks for the comment, I wish you good luck in learning Photoshop
Hey great and useful article!
I currently am looking to play around with editing especially images. At the moment I’m on the curiosity stage so just reading here and then about the different editing techniques. The blend if, so far seems like a pretty useful skill for me to learn, it looks pretty cool!
Thanks, You are welcome