

Many photographers are willing to take photos of animals and wildlife. Unfortunately, they need to travel halfway across the world to stalk them in their natural habitats. A reasonable option is to pay a visit to Zoos and wildlife-oriented parks, they provide perfect opportunities to photograph exotic and often dangerous wildlife. However, thick security fences often make it difficult to create truly excellent shots.
The good news is that modern digital editing software like Photoshop offers all you need to remove fences from your photos.
In this post, I will explain the steps required to remove a fence from a photo. First I will mention the shortcuts used in this example. At the end of the post, you will find some more examples.
Useful Photoshop shortcuts
- Zoom in: Ctrl + +
- Zoom out: Ctrl + –
- Brush tool: B
- Increase Brush Size: ]
- Decrease Brush Size: [
- Default Foreground/Background colors: D
- Switch Foreground/Background colors: X
- Clone Stamp tool: S
- Undo: Ctrl + Z
- Deselect: Ctrl + D
- Add to a selection: Any selection tool + Shift-drag
- Subtract from a selection: Any selection tool + Alt-drag
How to remove a fence from your photo
In this method, we are going to use the brush tool to paint over the fence in a separate layer, and then turn this painting into a selection, (You can also use any selection tool to make the selection, the polygon Lasso tool is appropriate for straight fences) and finally fill this selection with the content-aware fill tool. The following is a detailed systematic explanation.
Step 1
Open photo in Photoshop
Step 2
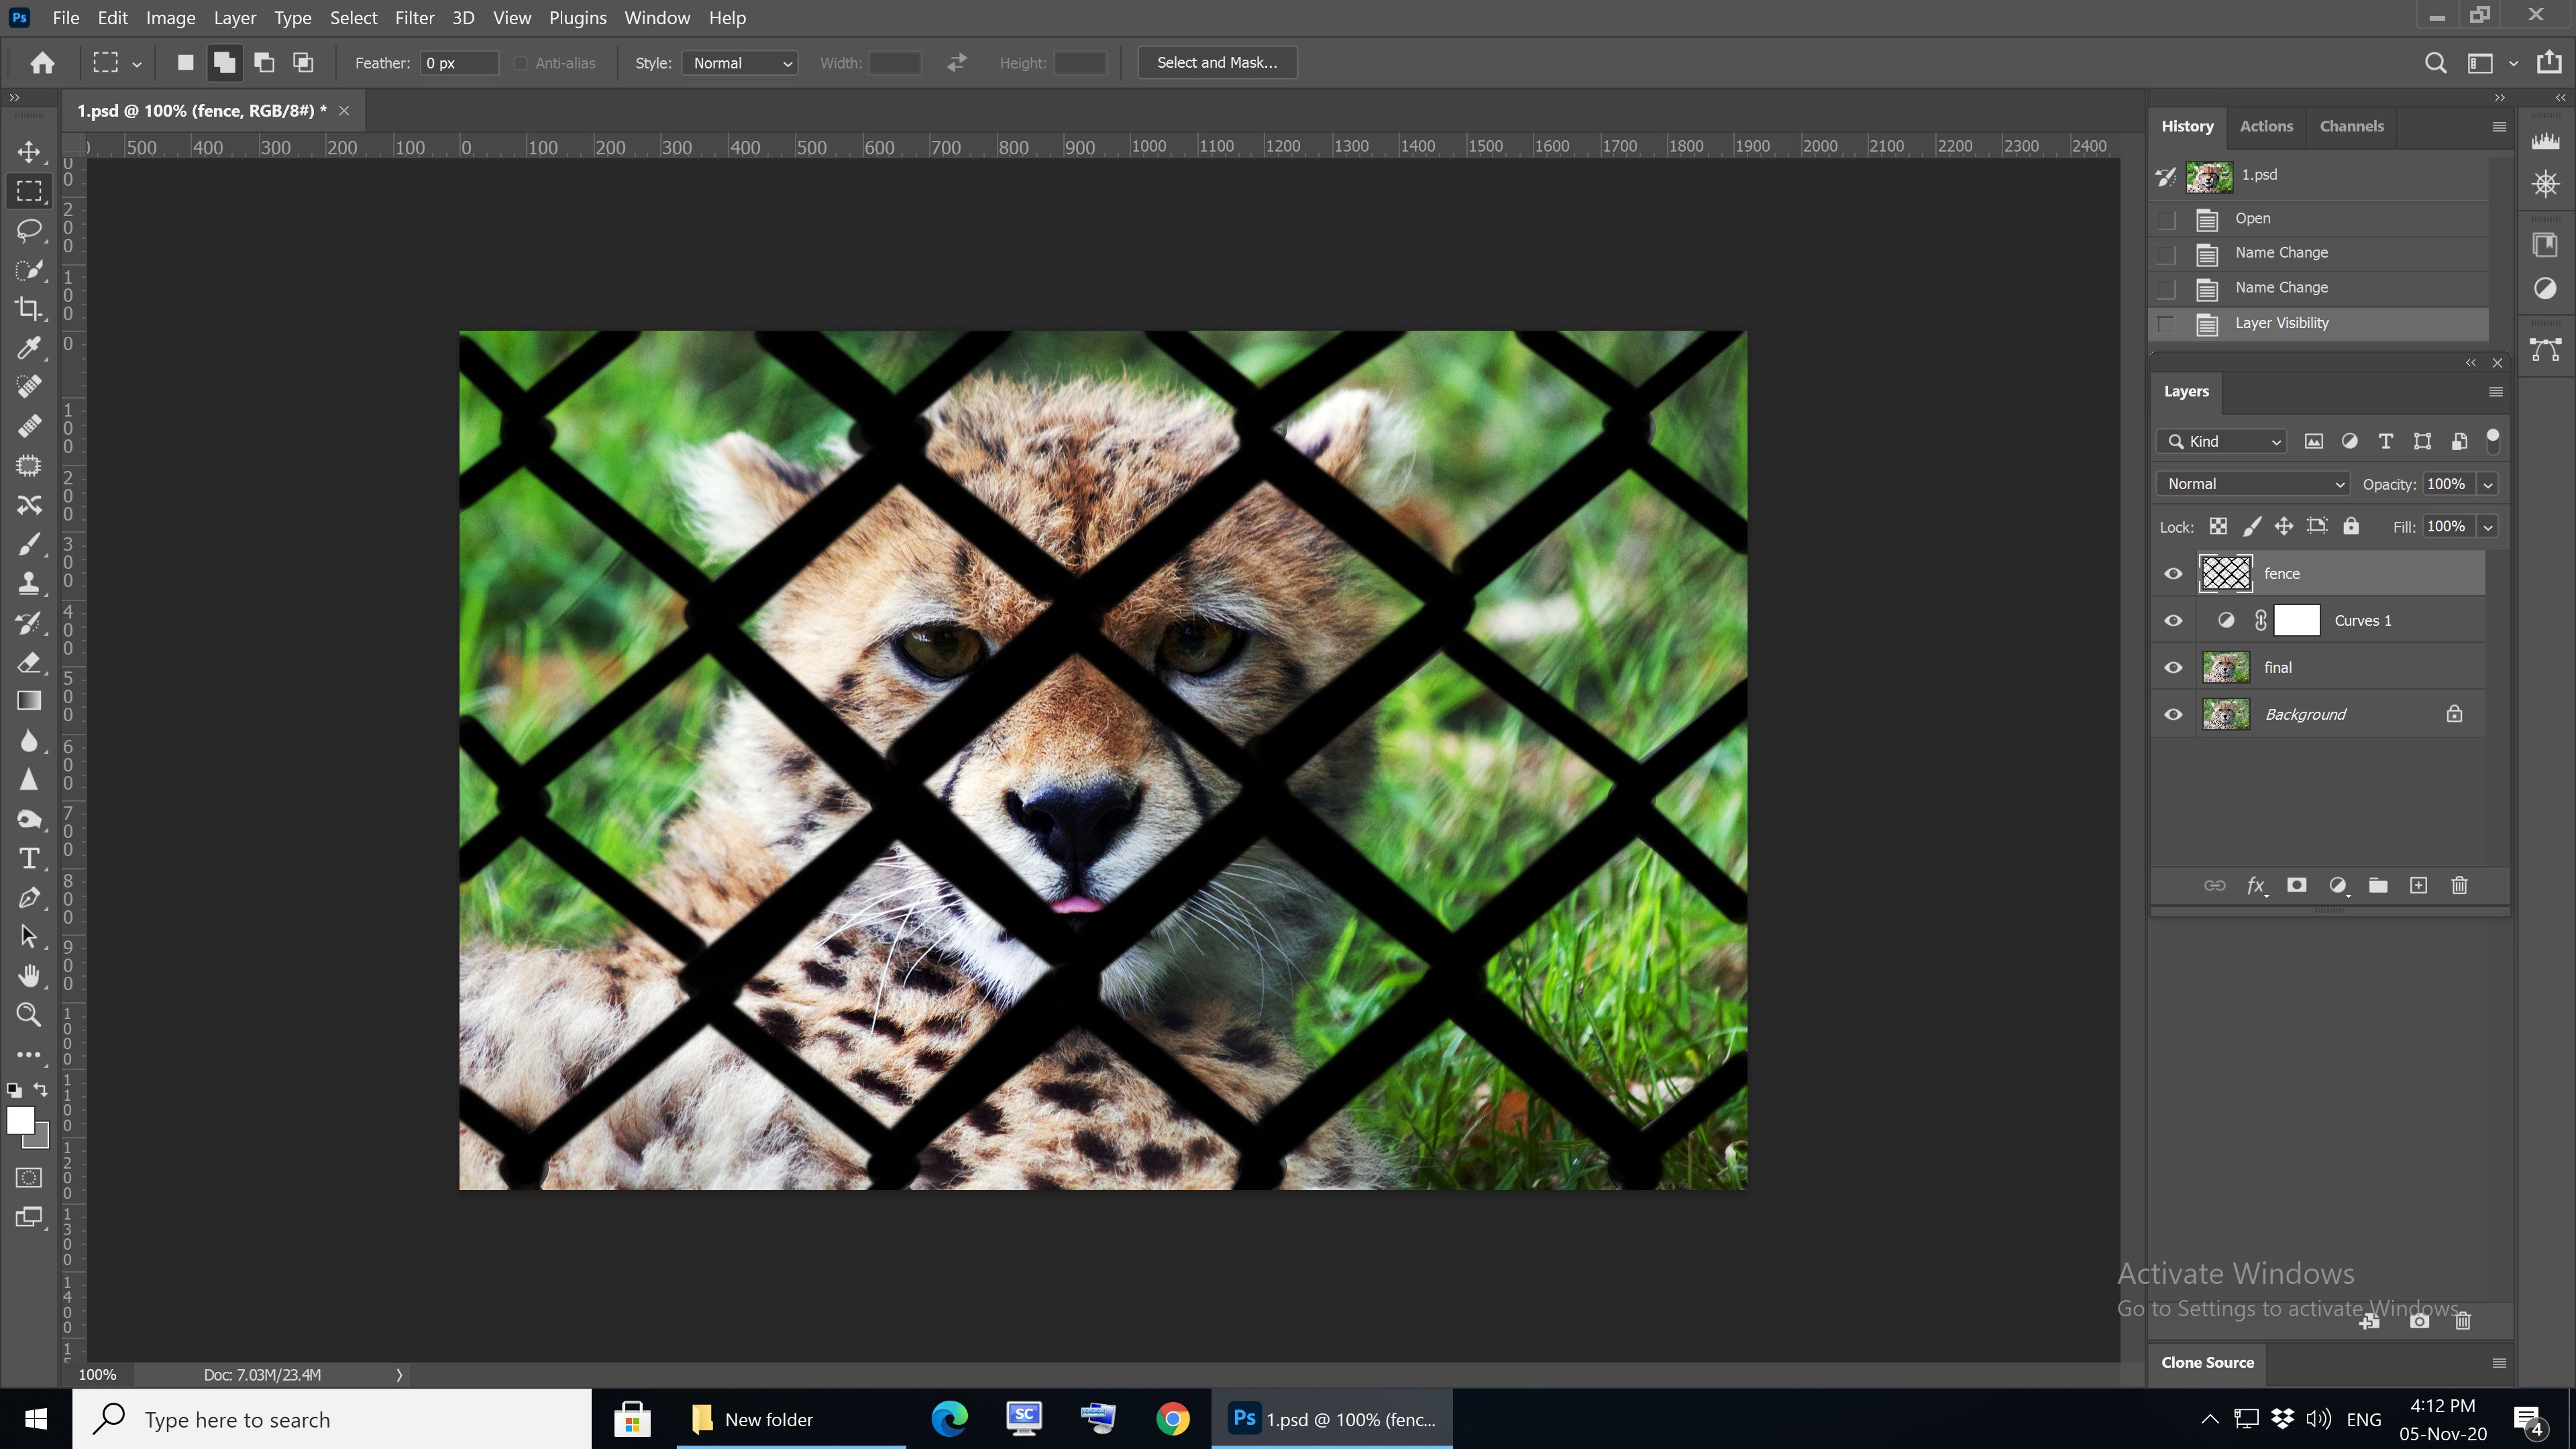
Duplicate the original layer. By right-clicking on the layer and choose the Duplicate layer. Then name it “final”.
Step 3
Add a new layer

Name it “fence”
Step 4
Choose the brush tool from the toolbar or click B, adjust the size of the brush using ] or [
The brush size has to be a little larger than the bar of the fence, it is better to make the selection bigger and larger to include all the edges of the fence inside the selection.
Step 5
Start painting with black on the fence layer. To paint a straight line, click at the beginning of the line then hold the shift key and click at the end of the line. Keep painting until you paint over the whole fence.
Step 6
Right-click on the fence layer a menu will appear, then choose Select pixels as shown below
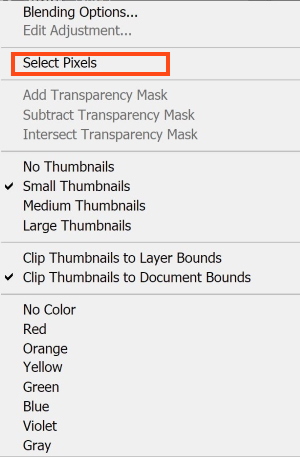
The fence, which is painted black, will turn into a selection.

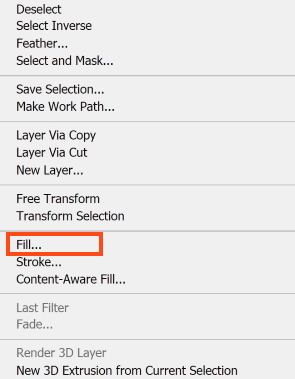
Step 7
Make the final layer active by clicking on it in the layer panel, select any selection tool (Lasso tool for example) the right click on the layer final, then choose fill
The following menu shows up, Make sure that you choose Content-Aware in the content, and remember to check the Color Adaptation box (this will help adjusts the brightness and contrast of the filled area to better match its surroundings).
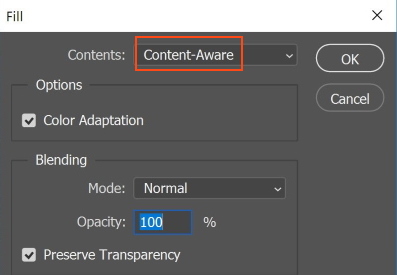
Press O.K to do the content-aware fill action
Step 8
Photoshop will process the selected fence and change it with the surrounding content around the fence. To see the result just hide the fence layer.
Step 9
You may need to fine-tune the final image; you may use the clown stamp tool.
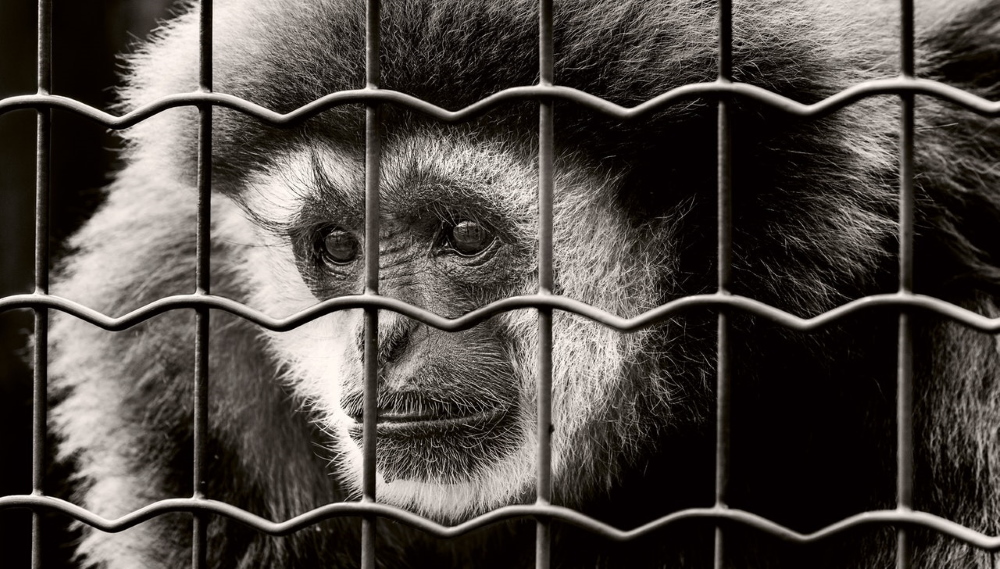
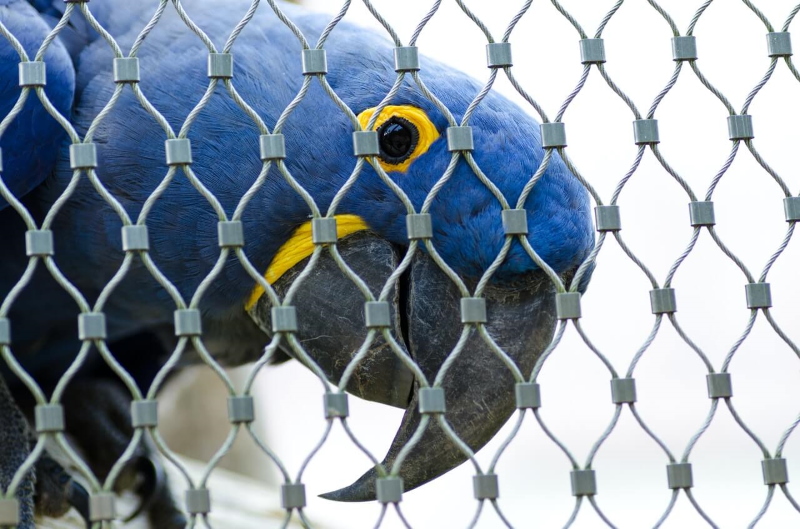
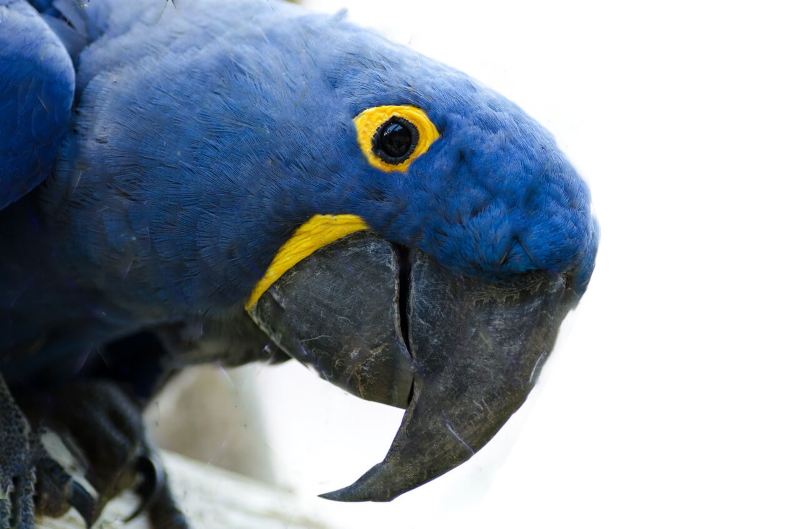
The before and after images are shown below.
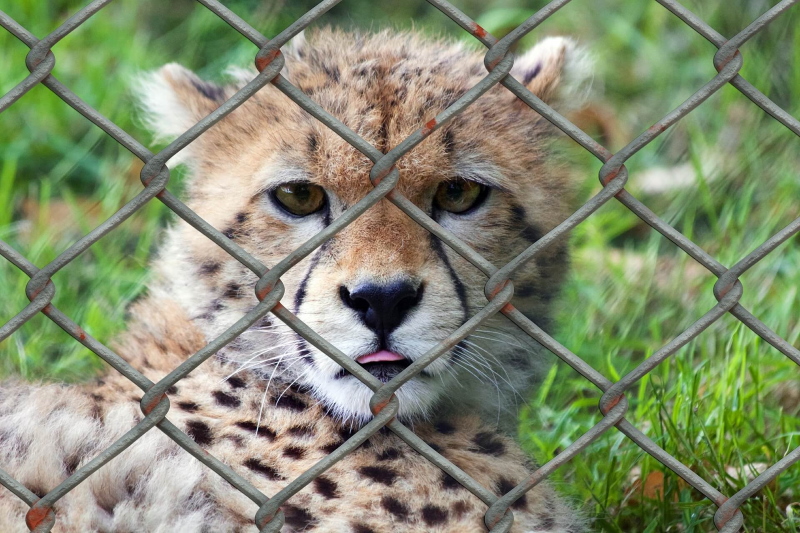
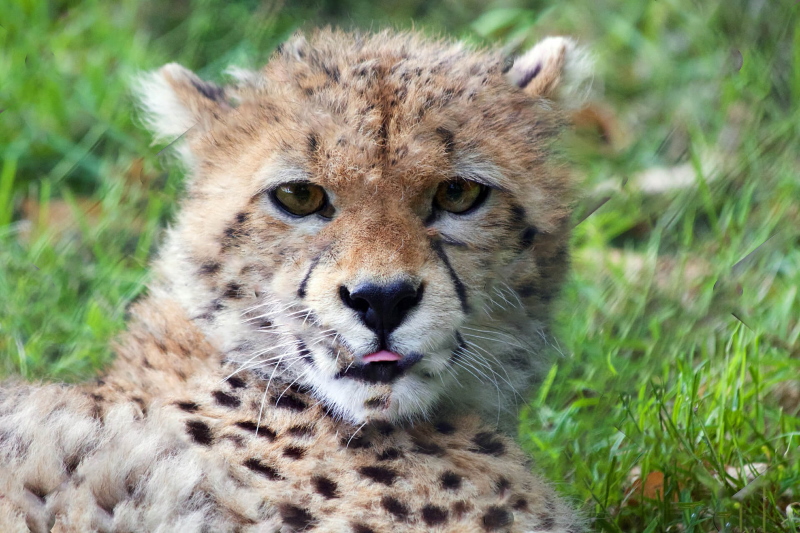
Image by Gerd Altmann from Pixabay
More examples
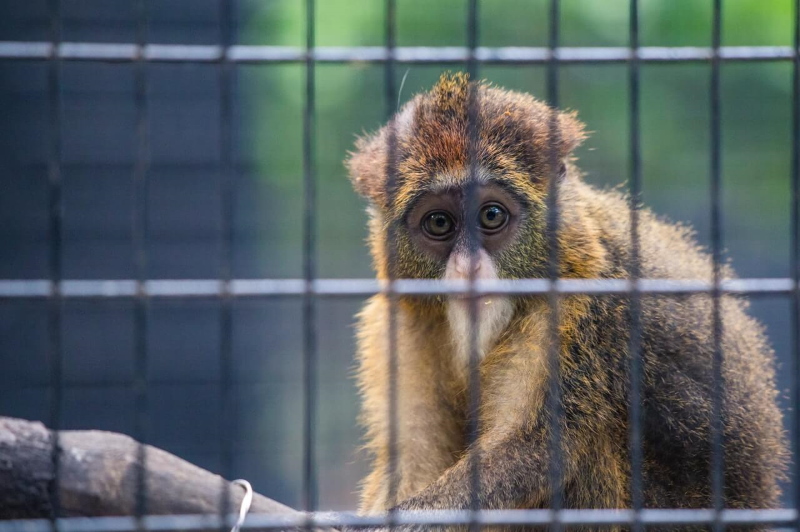
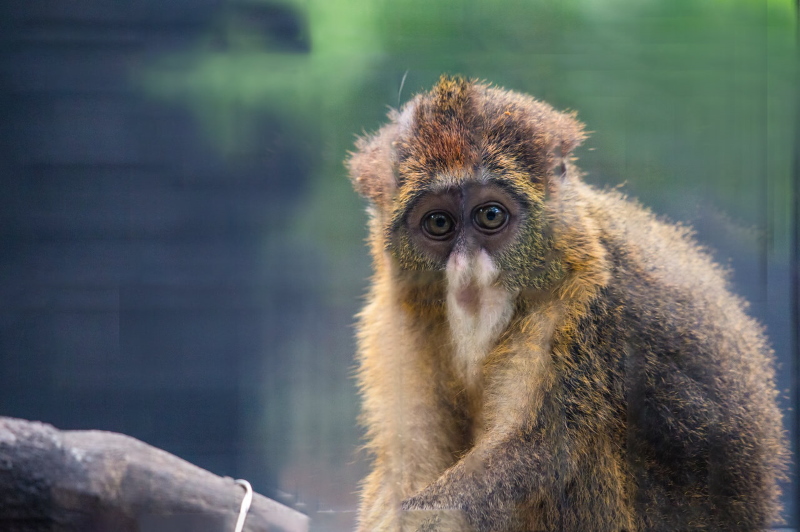
Photo by Jimmy Chan from Pexels
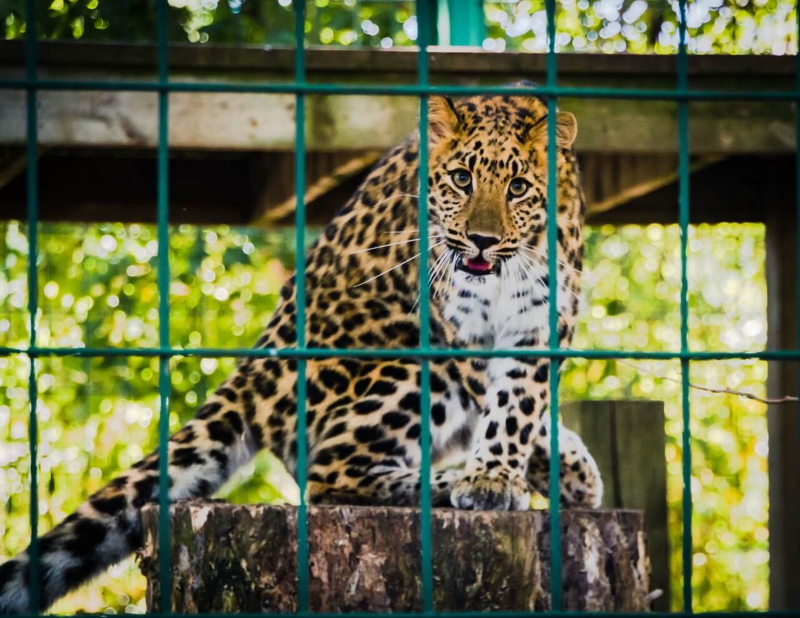

Photo by Tina Nord from Pexels
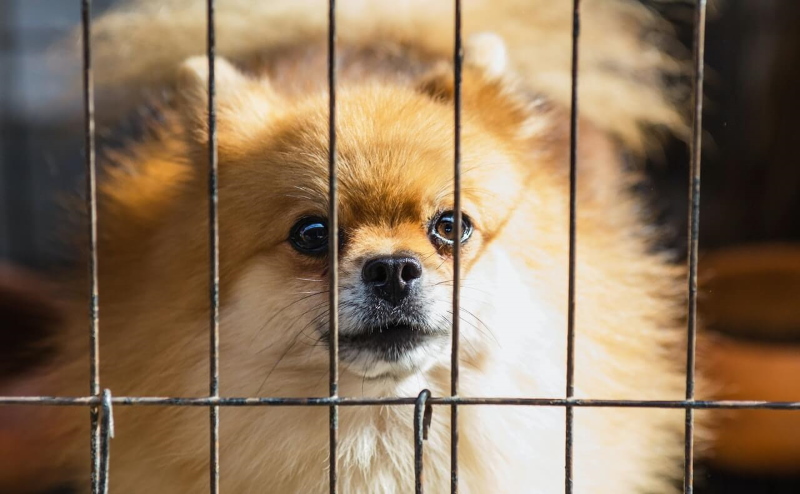
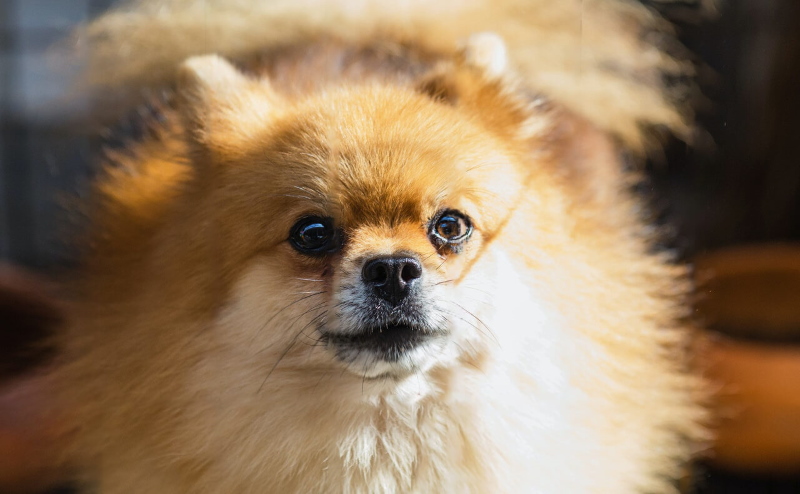
Photo by NEOSiAM 2020 from Pexels
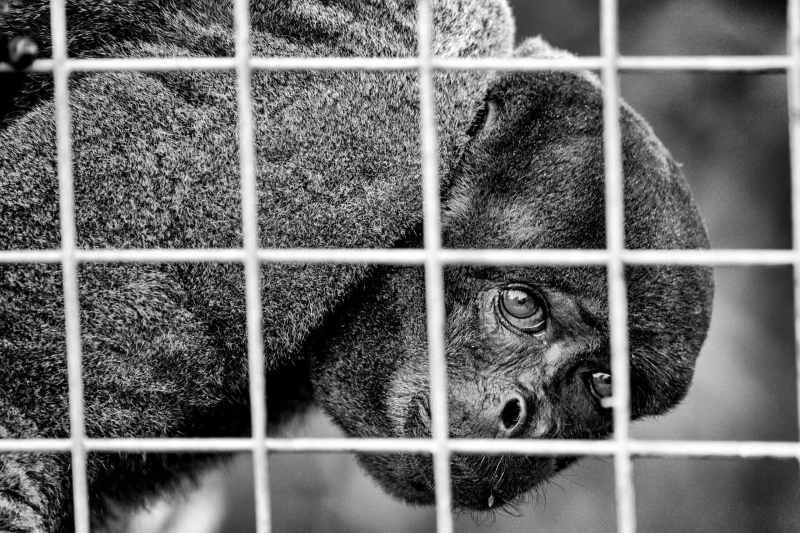
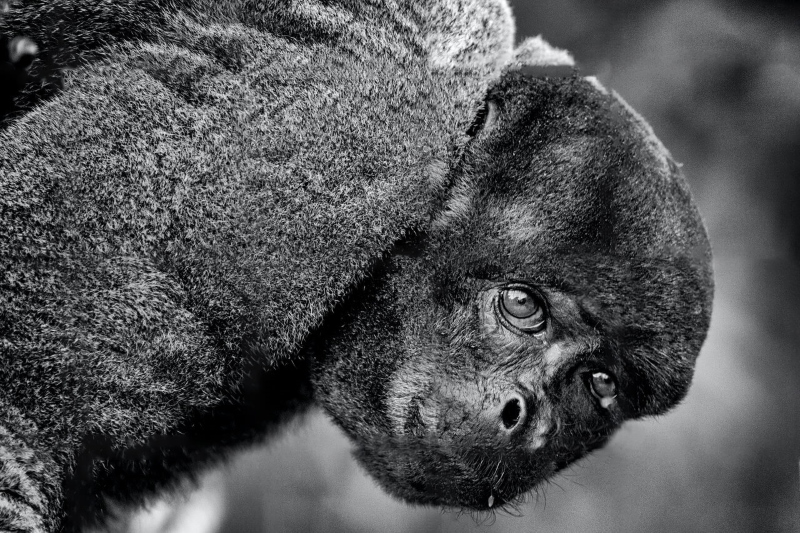
Photo by David Price from Pexels
Thanks for reading, I hope you enjoyed the article if you have any questions just post them below & I will be happy to answer you.
If you enjoy the site, don’t forget to subscribe, we will only inform you when a new article is posted.


This article is very exciting to read and do. I like the fact that you’ve showed us what you’re talking about. You gave us the experience to see what’s it like to view with a fence and no fence. I have copied the “Useful Photoshop Shortcuts” and saved it. For the part with the wild animals, it looks like you’re right there without any fence facing them with a camera. That looks scary and bold at the same time. I’ve subscribed. I’m looking forward to get the download link. Thanks.
Thanks for your comment, glad you found the article interesting and useful
very interesting article. I just experienced how powerful photoshop is as a software. The elements in this software are nicely and very comfortably help an individual to uplift the natural quality of the photos. if you use this tool properly. your article describes most of this sub-topic in a nice, easy way.
thanks for sharing.
Thanks for the comment