

There is a wise and correct saying “A camera is just a tool in a photographer’s toolbox; what is really matters is the skill of the photographer behind that camera”. If you would like to improve the results that you get from your own photography there are many different things that you can do to enhance your skills.
Here is a collection of tips you may want to try to improve your photography and develop your creative eye. They are arranged in no particular order.
1- Know your gear and Read your camera’s manual
Despite what kind of camera you are, utilizing you should know how it functions and how to utilize it to get the best outcomes. It doesn’t make a difference in case you’re utilizing a DSLR, a simple-to-use, or a cell phone camera; having a superior comprehension of how it functions and what you can do will open up new potential outcomes and enable you to utilize it all the more successfully.
The best spot to begin is, obviously, the camera’s manual. Manuals aren’t the most energizing understanding material, such a significant number of individuals overlook them, however, you can get a ton of important data from the manual. You don’t really need to peruse it spread to cover, however, skim through it and search for things that are unfamiliar to you.
2- Make sure you understand the following camera modes
-
Exposure Modes (shooting modes)
Digital cameras offer a number of different shooting modes. Each one aims to provide correct exposure, according to the situation, but each one approaches this goal in a different way. Although different camera manufacturers have their own names for their exposure modes, there are two common ranges of shooting modes, the ‘basic zone’ and the ‘creative zone’. EOS professional digital cameras only offer creative zone modes. You may check my post “Exposure Modes Explained”
-
Camera metering modes
Camera Metering means how the camera determines what the correct exposure should be, depending on the amount of light that goes into the camera and the sensitivity of the sensor. To understand more about how the camera metering system works, and the difference between the handheld metering device and the camera metering, I suggest reading my post on this subject. Also understanding the types of light in photography can be of great help.
-
focus modes (AF/MF)
One of the most confusing aspects can be figuring out when you should use manual focus, versus when it is better to use an autofocus mode. There are two Autofocus modes you have to do some setting among both of them, the first is AF mode (the choice is made according to the movement or stillness of your subject, and the second is AF area mode (the choice is made according to the position of the sensor you want to use in focusing). For more in-depth information about autofocus, you may check my post “What Is Autofocus And How It Work”

3- Use the proper lens
Figuring out which lenses will suit your specific needs is not always easy. Below is a list of the important features you should consider when choosing a lens for a specific situation.
-
Lens mount/format
Because most DSLR camera has mainly two sensor sizes, full format, and crop sensor there are two different types of lenses to fit into your camera. Camera manufacturers generally make lenses with special mounts, which will only fit their devices, so, it is important to know which mount your camera uses before heading out to buy a lens.
If you have a crop sensor camera, you can use lenses with the designation EF-S (Canon) and DX (Nikon). If you have a full-frame camera, you can use lenses with the designation EF (Canon), and Lenses are not marked with DX (Nikon). For more information, you may check my post “Which Canon Lens To Choose”
-
Focal length
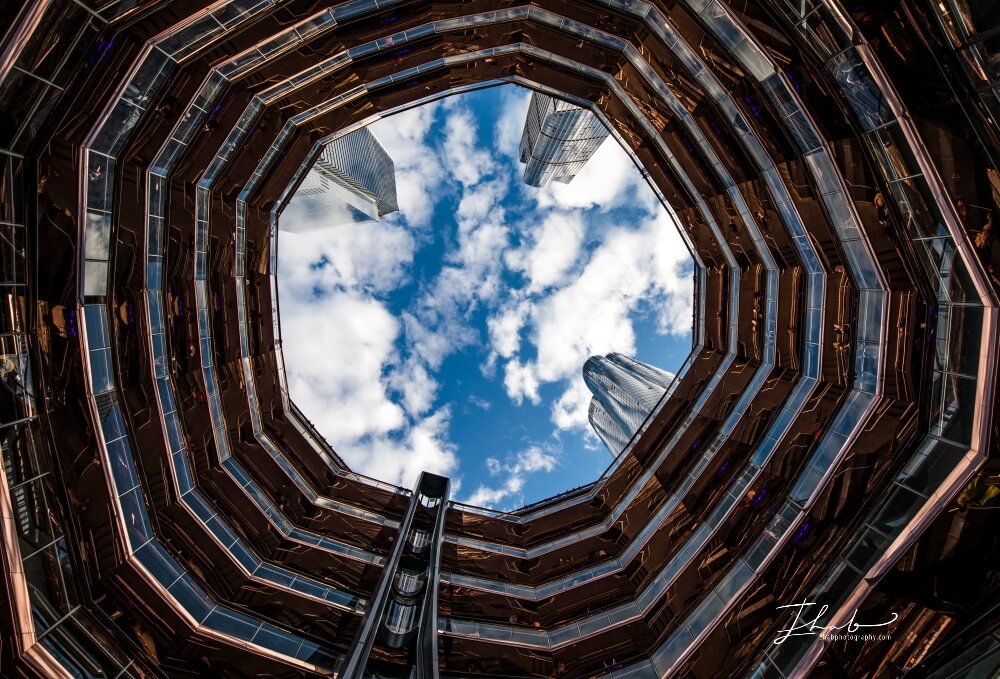
The focal length specifies whether the lens is a wide-angle, normal, or telephoto. Generally, lenses having a focal length or focal length range wider than 35mm on a full-frame camera can be considered wide-angle lenses, while lenses featuring focal lengths wider than 24mm can further be categorized into a subset known as “ultra-wide angle” lenses. Wide-angle lenses are fine for nature photography when you want to capture more of the landscape, cityscapes, and wedding receptions. In addition, it is suitable when shooting inside tight areas (indoors).
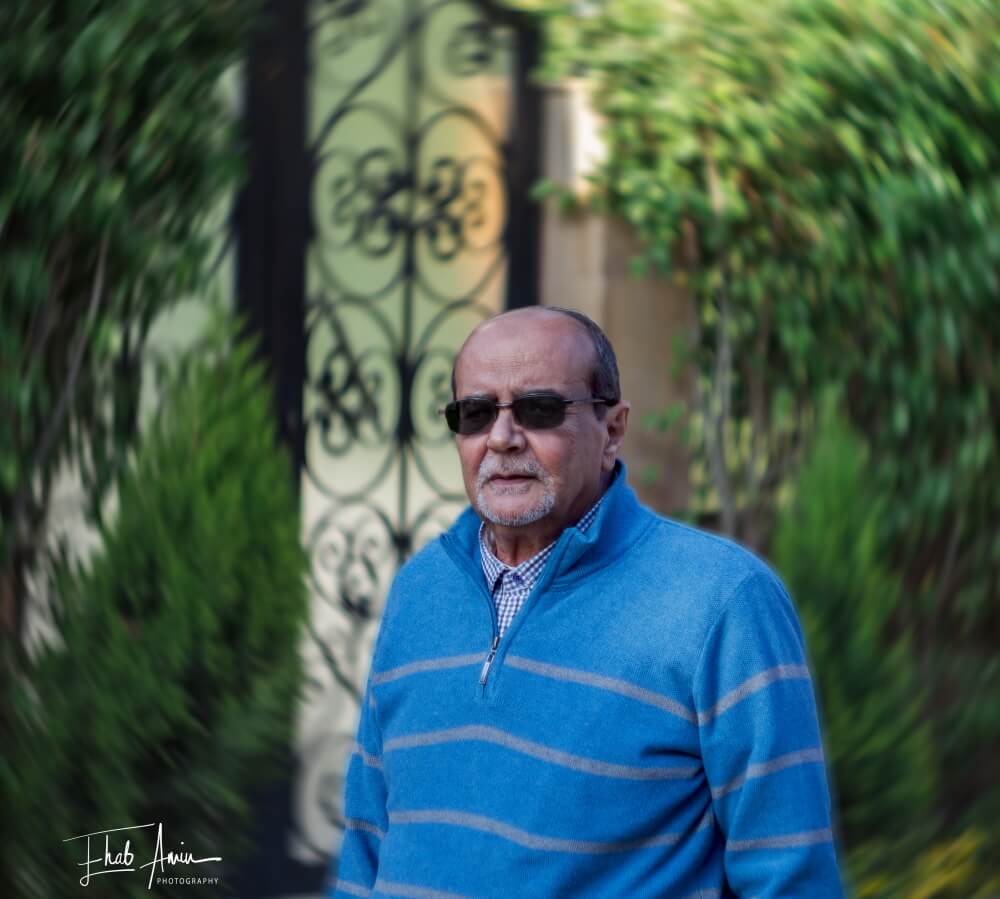
The range between a wide-angle and a telephoto lens is called a normal lens. This is a lens that renders the environment as we see with our own eyes (in relation to distance and magnification). In the full format, a normal lens is 50mm. It is normally suitable for portrait photography.
A telephoto lens, you’ll naturally get closer to subjects far away. It has a focal length of more than 70mm up to 800mm. Telephoto lenses are also preferred for portraiture as they protect the facial proportions better than a wide-angle. It can be used for shooting product photography, sport, and wildlife imagery. They allow the photographer to produce close crops on the subject.
-
Aperture
The maximum aperture of a lens tells you how much light the lens can get through to the sensor at its best. Much light means you can keep shooting in low light conditions
-
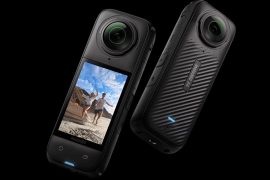
Image Stabilization
Major manufacturers continue to put the image stabilization mechanism in the lens to eliminate camera shake. The manufacturers use abbreviations to specify that their lenses have built-in image stabilization. VR for (Nikon) and IS for (Canon)

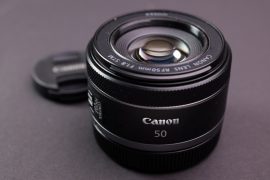
4- Try a prime lens
A prime lens is a lens with a fixed focal length, like Canon EF 50mm, this lens type has many advantages over the zoom lens type. It has greater sharpness, less distortion, and less vignetting, and it is smaller and lighter. Another advantage of using prime lenses is that they’re usually ‘faster’. This means they have a larger maximum aperture, which enables quicker shutter speeds. In low light conditions, you’d be limited to a shutter speed of, say, 1/15sec with a typical zoom (unless you increase your ISO setting). However, an f/1.4 lens will enable a much faster shutter speed of 1/250 sec. An f/1.8 lens is 3.3 stops faster than an f/5.6 lens, and even an f/2.8 model is two stops faster.
Another big advantage is that you can get a much tighter depth of field, enabling you to isolate the main point of interest in a shot by blurring the background. It’s a favorite trick in portraiture, especially when the background is cluttered and would otherwise be a distraction.
So, it is advisable to have a prime lens in your gear and get some amazing photos.
5- Frequently read photography tutorials
There are thousands, of photography tutorials and writes that distribute aides and instructional exercises that will show you new things. With the assistance of these learning resources, you can learn things about any type of photography and discover new techniques, and there are likewise many tutorials for post-processing your photographs in Lightroom and Photoshop. The following are collections of some learning resources that can help you.
Learn Digital Photography Online
6- Learn how to compose your photo
Photo Composition is the arrangement of subjects or elements within the photographic frame. How you are going to select your subjects, and how you arranged them can make a big difference to your photograph. You decide what the focal point of interest is and where to place it within the frame so that the viewer’s eyes will be drawn to that point. I think we all agree that the major target in taking a photograph is pleasing the eyes of your audience. When it comes to how you should compose your photographs, there are some rules and guidelines you can use to help improve the composition of your photos. It is worth mentioning that most of the composition rules are based upon the golden ratio.

7- Always check your histogram
The histogram is a graphic representation of the brightness of your image that will help you determine if your photo (or part of your photo) is correctly exposed, underexposed (too dark), or overexposed (too light). It is very advisable to always check your histogram to get the right exposure.
8- Get the white balance right
Digital cameras have difficulty seeing the right color like a human eye. They can create unsightly blue, orange, and even green colorcast. The digital camera record colors exactly as they are, which is why photos taken in household lighting condition have an orange color cast, and photos taken at dusk or dawn have a cold and blue look. White balance (WB) is the process of removing unrealistic color casts so that objects which appear white in person are rendered white in your camera. Proper camera white balance has to take into account the “color temperature” of a light source, which refers to the relative warmth or coolness of white light. Your camera’s Automatic White Balance setting generally does a good job of capturing colors correctly in most lighting conditions, but it’s not infallible. When your subject is dominated by a single color or tone, such as a blue sky, orange sunset, or even a large expanse of green grass. You can get better results by selecting a white balance setting that suits the lighting conditions, such as Sunlight or Shade.
A good alternative is by using a grey card in the same position as the subject you want to shoot and set a customized white balance.
9- Correctly nail the right focus
An important skill you need to master is how to get your camera to focus on exactly the point you want to be sharp. As you already know, a digital camera has a number of focus points spread across the frame (you can see them through the viewfinder), these points allow you to focus on off-center subjects. You’ll need to set your camera to its single-point autofocus mode, rather than the multiple or automatic selection. The disadvantage of using the outer focus points on many cameras is that they aren’t as sensitive as those in the center of the frame. So your camera may struggle to focus (hunting), especially in low light, or when the subject has low contrast, or you are using a lens with a maximum aperture of f/5.6 or narrower. Remember that there is a solution to these problems. The first is to use the center point to get the focus, then lock the focus and recompose the shot.
10- Use exposure compensation
It is very important to know how to use your camera’s Exposure Compensation function to lighten or darken your image. The following two examples illustrate why you should consider using exposure compensation features. If you are shooting a white subject, for example, a beautiful bride with a white dress, the camera doesn’t know that your subject is white, so it assumes that the scene is an average grey as it always does. This means that the camera sees the bright light coming through the lens from the white subject and interprets this as meaning that a lot of light is falling onto a grey scene. The camera reduces the shutter speed and/or the aperture accordingly, which means that the scene will be underexposed. In the same way, if the scene has many dark tones, the camera assumes that it is a mid-tone scene in low light, and increases the shutter speed and/or the aperture. This leads to overexposure.

11- Shoot RAW
As long as you exposed the scene fairly well, saving your photo as RAW file format allows you to make sweeping adjustments to exposure, contrast, sharpness, clarity, tones, dynamic range, noise levels, and much more. Another reason why you should shoot in RAW format is that the tonal range of RAW files is massive compared to JPEG. In addition, you will have the ability to make a large print if you find that you captured an image you really like.
12- Shot at the right time
When the Sun is close to the horizon on a sunny day, its light appears warmer and softer which is very suitable for amazing shots, this time is called the golden hour. On the other hand, the blue hour refers to the darker stages of morning and evening twilight, when the Sun is quite far below the horizon, coloring the sky deep blue, it is also a favorite with painters and photographers. To take photos at golden and blue hour, you need to consider the following tips:
- Plan for the shot: Because the golden hour is short, you should plan well for your shot. Make yourself familiar with the destination and turn up with some ideas of the subjects and angles you wish to capture.
- Use a tripod: tripod will help you keep your images sharp.
- Use a wide aperture: The sunlight is not as bright during the golden hour, requiring a larger aperture—unless you are planning a long exposure shot.
- Consider increasing the ISO: The low light level during the golden hour may require you to try out a higher ISO setting. However, be aware that this may also increase noise.
For other tips, you may check my post “How to Take Best Sunset and Sunrise Photos”
13- Look for unique perspectives
Photographers can benefit from an interesting perspective of ordinary subjects. You can think of finding some ways to get shots with a different perspective and different viewing angles. It could mean shooting at ground level instead of eye level, or standing on higher ground and shooting a familiar subject with a downward angle. Another approach is to look for a tiny detail of an ordinary subject, you may end with an amazing abstract photo.
14- Practice some advanced techniques
There are many kinds of photography techniques, learning and discovering new ones can open up new possibilities, and provide endless potential for inspiration and creativity. The following are some of these techniques:
- HDR photography – Bracketing technique
- Freezing the motion – high shutter speed technique
- Motion Blur Photography- slow shutter speed technique
- Panorama photography- Photo stitching technique
- Silhouette photography
- Focus stacking technique
- Panning technique
- Low-key photography
- High key photography
- Time lapse photography
15- Try lens filter
There are many types of photography filters; each one has its unique use:
Neutral Density (ND) filter is a semi-transparent piece of glass that could be mounted in front of your lens. The filter prevents a certain amount of the incoming light from passing to the optical sensor. When doing that prevention, it doesn’t change the contrast or sharpness of the image. It is called a neutral density filter because the light obstruction through the filter is equal to the completely visible spectrum, so it should not add any color cast.
A polarizing filter is a standout amongst the most crucial instruments in a landscape photographer’s pack.
- A polarizing filter slices through the glare from a scene.
- When shooting scenes that are overwhelmed with harsh light. While this kind of shooting circumstance will frequently bring about desaturated hues, a polarizer can cure this.
- It enhances the aspect of the skies in your photography. It can extend the blue sky and light up the clouds to make shocking and emotional skies even in sunny conditions.
16- Start using a tripod
The main function of a tripod is to support your camera firmly and prevent it from unintentional movement. This setup will allow you to do long shutter speed photography, bracketing (HDR photography), and time laps photography and set you free from camera shake. The hidden benefit of using a tripod is forcing you to slow down and prevents you from just taking quick snapshots. You now have to adjust the tripod to be level with the horizon. You have enough time to move it left or right manually to adjust the position of your subject and adjust your camera setting. You may check my post “Digital Camera Tripod- How To Choose The Right One” for more information.
17- Learn and master an editing software
If you’re already satisfied with the general look of your pictures and just want to enhance them a little before sharing them online, a basic editor that enables you to resize, crop, and apply filters will be ideal. If you’re planning to print your work, you’ll be better off looking at more advanced photo editors that will give you the fine control you need to make your pictures look perfect at high resolutions.
- Adobe Photoshop & LightRoom Creative Cloud
- LUMINAR 4
- The Photo Editing Software – CyberLink PhotoDirector 8 Ultra
Thanks for reading, I hope you enjoyed the article if you have any questions just post them below & I will be happy to answer you.
If you enjoy the site, don’t forget to subscribe, we will only inform you when a new article is posted.


These tips can really prove to be the difference when it comes to snapping and getting the perfect shots. Even for a beginner, we all can really get to make use of the right gears to achieve excellence in our photography. Thank you so much for sharing this out with us all. Also, I must say that if these tips can be added well, it can make one’s work more professionally inclined and better. Thank you
Hi Rodarrick
I appreciate your comment very much, thanks
Wow,this is really awesome to see that you can come up with not one or two but 16 beautiful tips to get the best out of photography. Dance I am not a professional, I can say that this post is a very helpful one too because it has explained how to use the tripod and also how to understand what aperture means in photography because it has been confusing for me. Thanks a lot.
Hi Henderson
I’m glad you like the article, The post is rather an educational one, I hope it will help our fellow photographer to remember the most important aspect of photography.