


A gray card is a powerful tool used by professional photographers. In this article, we will discuss how to use a gray card in different ways in order to get a proper color and exposure. Gray card can be used to correct color and adjust the white balance in both camera and post-processing. It can also be used to help you get the proper exposure in some situations.
When to use a gray card?
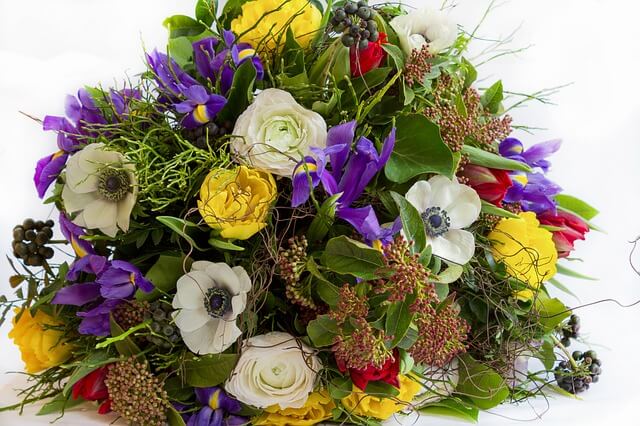
It is ideal to use a gray card when for example you are shooting portraits because the lighting remains constant, and you have the time to set up your shot. It is not practical to use a gray card for metering when you have a moving subject or when the light is changing rapidly.
It is also useful to use the gray card when you’re dealing with a mixed lighting situation – such as daylight from a window and overhead fluorescent lights – then doing a custom white balance in the camera is a good solution to handle that and get a neutral color to your images. But you have to keep in mind that if you change your camera position or the power and direction of light source then you’ll have to do it again as the color will shift.
What is the best size of the gray card?
There are many different sizes available in the market, choosing one to buy depends on the way you are going to use it. If you are going to use it to correct and create a custom white balance in-camera then I’d recommend a slightly larger one because you have to photograph it and crop out everything else. That’s very hard to do with the business card-sized ones.
If you only plan on using it for exposure metering and use it for color correction on post-production later then you can go for a smaller one. Also, it will fit nicely in your pocket or camera bag. My recommended types of gray cards are shown at the end of the post.
How to use a gray card for exposure metering?
The exposure meter system in your camera measures the light reflected off the subject and sets the exposure to make it 18% gray, or middle gray. It reads the light from the entire scene and uses an averaged reading based on an 18-percent gray (also known as middle gray). This gray is a standard value designed to provide a safe and predictable exposure for average subjects.
If you look at the histogram, the areas of black are represented on the left and white is on the extreme right – leaving the center for middle gray. You may check my post “How to Use Histogram in Photography” for more information.
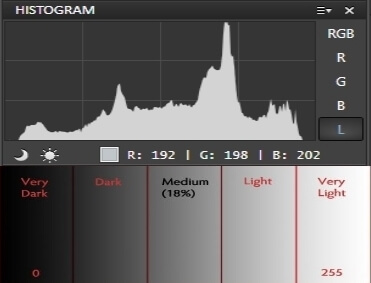
Since these meters assume the subject has a reflectance of about 18% (the same as neutral gray), it sets the exposure accordingly. That’s good for a typical landscape in daylight, but not if something lighter or darker is predominant. Sometimes the camera metering system gets it wrong, for example when you’re shooting a scene with a very dominant white subject, or a really dark one. It’s just getting fooled with the tricky subject matter. The camera is overexposing the black subject and underexposing the white subject to try to make them gray.
That is because the camera is measuring and setting to make everything medium or 18% gray. You can use a gray card to help you set the exposure in such situations.
Steps to take to get your meter reading:
- Place the gray card where your main subject is going to be.
- Set your camera to manual shooting mode.
- Select the ISO and aperture you wish to use for your shot.
- Set your camera’s metering mode to Spot Metering. This will allow the camera to read a very small area only.
- Set your focus point to single and choose the center one.
- Aim your camera at the gray card and press the shutter button halfway down to take a reading.
- Looking in your viewfinder (eyepiece) adjusts the shutter speed until it gives you a reading of “0” (zero).
- Review the histogram, you should see one like below.
- With the same setting, remove the gray card from the scene and take the final shot of the subject.
How to use a gray card for making a custom white balance in-camera?
If you are shooting photos with a mixed lighting situation, such as daylight from a window and overhead fluorescent lights, then doing a custom white balance in-camera is a good solution to handle that and get a neutral color to your images. The camera settings are slightly different according to camera models, but they are all similar. The followings are the steps of how to make a custom white balance on a Canon camera.
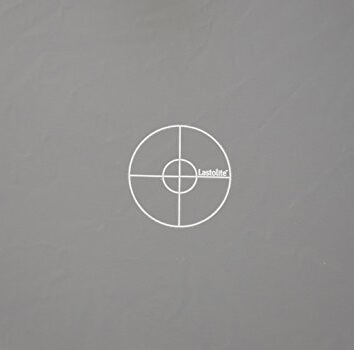
- Take a photo of only the gray card, zoom or get closer until the card fills the frame, switch to manual focus, focus on the card, and take the shot. You should have something that looks like the photo below.
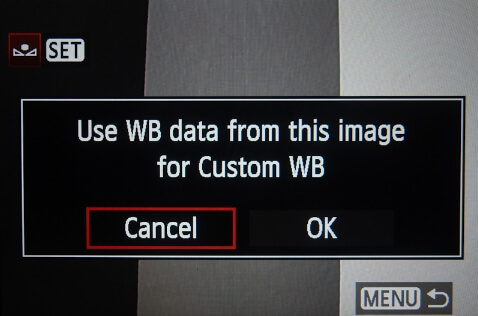
- Navigate to your menu until you find “Custom White Balance”

- It will then ask you to choose an image, select the image of the gray card you have just taken. It may ask you “Use WB data from this image for custom WB” select OK.
- Set your camera’s White Balance setting to Custom white balance
- Take your shot.
How to use a gray card for color correction in post-production?
If you included a shot of your gray card in your computer, you can do a custom white balance in post-production. Both Lightroom [popup_anything id=”9359″]and Photoshop [popup_anything id=”9359″]have an eyedropper tool you can use to do just this. Don’t forget that a custom white balance in only useful in the same lighting conditions, it is mainly used to do a batch process of a number of photos taken at the same lighting condition. This example uses Adobe Lightroom [popup_anything id=”9359″]so the screens and tools might look a little different if you use something else, but the process should be similar.
Open the cray card image in Lightroom
Go to the develop module
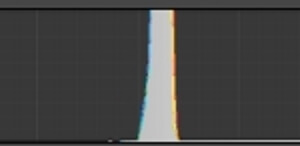
Find, and click on, the White Balance Selector Tool. It’s the eyedropper you see circled below.
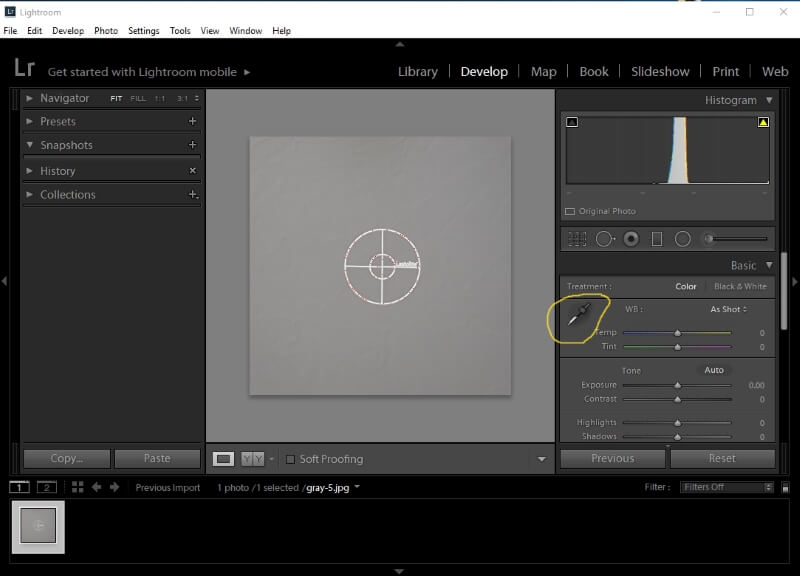
Place it over an area of your gray card in the image, Try different point until you get the same reading for R, G, and B (that is a neutral gray)
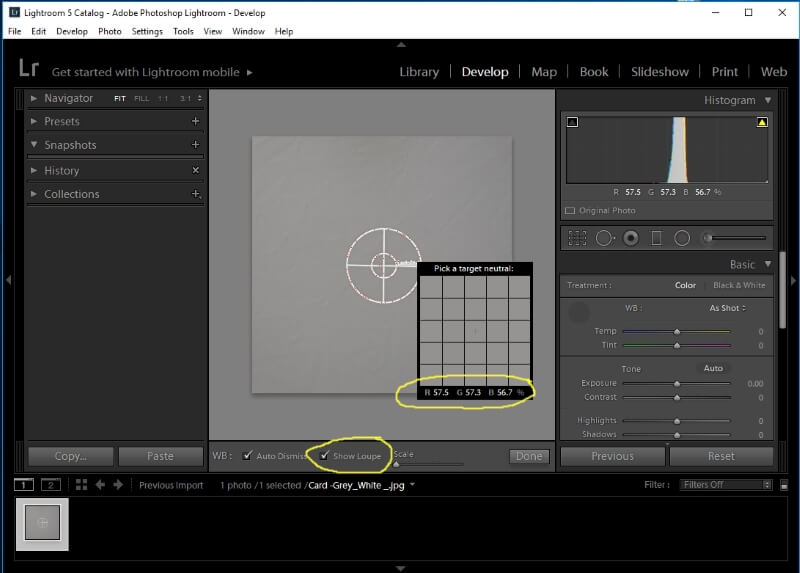
Use copy and paste buttons, to copy the color settings of this photo. Or select other photos and Sync this color setting to all of them.
Recommended Gray Cards:
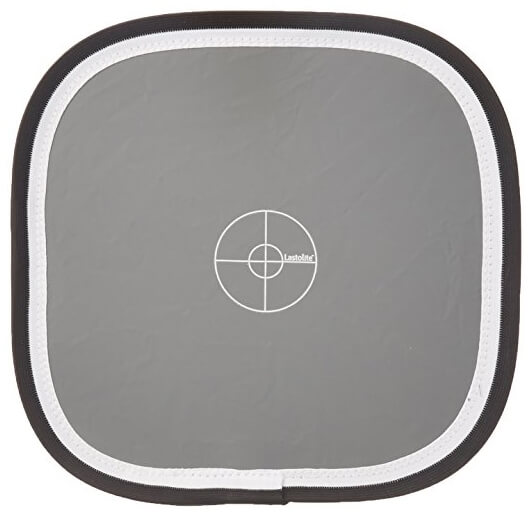
Lastolite LL LR1250 12-Inch Ezybalance Card -Grey/White
Product highlights
- Triple re-enforced stitch line – Over 30 stitches per inch ensures steel rims won’t be popping out of the rim tape
- Collapses to a third of opened size – Close down to a convenient size for portability
- Pre and Post capture color correction – Can be used to white balance digital cameras or fix color on digitized images
- Pre and post-capture exposure control – Can help determine the exposure for cameras or fix exposure on digitized images
- Collapsible/Reversible/Cleanable – Two wipe-clean surfaces in one size makes it easy to take with you
- Can be used with all digital and film cameras – Not limited to only high-end cameras can be used on throwaway film cameras all the way up to large format cameras
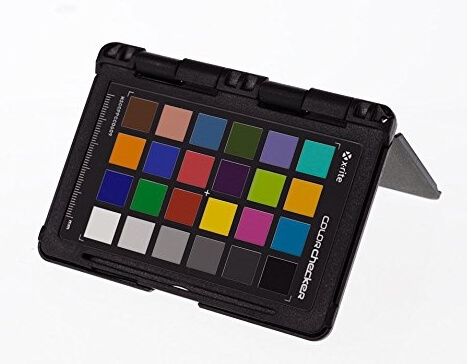
X-Rite ColorChecker Passport Photo (MSCCPP)
Color Control and Creativity for Photography – from Capture to Edit. Color Checker Passport Photo includes three powerful photographic targets in a portable protective case, enabling you to reduce your image processing time and improve quality control in your Raw or JPEG workflow. Quickly and easily capture accurate color, instantly enhance portraits and landscapes, and maintain color control and consistency from capture to edit. You’ll achieve superior color results in a fraction of the time.
Product highlights:
- Ideal for photographers shooting still images in a Raw workflow
- Creates professional, custom camera profiles in minutes using the industry standard 24 patches Classic target.
- Combines 3 photographic color-balance targets into one pocket size protective, a multi-positionable patented case that adjusts to any scene
- EXCLUSIVE X-RITE TECHNOLOGY! Dual Illuminant profile creation – takes into account two different light sources to create a single profile which can be applied to a variety of lighting conditions
- Easy to use with Adobe® Lightroom® Plug-In or stand-alone software for use in other image editing software
- Use Creative Enhancement target to quickly check and evaluate shadow details or highlight clipping; understand and control color shifting or neutralize and create a look with one click.
- Take one step closer to professional results creating custom, in-camera white-balance. Capturing a consistent white point in a set of images allows for adjustments to different lighting conditions and helps eliminate color casting
- Supported by several 3rd party software programs
Related articles:
Photography Light Meter – Camera metering Vs Handheld Metering
What Is White Balance? – A Beginner Guide
What Are The Different Types Of Light In Photography?
Thanks for reading, I hope you enjoyed the article if you have any questions just post them below & I will be happy to answer you.
If you enjoy the site, don’t forget to subscribe, we will only inform you when a new article is posted.


Hi I’m studying photography and I need a bit of help. I got confused about the 18% gray card. Can you explain it for me, please?!
The question is : An 18 % gray card is best used to set exposure for:
A)
Black-and-white images only.
B)
Color images only.
C)
A dimly-lit scene.
D)
High-contrast scenes.
Hi Diana
For your question, the answer is D)High- Contrast scenes. Because it allows you to correctly expose the highlights and still getting all the details in the shadows
I have a question if you are so kind. Could I take a photo of the grey card pressing the AE-L button on first? AE-L would stay on for as much as I want in a location with those settings
Hi Hector
If you are using the gray card to get the proper exposing tone, yes you can lock the exposure of the camera metering system by pressing the AE-L button.
I really enjoy learning on your site! I have never actually heard of a grey card before but it is very cool. If I understand correctly you put the gray card in the scene and basically use it to calibrate the camera to the correct level of gray. Is that right?
I also saw the X-Rite ColorChecker Passport Photo which is very cool. Does it also work in the same way? Do you just place it next to the subject and then press the shutter down half way to calibrate the shot and then focus on the subject and capture the image.
Can a beginner also use these techniques or is it more for intermediate to advanced photographers? I still think I would like to try it out in real life and am quite excited to buy the X-Rite ColorChecker Passport Photo.
Thanks for sharing this!
Thanks for your comment, the X-Rite ColorChecker Passport Photo (MSCCPP) is very good and can help you a lot in your photography.
Thank you so much for your helpful post. I am a beginning photography hobbyist and I just received my first Gray Card as a Christmas present and to tell the truth I don’t know that much about them and I have a lot to learn but they definitely seem cool and a very useful tool. I love that your article speaks about using a Gray Card for exposure metering, making a custom white balance in camera and color correction in post production. I was only familiar with the first technique so your article was super informative and has really opened me to what this simple little item can do. Thank you for the insight and the tips
Thanks for your comment and hope you success
The gray card I a great device for photographers. Every professional photographer can not do without it. Among the numerous functions of the device, the color correction caught my attention the most.
Colours add beauty to photography and gray card help to enhance the beauty of photography. I want to ask, if graphic designers can also make use of the gray card.
I don’t know much about graphics design, but if it includes shooting with a camera, it needs a gray card.
Thanks for the comment.
Wow , once again your article is very informative and easy to understand. I did not know that there existed such a thing as grey cards that are used in photography. I am no photographer but i must say that this article is spot on. I know in your article you mention recommendation for grey cards, but which do you think is better ?
Thanks for our comment, I’m currently using Lastolite LL LR1250 12-Inch Ezybalance Card -Grey/White, it is very useful.
Ok. Now I’m convinced that your entire site is going to be perfect for my nephew. I think you’re going to have a new subscriber on your hands lol. This is great content! I’ve always had a love for photography but really only saw it as a hobby and I’m completely ignorant when it comes to all the details and techniques. But even for me this is fascinating. My nephew on the other hand is going to eat this up. He loves portrait photography and this is another aspect he’s going to love reading about! Thank you!
Thanks for trusting and believing in the site, and you and your nephew are very welcomed at any time.