

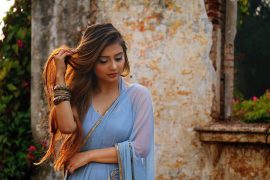
Cartoon effects can come in handy for special events and projects. In addition, cartoon portraits can actually make great social media profile pictures to help you build your personal brand. You can use Photoshop to create cartoon images from your pictures. While some photos will work better than others will, it is possible to turn just about any photo into a “cartoon” image with cool line art and bright, smooth colors. In this tutorial, I will take you systematically to learn about turning your portrait into a carton effect. However, before going through this tutorial I will begin by explaining some filters and tools that I am going to use.
Poster Edges filter
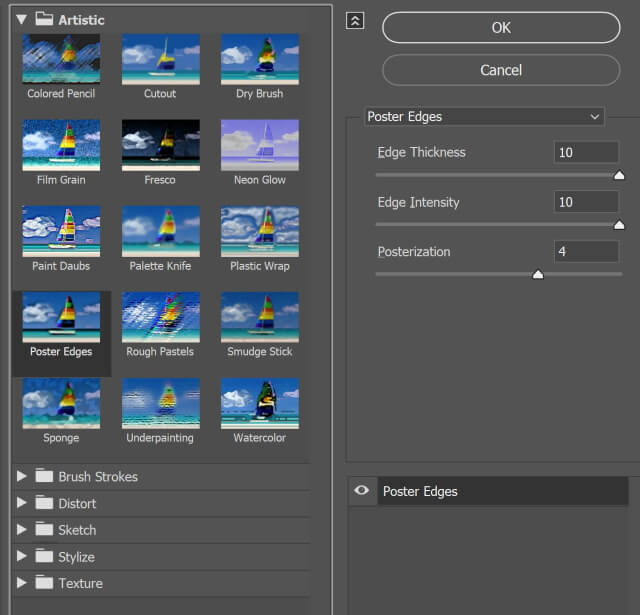
Reduces the number of colors in an image (posterizes it) according to the posterization option you set, and finds the edges of the image, and draws black lines on them. Large broad areas have simple shading, and fine dark detail is distributed throughout the image.
Posterization occurs when an image’s apparent bit of depth has been decreased so much that it has a visual impact. The term posterization is used because it can influence your photo similar to how the colors may look in a mass-produced poster, where the print process uses a limited number of color inks. This effect ranges from subtle to quite pronounced, although one’s tolerance for posterization may vary.
You can access the poster edges filter by
Filter > filter Gallery > Artistic > Poster Edges
The Threshold adjustment tool
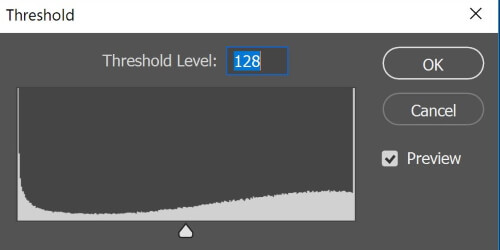
The Threshold adjustment tool converts grayscale or color images into high-contrast, black-and-white images. You can specify a certain level as a threshold. All pixels lighter than the threshold are converted to white, and all pixels darker are converted to black. The Threshold command is helpful in determining the lightest and darkest areas of an image.
You can access the threshold filter by:
Image > Adjustments > Threshold
Oil Paint filter
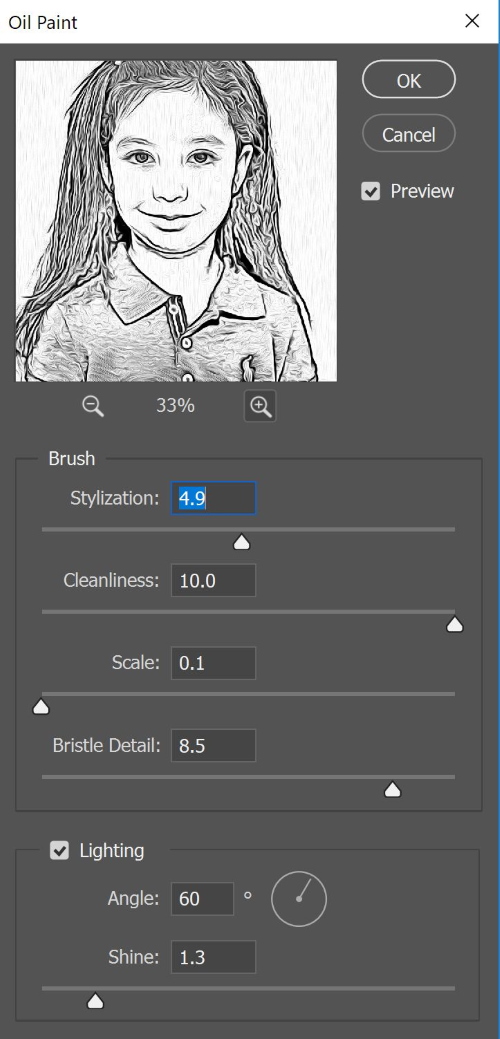
The oil paint filter creates the effect of painting with a brush. The Oil Paint filter in Adobe Photoshop is very well known, as it also creates the Bevel effect along with the brush strokes (adds a glow and a shadow to the sides of a stroke).
You can access the Oil Painting filter by:
Filter > Stylize > Oil paint
Level adjustment
Levels is a tool in Photoshop and other image editing programs that can move and stretch the brightness levels of an image histogram. It has the power to adjust brightness, contrast, and tonal range by specifying the location of complete black, complete white, and mid-tones in a histogram.
You can access the level tool by:
Image > Adjustments > Level
Hue/Saturation adjustment
Hue/Saturation lets you adjust the hue, saturation, and lightness of a specific range of colors in an image or simultaneously adjust all the colors in an image.
Choose Master to adjust all colors at once. Choose one of the other preset colors ranges listed for the color you want to adjust
Enter a value or drag the Saturation slider to the right to increase the saturation or to the left to decrease it. Values can range from ‑100 (percentage of desaturation, duller colors) to +100 (percentage of saturation increase).
You can access the Hue/Saturation adjustment tool by:
Image > Adjustments > Hue/Saturation
Using Smart Objects
Smart Objects are layers that contain image data from raster or vector images, such as Photoshop or Illustrator files. Smart Objects preserve an image’s source content with all its original characteristics, enabling you to perform nondestructive editing to the layer.
With Smart Objects, you can:
- Perform nondestructive transforms. You can scale, rotate, skew, distort, perspective transform, or warp a layer without losing original image data or quality because the transforms don’t affect the original data.
- Perform nondestructive filtering. You can edit filters applied to Smart Objects at any time.
Step by step to Turn Photo into Cartoon
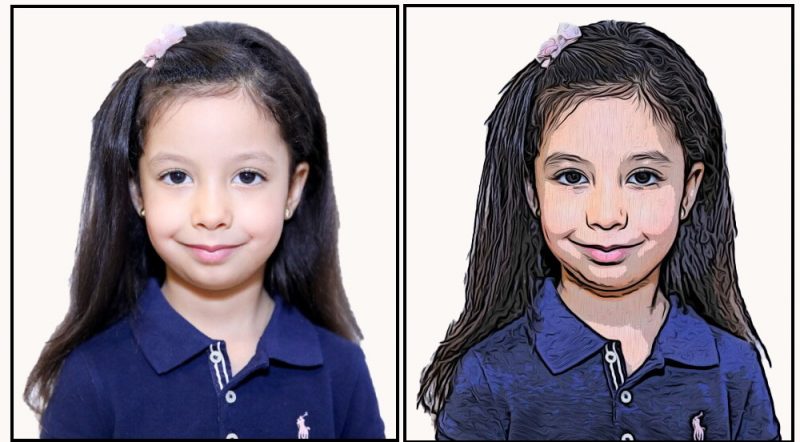
This way of creating a carton photo from an existing portrait photo depends on creating two duplicate layers of the original; I call them the Main and color layers. I will apply multiple of filters and tools (Poster Edge filter, Threshold tool, and Oil paint filter) on the Main layer while applying other filters on the color layer (Poster Edge filter, Level tool, and hue/saturation).
Then I will change the blending mode of the main layer to multiply to get the final carton photo as described below:
Step 1
Open photo in Photoshop
Step 2
Unlock the layer by clicking on the lock symbol
Step 3
Change the size of the photo such that, one of its dimensions should be between 1500 to 2000 pixels (this will help in getting the best results when using filters)
Image > Image Size or use the shortcut ALT + Ctrl + I
Step 4
Duplicate the original layer and name it Main. By right-clicking on the layer and choosing the Duplicate layer.
Step 5
Change the Main layer into a Smart layer. By right-clicking on the layer and choosing Convert to Smart Object.
Step 6
Apply the Poster Edge filter to the main layer by:
Filter > filter Gallery > Artistic > Poster Edges and choose the following setting:
Edge Thickness:10
Edge Intensity: 10
Posterization: 6
Step 7
Turn the main layer image into a black outline image by using the Threshold tool
Image > Adjustments > Threshold
Move the slider toward the left
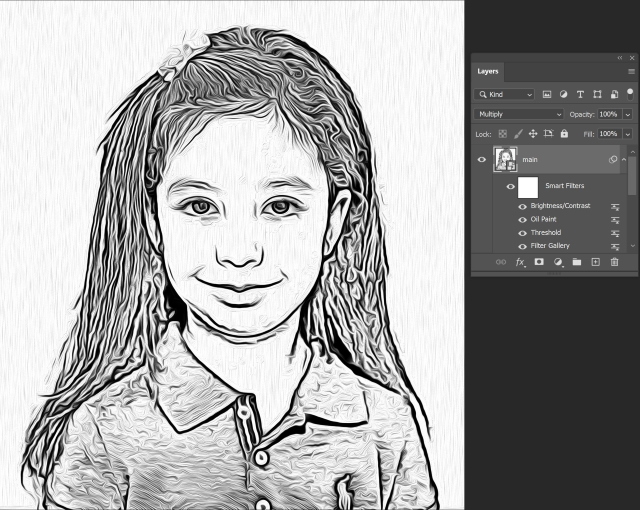
Step 8
Apply the Oil Paint filter to the main layer by:
Filter > Stylize > Oil paint and choose the following setting:
Stylization: 5
Cleanness: 10
The image will look like the following
Step 9
Duplicate the original layer and name it color. By right-clicking on the layer and choosing the Duplicate layer. In addition, Change the color layer into a Smart layer. By right-clicking on the layer and choosing Convert to Smart Object.
Step 10
Apply the Poster Edge filter to the color layer by:
Filter > filter Gallery > Artistic > Poster Edges and choose the following setting:
Edge Thickness: 0
Edge Intensity: 0
Posterization: 1
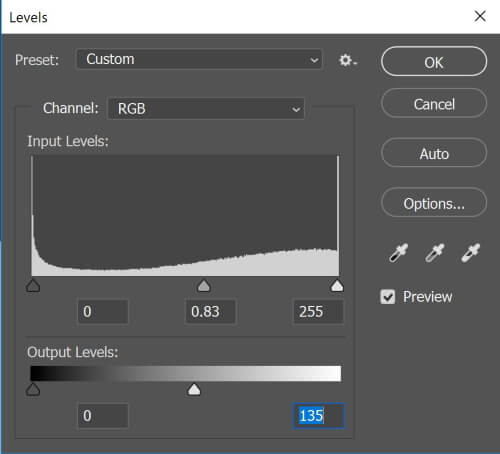
Step 11
Use the Level tool to adjust the histogram of the color layer by:
Image > Adjustments > Level then move the left slider to the right and move the right slider to the left
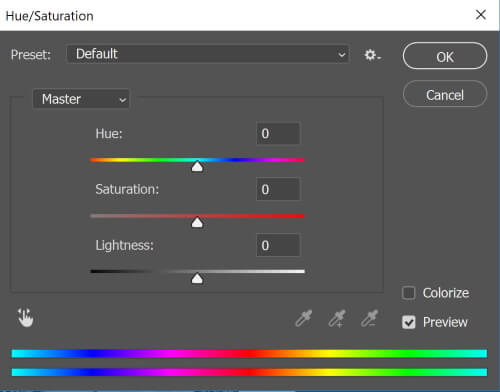
Step 12
Increase the saturation of the color layer by:
Image > Adjustments > Hue/Saturation then move the saturation slider to the right.
Step 13
Change the blend mode of the main layer to Multiply
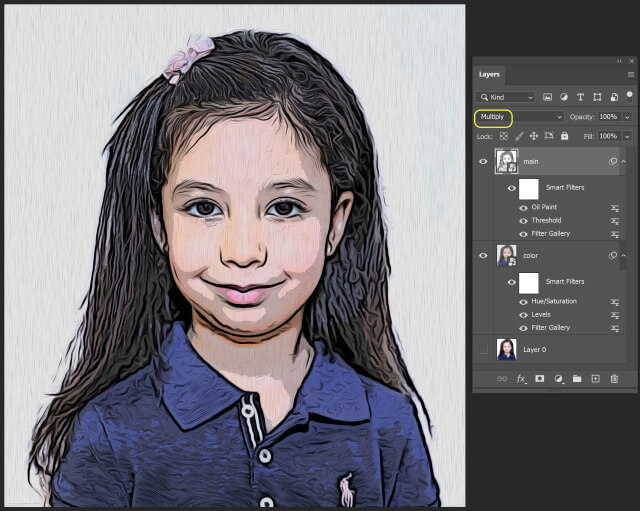
After and before photos are shown below
Photo by Ehab Amin
More examples

Photo by Ehab Amin
Photo by Italo Melo from Pexels
Image by Anastasia Gepp from Pixabay
Add fun to your carton image
You may want to add some fun to your carton image, use the Liquify filter to change a person’s face
Face-Aware Liquify filter in Photoshop automatically detects facial features and helps you adjust them to change a portrait or add creative character to a fun shot, by just moving sliders.
You can get access to the filter by:
Filter > Liquify
The following pop-up menu will appear.
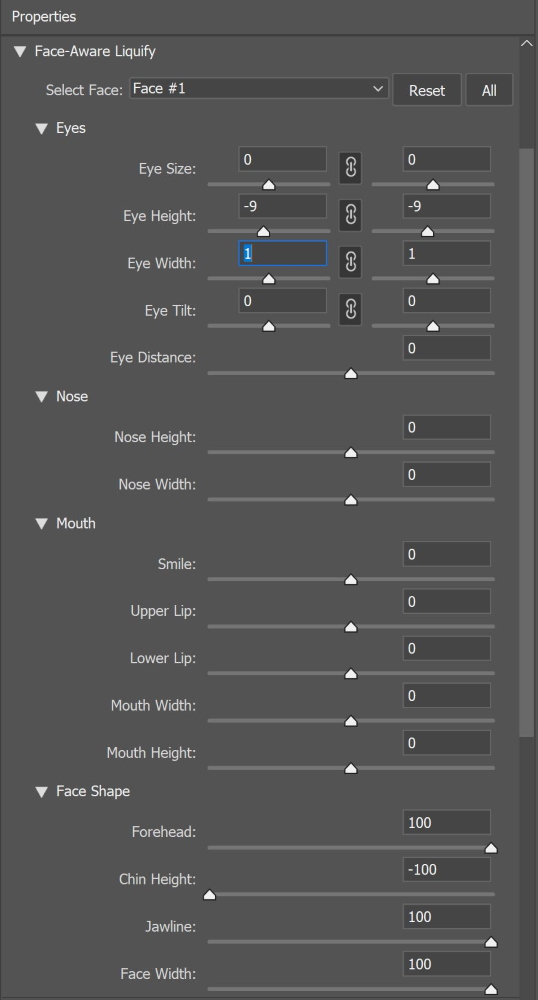
You can change the following features of your portrait; remember to click the link between the two sliders to make changes to both right and left eyes.
I use a Photo by Andrea Piacquadio from Pexels
- Eye size
- Eye height
- Eye width
- Eye tilt
- Eye distance

- Nose height
- Nose width
- Smile
- Upper, lower lip
- Mouth width, height

- Forehead
- Chin height
- Jawline
- Face width
Are you looking for Photo editing resources?
If are looking for editing resources like actions, overlays, and textures, I highly recommend paying a visit to my store, it has amazing professional photo editing tools.
In addition, you can check my editing tutorials, and my YouTube channel there are many tips and tutorials there.
Thanks for reading, I hope you enjoyed the article if you have any questions just post them below & I will be happy to answer you.
If you enjoy the site, don’t forget to subscribe, we will only inform you when a new article is posted.

Oh, this is really interesting. I never know that Photoshop has the ability to convert photographs into cartoons (I always thought that brands just hire some illustrators to make a cartoony photograph). The steps look easy enough to follow. I will try to experiment with some of my photos. Thank you
Thanks
Hello there thanks a lot for sharing this beautiful piece of information here with us. I must say i really did enjoyed going through your review as it contains valuable informations one needs to be aware of. I learnt how to make cartoon pictures using photoshop a year ago and it has been a nice experience because i make money out of it now
Thanks for your comment