


The task of how to clean digital camera sensor may seem difficult and complicated but it is actually much more straightforward than you may think. For photographers constantly using their interchangeable lens camera and switching lenses during photo shoots, they often noted mysterious spots that appear in their photos, these spots are caused by dust or dirt on the sensor of the camera that is completely normal and virtually unavoidable. Every time the lens is removed, dust is given an opportunity to enter the camera. Once inside the camera, it can (and does) find its way onto the sensor. In addition, some zoom lenses, particularly those with a push-pull action can create air currents within the camera, which stir up any dust present, again allowing some dust to contaminate the sensor.
Most modern camera makers have included a sensor cleaning function in newer camera models. However, sometimes this handy little feature just isn’t enough that is why cleaning the camera sensor is an important service task that every photographer has to deal with so often.
A typical professional in-factory or certified-shop cleaning usually runs around $75 (plus an additional $25 or so in shipping costs if you have to send it out). I think $75-100 will get you enough supplies, cleaning materials, and tools that you can routinely clean your digital cameras for years.
What is sensor dust?
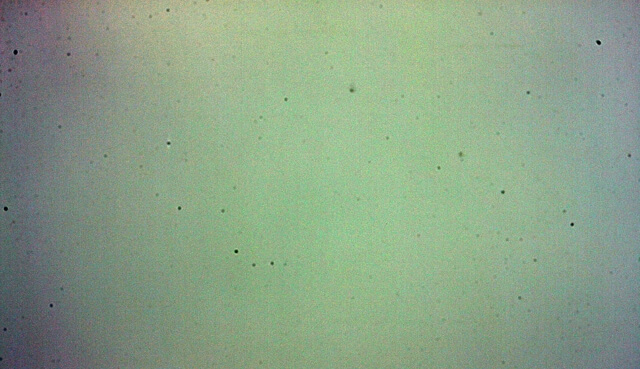
The term sensor dust is used to describe the particles or elements that enter a camera and stick to its sensor. This usually happens when the camera user exposes the sensor by removing the body cap or switching lenses. Sensor dust will show up in your images as blurry spots which will look something like the spots in the below photo.
How to know it is actually sensor dust?
Seeing spots in your viewfinder and/or images doesn’t necessarily mean you need to clean your camera sensor. There are other sources of dust contamination inside your camera:
Viewfinder focusing screen and SLR mirror

This type of dust is clearly visible in the viewfinder but fortunately doesn’t alter the image file. Try looking through your viewfinder and changing the f-stop (while holding the depth of field preview button). Viewfinder dust will appear the same size regardless of the f-stop.
Front or rear of your lens
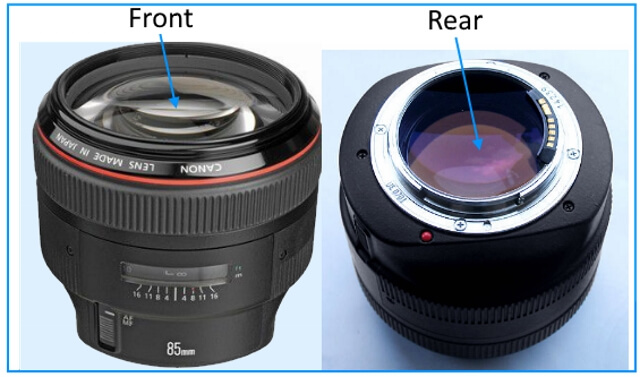
Dust on your lens has also an impact on your image, so, to find out change your camera lens to see if the spots remain. Lens spots generally appear larger and more diffuse than sensor dust and are usually only visible with wide-angle lenses at high f-stops. There is a relevant post about lens cleaning you may check it.
For the above cases, dust will become more apparent when you aim your camera at a clear sky or light-colored wall. If neither of the above is true (and you’re still seeing spots in your images), it is safe to assume that the dust culprit is your camera’s sensor.
How to check the presence of sensor dust on your camera?
To check and see if you have sensor dust follow the steps below:
- Set your camera to a small aperture such as f/16 or f/22. It is worth pointing out that you may not see any sensor dust if you shoot at wide apertures (such as f/2.8) as the depth of field is wide enough to throw these spots out of focus rendering them very difficult to see, if you can see them at all.
- Set your camera to the lowest ISO
- Set your camera to slow shutter speed, you want to blur the subject as much as possible.
- Take a photograph against something bright white, such as a white wall, piece of paper or cloudy sky. You may also gently move the camera slightly when taking the photo (to help blur the photo and make the dust more visible).
- Load the image into your computer, carefully inspect the photo, If you see signs of dust then you know you need to clean the sensor.
The auto-cleaning system for the camera sensor
Many modern DSLR cameras have a self-cleaning system for sensors. It has the following features:
- Materials used in the shutter mechanism and body cap are engineered to minimize dust generation within the camera itself.
- Anti-static technologies are applied to the low-pass filter covering the front of the sensor so as not to attract dust.
- A Self-Cleaning Sensor Unit uses hi-frequency vibrations to shake off the lingering dust on start-up. To enable immediate shooting, the cleaning cycle stops instantly if the shutter is pressed. The cycle repeats when the camera is switched off and can be manually activated at any time.
Getting your camera ready for cleaning
Make sure that the place where you’re going to clean your DSLR camera sensor is clean and dust-free. You don’t want more dust to add to the dirt that you’re trying to remove. It’s important that you clean the outside before you move on to what’s inside. If you fail to do so, dust particles could enter your sensor. If the battery runs out while you’re working in the sensor chamber, the mirror will slap down and you’ll have to deal with a very expensive repair. So it is very important to make sure you have a fully charged battery.
Camera manufacturers provide a special mode on the camera that will lift the mirror and open the shutter to reveal the sensor so that it can be checked or cleaned. This mode is sometimes known as ‘Mirror Lock-Up’ or ‘Sensor Cleaning Mode’ and is usually accessed via the menu system on the rear LCD. For example, on a Canon Camera
First, make sure that the mode dial is not set to fully automatic.
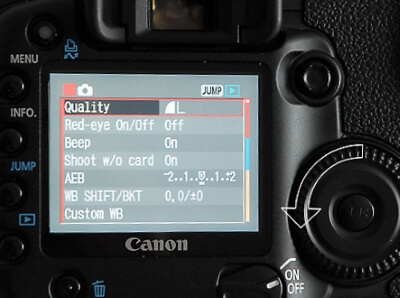
Press the menu and rotate the Quick Control Dial
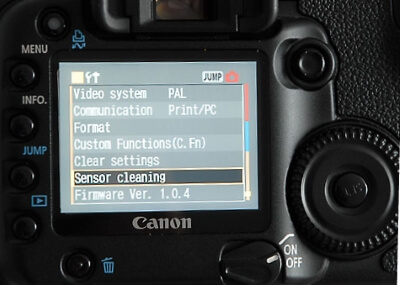
Select ‘Sensor Cleaning’ then press the ‘Set button
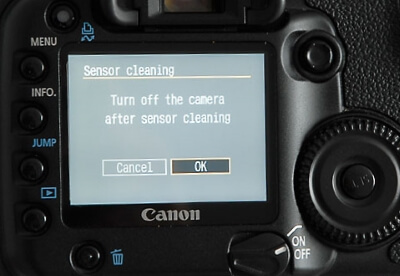
Select OK and press set again to raise the mirror and open the shutter to access the sensor.
The recommended Cleaning method
Contamination on the sensor can be formed by a number of reasons, Dust particles, pollen, and wear and tear particles. For cleaning purposes, we should consider two types of contamination and deal with them separately. There are loose dust particles, which can be cleaned off the sensor by dry cleaning first, then there are the more stuck-on or marks that are harder to remove. Cleaning away these marks effectively will require the use of wet cleaning method with swab and cleaning solution.
Remember that the longer loose dust is left on the sensor, the greater the chance it is becoming hard to remove, particularly if the camera goes through a few humidity cycles. For example, when it’s left in a car overnight and gets very cold, and is then brought into a warm environment. Sensor dust will get damp from the humidity, then dry out and stick to the surface.
If you use the dry cleaning method on a regular basis, then the need for swab the sensor is greatly reduced.
Dry cleaning
-
Using bulb blower
The required cleaning tools are:
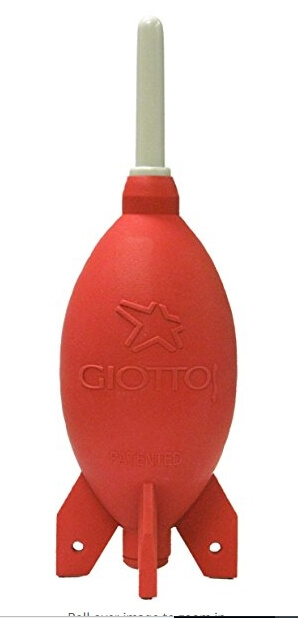
Giottos AA1903 Rocket Air Blaster Large-Red
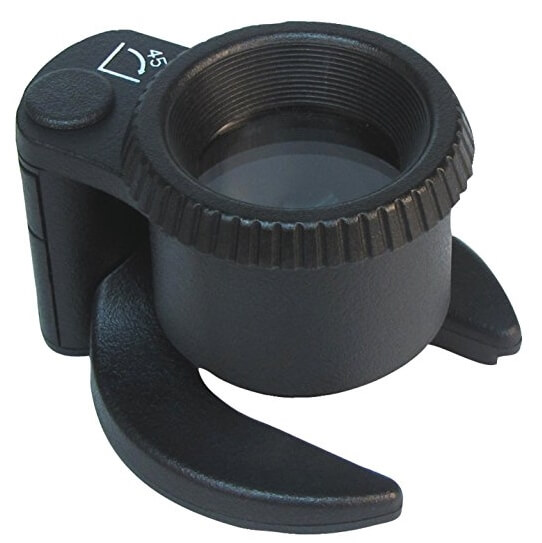
Carson SensorMag 4.5x30mm Camera Sensor Magnifier
The best type to use is a dedicated rubber bulb blower (with no brush) and a reasonably sized bulb. The type with a non-return valve generally is better. Remember, that these can contaminate the sensor with debris from inside the bulb. So, always squeeze the bulb several times in a safe direction, before using it on the sensor, to ensure any debris has been expelled. Keep the blower, inside a zip-lock polythene bag when not in use, so that it can’t suck up any debris from the bottom of your camera bag.

Hold the camera upside down so the LCD screen is facing the ceiling; use the manual air blower to blow air into the camera onto the sensor. Be extremely careful NOT to touch the sensor with the tip of the blower. The best practice is not to put the tip of the blower inside the camera at all
This method is free from risk because you don’t touch the sensor surface. Check the result with the magnifier, and repeat as necessary.
-
Using cleaning brush
The required cleaning tool is:

The cleaning brush uses a low-cost nylon brush that is charged by some means to introduce a static charge onto the nylon bristles. This charge can be used to attract dust from the sensor surface to the bristles. A nylon brush can be charged by various means, such as blowing air over the surface, or an aerosol, or by spinning. There are different sizes to suit the camera sensor size.
Wet cleaning method
The required cleaning tools are:
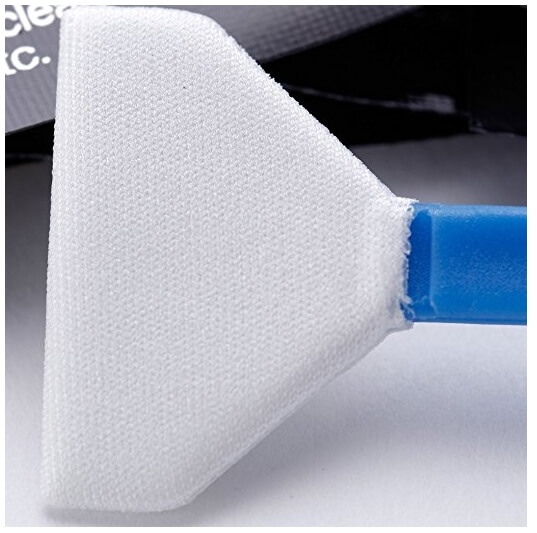
Sensor Swabs are extremely effective at cleaning greasy marks from the sensor. They use a cleaning solution. Sensor Swabs are manufactured in 3 different sizes to ensure a precise matching with the different sensors sizes.
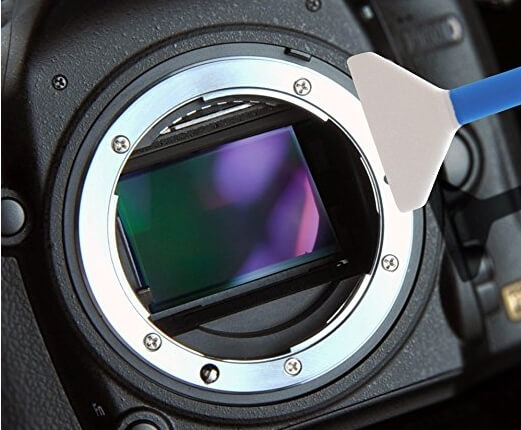
How to wet clean your sensor
- Remove the lens and place the camera on a surface with the LCD facing the floor.
- Select the manual cleaning option to lock up the mirror.
- Remove a sensor swab and using the air blower a few times, blow air to remove any odd pieces of lint that may be stuck to the swab.
- Add two (or three drops max) of the solution to the tip of the swab. Do not oversaturate the swab or you will leave streaks on the sensor. Less is definitely more in this case!
- With great care place the swab onto one side of the sensor and with not too much force; gently move the swab across the sensor in one smooth motion. When you get to the other side, turn the swab over and repeat the process starting from the far side back to where you started. Again, do this in one smooth motion with no great force.
- It is important to remember not to reuse a swab.
That’s all there is to it! Although cleaning your DSLR camera’s sensor seems like an enormously intimidating task, it’s actually a pretty straightforward and safe bit of routine maintenance. I hope this tutorial helps to explain how to clean your sensor in a straightforward way.
Related post
How To Clean Your Camera Lens? – Protect your asset
Thanks for reading, I hope you enjoyed the article if you have any questions just post them below & I will be happy to answer you.
If you enjoy the site, don’t forget to subscribe, we will only inform you when a new article is posted.


I always took a cloth and try to clean my lenses obviously I was doing the wrong thing. Reading your article opened my eyes to the complexity of lenses and cleaning. No wonder I could never do a good job. Thank you for the tips. Is there any of the types of cleaNING That you recommend that you think would be best for a beginner like myself? thank you again for you help
Obviously, you mixed camera sensor cleaning with lens cleaning. There is a post that describes how to clean your camera lens I suggest you should read it