

It really doesn’t matter what type of photography you are specialized in or prefer, you will always find yourself having to take a picture of people. Taking pictures of people is much different than photographing landscape, beautiful mountains, historic architecture, butterflies, plates of food, or whatever it is that you usually photograph. In this article, I’ll try to collect some important and basic tips to let you get the best picture possible of people.

As we all know, photography is about finding and controlling a suitable light, so let us start by reminding you of some basic characteristics of light.
- A broad light source lessens shadows, reduces contrast, suppresses texture, and gives more even illumination to the scene.
- Diffusion makes the light source broader and therefore softer. The light bouncing off a wall, ceiling, and a reflector is a diffused light.
- The closer the light source to your subject, the softer the light will be and the farther the source, the harder the light you will get.
- The light gets dimmer fast when you move it away (If you move a light twice as far from your subject, you end up with only one-quarter of the light on the subject).
- The greater the angle at which the light is positioned to the subject, the more texture is revealed. Lighting from the side, above, or below emphasizes the texture but Front-lighting de-emphasizes it.
- Shadows create depth in your photo; they create the third dimension and add a sense of volume to the scene.
- Light has color, it is called color temperature. Our eyes hardly notice it, a digital camera records it, and you can use the white-balance control to neutralize color casts or to emphasize them. Also, you may alter it using filters.
Tips for taking a picture of people
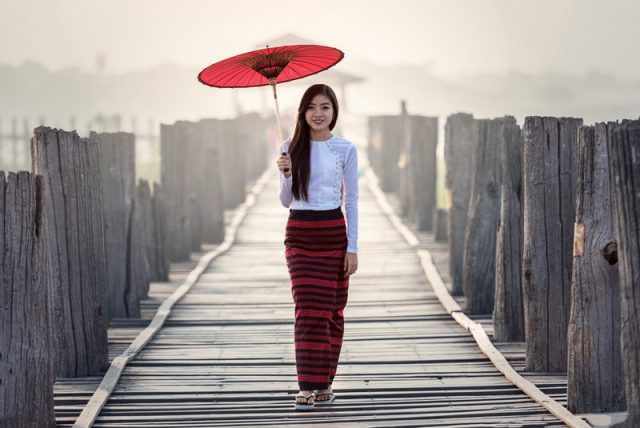
Position the camera in the portrait position
Turning the camera on its side will produce an image in portrait format (taller than it is wide) that is much better suited to pictures of people. Sometimes a landscape format works best is with a group of people or if you got close enough for a “head and shoulders” shot or you deliberately want to include something else in the background of the shot.
Get close enough to your subject
A good photography tip is to try to fill the frame with your subject. If you are shooting a portrait of a person and you want only its head and shoulders, it is better to get closer to the subject until there is just a little space either side of him/her and a little more space above their heads.

Be aware of where the light is coming to your subject
Bright sunlight produces hard dark shadows which can have a very unflattering effect on someone’s face if they are at the wrong angle. It is much easier to take pictures of people on a cloudy day because, no matter which direction they face, the lighting won’t change too much. If that is not possible, find a shaded area and always watch the shadows on your subject’s face. The best condition to work best is when the background, the subject, and the camera are all shaded from direct sunlight.
For indoor portraits, a large window is considered a good light source, also the use of some reflectors (if available) may add a lot. For the studio lighting setup, check my post HERE
Compose Your Images Correctly
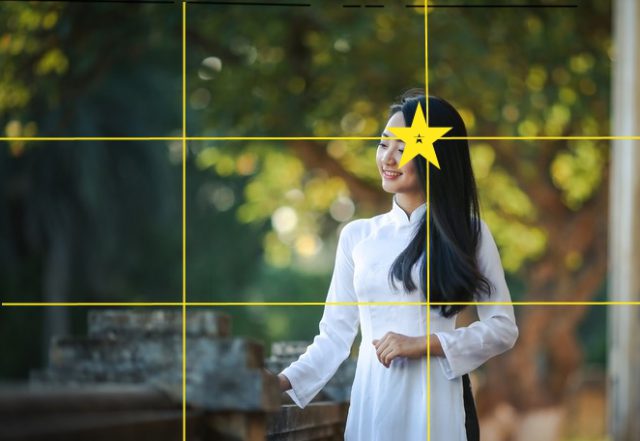
The rule of thirds is the most commonly used composition technique. The basic idea is that you split your frame into three equal horizontal sections and three equal vertical sections. This creates a grid of nine boxes and four main points of intersection, Those four points of intersection are areas that tend to draw the viewer’s eyes, and that’s where you want to place your subject. Your goal with the rule of thirds is to try to compose your photo such that you place the important parts of the subject (Its face) in any one of the four points. The below photo illustrates the rule of thirds.
Look for a plain background
One of the important things to make a good photograph is to have nothing to distract the viewer’s eye from the main subject, so, try to find a plain background with less or noninteresting elements and colors.
Focus on the eyes
It is always desirable to get sharp eyes in a portrait. Manually select an AF point that’s positioned over one of your model’s eyes, or use the central focus point to lock focus on their eye.
Position your camera on the eye line level
The height of the camera relative to the subject’s eyes plays an extremely important part in determining how they will look in the final image. Even slight changes in this aspect can make a great difference. The most neutral place to be is at the same level.
When dealing with a subject who is much taller than you then you should think of asking them to sit down or find something to stand on it, so you can be on the same level as their eye level.
Use Aperture Priority Mode
Set your camera to “aperture priority” mode, it will easily let you control the depth of field, which is how much or how little you want to be in focus in your photo. When photographing people, the depth of field is the first thing you should notice before pushing the shutter, deciding how much and what do you want in or out of focus.
Use a Longer Lens
Using telephoto lenses for a single person and small group photos can help in two major ways. First, longer lenses typically have a more thinning look for your subjects and second, one key determinant of the depth of field is lens focal length and the more telephoto the lens is the easier and more background blur you will get in your shot. This will isolate your subject from the background, a pleasing look for people portraits.
However, when shooting a group of people, do not use such wide apertures as this can cause certain people to be out of focus. To ensure everyone is in focus on group photos use larger apertures for more depth of field.
Another lens choice for portrait photos is a standard lens. The classic portrait focal lengths for a full-frame camera are 50mm, and 85mm prime lenses.
The pose of a single subject
Probably the simplest way to start with is to avoid having them directly facing the camera. Ask your subject to face about 45 degrees away from the camera, and then ask them to turn their head to face the camera for the shot. This usually looks much better; also you will have a slimming effect on most people, which is often appreciated. You may also work the pose by shooting it from different angles and perspectives; it really will give you so many alternatives to choose from later.
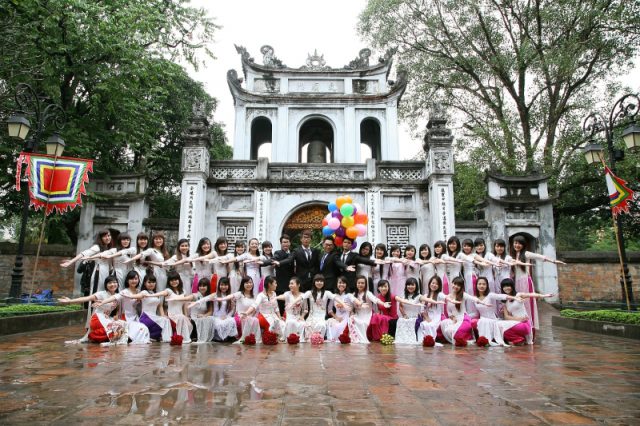
The pose of a group of people
When you’re arranging a group portrait, the first thing you’ll probably consider is height, putting taller people at the back and shorter people at the front. But remember to keep a close eye on clothing too. It’s easy to miss clashing colors while you’re focusing on everyone’s height, and that will be more noticeable in the final picture.
To ensure everyone appears sharp, you need to use an aperture of at least f/8 with a wide-angle lens. But if you’re taking an indoor group portrait, you’ll need to use a high ISO in order to shoot at that aperture and get sharp handheld photos.
Don’t miss the candid shots
Everyone loves candid photos; they are some of the most natural photos you can get. There are two ways to get candid:
- The first way is by getting friendly with your subjects and talking to them, a funny conversation and some jokes which can create a candid moment.
- The second way is to simply just stand back and wait, just be an observer. In the observer role, try to use a telephoto lens and no flash and try to snap photos without drawing attention to you. Simply giving your subjects some space and letting them have the chance to interact with one another is the best way to capture those quick and candid moments, just make sure to be ready and anticipate the moment or you may miss it!
For more information on this candid subject, you may check my post HERE.
Thanks for reading the post and hope you find it useful. If you have any comments, just drop it in the box below and I will respond immediately. You may also subscribe to the site, so you will never miss a post; there are always new fresh posts.
If you enjoy the site, don’t forget to subscribe, we will only inform you when a new article is posted.


Some very interesting and valuable tips here. I rarely take pictures, but when I do I shall try to remember your ideas. I was particularly intrigued by the ‘rule of the third’. It is useful to know where someone looking is likely to focus.
Thank you for your comment, you may check our photography courses HERE, It will help you to start your new hobby. Have a nice day.