

Flowers are very interesting creatures, and they have a wide variety of amazing colors, shapes, and patterns, when watching them you’ll feel relaxed and happy. Giving them to the person you love is the best way to express your feeling. For the above reasons, I think flower photography is probably the most explored area of photography. It is much evident from the numerous photos of flowers posted on social media and photo sharing sites every day. However, not all flower photographs are created equal. In this article, I’ll try to provide you with the general rules, guidelines, tips, and tricks to help you take the best images possible.
Use macro lens, at its sweet spot
There aren’t any special requirements for shooting nice flower photos. A decent DSLR camera and a macro lens and perhaps a tripod are all you need. Using a macro lens enables you to focus up close so you can really fill the frame with your subject.
The official definition of a macro lens is that it should be able to reproduce a life-sized image of an object on the image sensor. True macro lenses offer a magnification factor of 1.0x or 1:1 at its closest focus setting. For more detailed information about macro lenses, you can check my post >>The Macro Lenses Explained – Samples & Recommendations<<
How to find the mid-range sweet spot of your lens (to get the sharpest photo).
I’ll use an entry level standard zoom lens as an example: EF-S 18-55mm f/3.5-5.6 IS II.
The meaning of the number written on this lens is that if you zoom out the lens all the way out, its widest aperture is f/3.5. When you zoom in the lens all the way in, its widest aperture is f/5.6. Then how to finding that mid-range sweet spot, the answer is by counting up two full f-stops from the widest aperture. In this example, the widest aperture is f/3.5. Two full stops from there would bring me to a sweet spot of around f/7, so anything from f/7 to say f/10 will capture a sharp image. You can use this chart to count your f-stops
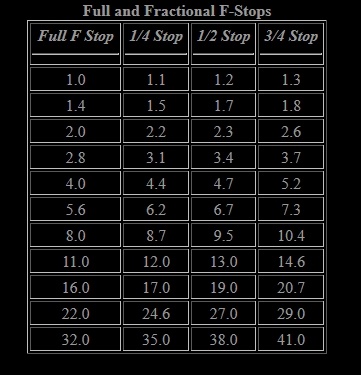
When you use smaller apertures (larger f-numbers) to achieve a greater depth of field, at some point the aperture size will cause some softening due to the effects of diffraction. So it is also a good idea to use apertures at least two f/stops below the smallest opening. So if your minimum aperture is f/22, then you should use f/11 or larger. Always remember that setting up your aperture is essential in flower photography. Always check the aperture you’re using and use the option to preview the depth of field if your camera has it.
Great care has to be taken when focusing macro lenses as the depth of field is very limited when you’re so close to your subject.
You may check my post to learn more about how to control your depth of field of your photos.
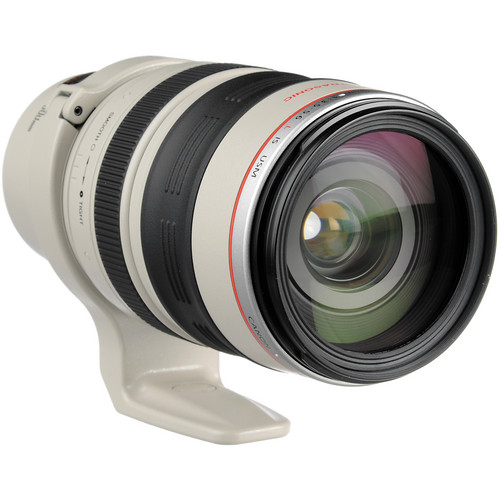
Consider also a telephoto lens
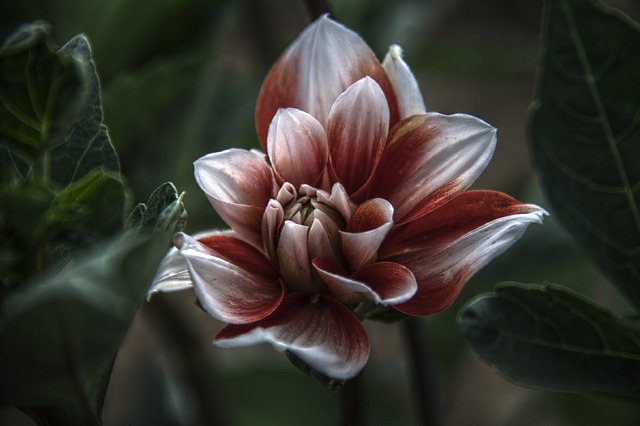
You can isolate a particular flower from its surroundings by using a telephoto lens. A long lens, when used with the camera set to a wide aperture, can really throw the foreground and background out of focus and become bluer, so the viewer’s attention is drawn only to the flower. This is a great technique if you want to produce impressive photographs of individual plants. You can check some interesting Canon Telephoto lenses <<here >>
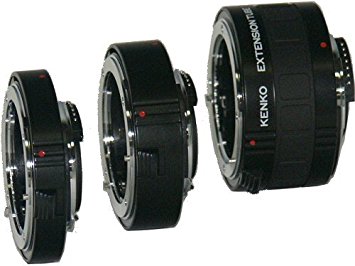
Extension tubes
If you want to try close-up photography without using an expensive macro lens, then extension tubes are a good alternative. A tube or combination of tubes is fitted between the camera body and the lens. Moving the lens away from the sensor reduces the minimum focusing distance to allow close-up photography. An extension tube is a hollow, light-tight tube that fits between your lens and your camera mount. It moves your lens further from the camera, and the front element closer to the subject. The closer you can focus the more magnification you get. One of my recommended types is “Kenko DG Auto Extension Tube Set for the Canon EOS AF Mount.“
There is an interesting technique that is used in macro photography, which is called the reverse lens technique. Recently, I wrote a post on this subject: An overview of the reversed lens technique for macro photography. I recommend that you check it.
General camera setting
- Use Live View to focus. When shooting close-ups with a macro lens, even at narrow apertures, you need to set your focus point accurately, because your depth of field is so limited that any small shift will result in blurred shots. You can use Live View to manually set your focus point.
- Set your digital camera to the lowest ISO setting available, usually ISO 100 or 200.
- Shoot in RAW format to save all photo information; you will need it later in post-processing.
- Set White Balance to Daylight to enable easy batch editing later.
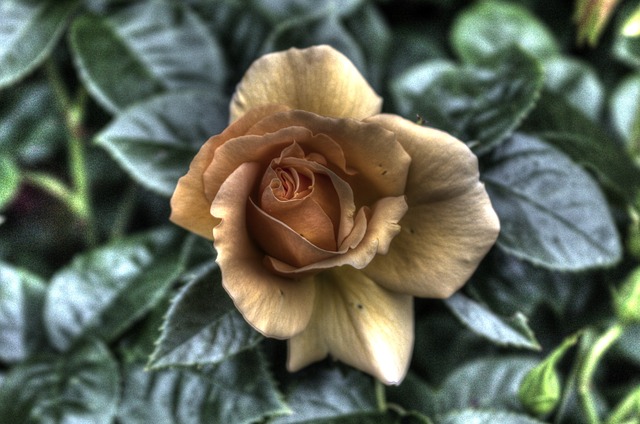
Find Contrasting Backgrounds
Using a background that has a different color than the main subject helps to define what is important in the picture, sometimes an artificial colored background is a good solution, by using colored cards. Colored cards are easy to find and you can buy them at a stationery store or art supply store. To use them, place the card behind the flower, and choose a complementary or contrasting color to bring out the petals.
Or you may take the flower into the home and arrange for whatever you think is suitable for the background. Using a spotlight pointing directly at the back and center of the image, you can create a gentle halo effect and a two-toned background.
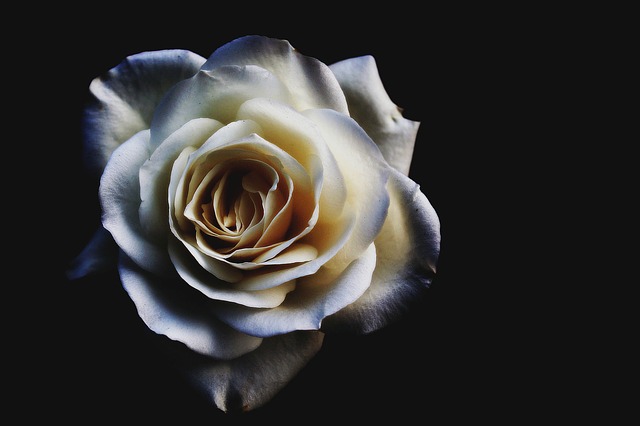
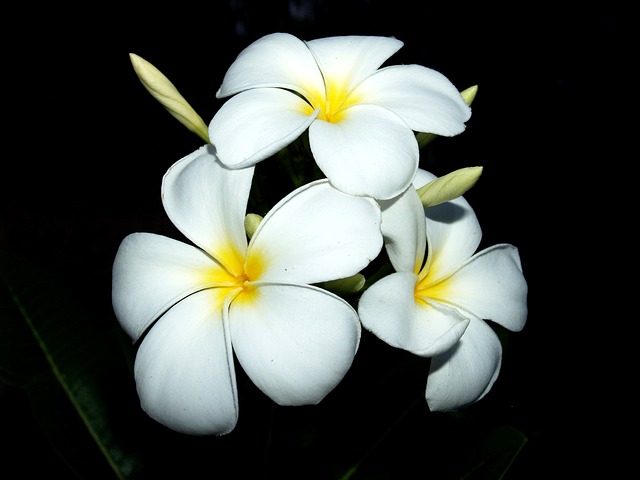
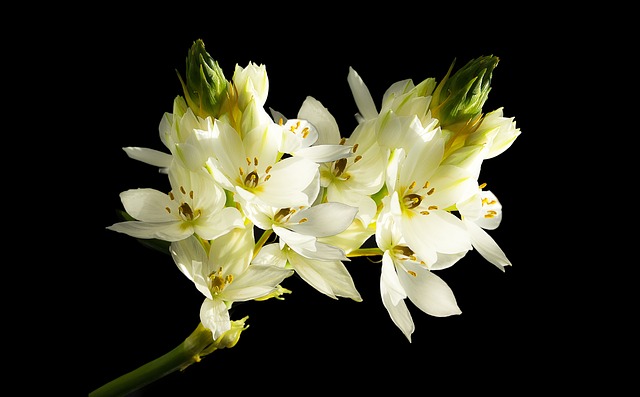
The following is a slideshow of photos of flowers with a black background.


Consider Using a reflector
When you position a reflector close to an individual plant it can be angled so that it directs light into shadow areas to reveal detail and to reduce contrast. It can also be used to shade plants from harsh, direct sunlight if it isn’t overcast.
Mind the weather
You will meet different kinds of weather conditions when shooting outdoors. There are three important weather elements to consider when shooting flower photos: the wind, the rain, and finally the sunlight.
- The wind is the number one enemy; it can make the situation very difficult to get a sharp photo. You can either wait until the wind dies down or you can make a wind barrier. Of course, your location and the strength of the wind will determine what type of barrier you can use. In a light breeze, you can tie the stem of the flower to a thin garden post with string or fishing line.
- Raindrops can add a great amount of interest to an ordinary photo. If there is no natural rain at the time of shooting you can add water drops to otherwise dry flowers. You can add a single drop of water or glycerin with an eyedropper or use a spray bottle of water for multiple drops.
- On bright sunny days, you have to consider balancing the harsh sun; use fill-in flash to illuminate the subject and to keep the fore and backgrounds balanced. Use a gold reflector for warmth and silver or white-toned reflectors to bounce light back on the image.


Select a creative point of view
If you want to take astonishing flower photos, you should think about how you are composing the photograph. Try to sit down at the level of the flowers and really look at them. Tilt your camera to get an interesting viewpoint, get down on your knees to look for a different perspective of the scene,
To really photograph flowers you cannot just take a snapshot and go away. It’s when you sit and watch and you will discover more than the casual photographer does.
Consider using photo stacking technique
Professional macro photographers use focus stacking technique to get all the subject elements in focus. Because the depth of field can be so thin that it is virtually impossible to get enough of the subject in focus in a single image. The focus stacking technique is taking several images of the flower, with each image focused on a slightly different part of the flower, then stacking all the images together by using special software to create a single image that is mostly or completely in focus.
Try HDR technique
The digital sensors in today’s cameras have a limited ‘dynamic range’. This means that they are only capable of capturing fine detail within a certain range of brightness levels. In these situations, photographers sometimes take a series of bracketed images at different exposure values and blend them into a single image in post-processing. This is called high dynamic range, or HDR photography. Many modern cameras have an Automatic Exposure Bracketing (AEB) that allows you to take 3, 5, 7, or even 9 images at different exposure values. In post-processing, use HDR software to combine and blend the images and get the final photo.
To correctly use the above-mentioned two techniques (HDR and focus stacking), and get final amazing results, you should make sure that the subject doesn’t move at all (because of the wind), even a very small movement will ruin the result. I recommend using these techniques in flower photography in a studio environment or in a greenhouse.
Related posts
Macro Photography Tips And Tricks – Guidelines & Examples
Using of extension tubes in macro photography – your full guide
The Macro Lenses Explained – Samples & Recommendations
An Overview of the Reverse Lens Technique for Macro Photography
Thanks for reading the article, hope you enjoy it and found it useful to you. If you have any questions, drop it down in the box below and I’ll answer it as soon as possible.
If you do like the site, don’t forget to subscribe, we will notify you if a new article is posted.
Also, if you are interested in reading about other types of photography, you can click this link” The Different Types of Photography “, and you will find 25 more types of photography.


Amazing photos. The flowers look real. The technical details offered on flower photography in the post were of great help to improve my skills in my profession. I was able to perform flower photography with great confidence after reading this post.
Hi Vivek
Thank you very much for your nice comment, I’m really glad that you found the article useful to you. Wish you all the success in your business and hope to see you again.
What a great post! I think I know a lot about photography, but your explanation on f-stops and sharper images is really eye opening for me. I have always just set the flower setting on my camera. Now I’ll try to get more creative. Thanks a bunch!
Warren
Hi Warren
I’m glad that you liked the article, thank you for your nice comment, hoping you all the success and enjoy photographing!