

Breathing new life into black-and-white photographs can be a captivating artistic endeavor. The process of adding color to black & white photos infuses vibrancy and dimension, transforming vintage or monochromatic images into vivid visual narratives.
Until the middle of the 19th century, most photographs were monochromatic, the only way to add color to photos is by hand-colored them, it is a very time-consuming process and depends mainly on the skills of the painter. Nowadays, in the age of digital photography era, coloring photos become a much easier task with the aid of the available photo editing software.
I think every one of us has old family photos, and many of them might be black and white photos. These photos are a great way to reconnect with our precious old memories. If we can find an easy way to turn these black-and-white photos into colors, it will be amazing.
In this exploration, we’ll uncover techniques and tools that enable you to skillfully reintroduce color to these timeless captures, granting them a fresh perspective and revitalized allure. We will learn how you can auto-colorize black-and-white photos in Photoshop and breathe life back into it!
Historical background
Color photography became popular when Kodak introduced Kodachrome film in 1935. The image was a slide that is a positive image in color on the film exposed in the camera. Processing the film was complicated. When Kodak introduced Kodacolor film to the market in the 1960’s color paper prints were reasonably priced for any photographer. The film gave color negatives that could be printed onto Ektacolor Paper in a lab or even in a home darkroom.
Add Color to Black & White Photo
Photoshop offers many ways and techniques to colorize black and white photos. However, the last update of Photoshop 2021, offers a new Neutral filter called colorize that allows you to automatically convert a black and white photo into a colored one in just one click.
Before starting to colorize your photo, I recommend that you do some basic editing: such as cropping, removing some unwanted scratches, adjusting the exposure and contrast. If the photo is sepia-toned, add a Black & White adjustment layer to neutralize the color and remove any colorcast.
-
Global colorization
Example 1
I will be using the following photo and colorizing it using the colorize filter (Neural Filter)
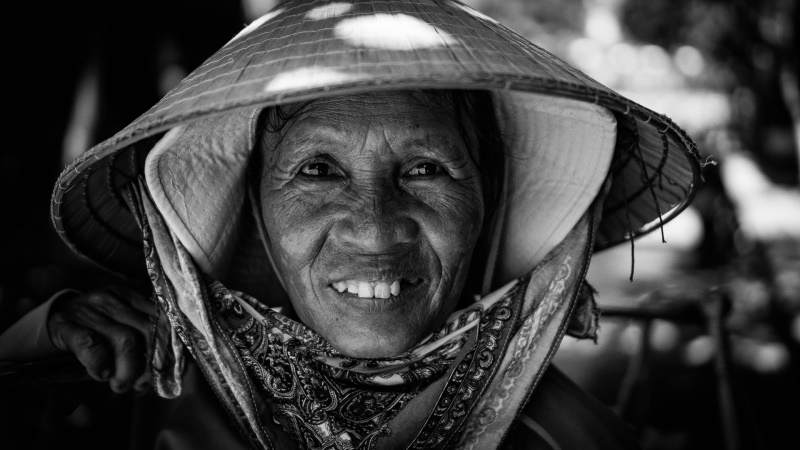
Photo by Aaron Lee from Pexels
Step 1
- Open the photo in Photoshop
- Duplicate the layer (Ctrl + J)
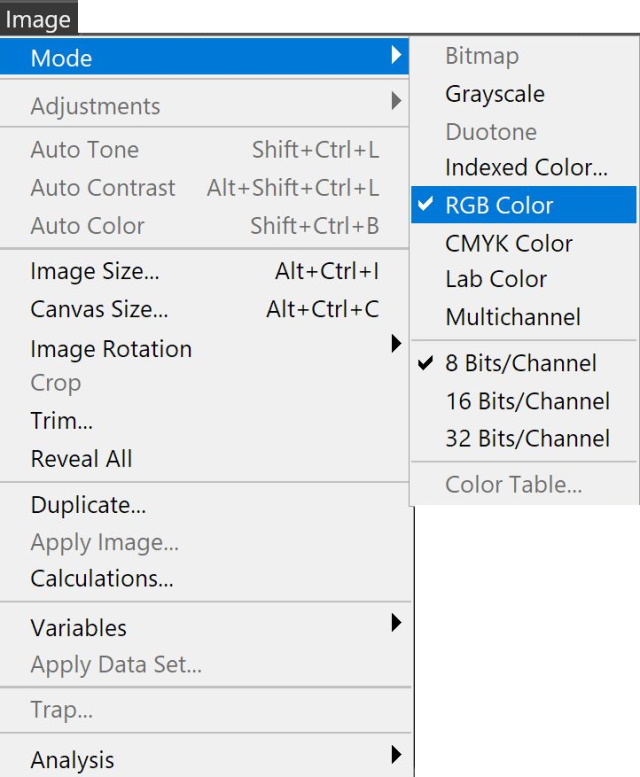
- Make sure that the photo mode is RGB color mode.
Step 2
- Convert the layer to smart layer (Filter > Convert to Smart Filter)
- Open the Neural Filters (Filter > Neural Filters)
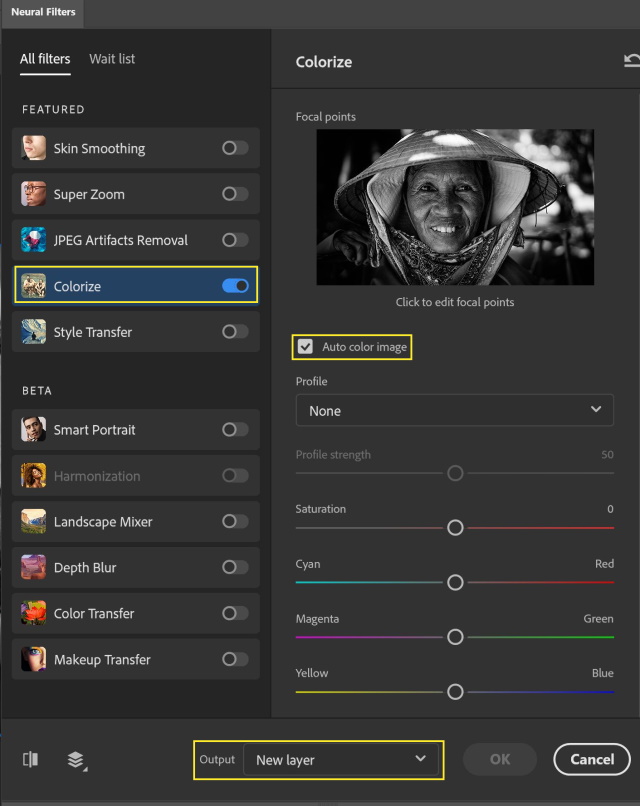
- Choose Colorize Filter under Featured Category
- Check the Auto colorize image box
- You may use the color sliders (Cyan- Red, Magenta- Green, Yellow- Blue, and Saturation sliders to change some of the colors if needed.
Step 3
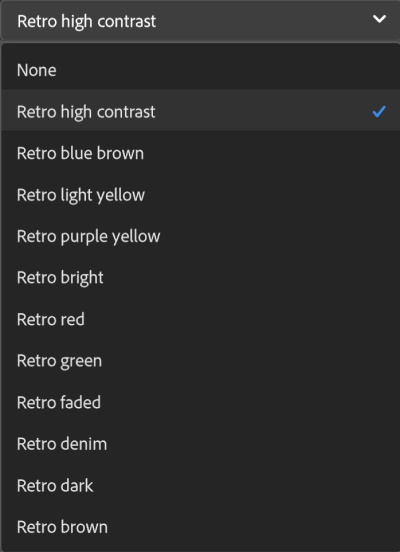
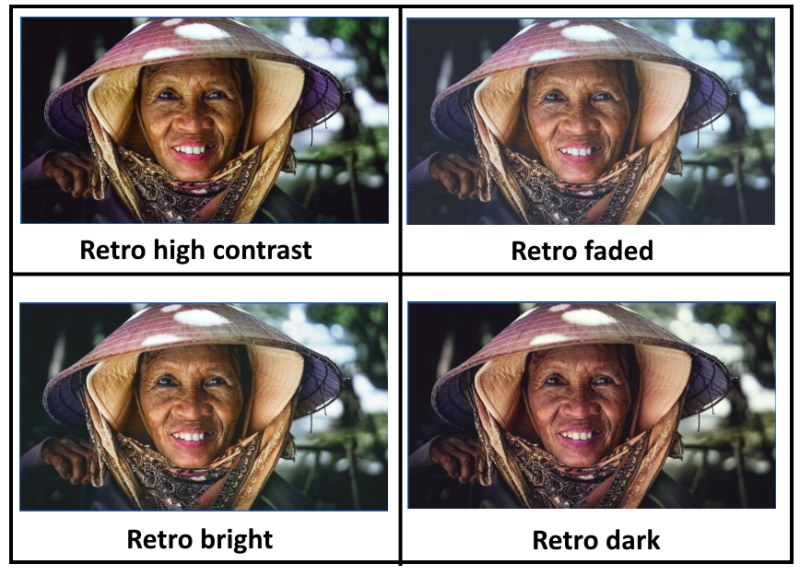
- The Colorize filter also provides some profiles; you may try some of them from the Profile dropdown menu
- When you’re done applying the changes, set the Output to Duplicate Layer for no transparency, or smart filter to allow you to nondestructively edit the photo (you can easily return back and adjust the colors)
- Press OK to exit the Neural Filters workspace.
The result is shown below

The following two examples are done with the same technique.
Example 2
Example 3
Photo by Dick Hoskins from Pexels
-
Local colorization
Sometimes you will feel that the result of the auto-colorizing is not enough and you want to make some additional color changes of certain elements of the photo.
There are many ways to change the color of certain elements in your photo, you may check my post “How to Change the Color of Something on Photoshop” for more details. However, my recommended method is Using Solid Color adjustment layers and a mask.
This method involves adding a Solid Color adjustment layer for every aspect of the photo you want to paint. Change the blending mode to Color so the details of the original image show through the paint. Invert the layer mask to black and use the brush to paint over the part of the image you want to colorize.
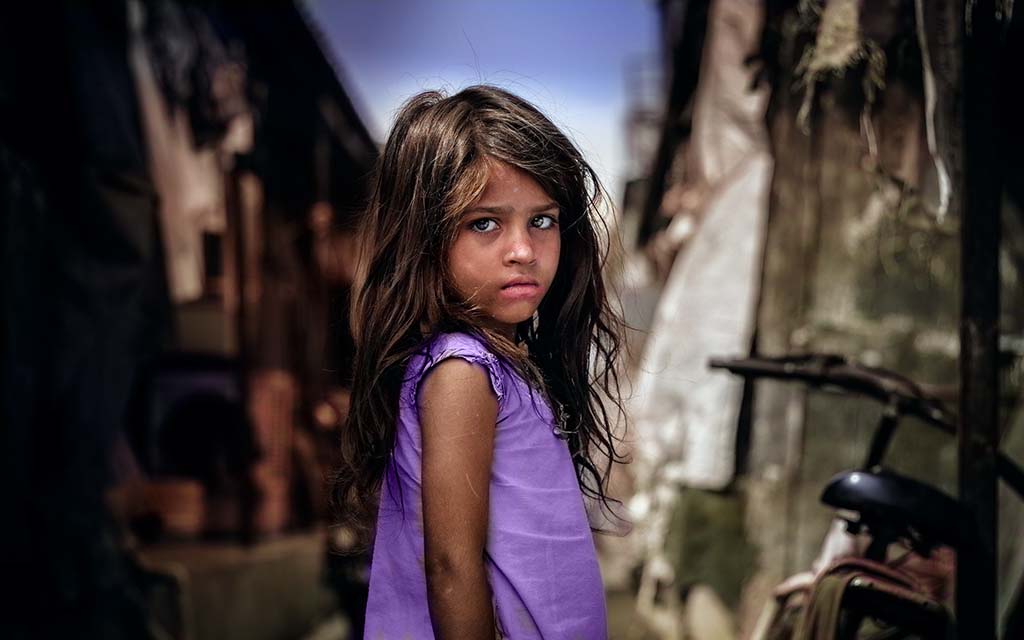
Example 4
I will use the following photo
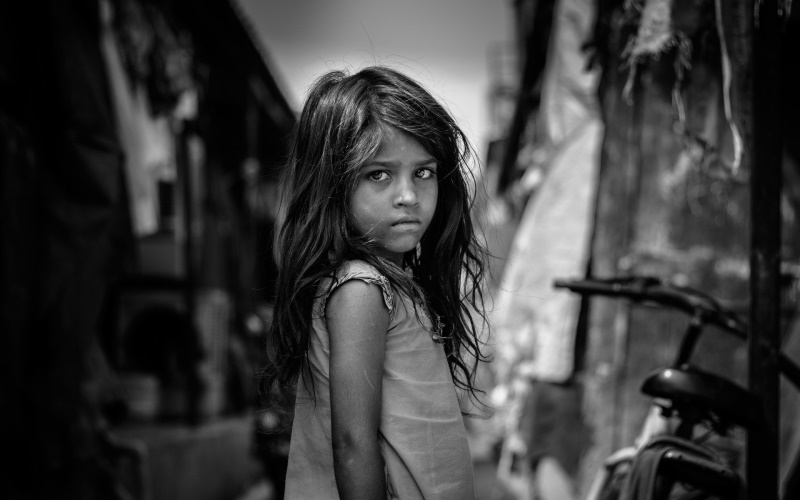
Photo by Pixabay
After applying the same procedure for coloring a black and white photo mentioned in example 1, the result is shown below
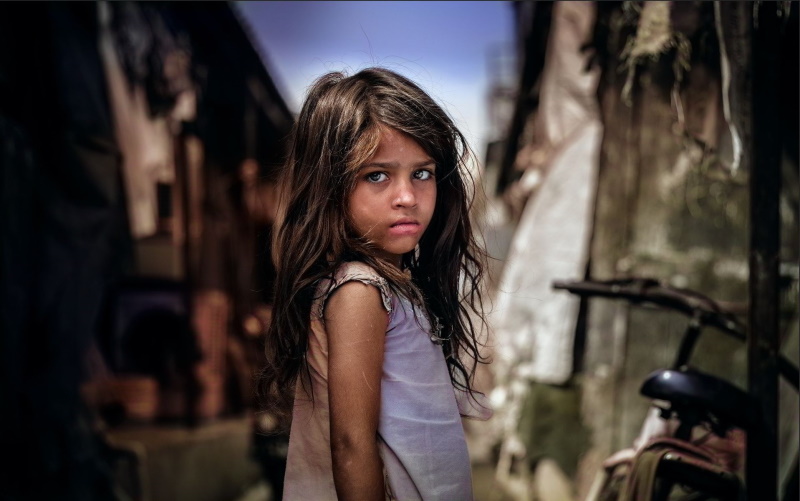
Now if we want to change the dress color of the girl.
Step 1
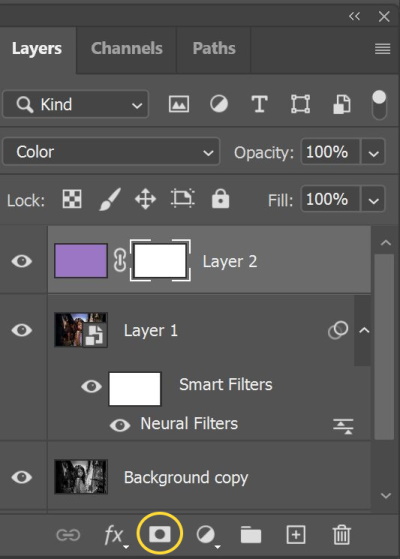
- Create a Solid Color adjustment layer on the top

- Pick up the required color
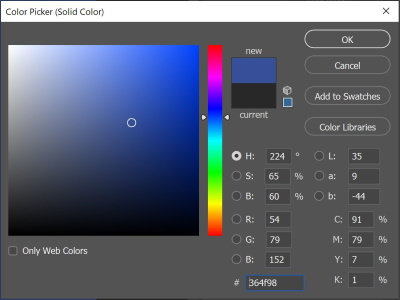
- Set the Blending Mode to Color
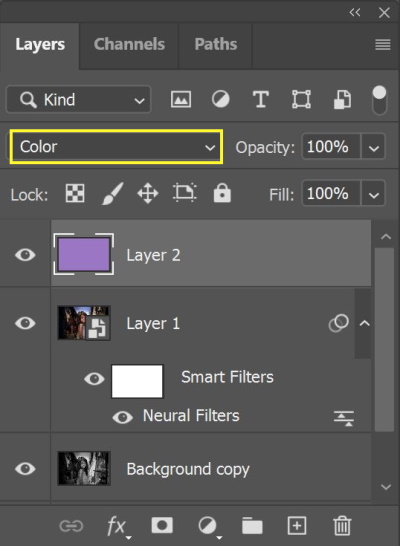
- With the Solid Color adjustment layer selected, click on the New Layer Mask icon to create one.
- On the Properties panel, click on the Invert
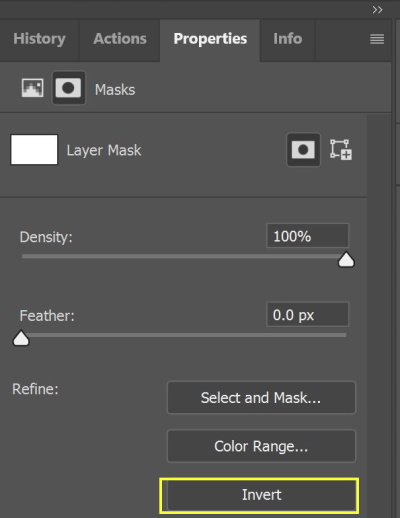
- Use the Brush tool to paint with white (to reveal the new color) on the dress
The result is shown below

Example 5
The same steps in example 4 are followed, and the result is shown below
Photo by Pixabay
Final thought
Although adding colors to black and white photos became a much easier task due to the power of the new colorizing filter from Photoshop, there are some tips that can dramatically improve your workflow even more.
- Use a graphics tablet and large screen: Doing the painting and selecting jobs using a graphic tablet will improve and facilitate your editing job.
- Learn keyboard shortcuts: Save yourself hours by memorizing some common keyboard shortcuts for the brush and painting tools in Adobe Photoshop.
- Be patient: Colorization is a time-consuming process. Realistically capturing undertones in the skin is especially difficult. It is a good idea to use a color photo featuring similar skin tones to use as a reference.
Related posts
How to Change the Color of Something on Photoshop
Thanks for reading, I hope you enjoyed the article, in case you have any questions just drop them below & I will be happy to answer you.
If you enjoy the site, don’t forget to subscribe, we will only inform you when a new article is posted.


Personally, I prefer black and white photos. I think they look pretty cool but I know that there’s others who do not like black and white photos so this article is for them. I will be sure to share this article with friends and family. I am sure that they will appreciate it and pick up a few tips
Thanks for dropping by.
I am an avid user of Photoshop so I was very pleased to run across your article. I had no idea that taking a BW and using the colorize tool was possible. I typically take all my photos in color. I’m going to get out of this mode and start taking more BW’s now that I know this is a feature on Photoshop. I appreciate your step by step instructions as well. Most of the time, I go to Written instructions vs. YouTube. The YouTube videos go Waaay too fast. You seem to have an excellent grasp on Training and Development skills. Nice job! Love the article!
Thanks for your comment, I really appreciate it