If you’re looking for an inexpensive way to achieve high magnification in your photography, you need to know about the reverse lens technique for macro photography. In the previous two posts, I have discussed the use of extension tubes and the best close-up lens for macro photography. They are very commonly used in achieving high magnification which is adequate for amazing macro photography. Now I’m going to explain the third option, the Reverse lens technique, it allows you to achieve the magnification you couldn’t come close to with even more expensive equipment.


What is the reverse Lens technique?
The reverse lens technique is exactly what the exact words said. You mount your lens on your camera backward (with a special adapter). I know it might Sounds crazy, and odd, isn’t? With this technique, you can achieve high magnification.
What Equipment do I need?
For the reverse lens technique, you only need three pieces of equipment: a camera, an adapter, and a lens (preferably with manual aperture control).
-
Adapter (Reverse adapter or ring)
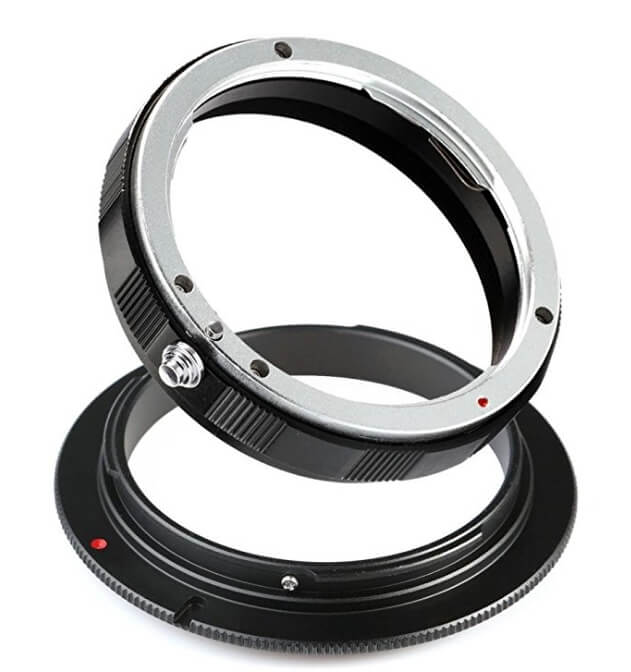
It is simply a metallic ring that has two adaptation mountings, the first is used to mount the ring into your camera body, and the second is used to mount the lens in reverse order.
The macro adapter screws onto the “normal” end of the lens where you would usually attach a UV or polarizing filter. Then you flip the entire lens around backward and attach it to your camera body so the lens is mounted to the camera with the side that usually faces the camera now facing the object you want to photograph. But you have to buy the reversing ring that has the same filter threads of your lens.
The figure below illustrates the mounting sequence.
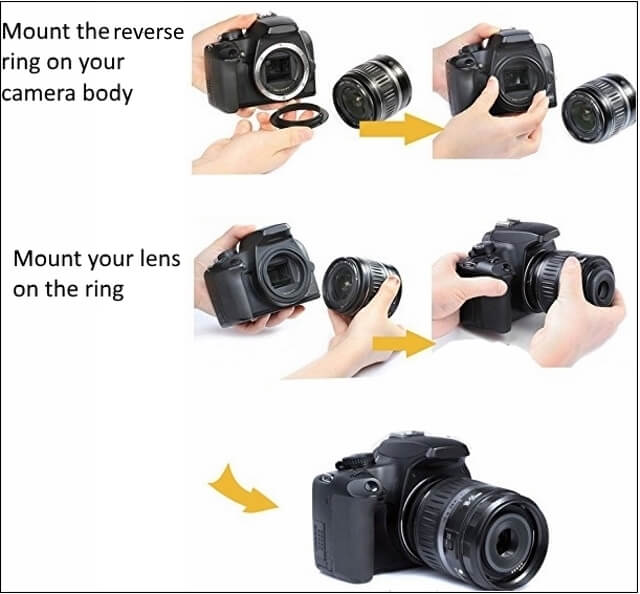
When finishing mounting, you see some parts of your lens that are normally not exposed. All of the pins the lens uses to talk with the camera are visible as well as the internal glass element that moves in and out when focusing. Leaving the lens on in reverse can potentially let dust inside your lens. I highly recommend you use the lens protector cap that comes with your lens to protect it while not shooting. If you plan on using the lens in reverse often, you can buy a bayonet-to-standard filter thread adapter. This lets you screw on a UV type, or another filter, or a lens cap to keep lens elements away from dust and damage. At the end of this post, there is another mounting system that can protect the lens.
-
The Lens
Generally speaking, you can reverse any type of lens you want. But to gain a reasonable magnification, you should select a lens with a shorter focal length. We already know that wide angle lens in a normal mount decreases the magnification of the subject, and telephoto lenses in normal mount increase the magnification of the subject. In the reverse lens technique, the case is quite the opposite. To achieve high magnification, you can reverse a lower focal length lens. When the focal length of the reversed lens is small, the magnification is high. For example, when you reverse a 50mm lens, the magnification is 1X, and if you reverse a lens with 28mm focal length, you get a 3X magnification. The combination of a 50mm lens and an EOS camera with an APS-C sensor gives you near life-size reproduction.
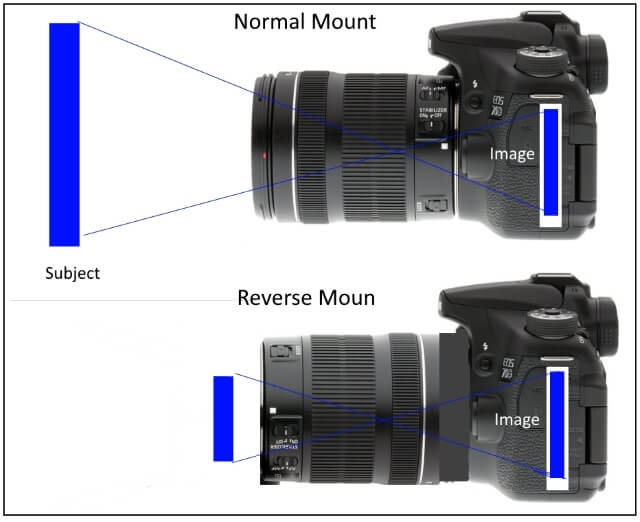
The only drawback is that: how you are going to change your aperture because after reversing the lens, you lost the communication between your camera and lens. When trying to set the aperture, you’ll see the figures ‘00’ in the camera’s viewfinder (or the LCD screen). This indicates that the camera is unable to communicate with the lens. Then how you are going to set the aperture?
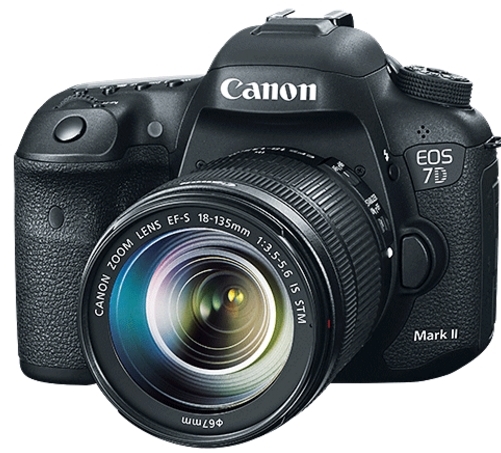
If you are reversing a Canon EF or EF-S lens directly on the camera. The lens automatically set the aperture wide open. This means that you have to take photos at the maximum aperture of the lens where the depth-of-field is very narrow.
One solution is to use an old Canon FD lens (these have an aperture ring on the lens). You can also use lenses from other manufacturers – many lenses from old film cameras have lenses with a ring which alters the aperture.
A lens with an aperture ring allows you to easily set the aperture you want. You can set your focus with the lens wide open. Then stop the lens down when you take the photo. This means you get a brighter image in the camera’s viewfinder and can help you to focus more accurately.

But, if you don’t have a lens with an aperture ring, then how are you going to set the aperture?
Canon EF mount lenses only use an electronic mount, they don’t have an aperture ring that can be used to control the aperture. Normally the lens aperture will be wide open when not attached to the camera. However, there is a trick that you can use to set a lens to a certain aperture:
- Attach the lens to the camera normally.
- Put the camera in Aperture Priority (Av) or Manual (M) exposure mode. Change the aperture setting to whatever you would like to use when the lens is reversed.
- Press the Depth of Field (DOF) Preview button on the camera.
- While still holding down the DOF preview button, press the lens release button, and remove the lens from the camera.
- If you look through your lens, you should now see that the aperture is stopped down.

Camera settings & Focusing
Exposure mode should be set to Aperture Priority or Manual mode. In Aperture Priority mode the camera will set the shutter speed automatically. In Manual mode, you set the shutter speed. This can be particularly useful when shooting with flash, as you can set a fast shutter speed and let the flash illuminate the subject. Also, you can use exposure compensation to override the camera’s settings if necessary.
With a reversed lens, the focusing mechanism on the lens will have little effect on the focus of an image. The focus point is fixed, so you set your focus by moving the camera nearer or further away from the subject until it comes into focus. It is also recommended to mount the camera securely on a tripod, set the focusing ring to infinity, then move the subject, rather than the tripod, backward or forwards until it is in focus (if it is convenient of course)
If your camera has a Live View, use it to focus accurately. With Live View, you can zoom in to see the image at up to 10x magnification giving much greater control than that offered by the viewfinder image.
If you use the Movo reverse ring system (at the end of the post), you have full communication between your lens and your camera, thus you can shot in the normal way! It is really amazing.
My recommended reverse adaptor
The following are two options for my recommended reverse adaptors; you can buy any one of them from my recommended retailer. Personally, I prefer the second option, it saves you a lot of setting time.
K&F Concept EOS-58mm Macro Reverse Adapter Ring Camera Mount Adapter + Rear Lens Mount Protection Ring for Canon EOS EF EF-S Mount
It allows the camera lens to be fitted in its reverse position onto the camera body.
- Makes the lens become a macro lens on the camera body.
- When attached, automatic diaphragm, auto-focusing, or any other functions will not operate.
- This lens mount adapter allows any 58mm lens to become a Marco lens on CANON EOS camera body.
NOTE: This kit is compatible with all 58mm lenses. Please verify your camera’s lens thread size before ordering. Your camera’s lens thread size will be marked somewhere on the lens barrel or printed underneath your lens cap.
Movo Photo AF Reverse Mount Macro Lens Converter for Canon
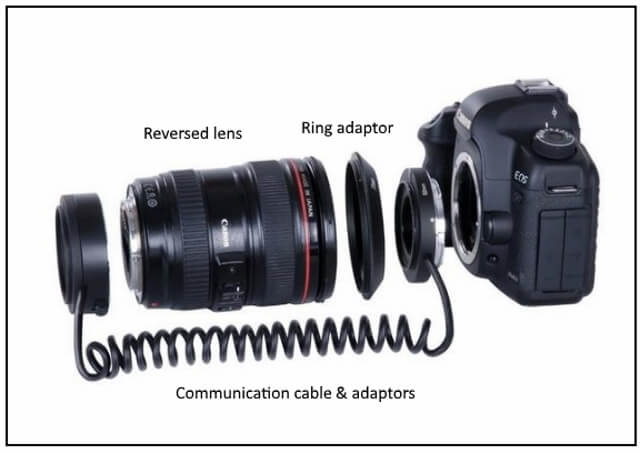
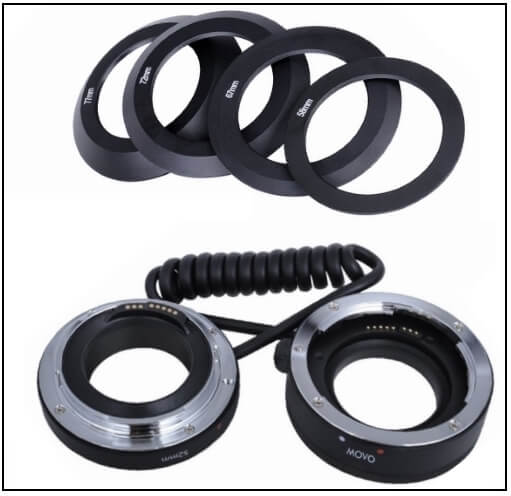
Product highlights
- Converts Your Standard Canon EF/EF-S Mount Lens to an Extreme Macro Lens while maintaining Auto Focus and Metering
- Mount your non-macro lenses in reverse for an extreme macro effect
- Includes adapters for 52mm, 58mm, 67mm, 72mm & 77mm
- Durable aluminum mount
- 1 Year Warranty
Using reversed lenses is a quite cheap method for macro photography. If you already have a suitable lens for reversing, you can buy a reversing adapter from the list above. If you don’t have a suitable lens, old manual focus lenses can be bought pretty cheaply as well. The reverse lens technique can have many different forms: you aren’t limited to have a single lens on your camera. You can have a lens like the 50mm is reversed mounted on the end of another zoom lens. Also, you can use an extension tube or a close-up lens in combination with a reversed lens.
Related posts:
Using Of Extension Tubes In Macro Photography – Your Full Guide!
The Macro Lenses Explained – Samples & Recommendations
Macro Photography Tips And Tricks – Guidelines & Examples
Thanks for reading, I hope you enjoyed the article if you have any questions just post them below & I will be happy to answer you.
If you enjoy the site, don’t forget to subscribe, we will only inform you when a new article is posted.





Hi Amin, wonderful review on Reverse lens technique. When I saw the title, I was wondering how that is even possible, until I started reading your piece line by line. It makes a lot of sense. It is exactly as the name sounds. Often times we desire to get a clear view of some objects but end up getting blurred images. From the technicalities you explained, it looks achievable.Also the pictures which I believed with captured with the reverse technique look so sharp and clear. It is interesting to know that the equipment listed are inexpensive and readily available. Thanks for teaching me a better technique of achieving high magnification in photography.
Thanks for your comment.