

Landscape photography is one of the interesting and rewarding genres of photography, so it’s no surprise that it’s hugely popular. It is a subset of photography that focuses on capturing the beauty of the natural landscapes found outdoors.
Landscape photography aims to take the viewer into the world being photographed and retrieve the feeling of beauty that they might feel if they were standing in the same place as the photographer.
In this article, we will discuss many aspects and types of landscape photography, we will provide a complete guide to help you enhance your skills, and hopefully be able to shoot unforgettable photos. Finally, at the end of the article, we will provide a set of Frequently Asked Questions and their answers.
What is landscape photography?
“Landscape photography shows the spaces within the world, sometimes vast and unending, but other times microscopic. Landscape photographs typically capture the presence of nature but can also focus on man-made features or disturbances of landscapes. Landscape photography is done for a variety of reasons. Perhaps the most common is to recall a personal observation or experience while outdoors, especially when traveling. Others pursue it particularly as an outdoor lifestyle, to be involved with nature and the elements, some as an escape from the artificial world.” via Wikipedia
Types of landscape photography
-
Natural photography
Nature photography covers shooting plants, flowers, deserts, mountain ranges, or even volcanos photographed in their immediate environments. The subgroup of nature photography includes:
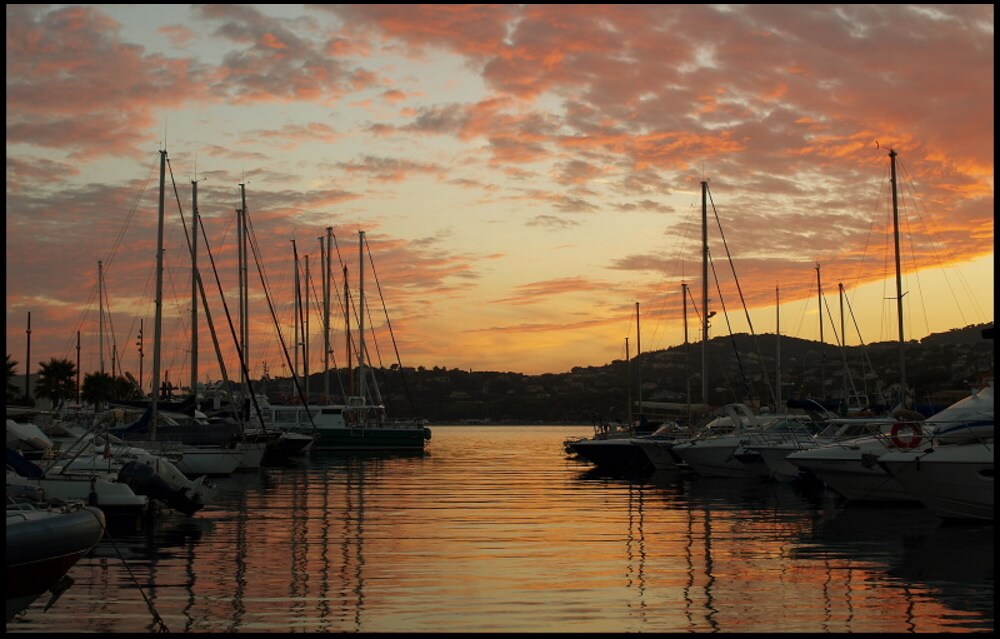
- Seascape Photography.
- Mountain Photography.
- Forest Photography.
- Cloudscape Photography.
- Flower photography
- Waterfalls photography
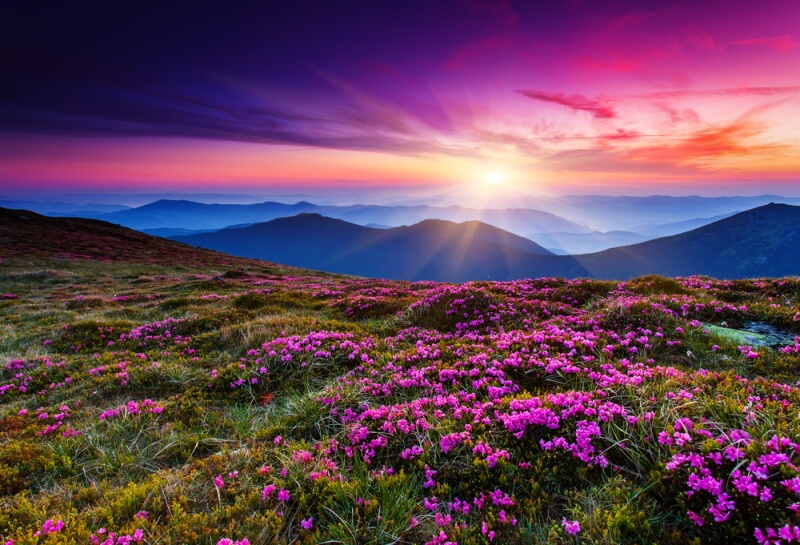
Photo by Depositphotos
-
Urban Photography
Urban Photography documents human-made interventions, structures, and environments, such as towns and other ecological spaces. Urban landscape photography can roughly be divided into three sub-categories.
- Cityscape: This type of photo aims to show a large part of the city. It needs to give a sense of scale to the place.
- Architecture: Stunning architecture is a staple of urban photography. Look for new buildings, statues or bridges for this.
- Urbex: This entails photographing abandoned buildings, or accessing underground tunnel systems. Urbex stands for urban exploration.

Photo by Depositphotos
-
Astrophotography
Astrophotography, also known as astronomical imaging, is the photography or imaging of astronomical objects, celestial events, or areas of the night sky. The following are some typical subjects you can photograph in the night sky.
- Star trails
- The Milky Way
- The Moon
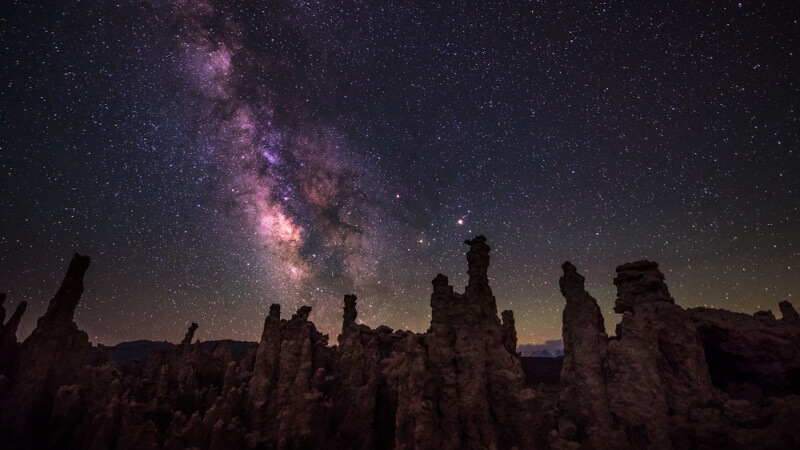
Photo by Depositphotos
Styles of landscape photography
There are three major styles of landscape photography
-
Representational
This style is the most natural and realistic out of all the styles of landscape photography. The approach is capturing the scene as it is, with your choices of framing, and composing the photo.
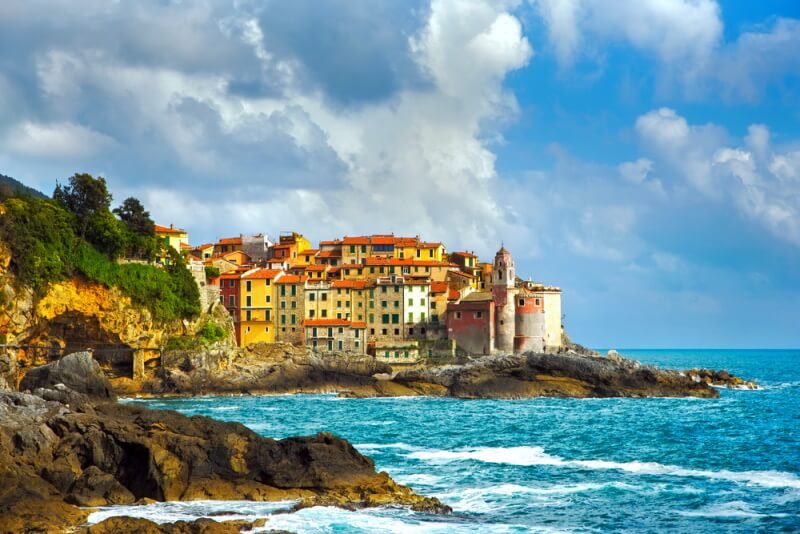
Photo by Depositphotos
-
Impressionistic:
The goal is not capturing the landscape as is, you’re trying to transform a feeling, an impression of the scene into a photograph. Intentionally out of focus, almost painting-like look. The viewer is given the impression of a landscape rather than the true representation of one.
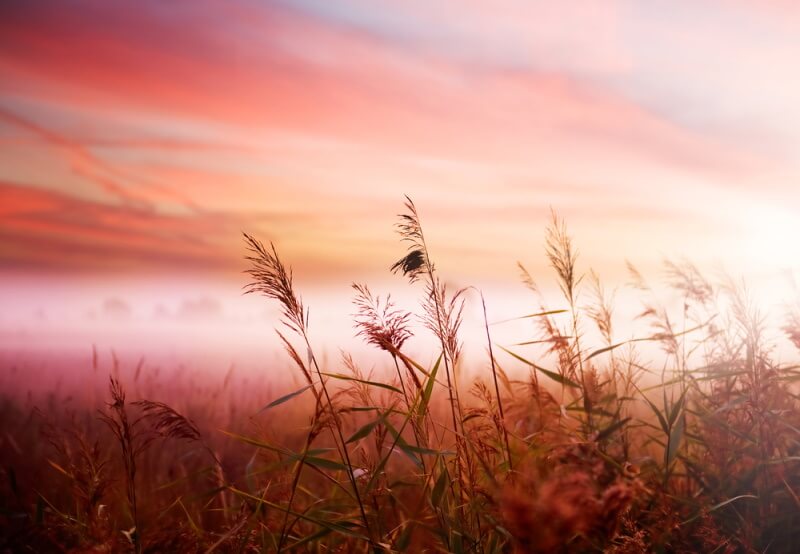
Photo by Depositphotos
-
Abstract:
Abstract landscape photographs use components of the scenery as a main subject. The photographer may place emphasis and focus in an area within the landscape itself, and on something which seems counterintuitive.
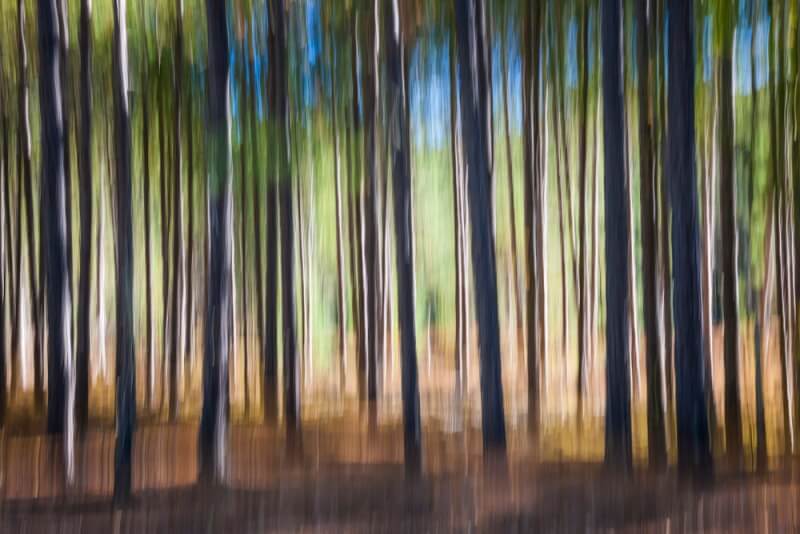
Photo by Depositphotos
Landscape Photography Techniques
There are many photography techniques you can use in landscape photography. Using any one of them will lead to a different style. The following are some of the most popular landscape photography techniques:
-
Long Exposure
Long exposure photography is a technique in which a camera’s shutter is left open for an extended period of time to capture a stationary subject while allowing the movement of any elements in the scene to create a blurred or streaked effect.
Typically, long exposures are used in low-light conditions or when a photographer wants to create a specific artistic effect, such as capturing the motion of flowing water or the trails of light from moving cars.
Using the Long exposure technique can make the look of falling water appears silky, and can flatten the sea. You can also make light trails of moving lights like stars trails or moving car light trails.
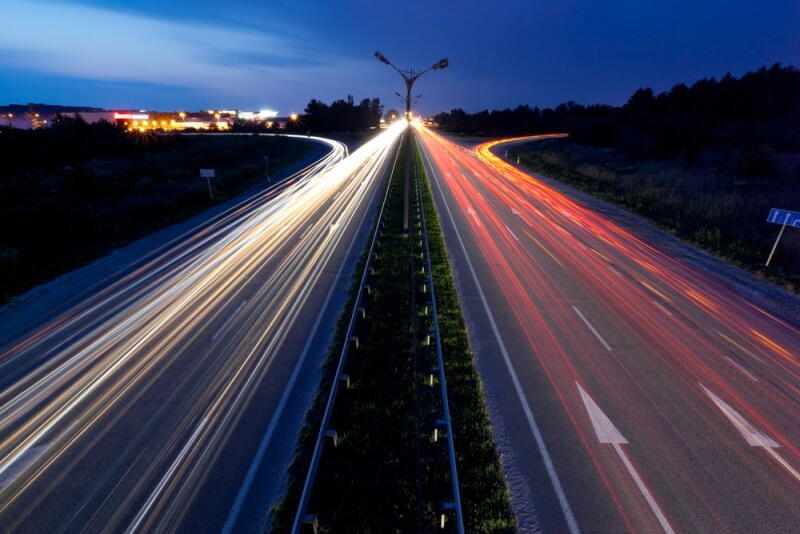
Photo by Depositphotos
-
Panorama
One of the most popular landscape compositions is the panoramic shot. It is used to capture images with horizontally elongated fields of view. Panorama photography is a technique in which a wide, horizontal view of a scene is captured by stitching together multiple images. This technique is used to create a single image that offers a wider field of view than what can be captured in a single shot.
To create a panorama photograph, a series of overlapping images are taken using a camera or a mobile device, while rotating the camera from left to right (or right to left). The images are then stitched together using specialized software to create a seamless, panoramic image.
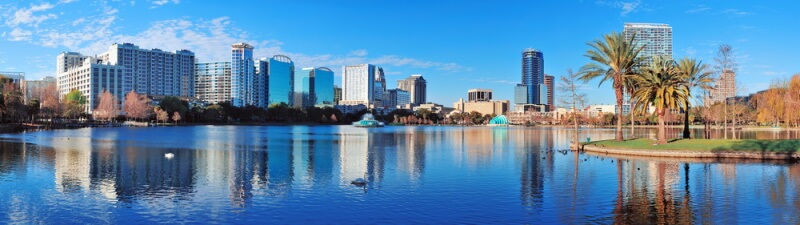
Photo by Depositphotos
-
Crystal Ball Photography
A popular form of photography in recent years involves the use of a Crystal Ball. This is a glass ball that works as an external lens optic, this can be handheld or put on the ground. The shots taken using a crystal ball look very similar to those taken by the fisheye lens
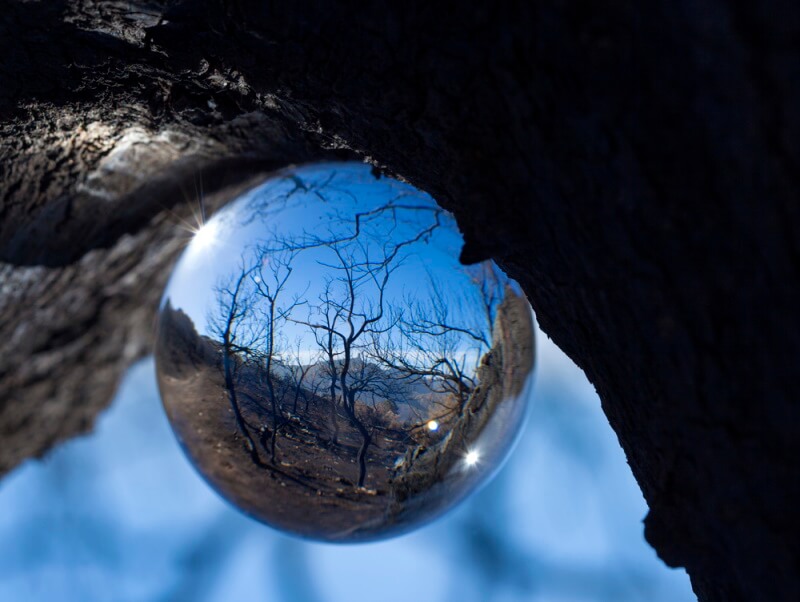
Photo by Depositphotos
-
Double Exposure
Double exposure is a photographic technique that involves combining two or more images into a single photograph. This technique was originally done by exposing the same film multiple times, but now it can also be done through digital image editing.
In a traditional double exposure, the photographer exposes the film to one image and then exposes it again to another image, resulting in two or more images overlapping on a single frame. The resulting photograph will have a unique and dreamy quality, with elements from both images blending together.
In digital photography, double exposure can be achieved by overlaying two or more images in photo editing software and adjusting the opacity of each layer to create a blended effect. This technique can be used to create surreal and artistic images by combining images with different colours, textures, and subjects.
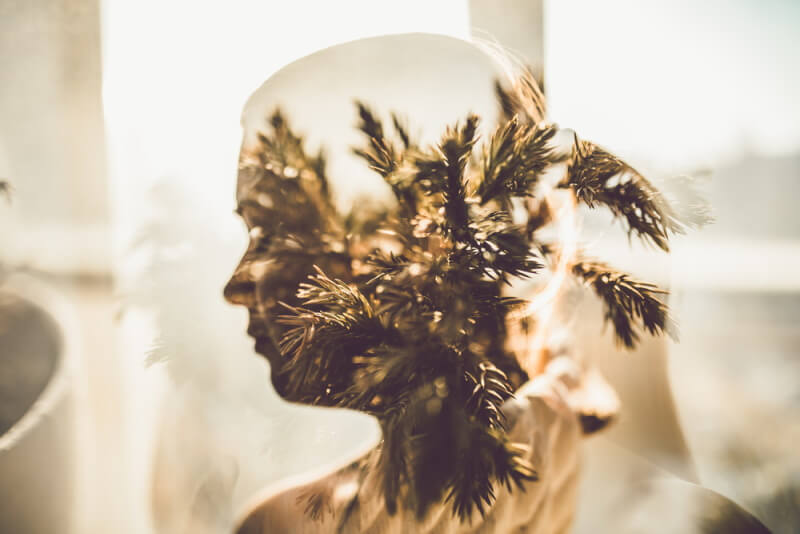
Photo by Depositphotos
-
Silhouettes
Silhouette photography is a technique where the subject is captured as a dark shape or outline against a brighter background. This is achieved by exposing a brighter background, which causes the subject to appear in a dark shape without any detail.
Silhouette photography is often used in portrait, wildlife, and landscape photography. It can create a striking and dramatic effect and is a great way to emphasize the shape and form of the subject. Silhouettes can also convey emotion or mood, as the lack of detail leaves room for interpretation.
To create a silhouette photograph, the photographer should position the subject against a bright background, such as the sky during sunset or sunrise, or a bright light source. The camera should be metered for the bright background, which will cause the subject to appear as a dark shape. It’s important to ensure that the subject’s outline is distinct and recognizable, as the lack of detail can make it difficult to identify the subject.
A great landscape composition is layering silhouetted mountains against one another. Another great option is to silhouette a person or object in a sunset sky.
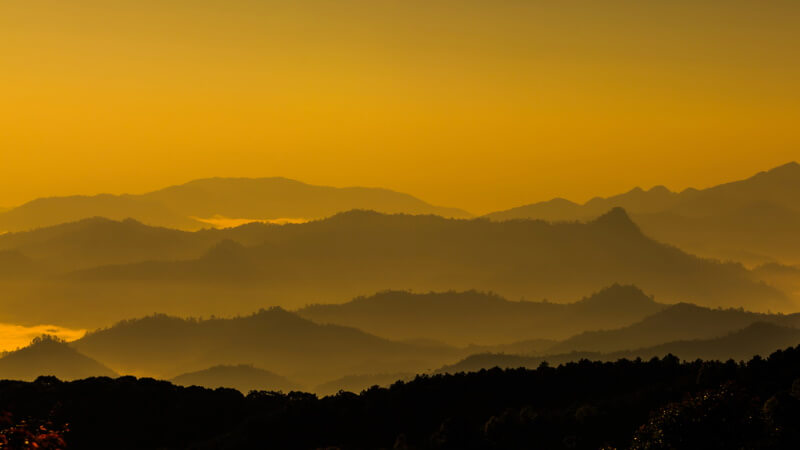
Photo by Depositphotos
How to Shoot Landscape Photos
-
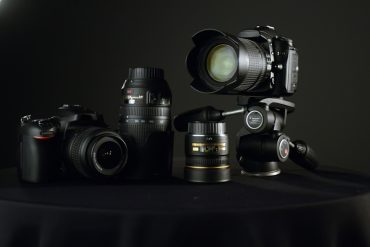
Use a Good Camera
A DSLR or mirrorless camera is the ideal camera type you can use for shooting landscapes.
While today’s most advanced smartphone cameras are able to produce pretty nice landscape shots, they do not catch up with the quality of professional cameras. A DSLR or mirrorless camera has a larger and more improved sensor size that produces higher-quality images. In addition, they have more settings that allow you to fully customize the exposure of your photos. Finally, to catch the widest possible views with your lenses, go for a full-frame camera with a 35mm sensor.
-
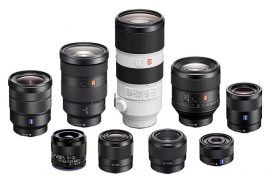
Select your lens
To take amazing landscape photos, you need to use the right equipment. The most important pieces of equipment that you should look at are the lenses to help you realize your creative vision. Four main types of lenses are used commonly in landscape photography the choice depends on the type of landscape you are going to shoot.
A lens is characterized by two main factors, its focal length and aperture.
Concerning the focal length the following lens type can be used in landscape photography:
-
Wide-angle lenses
Wide-angle lenses are the most popular lenses for landscape photography. Their focal lengths usually are less than 38mm. they allow you to capture a large range of views and a long depth of field, which is basically what most photographers want when they set out to photograph landscapes.
-
Standard zoom lenses
Standard zoom lenses usually range from 24-70mm. it provides a similar field of view to the human eye (around the 35-50mm range). So, you can create images that are more realistic and catch the eyes of your viewers.
-
Telephoto lenses
Telephoto lenses usually fall within the 70-200mm range. They’re great for situations when you want to demonstrate a sense of scale, as they allow you to compress the scene. They are also useful when you are unable to get closer to your subject.
-
Prime lenses
Prime lenses are those with a fixed focal length – that is, they don’t have any ability to zoom. They are most often used for certain applications, such as photographing landscapes at night or when shooting stars.
Concerning the lens aperture, you need to look for a lens with a fixed aperture. Although fixed aperture zoom lenses may be expensive, they are more versatile in terms of applications.
While there is no best aperture for landscape photography, the aperture of your lens should be f/4 or greater. A lens with a fast aperture is particularly useful in low light conditions, such as when shooting sunrise and sunset. You’ll also need a lens with a fast aperture to capture the stars, moon, and Milky Way at night.
-
Plan for the proper shooting time
Photography is all about the quality of available natural light. A good photo needs soft and diffused natural light. Your captured photos will be dramatically different when they are taken at different times of the day. There are two known times in the day that offer the most amazing light quality: Golden Hour and Blue hour.
The golden hour is also known as the magical hour, when the Sun is close to the horizon on a sunny day, its light appears warmer and softer which is very suitable for amazing landscape shots.
On the other hand, the blue hour refers to the darker stages of morning and evening twilight, when the Sun is quite far below the horizon, coloring the sky deep blue, it is also a favorite time among landscape photographers.
-
Set your camera properly
The following are the main camera settings in landscape photography:
-
Manual camera mode:
You may use the manual camera mode to get full control and to allow you to set the aperture, shutter speed, and ISO.
-
Aperture around f/8 or greater:
The high aperture keeps the entire landscape in focus without blurring details, while the white balance lets the camera capture the entire color spectrum. Remember, a balanced setting is important when shooting colorful landscapes like sunrises and sunsets.
-
Shutter speed:
It is equally important when you’re shooting moving landscapes like running water or if you’re shooting without using a tripod use a high shutter speed (for example 1/100 or more) to avoid camera shake and hence blurred photos.
When using a tripod, for a truly unique shot, use a long shutter speed to capture movement in waterfalls, waves, or even star trails.
-
Low ISO:
It is recommended to use a low ISO level to avoid noise in your photos, however, if you need more light to balance your exposure increase ISO carefully
-
White balance:
Use whatever gives you a good preview (often just Auto), or set it to “daylight,” “shade,” or “cloudy”
-
Autofocus:
Using the autofocus option could be acceptable in good conditions, however, if autofocus is not giving you a sharp result, set your camera lens to manual focus. And focus manually at 100% magnification in live view, with a tripod. For further reading, you may check my article “Where To Focus In Landscape Photography”
-
Make Histogram Visible:
Once you’ve set the aperture and ISO values, you may use the histogram to check whether your image is properly exposed or not. If the histogram is displaced to the extreme left, it means the image will be too dark (underexposed). Conversely, an overexposed image will have the histogram shifted way to the right. Try to keep the histogram centered.
-
Use a tripod & remote shutter release
To avoid the camera shake you need to use a tripod and remote shutter release, especially when you are shooting long shutter speed photography and astrophotography.
Using a tripod will stabilize your camera, and using a remote allows you to maximize image sharpness by making sure no camera shake is introduced by physically touching the shutter button.
-
Use polarizing and neutral density filters
Using filters can improve the quality of your photos to a higher level. The following two filters are used in landscape photography:
The polarized filter blocks random light waves from passing through your lens, creating a clearer image. It is typically used in front of a camera lens in order to reduce reflections, reduce atmospheric haze, and increase color saturation in images.
The ND filter allows you to use a longer shutter speed than otherwise possible to soften the appearance of turbulent water and blur the moving water in a waterfall. It is essential in long shutter speed photography.
-
Consider the composition
One of the most important tip you can get is to pay attention to your image composition. The same basic image can change drastically when photographed from slightly different vantage points.
There are a few compositional rules that you can follow to ensure that you get an image that will catch the interest of your viewers. Some of the most common rules include the Rule of Thirds, the use of leading lines, and incorporating balance in your images.
You can be more creative in composing your landscape photos by using the negative space technique in some situations.
-
Shoot in RAW format to allow for efficient editing
Shoot in RAW image format, rather than JPEG format, to preserve all image information and help you capture higher-quality images. Otherwise, shooting in JPEG image format will compress the files, resulting in fewer image data.
By selecting RAW as one of your go-to camera settings, you’ll be able to edit your photos using post-processing software to apply some color enhancements, correct white balance, and other necessary digital adjustments until you get your desired results.
Frequently Asked Questions
The following is a list of the most Frequently Asked Questions about landscape photography, and their answers.
Q1: What camera settings should I use for landscape photography?
- Use a low ISO setting to reduce noise and maintain image quality
- Use a narrow aperture (e.g. f/8 to f/16) to ensure a wide depth of field and sharpness throughout the image
- Use a slower shutter speed to capture movement and create a sense of motion in the image
- Use a tripod to prevent camera shake and allow for longer shutter speeds
Q2: What time of day is best for landscape photography?
The golden hours of sunrise and sunset often provide the best lighting for landscape photography, in addition, the blue hour after sunset or before sunrise can also provide interesting lighting and colors.
Finally, Cloudy or overcast days can provide soft, diffused lighting that can be ideal for certain types of landscapes
Q3: What lenses are best for landscape photography?
- Wide-angle lenses are often used for landscape photography, as they allow for a wider field of view and can capture more of the scene
- Telephoto lenses can also be used to compress the perspective and create a different look and feel in the image
Q4: How do I compose a landscape photograph?
- Use the rule of thirds to place key elements in the frame
- Use leading lines to guide the viewer’s eye through the image
- Consider the foreground, middle ground, and background elements to create depth and interest in the image
- Look for patterns, textures, and contrasting colors to add visual interest
Q5: How can I capture sharp landscape images?
- Use a tripod to stabilize the camera and prevent camera shake, together with a remote or timer to prevent camera shake when pressing the shutter button
- Use a narrow aperture (e.g. f/8 to f/16) to ensure a wide depth of field and sharpness throughout the image
- Use manual focus to ensure the subject is in focus
Q6: Can you give me some tips for capturing great landscape photographs?
- Scout out locations beforehand and plan the shot
- Use interesting foreground elements to create depth and interest
- Be patient and wait for the right lighting and conditions
- Experiment with different angles and perspectives
- Pay attention to the details and look for unique and interesting compositions
- Use filters to balance the exposure (e.g. neutral density or graduated filters)
- Shoot in RAW format to allow for more flexibility in post-processing
- Use post-process software (Photoshop) to enhance your photos.
Q7: What are the common mistakes most beginners photographers do?
- Overexposure or underexposure of the image
- Poor composition or lack of attention to details
- Overuse of filters or post-processing effects
- Not paying attention to the background or foreground elements
- Not taking the time to plan the shot and waiting for the right conditions
Related posts
Different Types Of Landscape Photography
Where To Focus In Landscape Photography
Best Time To Take Landscape Photos- Golden And Blue Hour
Thanks for reading, I hope you enjoyed the article, in case you have any questions just drop them below & I will be happy to answer you.
The featured Photo by Depositphotos
If you enjoy the site, don’t forget to subscribe, we will only inform you when a new article is posted.


I enjoyed your article; it was very helpful. I will share it with my daughter-in-law, who is into photography. I’m sure she will love it. I learned about the golden hour and blue hour. I hope my photos will be better when I try a couple at different times of the day. This is an excellent article for someone looking to take better pictures and improve their skills. Thank you.
Glad you liked the article, thanks
This is really helpful! It reminds me that understanding the basics is important for any kind of art, including photography. I learned that using a tripod can make a big difference in reducing camera shake. I’m interested in learning more about how to use depth of field and aperture settings to create a sense of depth in my photos but would really like that when using my phone. I’m not really experienced with a professional camera, so I tend to use my phone more often. Overall, this is a great guide for anyone looking to improve their landscape photography skills
If you want to know more about depth of field, you may check my post “How to control DOF“, and thanks for the comment.