

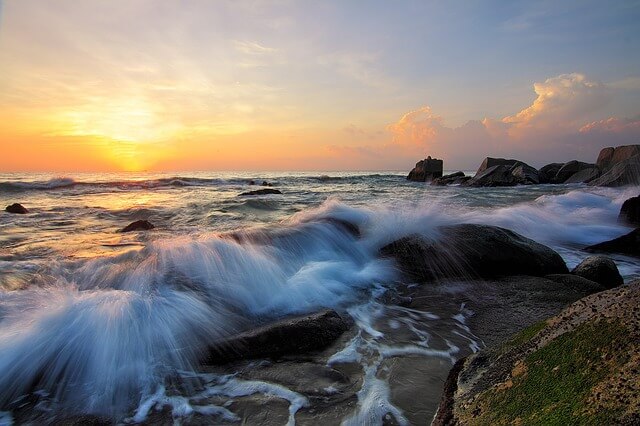
Taking images of beautiful sunsets, and sunrises is a popular subject for landscape photography. Most of the photos are going to be amazing because the photographic conditions are the best: the soft light is available, and the color temperature is fantastic. The setting is a perfect environment for amazing photographs which you shouldn’t miss out. It’s what you do with them that are going to make the difference between photos you’ll want to share and those you’ll probably delete. So, in this post, we are going to know more about how to best take advantage of sunrise and sunset opportunities. But before we begin, there is a small remark I would like to mention, there is a slight difference in the appearance of light at sunset versus what you’ll see at sunrise. Early morning light tends to be cooler (higher blue) than light in the late evening, which leans toward more warm color castings consisting of orange and red. For more detailed information, you may check my post about color temperature and white balance.
Now and we’re going to talk about how you can master sunrise and sunset photography and become a Pro.

Tips for taking Sunset and sunrise photos
Get ready for the action:
There are some important activities that you should plan ahead before actually taking your photos:
-
Scout the Location
Look for interesting places where you might not only be able to see the sun track all the way down but also where there will be opportunities for shots that include foreground elements and silhouettes. Sunsets only take half an hour or so you want to think about these elements before they start or you might miss the shots you’re after. Go to the location in broad daylight before the shoot, and ensure your view of the horizon will be unobstructed and free of any hazards and make sure it is out of the way of road and foot traffic, where you’re unlikely to be disturbed.
-
Check the weather forecast
If your shooting time coincides with an approaching or recently-ended storm, the results can be staggering. Rain and storm clouds can add a dramatic layer of dimension to the scene.
-
Know the exact time
You have to check the perfect time to shoot by using an online tool or smartphone app to determine precise sunrise and sunset times for your exact location. One of the useful online sites where you can get an application for your smartphone either Android or ISO is The Photographer’s Ephemeris. And remember that the most spectacular colors and tones last for only about a half-hour during the entire sunset or sunrise.
-
Check your camera gear
You will need a Camera and a suitable lens. Beautiful landscapes can be captured using a 35mm or 50mm focal length (for sensors with a 1.6 crop factor – 56 to 80mm on a full-frame system), a wide-angle lens is preferred, including any zoom lenses that can capture a length of 25mm and below (40mm on a full-frame system). A 24-70mm lens is my favorite for this activity, if you want to get up close, you may use a 70-200mm telephoto or larger lens. Also, prime lenses with those focal lengths have a better chance of catching an even sharper image.
Tripod, and, remote shutter release. Sunrises and sunsets are potentially low-light situations (depending on what part of the sunset you’re trying to capture) and may require long exposure times. , so you want a steady base for your camera to reduce the possibility of camera shake during exposure times. Exposures of several seconds are common in shooting sunrise and sunset photos.
Set your camera
It’s more important than ever before to get your camera settings right while shooting the sunrise. You need to ensure that your pictures come out to be the best possible.
-
ISO setting:
It’s highly recommended to use the lowest potential ISO for the ambient light since it ensures the image is free of noise. Use ISO 100 or 200.
-
The Shooting Mode:
The aperture priority mode will work the best for you while shooting the sunrise. You’ll get total control over the depth of field this way, which comes quite helpful when photographing both sunrise and landscape. This setting allows the camera to set the shutter speed for you.
-
Where to Focus
Usually focusing shouldn’t be too much of a problem. Just let your camera use its automatic focusing mode. However, sometimes the autofocus will not work when you point at the sky. In that case, focus on a distant object instead of the sky. There is an interesting post about where to focus on landscape photography, I suggest that you check it.
-
The Exposure Compensation
Your camera will automatically increase its exposure since it ‘thinks’ that the scene of sunrise must be brighter, especially if the sun has left the horizon. While the sun may be quite bright, you should still expect dark places on your image. As your photoshoot goes on, it’s recommended that you evaluate your pictures constantly. If you see that your image on the LCD monitor appears brighter than the scene in front of your eyes, just rely on exposure compensation to reduce the exposure.
-
White Balance
Sometimes you might notice that the colors you see on your camera’s LCD screen are not as deep or vivid as what you see with your eyes. In those cases try changing your camera’s White Balance setting to cloudy or shade. That setting will make the color tones in your images warmer.
-
Use the RAW file type
You want to go home and post-process your image to produce something really sweet. Shooting in RAW extends your editing capabilities. With the RAW file type, you also get the benefit of a bigger file size, you can easily print much bigger prints with the same resolution.
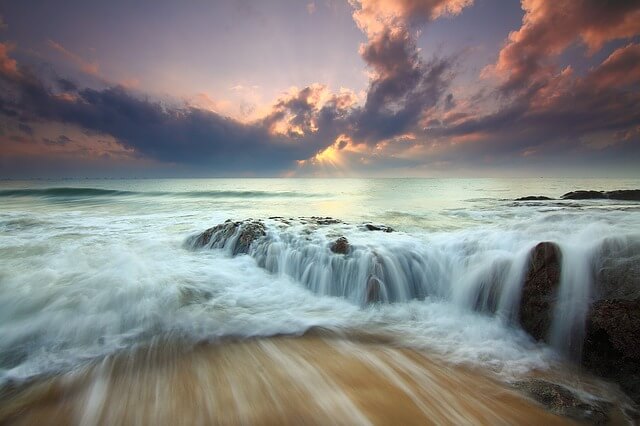
Look for an interesting composition
One of the most common errors in shooting sunsets or sunrises is composing the horizon exactly in the middle of the photo. While this can work in some cases, it normally causes a bit too much symmetry and can make the picture uninteresting. You may use the third rule or the golden section for better composition. Compose the shot to include more of the most dramatic scenery. If you have an angry, cloudy sky that accentuates the sunlight, adjust the horizon to the lower 2/3 of the scene. If you have an interesting foreground or landscape below the sun, and a less-intriguing sky, put the horizon at the bottom 2/3 of the image.
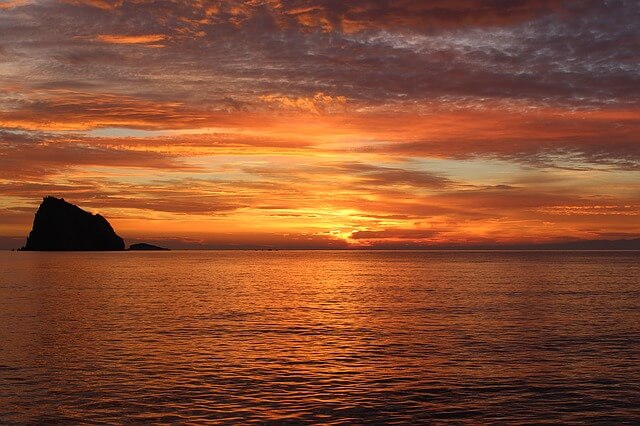
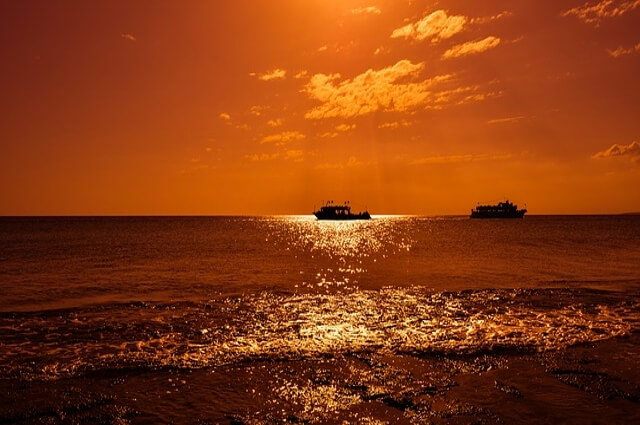
Consider silhouette
Shooting sunrise and sunset photo is very appropriate to use the silhouette technique. Dark underexposed areas in the scene may create a nice contrast with the brighter colors in the sky. Trees, people, or buildings silhouetted against the colorful sky can add depth to your photo. This is a common trick used by professional photographers. The photos below may illustrate the idea.
Consider HDR photos
HDR (High Dynamic Range) photography is perfect for sunrise/sunset shots, due to the high contrast range when you are shooting into the sun. The HDR photo is produced by taking three consecutive photos at different exposure setting. One photo is taken at normal exposure, the second at overexposure, and the third at underexposure. The three photos are then blended using special software and produce an HDR photo.
You may check my reviews of the well-known software for processing HDR photos.
The Best HDR Software- Photomatix Pro 5
Aurora HDR 2018 For Mac and PC
Safety consideration
When you are looking directly at the sun, this may cause harm to your eyes. Even looking through the lens of your camera with your naked eye is also risky. Moreover, your camera may be damaged too if you point it right at the sun. So remember to wear sunglasses and never stare right into the sun.
Sunrise photography is an interesting experience you should definitely try at least once; you’ll get breathtaking shots, which you can use to impress your clients and friends. The following short video that contains sample photos of sunrise and sunset photos, feel relaxed and enjoy it!
Thanks for reading, I hope you enjoyed the article if you have any questions just post them below & I will be happy to answer you. Feel free to share this entertaining post with your friends on social media.
If you enjoy the site, don’t forget to subscribe, we will only inform you when a new article is posted.


Hi Ehab!I recently bought a Canon T6 Rebel DSLR camera and have been having a hard time understanding how to control depth of field, especially in landscape photography. Your article on sunset and sunrise photography helped a lot and the example pictures were amazingly beautiful! After reading your article, I think I’ll experiment more with aperture priority mode. I may also need to invest in higher quality lenses than the kit lenses that came with the camera!Overall, it is a very informative article, especially for a beginner like me.
Thanks for the comment, I suggest you check my post “How To Control DOF Of Your Photos – Shallow Depth Of Field Vs Deep Depth Of Field” for more information about DOF.
Thank you AminAt this rate, if I continue following Hashem’s lectures and articles, I’ll open a photo studio. This simplicity in all his articles is really great. These tips on how to take sunset and sunrise photo is another angle in his photography’s education to his followers.With these tips, even a seven years old would be able to make this happen with ease.Thank you once again for your education on photography, Amin
Many thanks for your kind comment
Taking the perfect shot can be really awesome. Sometimes as was stated in this post we can be able to plan for that special occasion where we can get that perfect shot but other times it just happens and you just find yourself in a location where the scene is just amazing and if you are lucky you would have your camera with you. I guess this is what differentiates some professional photo takers as they are always with their cameras just in case they are in a scenario whereby they have to take a picture.
I agree with you, sometime you may take some shots without previous planning, but believe me to get an amazing one you have to prepare yourself and plane for the shot. Thanks for your comment.
Thanks for this informative article, I love your explanation on taking the best best sunset photos. I love taking pictures of the sunset anytime I’m on beach I have a collection of them in my home, but the problem I’m having is that most of the photos aren’t as clear as its suppose to, does the beach have any effect on photos?
Thanks for the comment, I think the beach has nothing to do with the quality of your photos, just keep practicing, wish you all the best.
That is what I called natural photography. It what we the lovers of dimensional images should appreciate and practice. This landscaping is the bomb in order to make photos of high quality with good camera in mind. I think with tech advancement in camera and lens optimisation, there no excuse for poor picture quality that i s bereft of natural appeals.