


When confronted with a sizable collection of images necessitating uniform adjustments, individually sifting through each one becomes impractical. This approach drains both time and energy.
At times, you might encounter a scenario where an extensive photo folder awaits your attention. Tasks like resizing to specific dimensions, embedding your brand logo for marketing, exposure refinement, color correction, or applying artistic effects could be in order. In such instances, the optimal solution involves seeking a tool capable of automating these edits.
Irrespective of the editing complexity or image count, leveraging batch editing tools empowers you to streamline the editing workflow. This not only preserves time but also enables you to channel your efforts into other essential undertakings. If you’re looking to streamline this process, consider the advantages of batch editing photos in Photoshop for a seamless and efficient approach.
Definitions
First, we need to define some terms. There are two key components to automate your workflow in Photoshop: Actions and Batching.
Actions
Actions are mainly the recorded steps you would like Photoshop to repeat and can be executed on a single photo. For example, you can make an action to crop or resize your photo to a certain dimension.
Batching
Batching is the process of using the Batch function to repeat an Action on multiple photos, i.e. to crop many photos in one session.
Batch Edit Photos in Photoshop
In the following paragraphs, we will present you with three examples to automate photo editing resizing, adding a frame, and adding a watermark to a batch of photos.
Example 1: Batch Resize Images
In the following steps, I will show you how to create an action on a photo to resize it to a new smaller width of 640 pixels. After finishing recording the action and testing it, we will use the batch command to run and apply this resizing action on a folder that contains many photos.
To keep ourselves organized, we arrange all the images we need to resize in one folder and name it “Original”. We create another folder to hold the processed resized photo and name it “Resize 640 JPEG”.
We are using Photoshop CC, but this process will work in older versions of Photoshop too.
Step 1: Create a resize action
- Open up one of the images in Photoshop
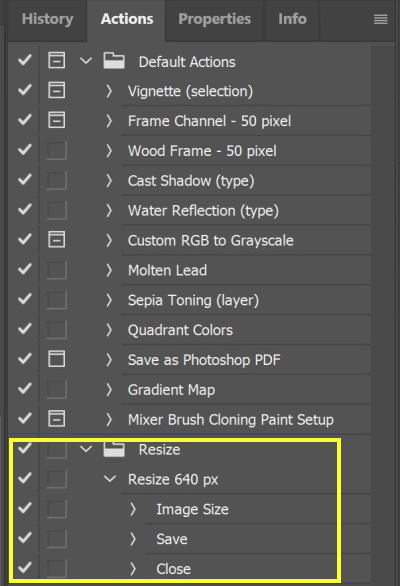
- Click the actions panel, (If you can’t see it, go to Window and click Actions).
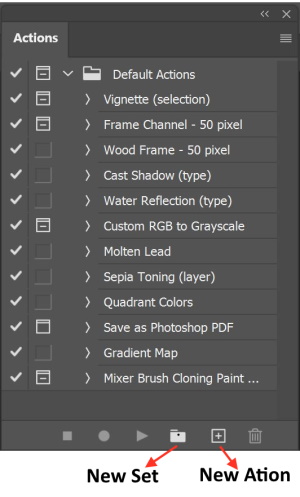
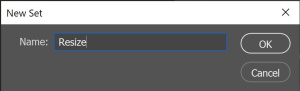
- Create new sets by clicking the folder icon, and naming it “Resize”
- Click the new action and name it “Resize 640 px”
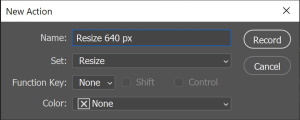
You can create a shortcut to make the action easier to perform; you can do so by choosing a function key from the drop-down menu, and checking shift and/or command. You can also color-code the action if you want to.
Once you’ve chosen the name of the action, the set, the shortcut, and the color, you now need to record your action.
- Now begin to record your action, by pressing record.
- Click Image > Image Size to bring up the Image Size window
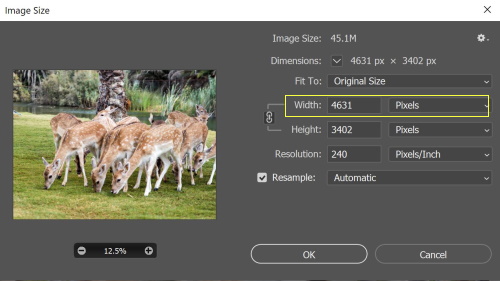
- Change the width to 640 pixels, press OK
- Click File > Save As, and then choose your destination folder “Resize 640 JPEG” folder. Keep the file name as it is. Click “Save”.
- Choose your image options, and then click “OK“.
- Close your image
- In the actions panel, click the square ‘stop‘ icon next to the red record button.
Your action should now appear in your actions panel.
It is important to test the action before you attempt to carry it out on multiple images to make sure that the action is working probably and with no error.
Open another image that you would like to resize, and then select your new action “Resize 640 px”, then click the ‘play‘ icon. Your image should disappear from your window, but you should now find it, resized, in your “Resize 640 JPEG” folder.
Step 2: batch processing – resizing multiple photos
We are going to batch process multiple photos to resize them all. To do this, follow these steps:
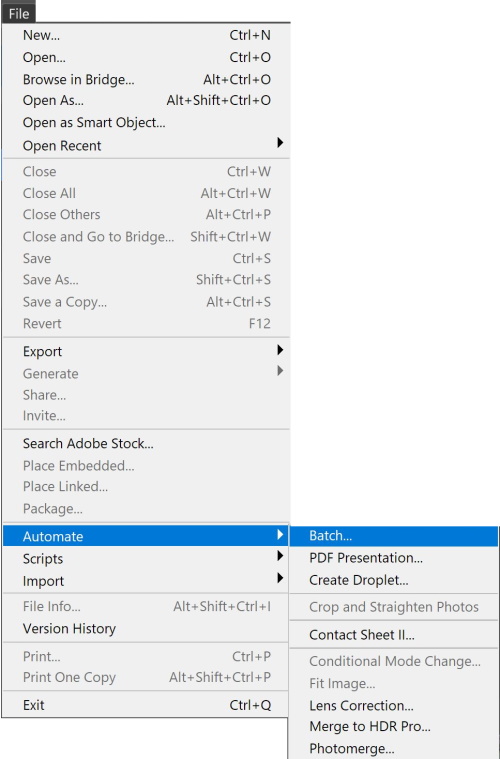
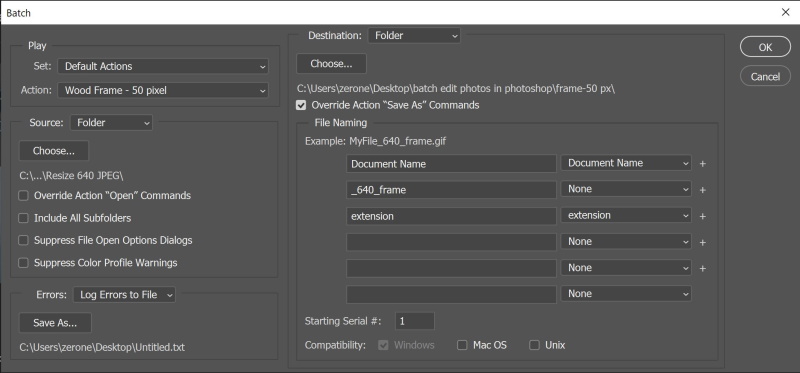
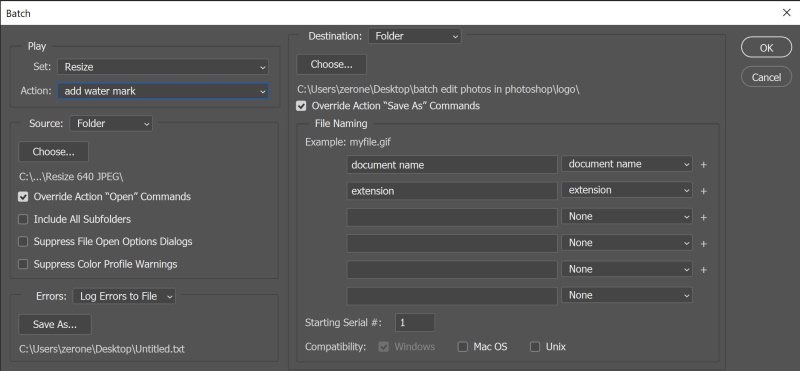
Open Photoshop, then go to File > Automate > Batch.
The Batch window will show up.
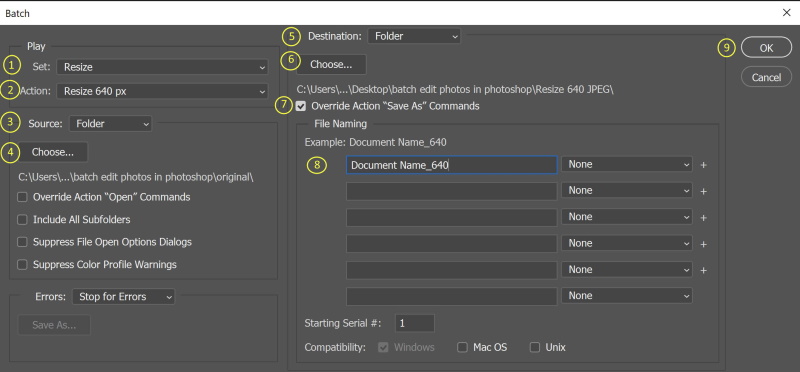
Under the Play heading:
- Choose the set that you created your action in ”Resize”
- Choose your action “Resize 640 px”
Under the Source heading:
- Set the source to Folder
- Press choose, select the source folder “Original”
Under destination heading
- Set the destination to Folder
- Press choose, select the destination folder “Resize 640 JPEG”
- Check “Override Action “Save As” Commands“. (When this option is checked, files will be saved to the destination folder only by “Save As” steps in the action. If there is no “save” or “save as” step in the action, no file will be saved)
- type in the extension
- Click OK.
Now, you should find all of your images, resized, in your “Resize 640 JPEG” folder.
Example 2: Batch Add wooden frame
In the following steps, I will show you how to modify an existing action. Photoshop is packed with some default actions, one of them is called “Wood Frame -50 pixel” which will add a wood frame to your photo.
After reviewing the action, we discover that the action needs to be edited by adding save and close steps. Therefore, we create a new folder to hold the processed framed resized photo and name it “frame-50 px”.
Step 1: Modify the “Wood Frame -50 pixel” action
We will modify the action in the following steps
- Open up one of the images in Photoshop
- Click the actions panel
- Choose the “Wood Frame -50 pixel” action, and expand it if needed.
- Go to the last step in the action
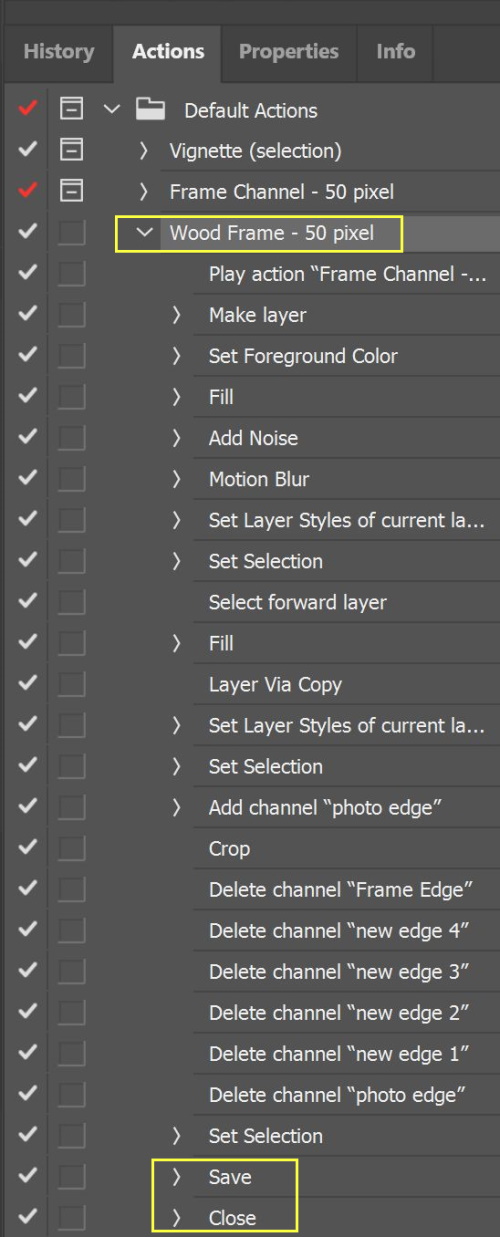
- Press the record icon
- Click File > Save As, and then choose your destination folder “Wood Frame -50 pixel ” folder. Keep the file name as it is. Click “Save“.
- Choose your image options, and then click “OK“.
- Close your image
- In the actions panel, click the square ‘stop‘ icon next to the red record button.
Step 2: batch processing – adding a frame to multiple photos
Follow the same steps mentioned in example 1 but with different source and destination folders, as shown below.
Now, you should find all your images have a nice wooden frame
Example 3: Batch Add Water Mark
In the following example, we will explain how to add your watermark to multiple photos. We will carry out the same procedure: first, record your steps in an action, and then apply the batch command to repeat the action on multiple photos.
We created a watermark file, and named it “logo2”. The file should be stored in PNG format because it has a transparent background. A shown below.

In addition, we created a folder to receive the processed photos and named it “logo”.
Step 1: Create an Add watermark action
- Open up the watermark file “logo2” in Photoshop
- Click the actions panel, (If you can’t see it, go to Window and click Actions).
- Choose the set “Resize”
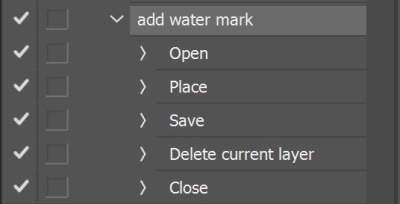
- Create a new action and name it “add water mark”
- Press the record icon to start recording
- Open up one of the images in the folder “Resize 640 JPEG”
- Click file > Place Embedded
- Click file > Save as (and set the output folder)
- Click the delete layer
- Click the Close icon
- Click Stop, to stop recording the action
The action steps are shown below
Step 2: batch processing – adding watermark to multiple photos
Follow the same steps mentioned in example 1 but with different source and destination folders, as shown below.
Now, you should find all your images with a watermark
Conclusion
Using actions and batching command in Photoshop offer a great option when dealing with mutable photos that need repeated editing steps. Maybe the only drawback of this technique is that creating an action is a tricky task and needs some experience to make it versatile so it could be applied to different photos. However, the good news is that there are many readymade actions available on the market ready for use.
Related posts
What Is Photoshop Action- How To Install And Use
How to Crop Pictures in Photoshop
10 Best Photoshop Actions for Landscape Photography
How to Print a Photo- Here’s What You Need To Know
If you are interested in reading more about post-processing tips and tricks, you may check our photography editing articles.
Thanks for reading, I hope you enjoyed the article, in case you have any questions just drop them below & I will be happy to answer you.
The featured image by Ehab Amin
If you enjoy the site, don’t forget to subscribe, we will only inform you when a new article is posted.

I’ve been using an inferior program for my photo editing for years, but I’ve been looking at upgrading to Photoshop recently. I have been trying to figure out if it’s worth the financial investment in the product and if it will be worth the time to learn how to use it proficiently. It’s really helpful to know that the software can do all of these types of jobs in batches, which would definitely save me a lot of time. Thank you for the helpful article!
Of course, it will help a lot, especially when dealing with a big number of photos and you want to carry out the same edit on them. Thanks for your comment, wish you all success.
Hi Ehab,
Here is another interesting article. I will definitely bookmark your website for reference or learning about the photography. I will also make sure your site is shared with whoever in need to learn about photography. It is also an interesting field to look at. I really enjoyed it.
Thank you so much.
Thanks for your comment